Superhero Summer Camp – Projects, Activities and More
I love a camp with a good theme and this one promises to be a blast! We have all sorts of ideas for a Superhero and Spy STEM Summer Camp. An action-packed week of science, technology, engineering, and math with the imaginative worlds of secret agents and caped crusaders. It’s the perfect fusion of creativity and critical thinking and it will be unforgettable for the kids!
Superheroes and Spies:
A High-Energy STEM Summer Camp Theme Week
Table of Contents

Disclaimer: This article may contain commission, paid partnerships, or affiliate links. We independently review everything we recommend. When you buy through our links, we may earn a commission from qualifying purchases.
Day 1: Super Secret Identities
There is no better way to get the kids invested in the superheroes and spies than to create their alter ego – their secret identity, their super power!
For this project you will need enough manila folders for each camper (to be sure the identities are top secret) and a bin of supplies ready (art supplies, recycled items, ribbon, fabric, capes, masks, etc.) whatever you think might be helpful to creating the super costumes. Then, let them go to work.
As they create their superhero persona, here are some ideas and prompts to create their very own superhero:
- My Super Name:
- My True Identity:
- My Superpowers or special skills:
- MY Mission (What I protect the world from):
- My Gear and Gadgets:
- MY Motto or Catchphrase:
- Draw your super symbol and costume:
For an extra challenge, have your kids create their own origin story.
When they’re finished they can use the supplies to make a mask, a cape, a shield, arm cuffs – whatever they need to complete their super hero persona. Once everyone is set – let them show off their creations and introduce their superhero to the rest of the campers.
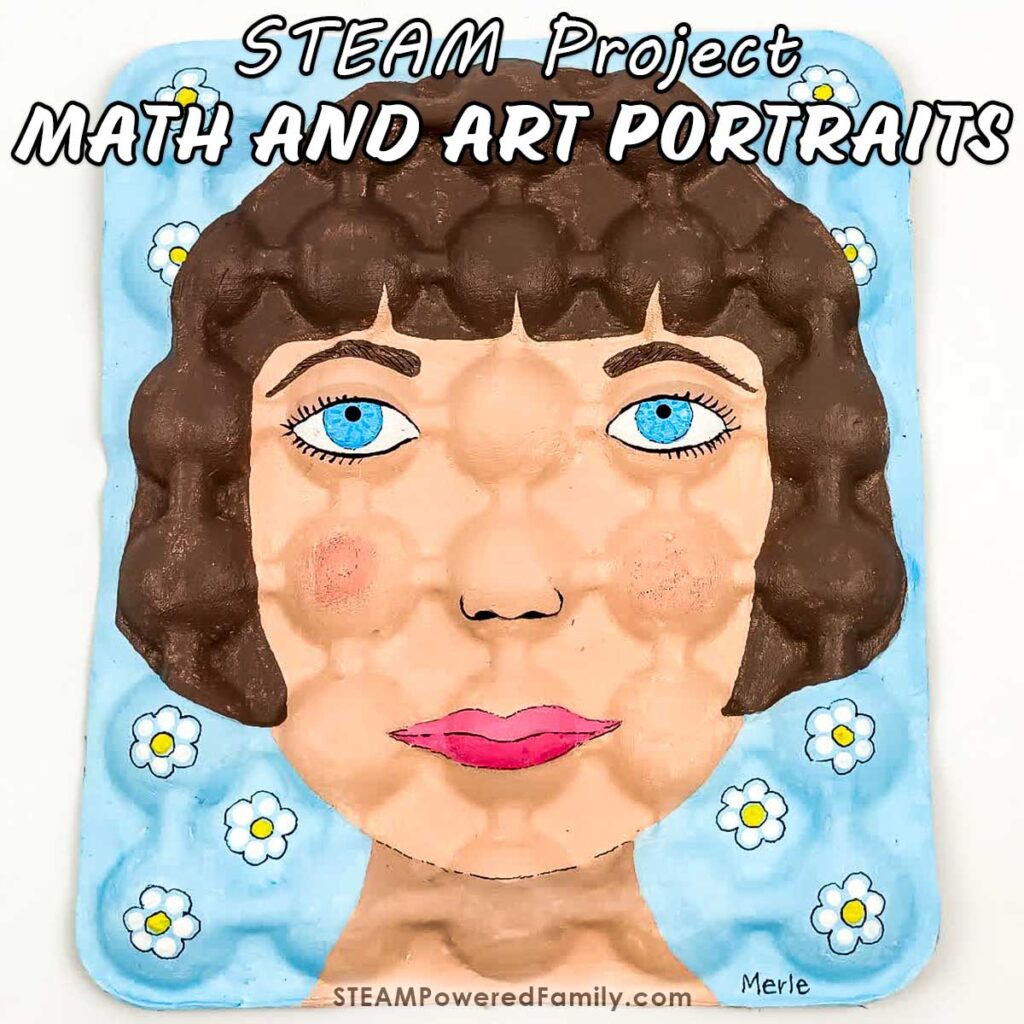
Superhero Portrait
A fun side project would be to create a Superhero Portrait using math.
Day 2: Spy Training – Codebreaking
There are so many codes and ciphers and ways to send secret messages out there and using these fun elements require all sorts of STEM skills. Cracking codes and ciphers and sending messages has the kids Problem-Solving: they need to think logically and sequentially to crack a code. They will use pattern recognition. Like shifting letters or dashes and dots. This helps them develop their logic and reasoning skills. Cracking a code requires critical thinking, it makes them evaluate clues and make choices based on evidence and reasoning.
Some cool ciphers to investigate…
Caesar Cipher
A Caesar cipher is a really simple encryption method where each letter in the alphabet is replaced by a letter in the alphabet that you have shifted by a specific number – so if you set your SHIFT to 3 “A” becomes “D”, “B” becomes “E”, etc. This method is named after Julius Caesar, who used it in his correspondence.
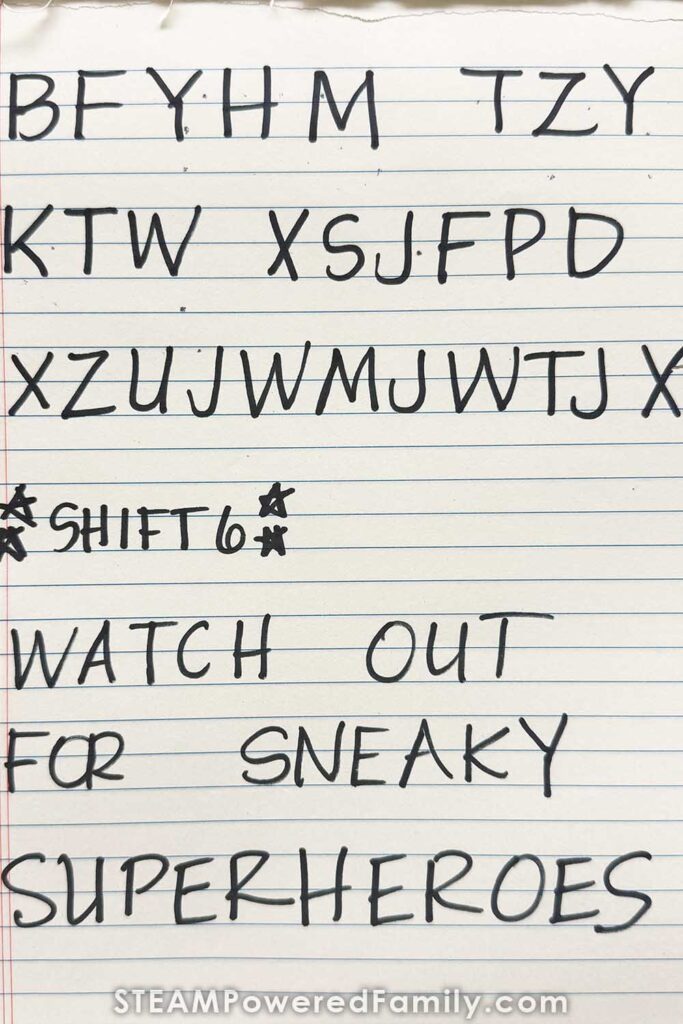
A piece of grid paper is a great way for kids to easily fill in and keep track of their cipher. If you have techy kids using something like Google Sheets will work the same way.
Create your own cipher
A create your own cipher is a fun way to have the kids use some creativity, they can base their cipher on numbers, a backward alphabet or even an emoji cipher. In Google Docs or a similar program have the students choose an emoji to replace each letter. Then construct a secret message for their partner to decipher. If you’d like some practice, check out our emoji cipher and jokes page!
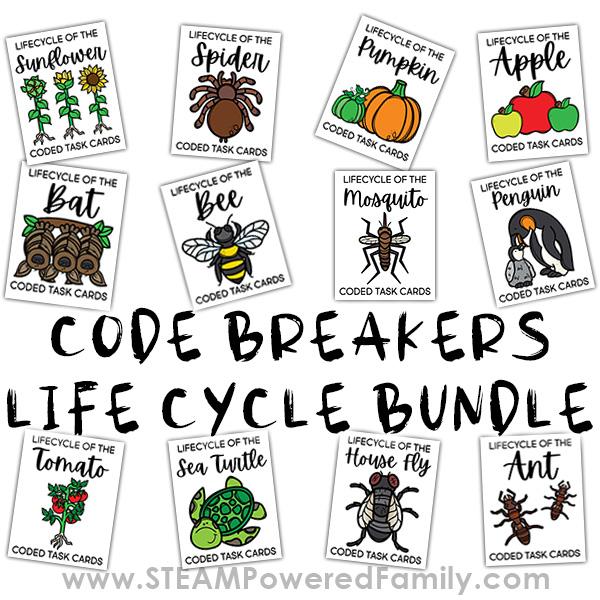
Code Breakers
Try some fun code breaker challenges to with this printable to learn more about the lifecycle of plants, animals and insects, while developing those code breaking and vocabulary skills.
Morse Code for Kids
Morse Code is a form of communication – it is transmitted using a series of dots and dashes, which represent letters and numbers. With Morse Code, each letter or number is translated into its own sequence of short signals (dots) and long signals (dashes). These signals can be sent with sound, light, physical touch or written on paper. Discover more about Morse Code and activity ideas for your camp with this resource.

Binary Code
Binary is a computer language but can be used as a secret message code as well, especially because to the untrained eye, it will look like just 0s and 1s! We have lots of Binary Code ideas for your camp, including a Binary Code Game, Binary Code Activities and a Binary Code Puzzle Crackers Lesson.

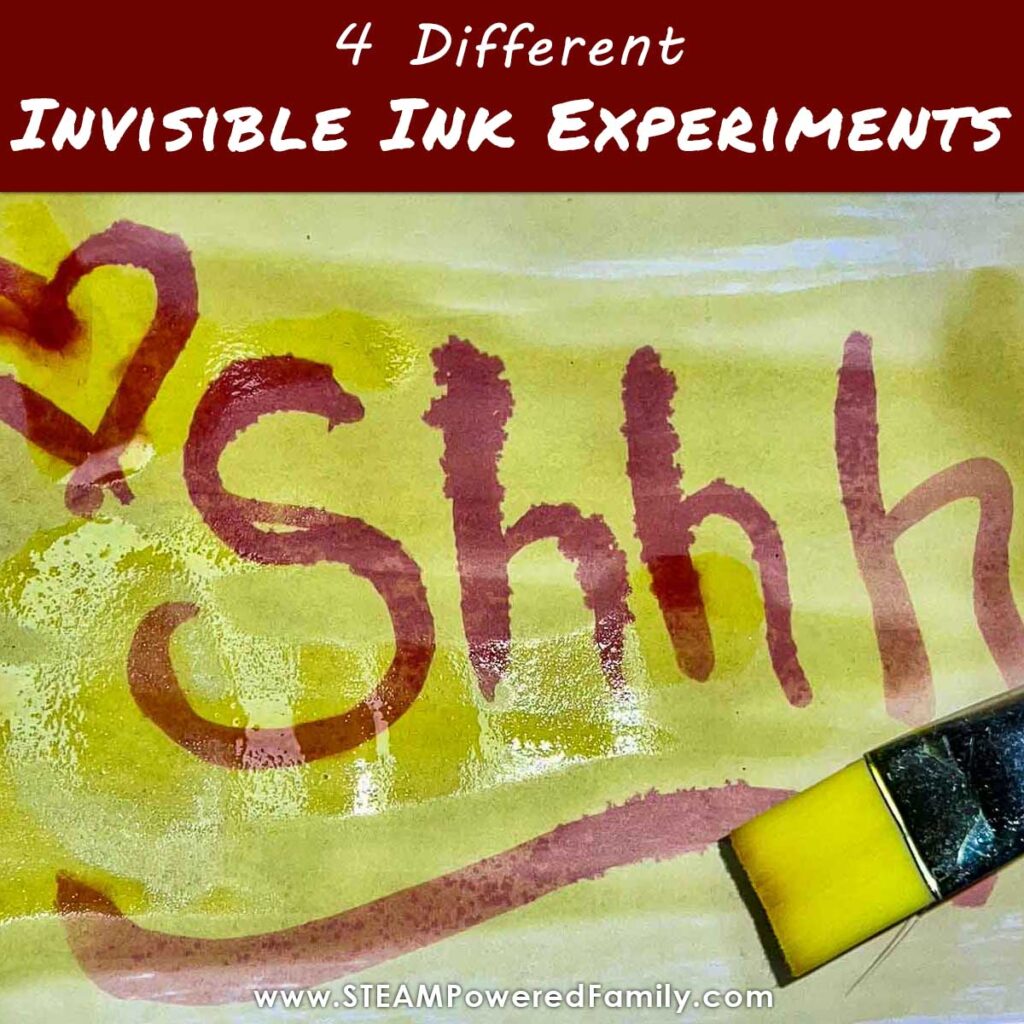
Invisible Ink
Invisible Ink is another fun way for kids to send secret messages. There are some fascinating ways you can use science for magical invisible ink reveals with simple ingredients like baking soda and turmeric. Discover all our invisible ink recipes here.
Day 3: Up, Up and Away
There are lots of really cool ways to make things fly like a superhero!
Straw Rockets
Straw rockets are a really fun way to send a superhero flying – and why not make the rockets with pictures of the kids for a fun tie in! You’ll need lightweight straws (plastic, cardboard, etc. should all work), paper or cardstock, Tape – like packing tape, scissors, glue stick a camera and a printer. For full instructions on the straw rockets check out our Reindeer Straw Rockets project.

Balloon Racers
Our heroes must launch a high-speed rescue mission using a balloon-powered rocket. Build and launch your very own Super Rocket using balloon power — and use the laws of physics to save the day!
This challenge is powered by Newton’s Third Law of Motion: For every action, there is an equal and opposite reaction.
When the air rushes out of your balloon, it pushes your rocket forward — just like a real superhero in flight!
Long, skinny balloons, construction paper (for wings, flames, capes), tape, string, straws (your rocket will slide along this), scissors, clips (binder clips or kitchen clips work great to hold the air in) anchor points for the string to make the track (chairs, tables, or even teammates). First step, build the balloon rockets. Blow up the balloon and twist the end but don’t tie it off, clip it with a chip clip or something similar. Decorate your balloon. Set up the track. Thread a straw onto the string and then anchor it to two points across from each other. Tape your balloon to the straw and you’re ready to launch. Remove the clip and watch the super balloon fly! Set up several lines and do some superhero races! If you’d like to know more about balloon racers, check out Balloon Races.
Zip Lines
Oh no – the superhero needs to save some innocent people from the top of the mountain – we need a zipline rescue!
To make zipline you will need some long string or yard. Two points to tie the line at – one high and one lower. Don’t make it too steep, just a steady incline. Now you need a rescue bucket, a small paper ice cream dish or paper cup will work perfectly. They will need to engineer a rope or clip system that will hold the basket steady without dumping its passengers while it travels down the zipline. Have things like pipe cleaners, paper clips, binder clips, more string and ribbon on hand for them to work with. Once all of the buckets are set you can test them out. Add some toys that need a rescue and send them down the line! This one can be tricky but it’s a great opportunity to challenge kids to improve their design and try it again.
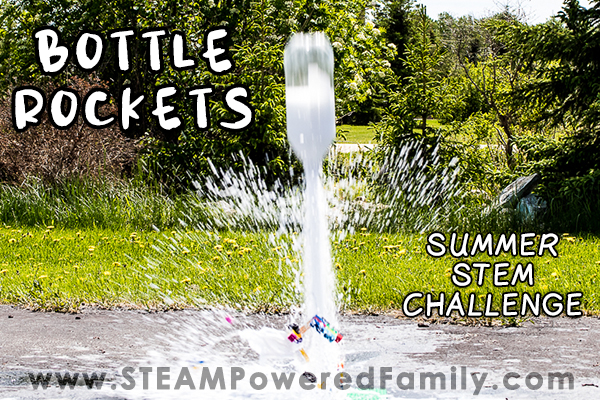
Blast off with Bottle Rockets
Send your villains into space with bottle rockets. Campers can design their own bottle rockets and even a stand to hold it. Then fill it with vinegar and baking soda and watch it send your villains flying far, far away!
Day 4: Super Substances
Whether they’re looking for kryptonite or trapping a bad guy in some slime, exploring oooopy goopy substances has fun written all over it.
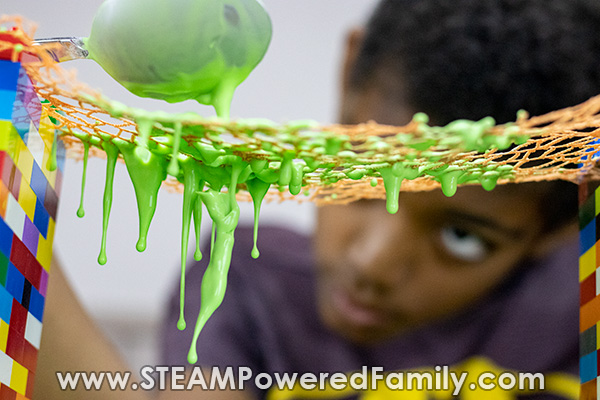
Slime Time
Slime is always, always a crowd pleaser. Kids can’t get enough of it and this is a fun chance to get a little writing in and explain why we have the slime – is it like a web? A way to trap a villain? Does it give our hero slime power? SPF has a lot of great slime recipes – but this one is my favorite! Frankenslime – and it goes right along with our heroes and villains theme. Green goop!

Slime is a polymer created through a chemical reaction. When we mix a plain old school glue and an activator (there are several to choose from) it becomes a new substance. How? Polymers! A polymer is a substance that is made up of large molecules which are each made of smaller, repeating blocks known as monomers. Adding another substance to a polymer can rearrange or cross link the molecules forming new chains and making a new substance. You can see the change when the liquid glue and activator become a thicker and stretchy slime! This is a change in viscosity. Viscosity is the way we describe how fast or slow a liquid will move. So the thicker the liquid the slower it will flow!
Oobleck
Want another super substance? How about oobleck – is it liquid? Is it solid? You tell me! Oobleck is a non-Newtonian fluid or liquid. Under pressure it behaves like a solid. But remove the pressure and it turns to liquid. You need cornstarch and water – some food coloring if you want but it’s not necessary. Mix together 2 Cups of Cornstarch and 1 cup of warm water. Add the food coloring if you would like and then test it out. Grab some of the slimy mess and squeeze it in your hand, it will firm up and seem solid, until you release the pressure and it drips out of your hand in liquid form! Try dripping it through netting or make a huge pool of it and try running across it!
Crystal Growing
Finally let’s make some Magic Crystals- Borax Crystals for a superhero fortress. I recommend doing this one first thing in the morning so the kids can watch throughout the day.

You will need Borax, boiling water, a clear glass jar, pipe cleaners and a pencil.
First make a supersaturated solution of borax and water. A supersaturated solution means that there is more solute, in our case Borax, than can normally be dissolved. The golden ratio we are looking for is 2:1 which means that we need twice as much water as borax. You can adjust your amounts according to how many students you are working with. I did a solution of 3 cups of water to 1 ½ cups of borax. Bring your water to a boil. Turn off the heat and add your borax. Stir gently. Don’t be concerned if it doesn’t look like it is all dissolved, that is what we want. Pour the mixture into your jars.
Grab a pipe cleaner and wrap one end around the pencil and lower the other end into the solution. Hot water has more “spaces” for the borax to go and dissolve – as the water cools those spaces become fewer and fewer and the borax will begin to adhere to the pipe cleaners and form crystals. You can check on the jars throughout the day and you will begin to see small crystals form on the pipe cleaners, leaving the solution overnight for the full effect.
Learn the super secret to growing extra large crystals with your campers! Or learn how to grow crystals with ingredients other than borax.

Day 5: Perspectives
Looking at the world around you in a different way is always exciting.
Stop Motion
Why not try some Stop Motion Animation. You know that the action figures aren’t moving by themselves, but when you string together a series of still pictures it magically looks like it’s moving. Check out an in depth how to on stop motion animation here!
Photo Perspective
What about a photo perspective? Have the kids create a cityscape with colored paper. You can make it as big or as small as you would like. Then have them lay a toy character in the city scape.
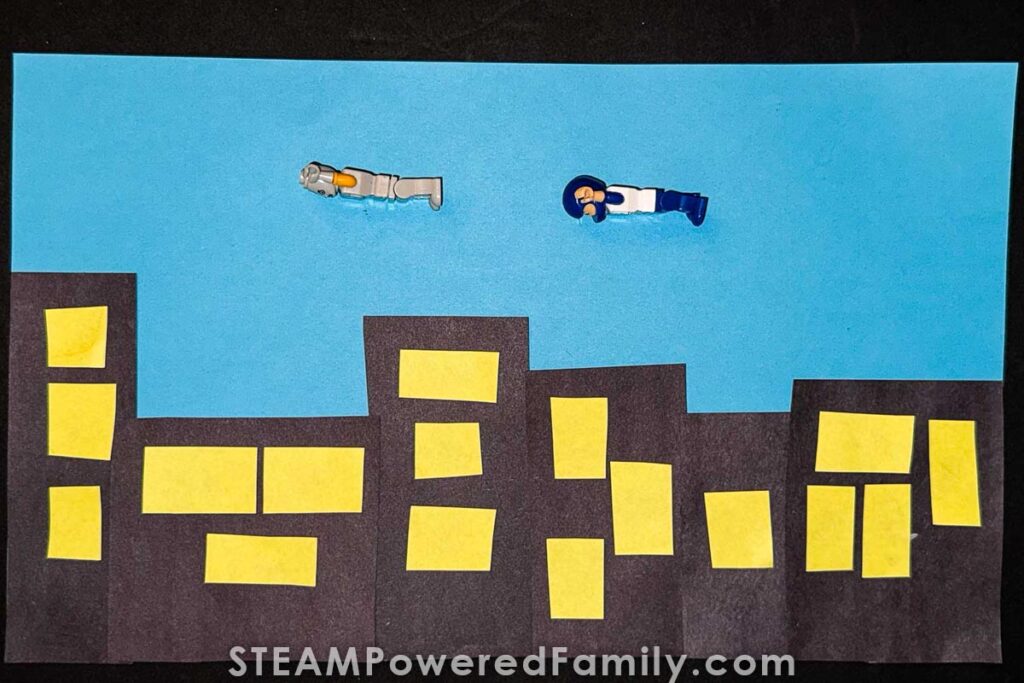
A fun twist, that adds some digital tech skills is to have the kids photograph each other laying across a desk or table. You can then edit the photos to remove the background, or simply cut out the images to add to the city scape.
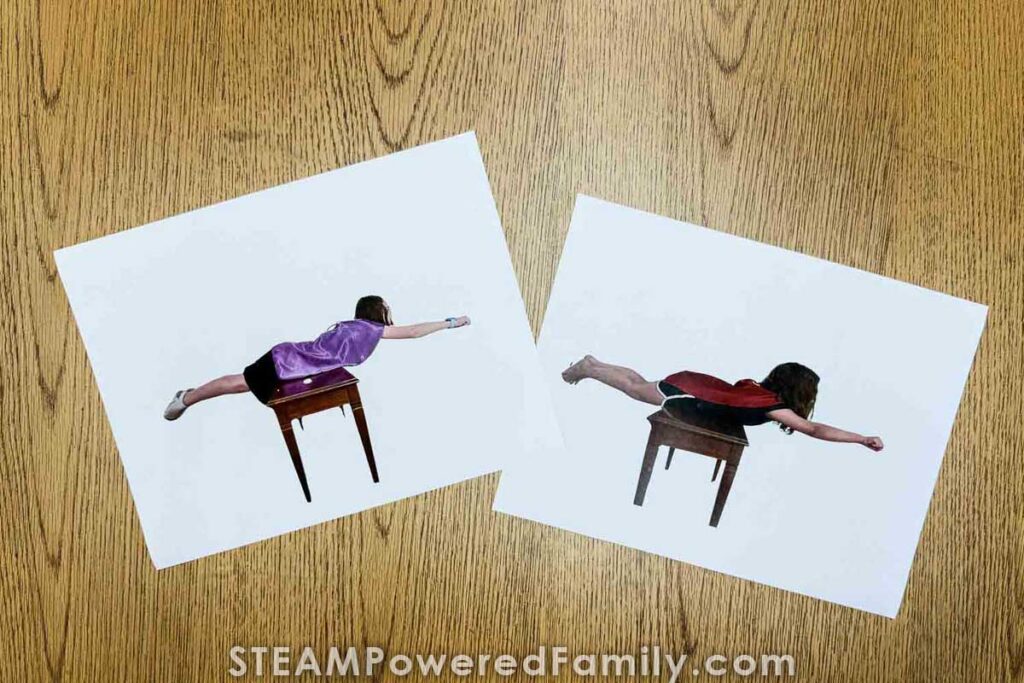

The result is them flying like superheroes over the city! Why? When you lie on a flat surface (like the “city” and “sky” scene) and take a photo from above, your brain looks at the background differently. While the camera is looking from above you’re looking straight on – which makes the picture look like the person is flying through the air!
Super Signals
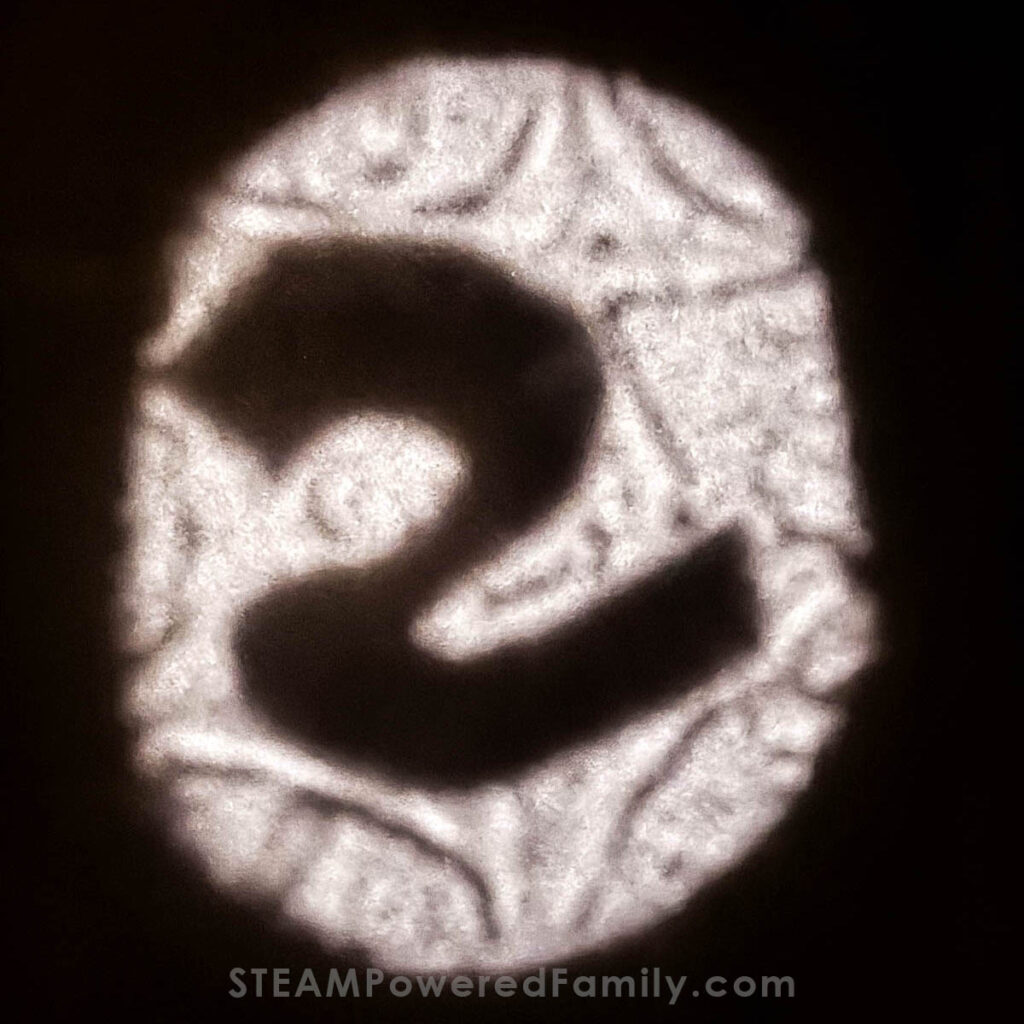
Finally to wrap up the week, super signals. You know how they have the bat signal? The big light in the sky with the bat symbol in the middle? We are going to make our own with the super symbols the kids create!
You will need a flashlight (small but bright works great), a cardboard tube (from paper towels or gift wrap — toilet paper tubes work too but give a smaller beam), Black paper, tape, scissors and a pencil.
Design the Signal: Draw a simple shape on black paper. Think of a shape that would match your hero.
Cut the Shape: Cut out the bat shape carefully. Run some clear packing tape across the top of the tube, then stick your shape in the center of the circle at the end with a second layer of tape.
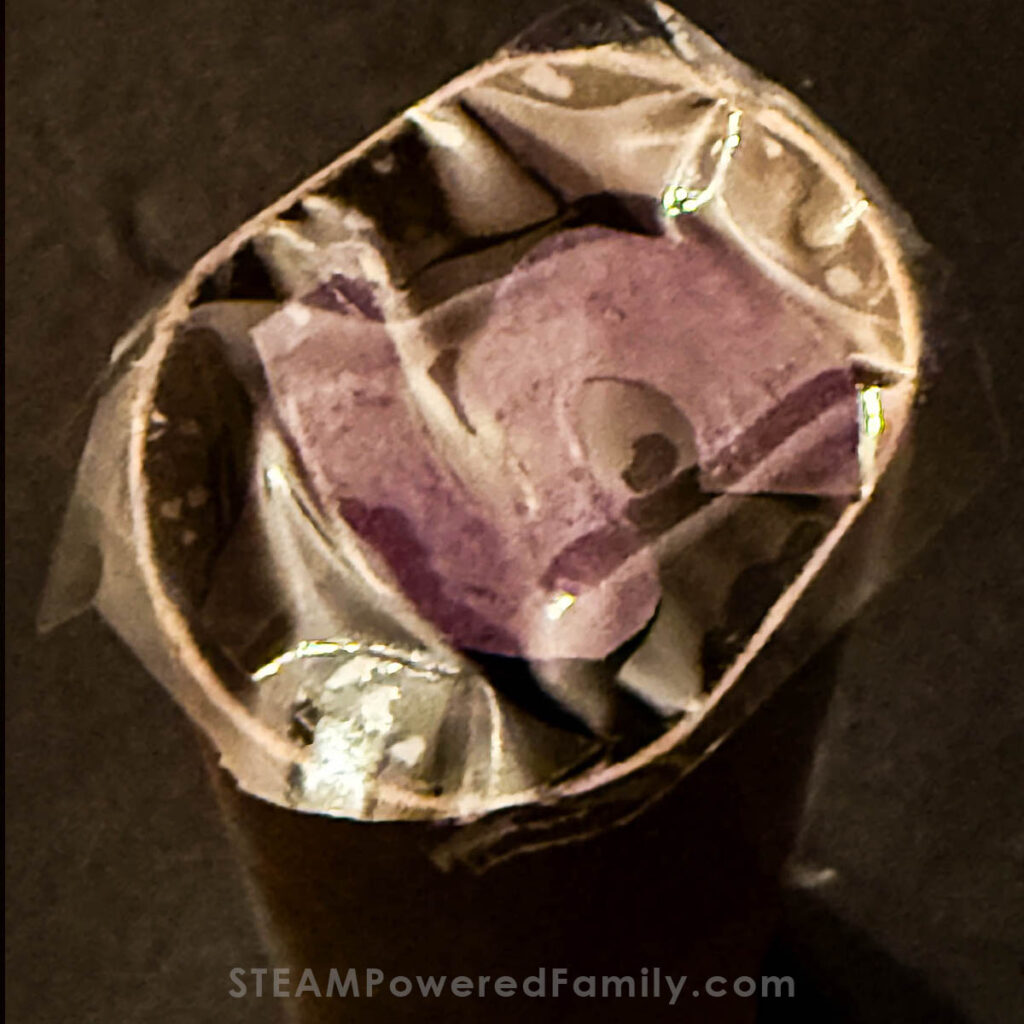
Put a flashlight on the other end of the tube and turn off the lights. The shape will project up onto the wall like the bat symbol! Why? Light travels in straight lines — the bat shape blocks some light, casting a shadow.
If you want to play with light and shadow more during your camp, try a Shadow Puppet Theatre!
This super fun jam packed week of superhero and spy inspired activities is sure to wow the kids and make memories to last a lifetime!
More Summer Camp Themes
Want more ideas? Try our Summer Camp Forces Theme, Sensory Science Summer or Engineering Summer Camp.
