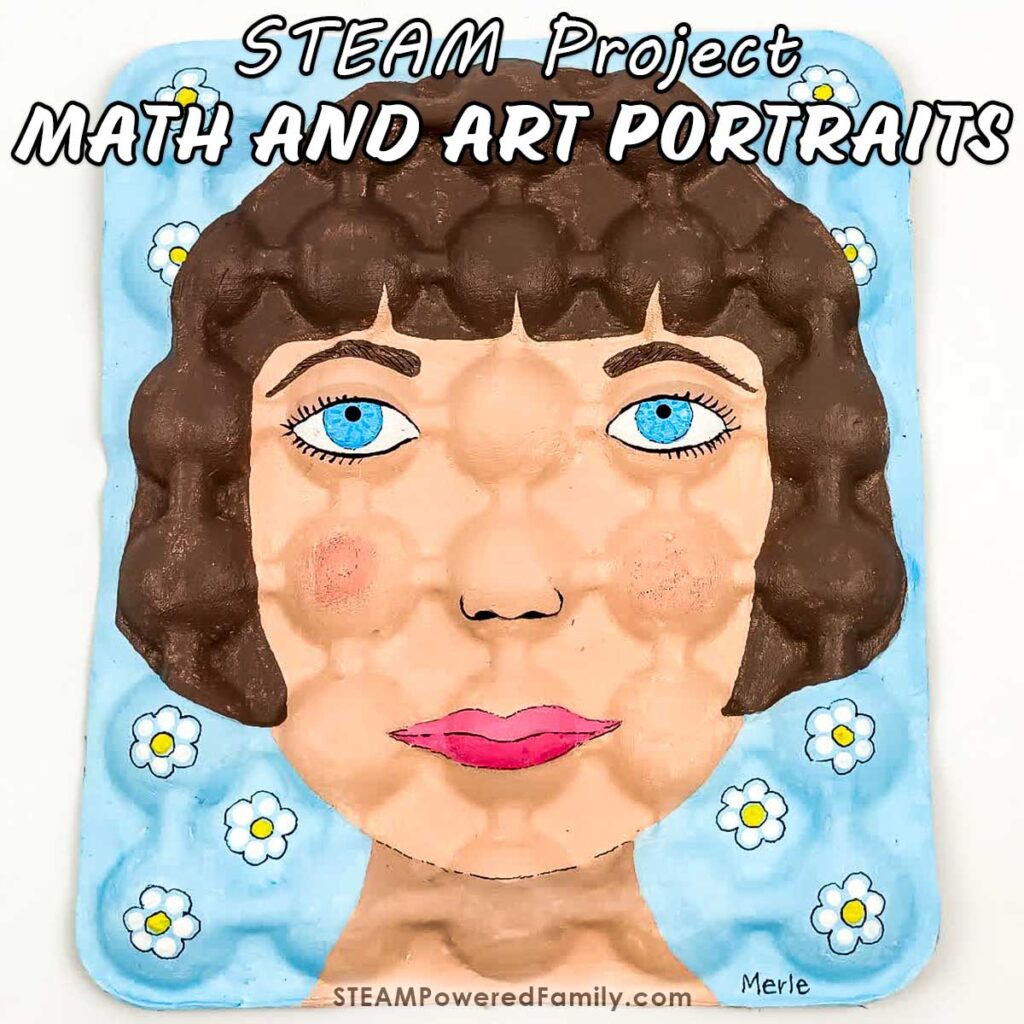
STEAM Self Portrait Project – Hands On Math and Art
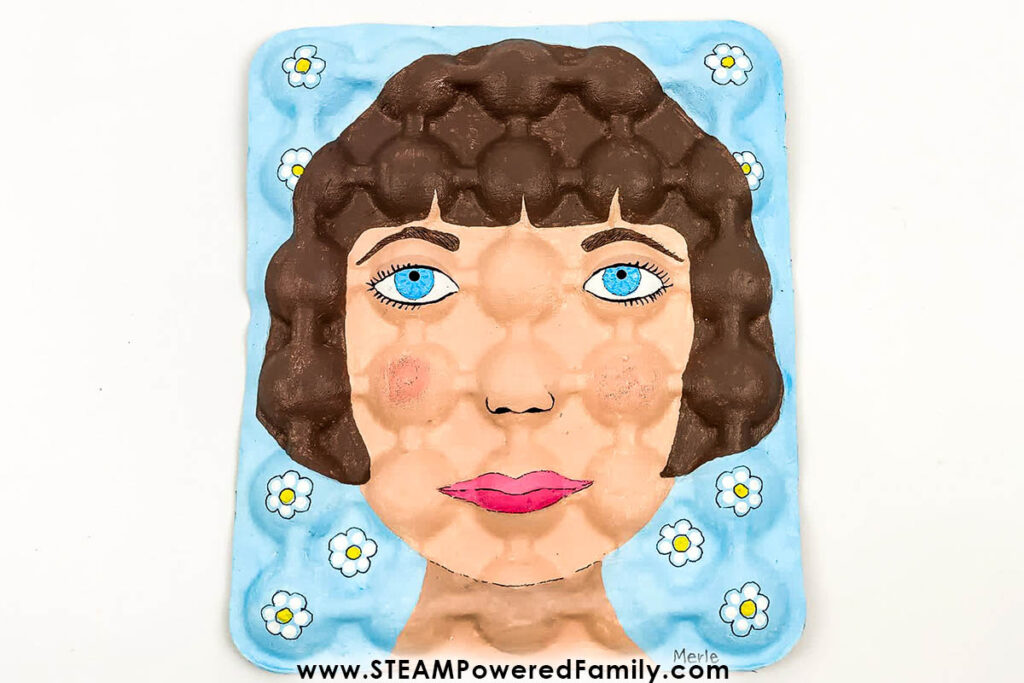
Painting portraits is always fun. Whether you do a self portrait or a portrait of someone else, doing an image on a recycled egg box or fruit tray is fun and easy. It also involves some fascinating math lessons and concepts. So, get your painting clothes on, and let’s have some STEAM fun!
Math and Art Portrait Project
Table of Contents
Disclaimer: This article may contain commission, paid partnerships, or affiliate links. We independently review everything we recommend. When you buy through our links, we may earn a commission from qualifying purchases.
First, we did this as a self portrait project, but you could do this portrait project of other people, celebrities, or even pets! Feel free to get creative in this arts based STEM lesson.
While doing this project, students will learn about the importance of symmetry and proportion and how to mix colors specifically for the portrait. We have included a detailed explanation of this principles below to help with your lessons.
Project Tutorial Video
Learn more about this project in our video tutorial. If you can’t see the video, you can also find it on the STEAM Powered Family YouTube Channel.
Mathematical Concepts
Symmetry and proportion are fundamental principles of geometry and measurement. Let’s look at each of these principles:
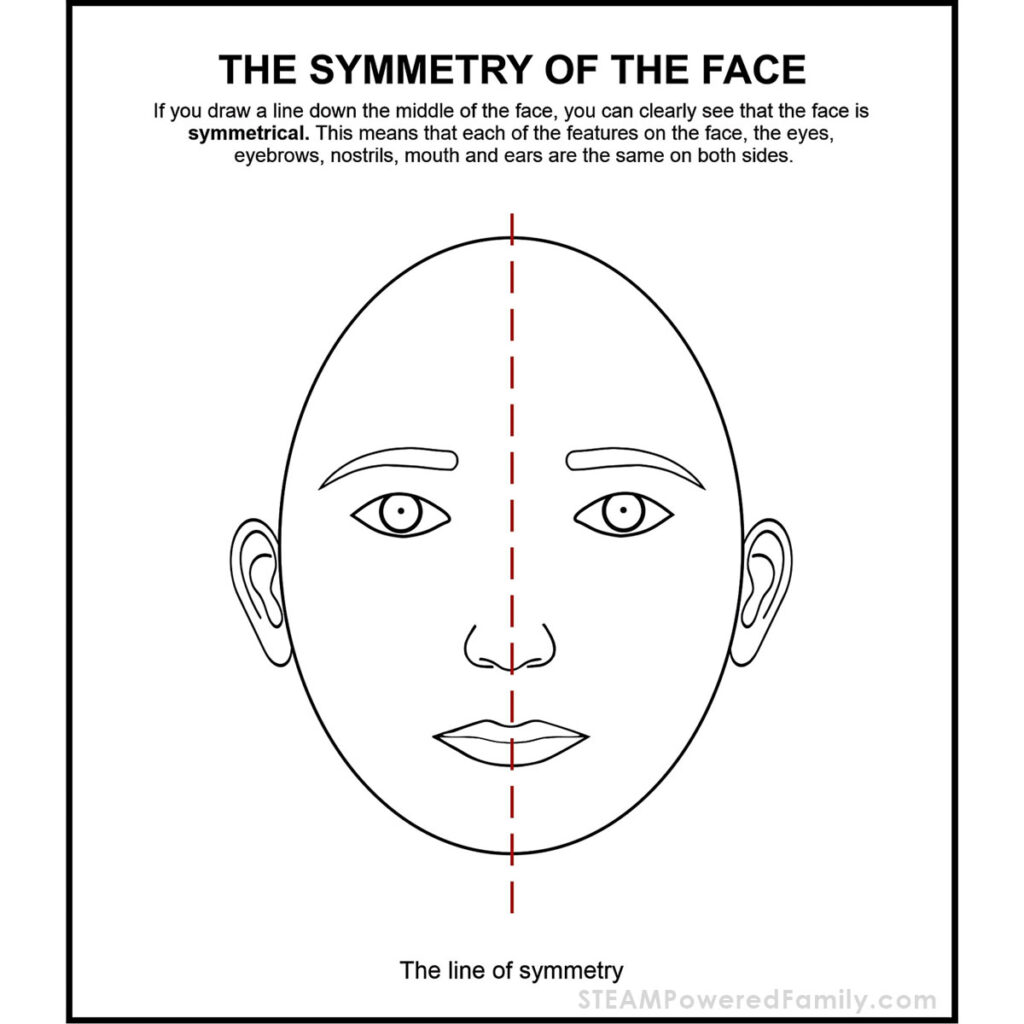
Symmetry
An object is said to have symmetry if it can be divided into two identical halves by a line of symmetry. In a portrait, this line is called the vertical line of symmetry. It goes from the top to the bottom, revealing that one side of the face mirrors the other.
Proportion
To create a realistic portrait, you must pay attention to the proportions of all the facial features. For example, the distance between the eyes, the size of the nose relative to the mouth, and the size of the ears are critical.
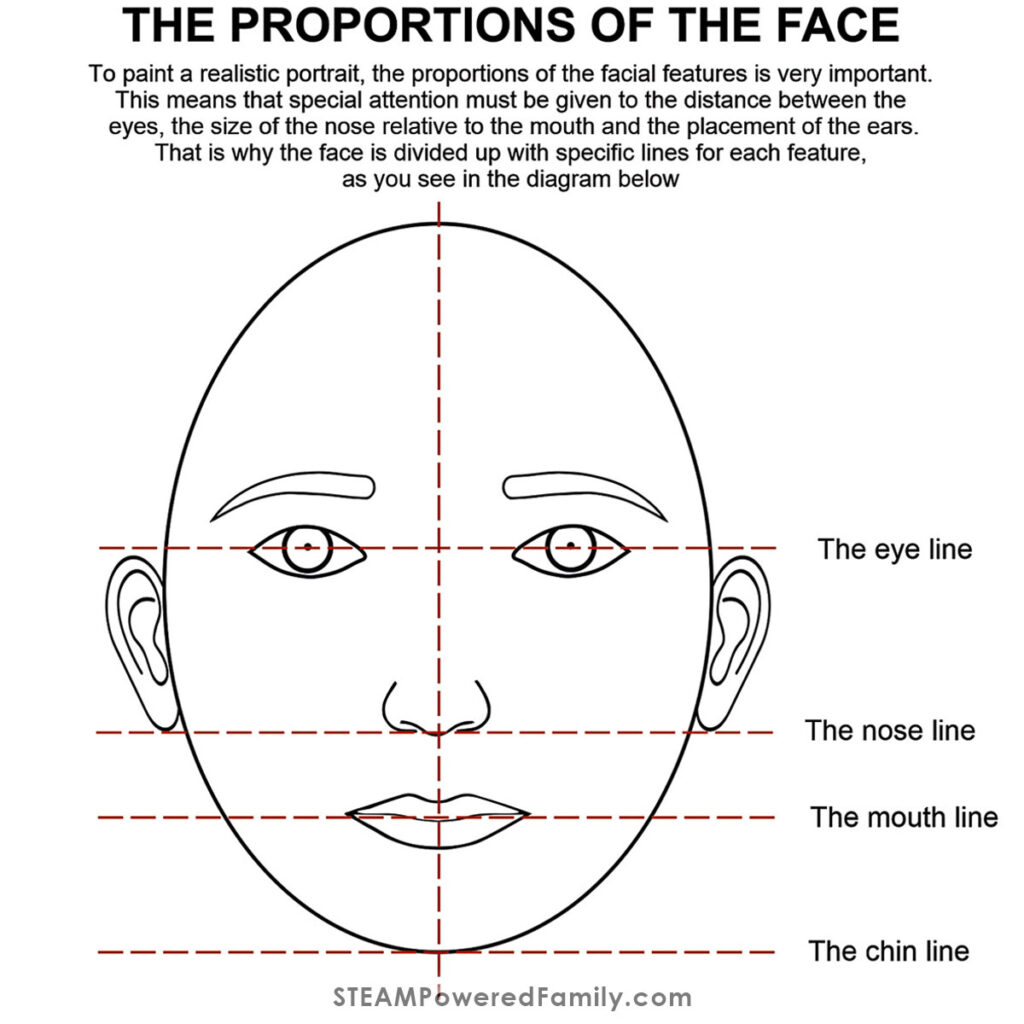
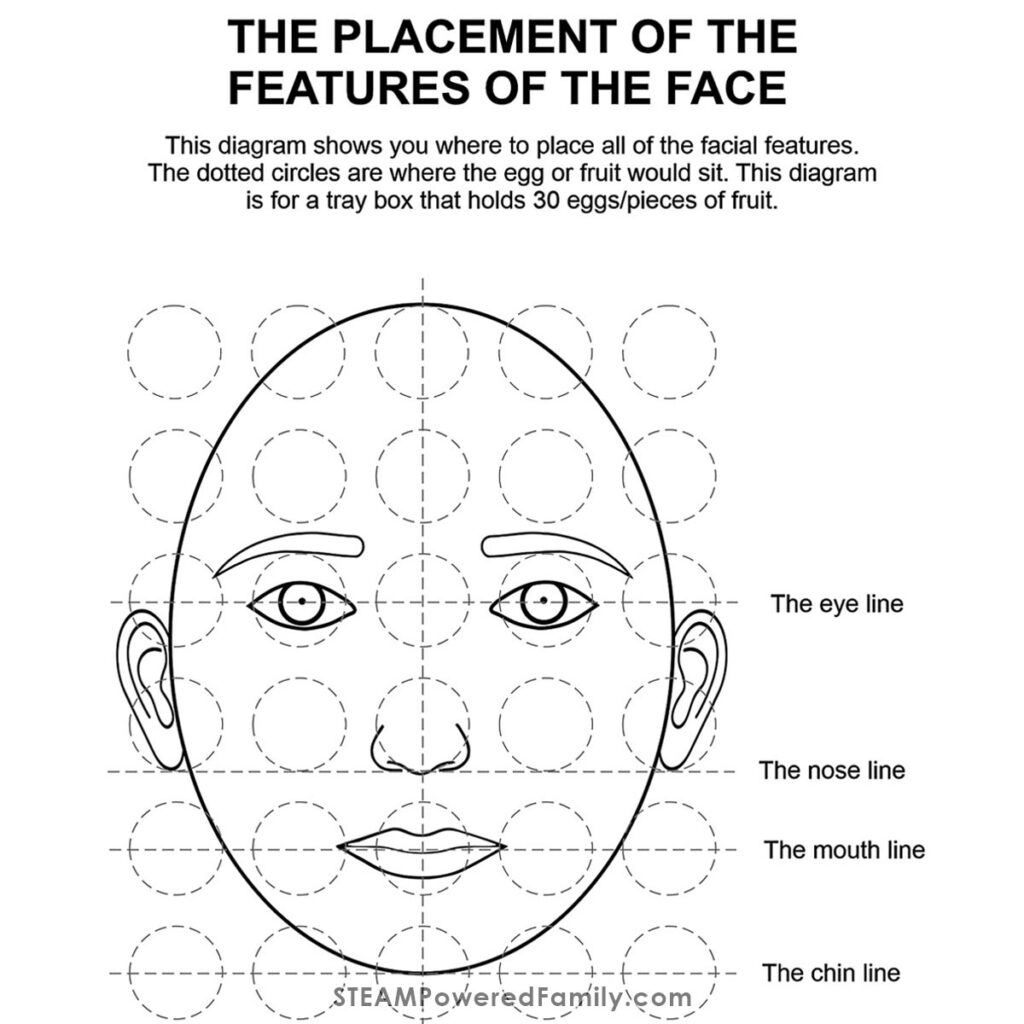
You might use a ruler or other measuring tools to ensure these proportions are accurate. Still, it is easier on the egg/fruit tray because all the “indentations” that keep the eggs/fruit in place allow you to calculate the proportions just by using your eyes.
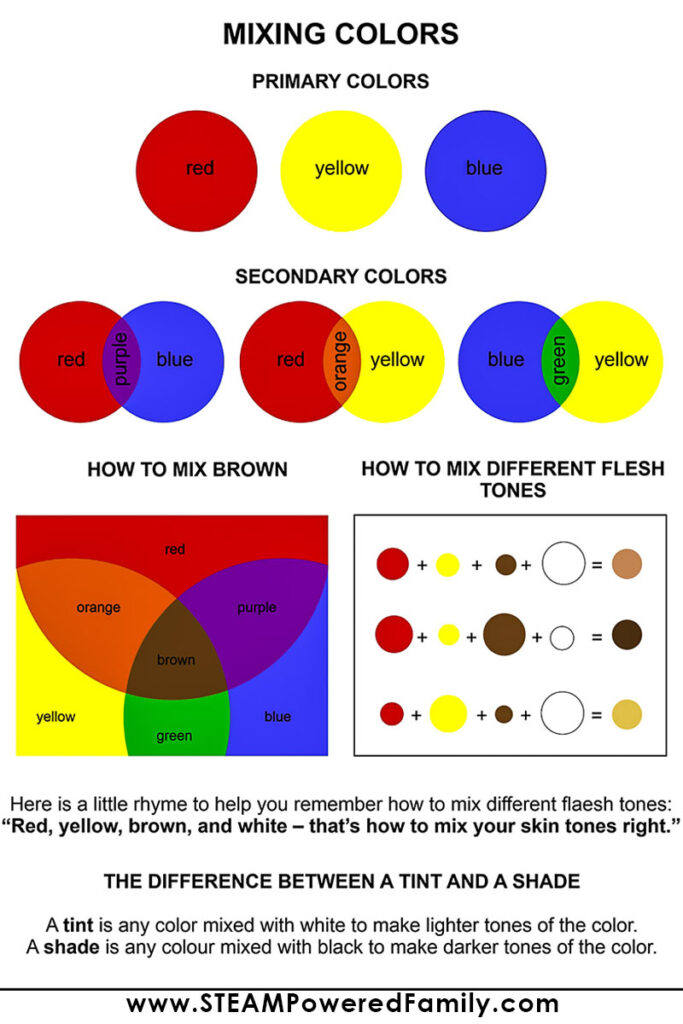
The Science of Colors
This chart shows you how to mix secondary colors from the three primary colors. The examples show how to make brown, for instance for the hair, plus three tones of flesh. Use this as a starting point, then mix to get the perfect colors for your project. This is a wonderful way for students to explore color theory.
How to Draw and Paint your Portrait
Materials & Tools
A cardboard egg tray that holds 30 eggs
Craft paint – Red, yellow, blue, green, orange, purple, black, and white
Scissors
Ruler
Pencil
Eraser
Assorted paint brushes
Paint trays or paper plates
Ten small lollipop sticks or plastic spoons
Unlock the printable templates by joining to the STEAM Powered Family mailing list.
STEAM Portrait DIY Directions
Print out all the template pages. The template for the face should be printed on cardstock, as you need to use this as a template to trace the shape of the face onto the tray.
It can be printed on printer paper, cut out, and traced onto a recycled cereal box if you don’t have cardstock.
First step is to paint the tray white. This helps the colours appear brighter.
Cut out the template of the face and place it precisely in the middle of the tray and trace it.
Planning your portrait
Plan your portrait and use the proportions of the face image as a guide.
Draw your picture, or watch and follow the video to see how this is done.
Start with the oval for the face, then the eyes, followed by the nose, mouth, eyebrows, ears, eyelids, and hair. Don’t forget to give your portrait a neck.
Once you are happy with your portrait, copy everything onto the tray.
Color Mixing
You are now ready to start mixing the colors you will need! Refer back to the Science of Colors for tips on mixing and refer to the provided chart as needed.
Brown is made by mixing all primary and secondary colors in equal quantities, and then you can make it lighter by adding white. This method is known as a tint. To make colors darker, you need to add black. This method is called a tone.
PRO TIP! Add a few drops of water when mixing colors. It makes it easier to stir.
Mixing the flesh tones
Choose the tone you want and follow the proportions of each color shown on the “Mixing Colors” page. Feel free to adjust the skin tone if you need to. I added more yellow and white to get the correct tone I needed.
PRO TIP! Always add a little bit of extra color at a time until you get to the correct tone.
Now that you have all the colors you need, it’s time to make your portrait come to life! Get painting and have fun!
Remember, give your portrait an exciting background. Don’t forget to sign your name at the bottom of your beautiful artwork!
Extension ideas
Try doing a still life, using different fruits or vegetables in a bowl or basket.
Make a portrait of your favorite pet.
No matter which portrait you are making, ensure you are keeping the symmetry and proportions correct.
Happy Painting!
MORE ARTS AND STEM PROJECTS