DIY Weathervane Project for Kids
Let’s learn about weather science by building a weather vane and learning about the wind, weather patterns, plus STEM skills. This hands on project uses simple materials and is perfect for elementary, especially grade 3 students studying weather and climate. You can also do it as a fun project at summer camp.
Weather Science for Kids – Weather Vane STEM Project
Table of Contents
Disclaimer: This article may contain commission, paid partnerships, or affiliate links. We independently review everything we recommend. When you buy through our links, we may earn a commission from qualifying purchases.
Predicting the weather and finding ways to utilize resources like water, the sun and the wind have always been important. Today we are taking a closer look at the wind.
You have probably all seen windmills. They are an iconic image from the past, but now we have modern wind turbines popping up as we move towards greener energy sources.
Windmills harness the power of the wind which can then be converted to power. Farmers, firefighters, pilots and sailors depend on understanding the wind and its direction to help them with their jobs. Of course, the weatherman is an expert in weather science. Known as meteorologists, their job is to use a variety of tools and technology to help with weather forecasting.
So what tools can we use to understand the wind? An anemometer can measure the speed of the wind as it is blowing, but knowing the direction of the wind is also important. For that we can use a weathervane.
What is a Weathervane?
A weathervane has lots of other possible names, including: weather vane, windvane, vane, windsock, weathercock, or wind vane. But what is it? In simplest terms, it is a tool that shows the direction the wind is blowing.
If you’ve ever seen a fancy decorative piece moving on the roof of an old barn or house, often with a rooster, you were looking at a weather vane.
How does a Weathervane work?
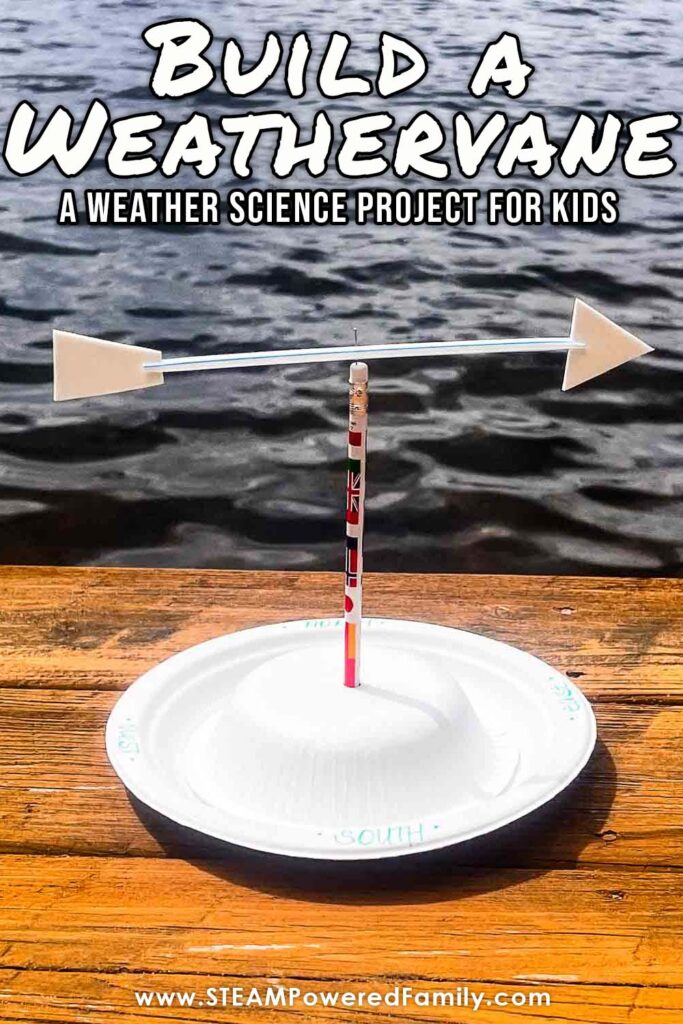
Traditionally, a weathervane features some sort of decorative ornament like a rooster, bird, or horse. Beneath the topper you will find an arrow with a prominent tip and tail. Under that there is normally a globe, then a directional showing North, South, East and West and below that another globe. All of this is mounted on a rod which is mounted atop a building.
Once the wind blows, the tail fin catches the wind and the arrow points toward the direction the wind is blowing from. If the arrow on the weather vane is pointing north then it means there is a north wind. In other words, the wind is blowing from north to south.
How to Make a Weather Vane
Materials
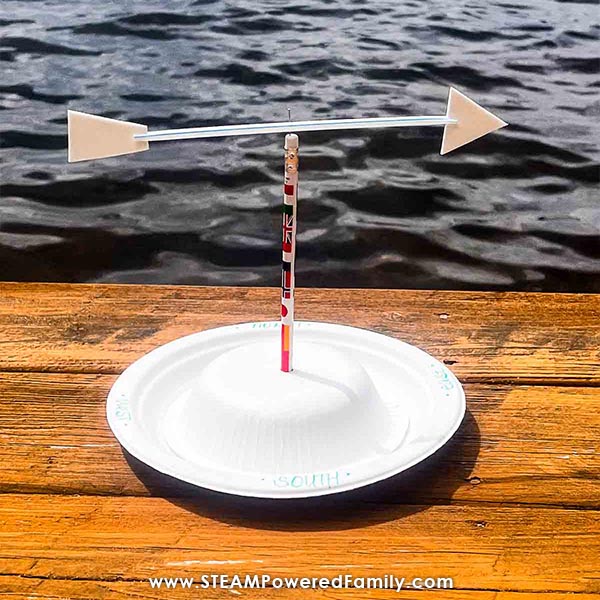
A base – We used a paper plate
An anchor – We used playdough and a paper bowl
Rod – We used a new, unsharpened pencil with an eraser
Pivot point – we used a straight pin
A directional – We used a straight straw and some foam shapes
Tools
Plus you will also need a pair of scissors and some markers or a pen depending on how fancy you would like to get. You may also want glue for the base, but we didn’t find it necessary.
For even more precision, you will also want a compass or a smartphone with a compass app to show you which way to place your wind vane after it is built.
This is a great opportunity to build your own compass!
Directions
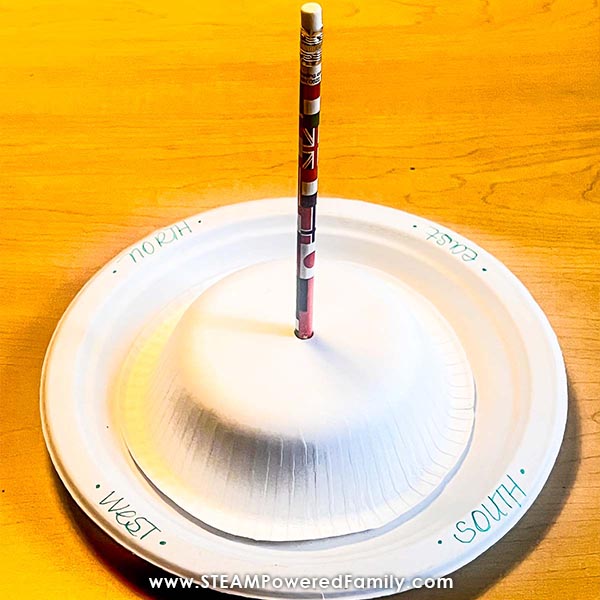
Step 1
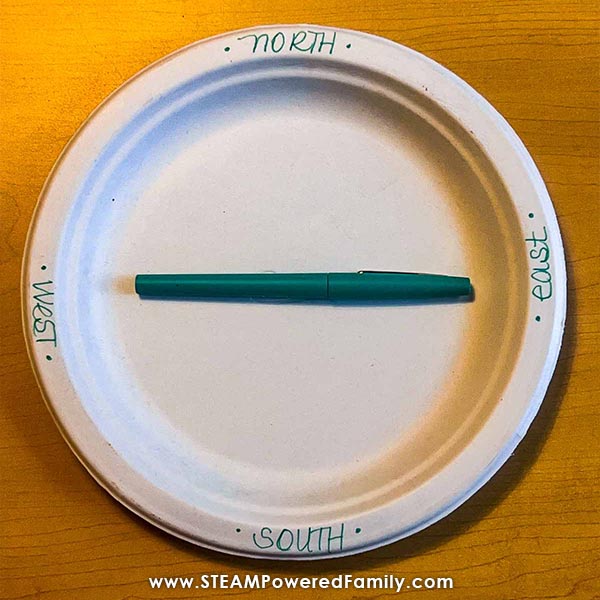
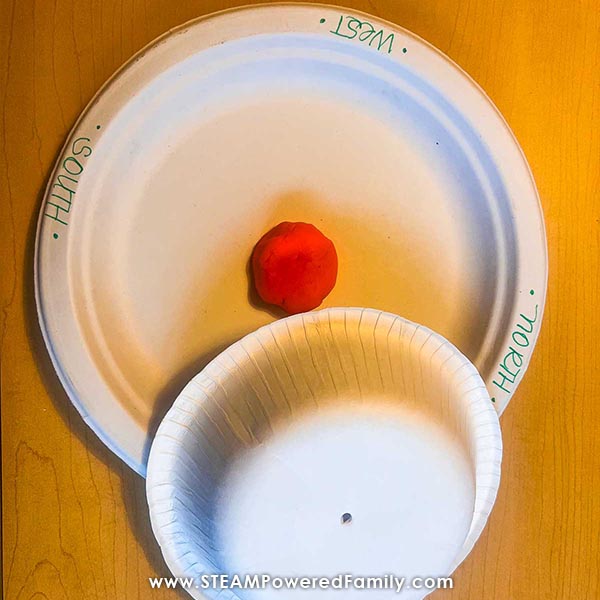
Put your paper plate down on a flat surface. With a marker write directional markings on the plate. This will be used when we set it in the wind so we can read the direction of the wind.
Step 2
Prepare your anchor points. We rolled a meatball sized ball out of playdough and put it in the center of the paper plate.
Next we poked a hole in the center of the bottom of the paper bowl and flipped it over and placed it in the center of the paper plate base.
Step 3
Place the rod into the base. Do this by putting the pencil, eraser side up, through the hole in the paper bowl and press it into the playdough ball making sure it is straight and tall.
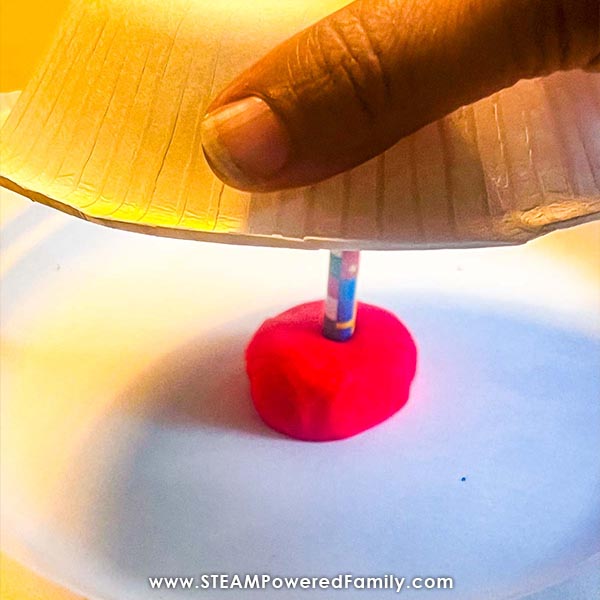
If you feel your weathervane needs more stability, you can glue the paper bowl to the plate.
The base is now complete and should look like this.
Step 4
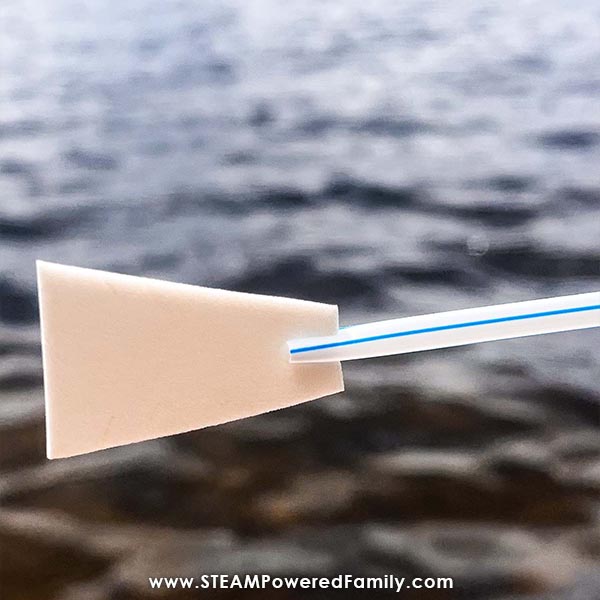
Next, we need to make an arrow. Cut slits even with each other on each end of the straw. Then cut your arrow and tail out of a foam sheet. I made them around an inch and a half each. One triangle for the arrow point and one tail fin. Slip the tip into one end of the straw and the tail fin into the opposite end.
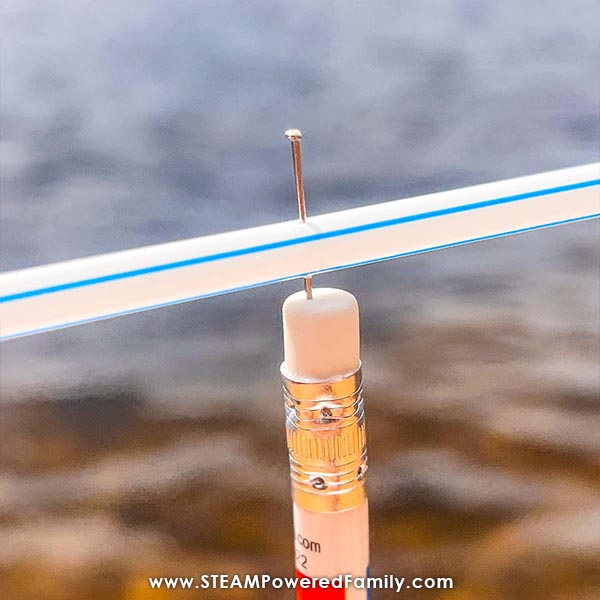
Step 5
Poke the pin through the middle of the straw. If necessary, use a ruler to find the middle point. Ensure everything is equal between the tip and the tail so that the tip and tail and pin are all upright. Spin the straw around several times so that it makes the hole big enough that the straw will be able to spin freely. Just make sure it is not so big that it will slip down the pin.
Step 6
Poke the pin into the pencil eraser to anchor it to the rod.
Step 7
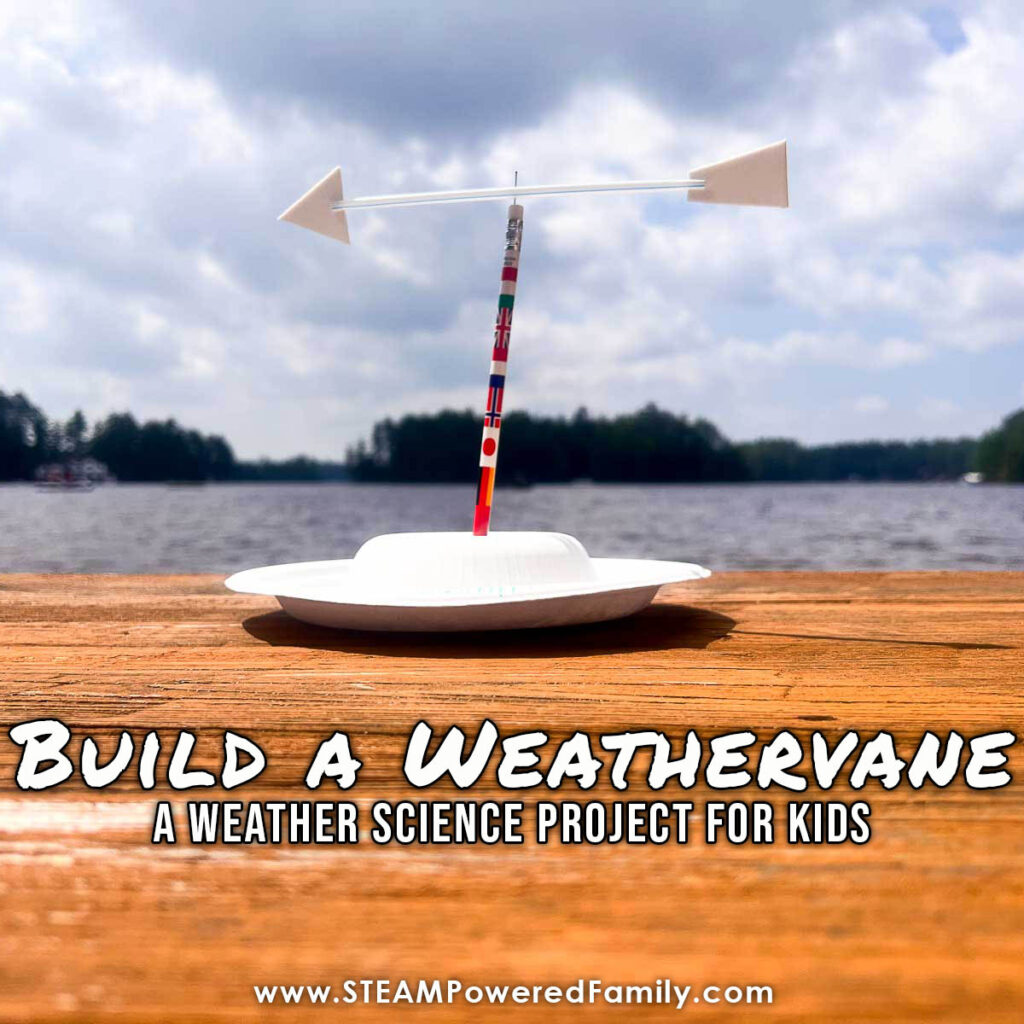
It’s time to test! Take the weathervane outside into a nice open area where it is in the wind. Use a compass (you can use an app on your phone) to place the North side of the base facing North. The arrow should catch the wind and spin to show you the direction the wind is coming from!
Troubleshooting
We found it interesting that where we placed the weather vane at first it spun around in different directions wildly. We soon realized that the wind was bouncing off of the structure we were next to and causing the wind to go in all directions. Once we moved to an open space it worked perfectly. Applying critical thinking skills helped quickly solve our issues and was a fantastic skill building moment.
Extension Activities
Build a Sailboat then use the weathervane as a sailboat wind indicator to predict how the boats will travel.
Explore more wind power with a Windmill Unit Study that includes a fantastic book and a STEM Challenge to Build a Windmill.
Make a simple Weather Station project and have kids track the weather to become more in tune with nature.
A compass helps you tell which way is North. Make a simple compass to go with your weathervane.
Continue studying the weather with a homemade Rain Gauge or a DIY Barometer.
This weather science project for kids was quick and easy. It is low prep STEM, using simple materials, but it was super engaging! My nephews were with us and even though they are well into their teens they worked right along with us testing and checking out the wind.
This was a great project to pair with building a sailboat so be sure you check that out as well. Or do it as part of a weather science study, or for Earth Day Most of all, have fun learning, exploring and growing!