Valentine’s Day Mailbox Projects
Valentine’s Day is right around the corner and part of the fun of celebrating is exchanging Valentines cards! I have a few ideas for DIY Valentine’s mailboxes made from recycled and simple materials for some easy receptacles to collect those valentines during your classroom exchanges. Plus you can sneak in some fun Valentine’s Day STEM lessons while celebrating love. Win!
Valentine’s Mailbox Ideas
Disclaimer: This article may contain commission or affiliate links. As an Amazon Influencer I earn from qualifying purchases.
Not seeing our videos? Turn off any adblockers to ensure our video feed can be seen. Or visit our YouTube channel to see if the video has been uploaded there. We are slowly uploading our archives. Thanks!
Recycled projects of any kind rely on some vision and creativity. Today I am sharing some ideas that you can use with your kids to inspire them to create their own special and unique mailboxes. This materials list is a guideline – as always let those imaginations run wild. This is a fantastic time to pull out your tinker kit and the recycle bin so kids can explore their creativity and ingenuity.
Materials Ideas
Cardboard boxes (I used a soft drink box and a cereal box)
Construction paper
Cardstock
Glue
Scissors
Tape
Doilies
Wax Paper
A Valentine’s Box can be super simple – or super involved, the design is up to you! Simply use our ideas to launch your own creativity in the classroom.
Valentine’s Card Mailbox DIY Project Ideas
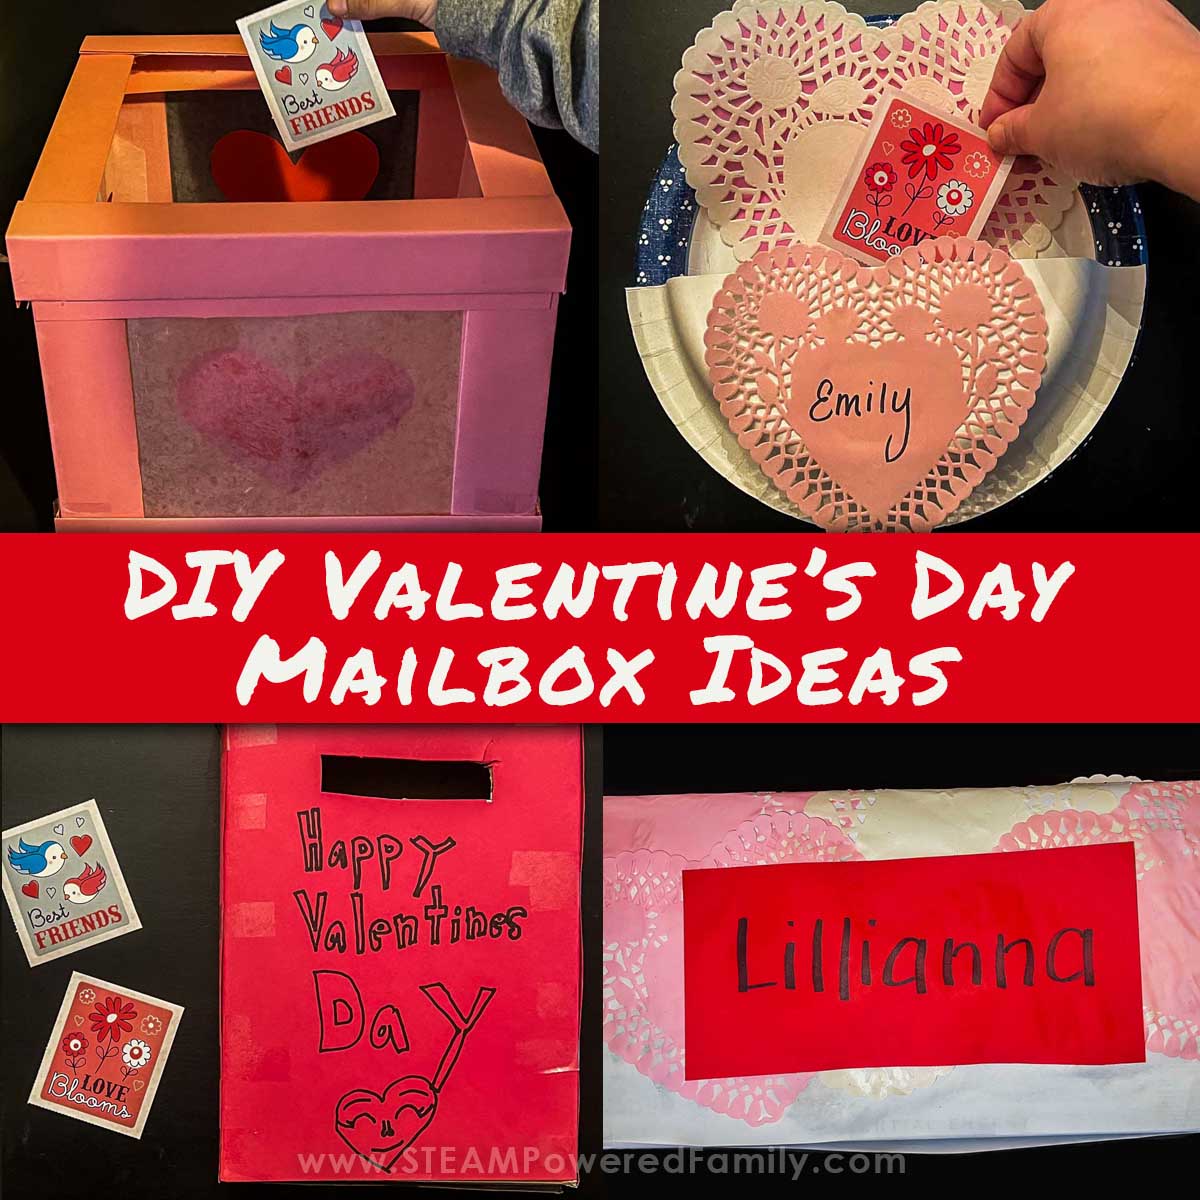
Idea #1
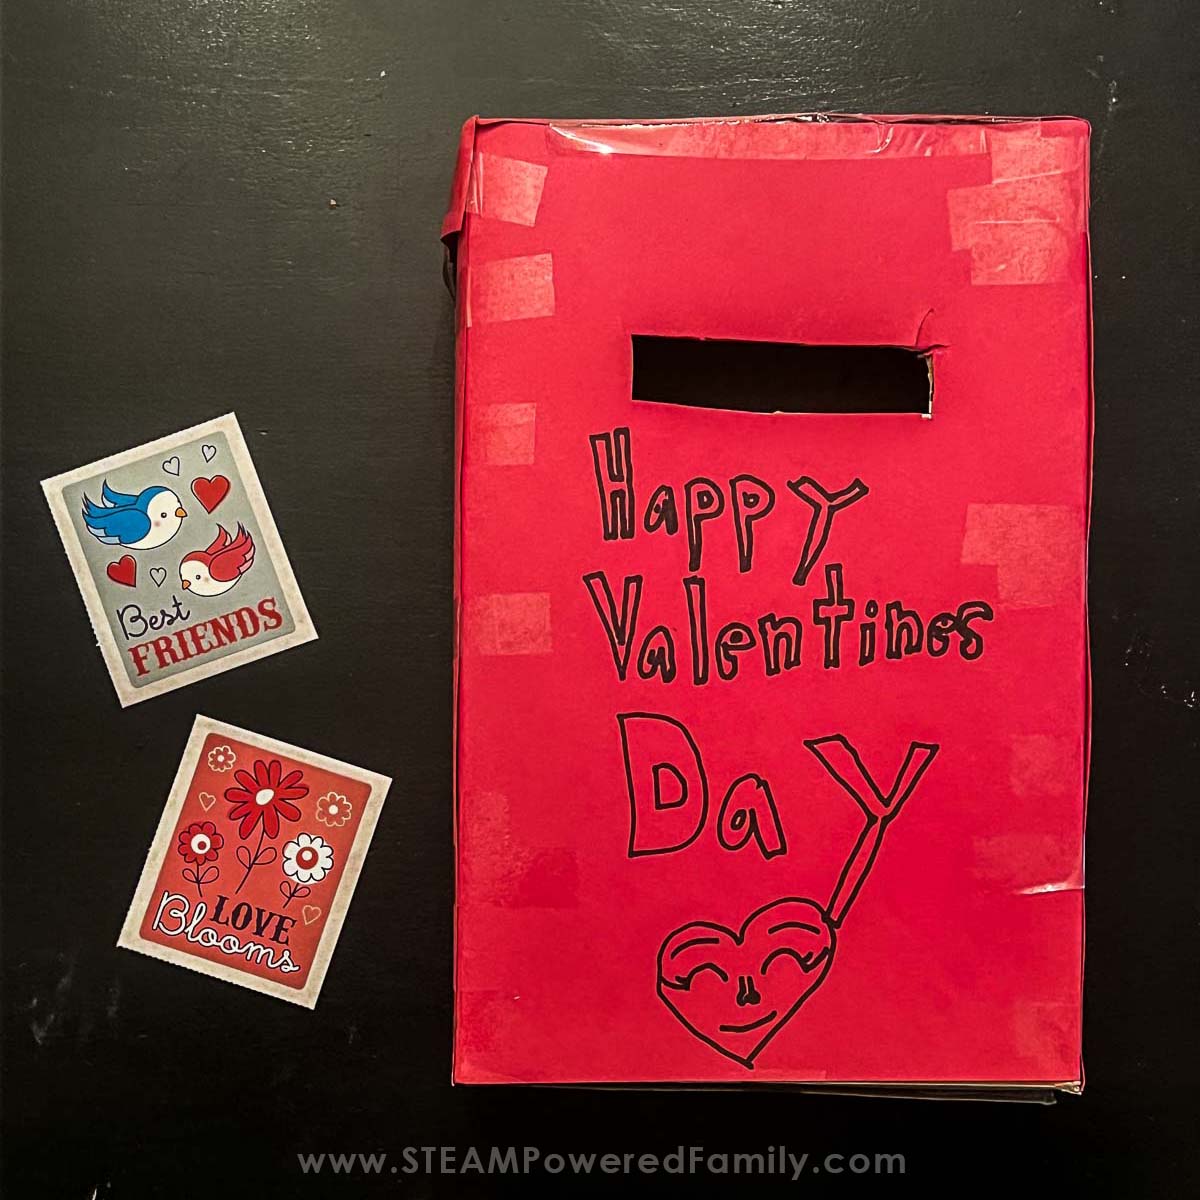
For the littlest kids we recycled a cereal box. For the Valentine’s mailbox pictured here, my student cut a mail slot in the front of the box for the valentines to be deposited. She then wrapped it in red construction paper and decorated the front with a marker. We had lots of craft materials on hand but this is the design that she wanted. And honestly I love the simplicity of the Valentine mailbox and she completed exactly what I asked for!
Idea #2
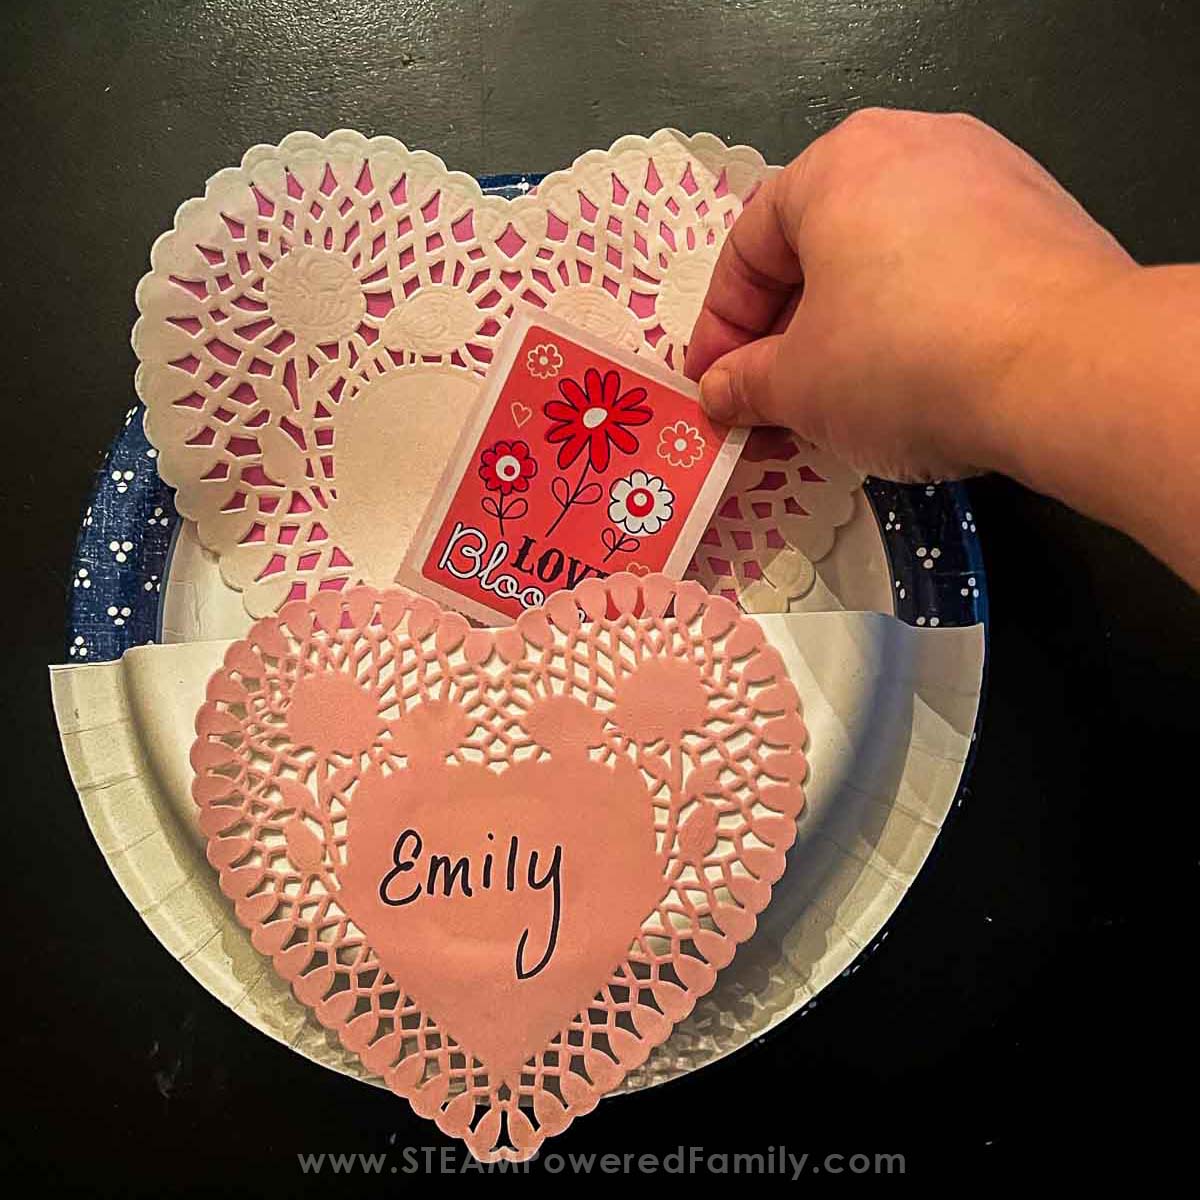
If you don’t have a lot of room in your classroom, how about a valentine mail pocket that could be hung on the back of a student’s chair, or from the front of their desk. I used a paper plate and a half for each mail pocket. I cut a plate in half and then flipped it over. With the plates facing each other I glued them together with a hot glue gun to make the mail pocket. The hot glue will hold better than school glue, but you can absolutely use school glue. I let the kids decorate the mailboxes once I had them glued together. A simple doily with their name is an easy way to make sure everyone knows which mailbox belongs to which student.
Idea #3
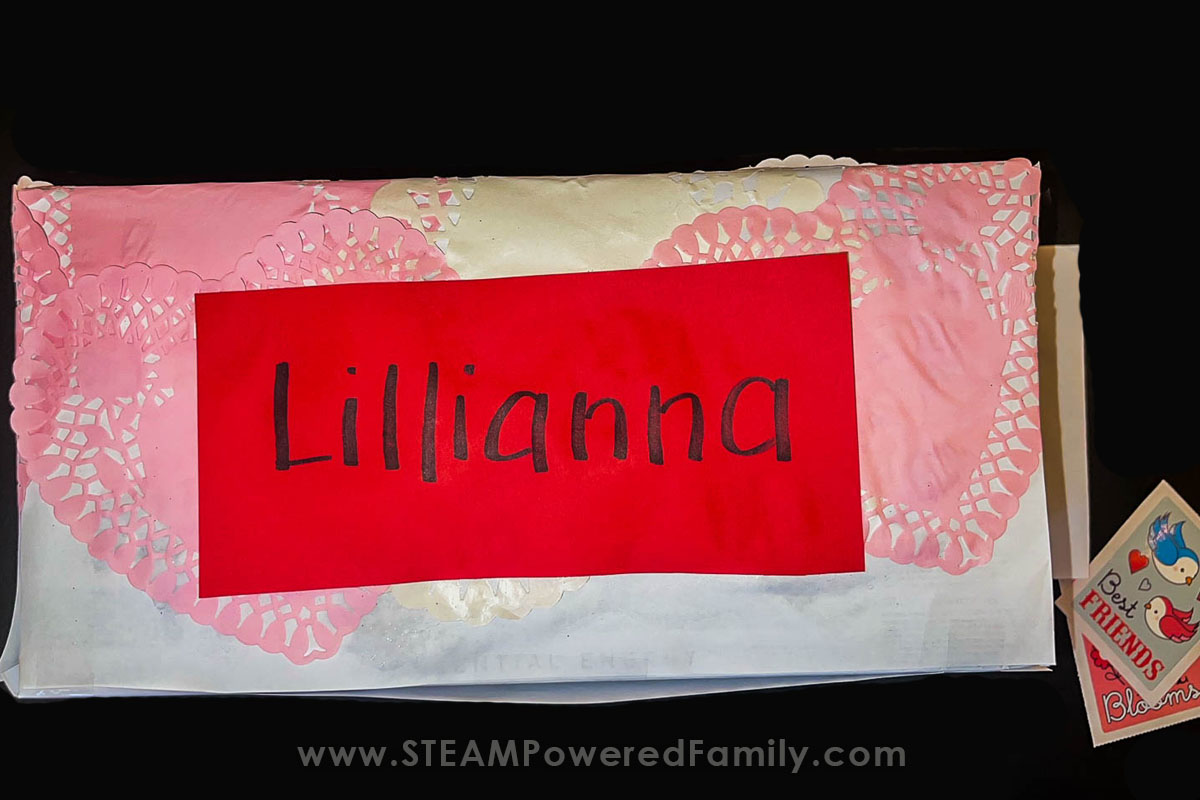
Another design came from a recycled soft drink box. This particular one has slots at the top for handles which are perfect for slipping the valentines in. We taped up the one end of the box that had been opened to remove the drinks, but left a flap that could be opened to remove the Valentines. From there they wrapped it in white paper and then decoupaged doilies onto the outside of the box. It’s super cute, we added a nameplate to the front and it’s ready to go.
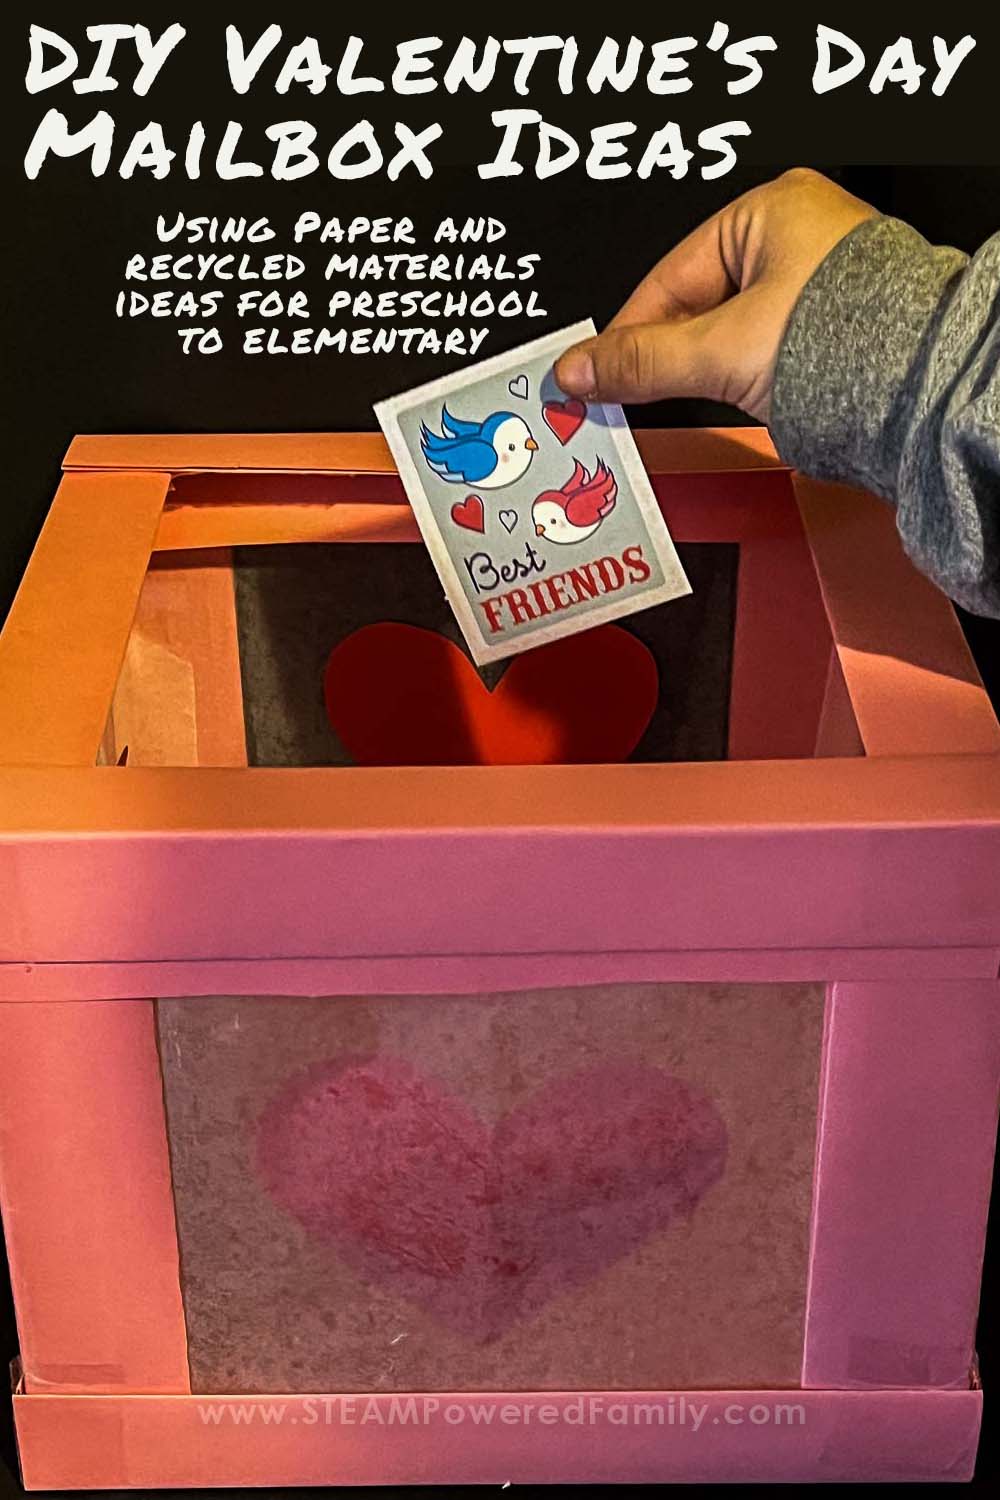
Idea #4
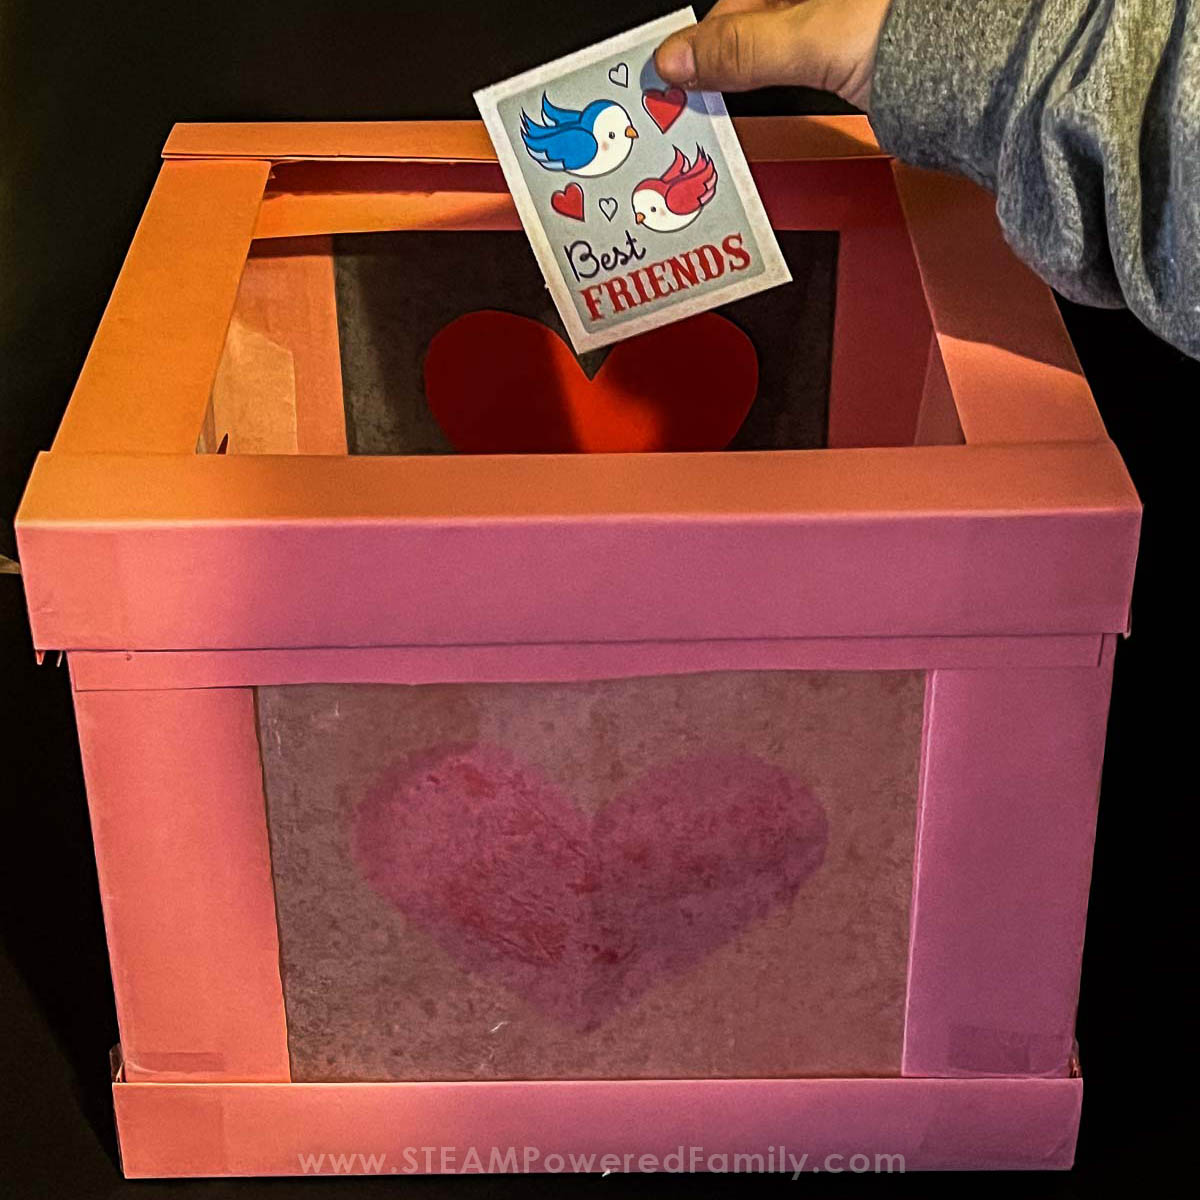
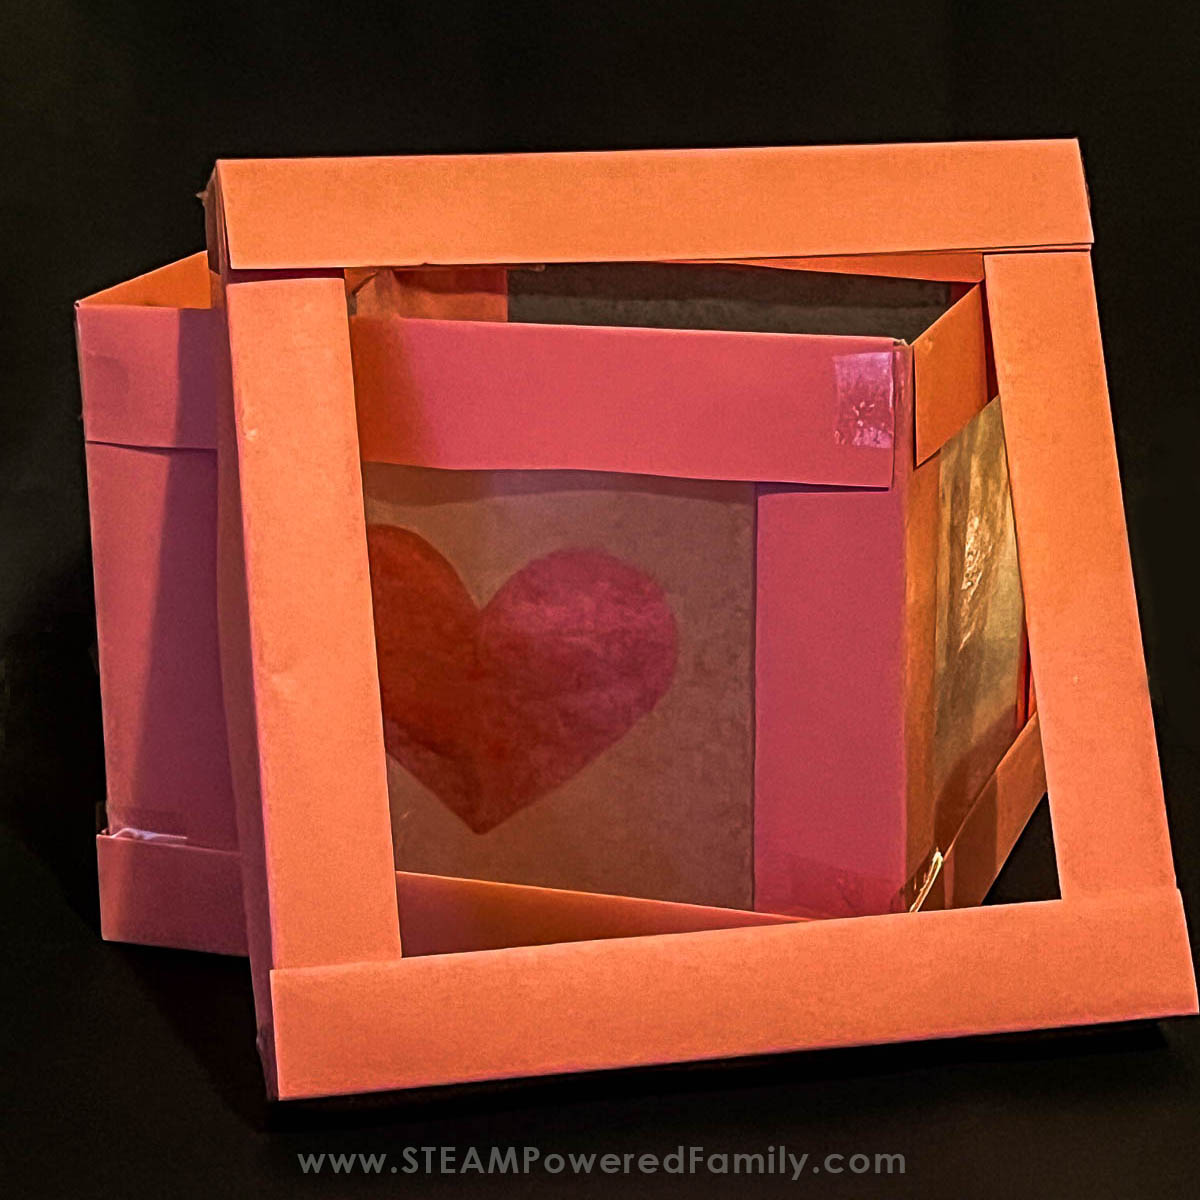
The final mailbox is by far my favorite – the challenge was to build a mailbox just out of paper. Our kids love their No Prep Paper STEM Challenges, and this was the perfect way to apply the lessons they have learned from those STEM challenges to build a 3-D cube Valentine’s Day Mailbox. We folded the paper to add structure and stability and then glued and taped the pieces together to form a cube.
Here are the basic steps.
STEP 1:
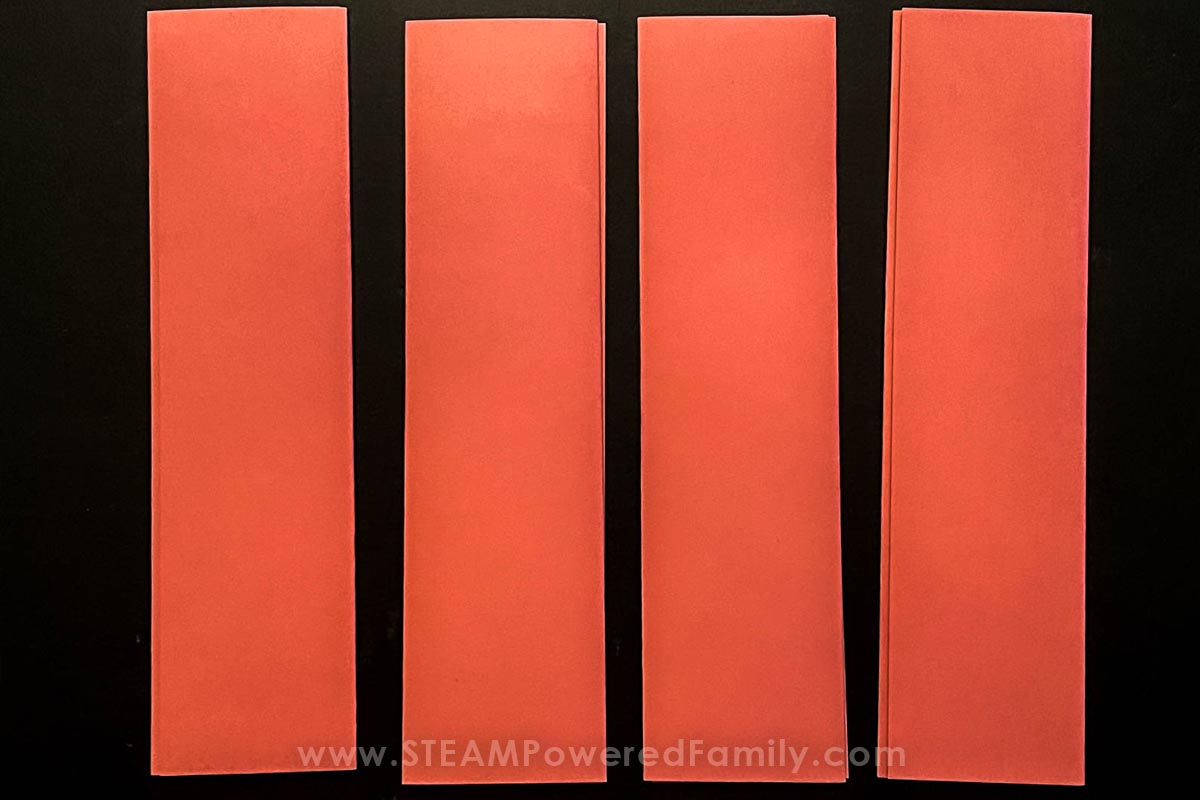
For the base of the box you need 4 sheets of 8.5×11 cardstock or other heavy paper. We folded each piece of paper into thirds the full length of the paper and then glued along the edge and put them aside for the glue to dry.
STEP 2:
For the sides of the cube you will need 4 more sheets. We folded these pieces in thirds the short way. Glued them and set them aside.
STEP 3:
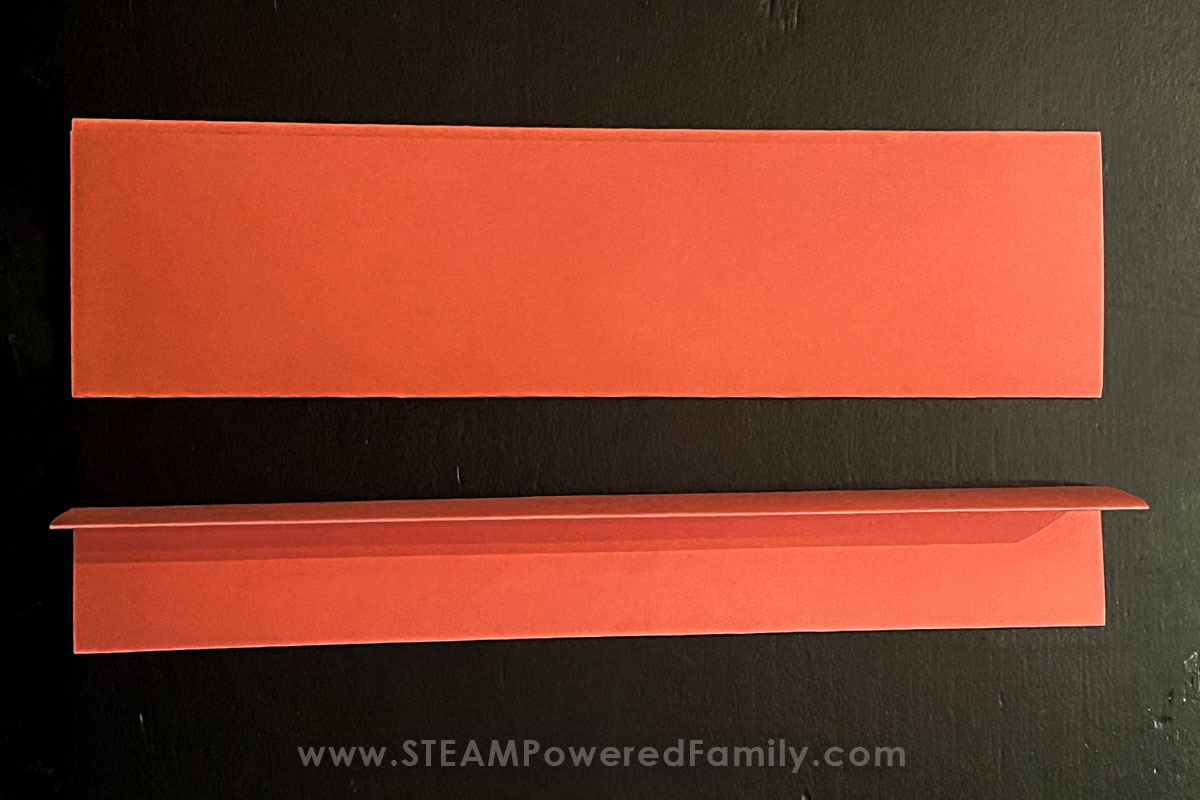
Take the 4 long sheets that were folded in thirds and take that piece and fold it in half forming a “L” shape. Repeat for all 4 pieces. Do the same for the shorter pieces.
STEP 4:
Lay the long “L” shaped pieces out in the shape of a square. One side laying flat on the table and the other will be facing up. Pull the corners together the flat pieces will overlap and the part that faces up will just meet the other piece. Tape or glue the joints together on all four corners to form a square shape that is sturdy enough to lift.
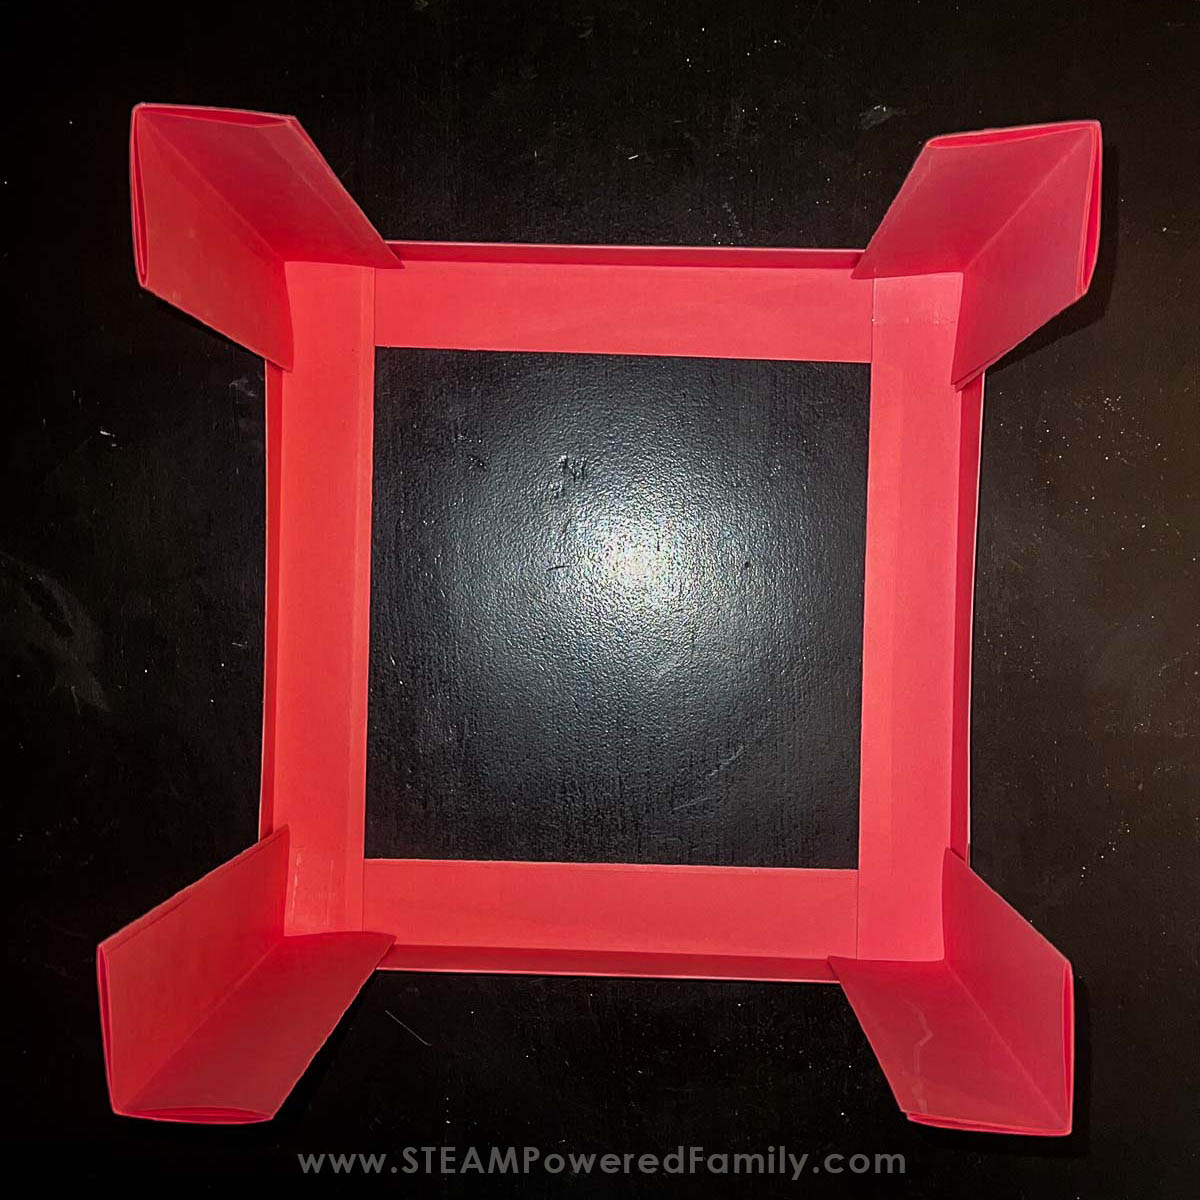
STEP 5:
Take the four shorter pieces and place them standing up in each of the corners, these will form the corners of the cube shape. Secure them in place.
STEP 6:
Layer some paper in the bottom of the box to give it some structure and so the Valentines don’t just fall out. We secured it with glue.
STEP 6:
Make a lid. Repeat the steps you used to make the base of the box to make a lid.
STEP 7:
This step is optional. We used wax paper to fill the windows of our cube. Use a glue stick to secure the wax paper to the inside of the cube. Then we used a folded piece of paper along the top edge to give the wax paper a little structure, after that we cut out some heart shapes and glued them inside the box.
STEP 8:
Put the lid on the box and it’s ready to go!
I love the way these projects turned out – it adds a great extra element to your Valentine’s celebrations and gives the students a keepsake they can be proud of! It also provides students with a chance to get creativity and use their imaginations while building STEM skills.
Extension Ideas
For Halloween we made a Candy Dispenser that used a simple machine to deliver candy. How could you use a simple machine for depositing Valentine’s Day Cards into your mailbox?
Happy Valentine’s Day!