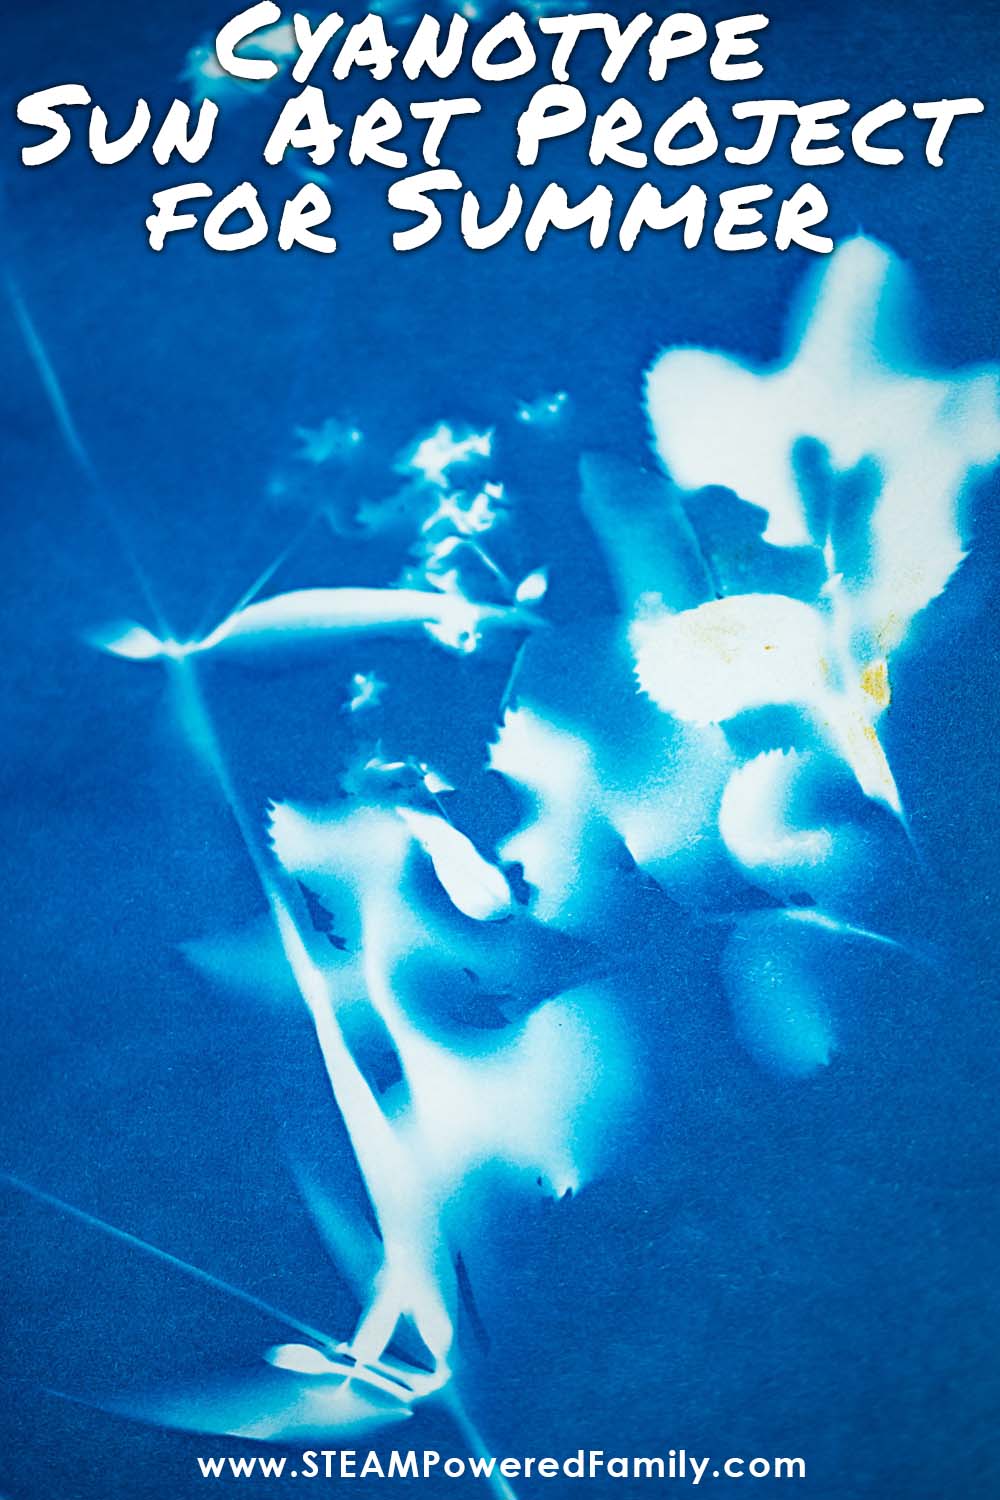
Sun Art – Cyanotype STEAM Project
The sun is shining, let’s capture those UV rays and turn them into some incredible sun art! This cyanotype STEAM project is perfect for summer, especially on the summer solstice or at summer camp, and is so easy. Best of all, it is a fun way to play with art and chemistry that everyone from preschoolers to high school students will enjoy.
Cyanotype Art – Summer STEAM Project

Disclaimer: This article may contain commission or affiliate links. As an Amazon Influencer I earn from qualifying purchases.
Not seeing our videos? Turn off any adblockers to ensure our video feed can be seen. Or visit our YouTube channel to see if the video has been uploaded there. We are slowly uploading our archives. Thanks!
What is Cyanotype?
OK, let’s answer the big question first… what the heck is cyanotype?
Also known as sun prints, photograms or sun art, cyanotype is a photographic printing process that produces prints in a distinctive dark blue. The word cyan comes from the Greek word ‘Kyanos‘, meaning “dark blue substance.”
Cyanotype printing is easy and inexpensive. No darkroom is needed, instead it uses the power of the sun and iron salt solutions. By shielding parts of the paper with objects from UV rays, you can create amazing art.
Although it goes through a process to get there, in the final art, the areas where the UV light hits the coated surface will trigger the chemical reaction and turn blue. The areas covered by objects will remain white.
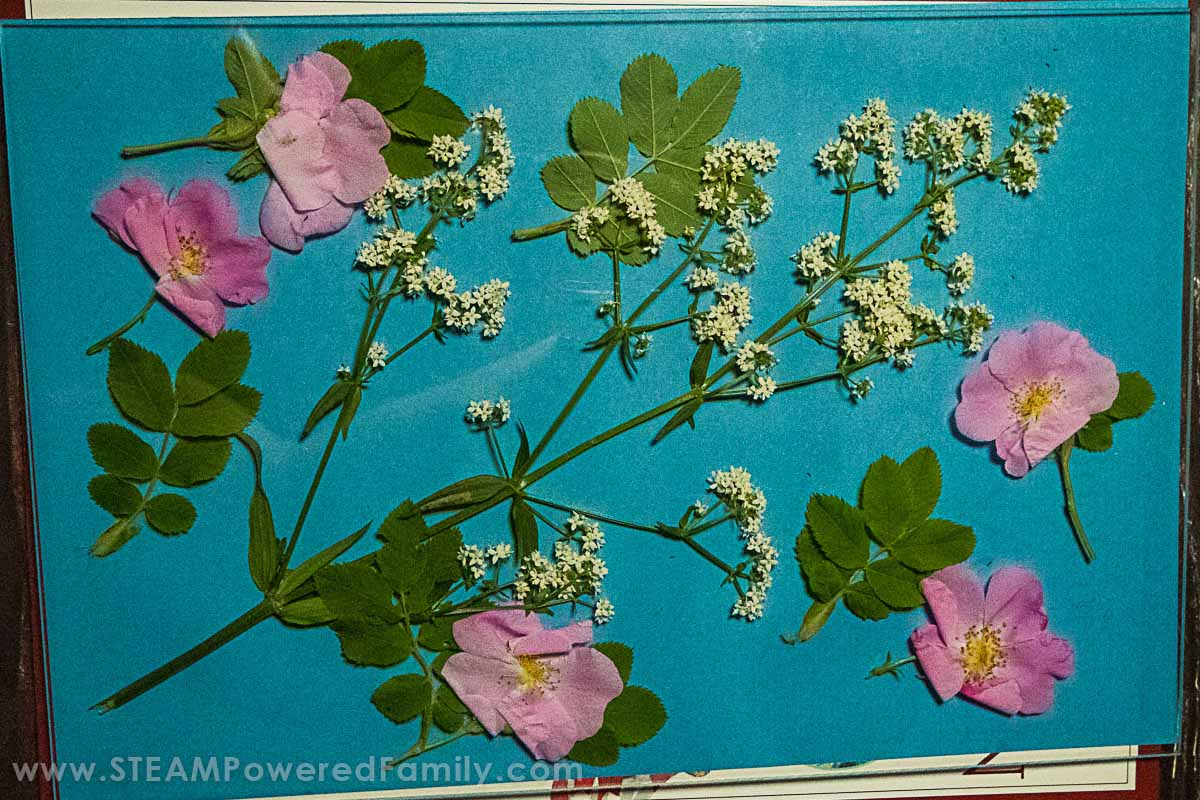
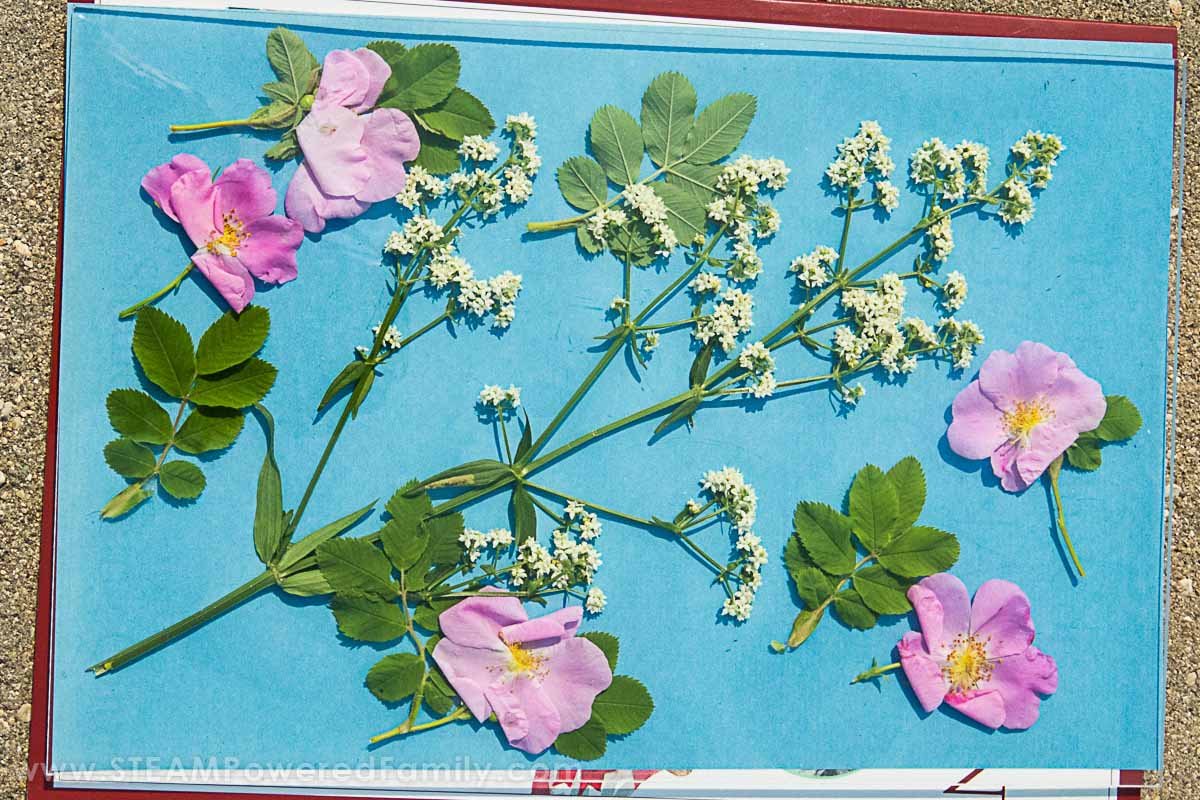
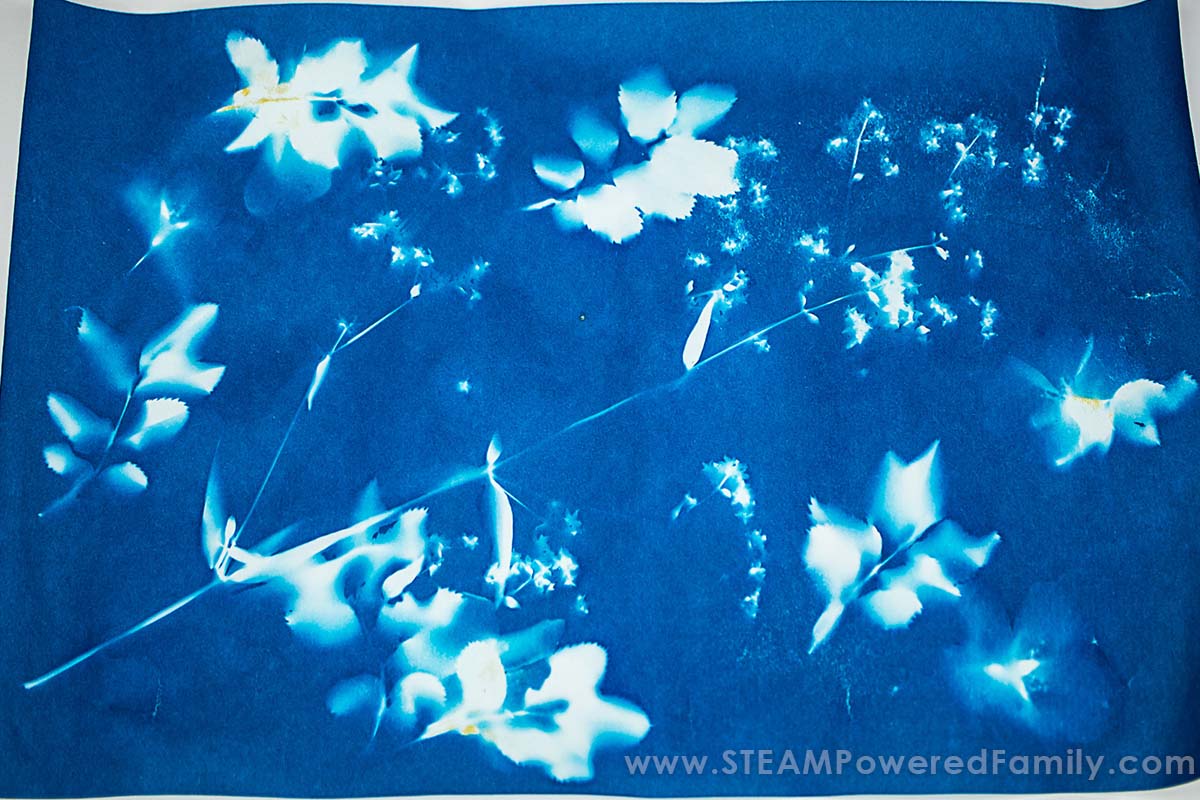
Cyanotype Process Step-by-Step
What starts as this:
Goes into the sun where a chemical reaction starts immediately.
Where UV rays hit, the chemical reaction happens, but where our flowers block the rays, there is no chemical reaction.

Then after rinsing and drying becomes this beautiful art!
The History of Cyanotype
The cyanotype process was invented over 180 years ago in 1842, by Sir John Herschel, a brilliant astronomer and scientist. He is also credited with coining the terms photography, positive and negative (in reference to photographic images).
If you recognize his name, it is because his father was the famous astronomer, Sir William Herschel, who discovered the planet Uranus.
Although Sir John Herschel developed the chemical process of cyanotype, he didn’t use it for photography originally. He used it for making copies of his notes and diagrams from his scientific research.
It was actually Anna Atkins, an illustrator and botanist. She used the process to make detailed images of plants, opening the door for photographers to use this technique. This was a huge advance in scientific illustration.
Over time the process was adapted for use in a variety of ways including creating copies of technical and architectural plans. These were called ‘blueprints’. A term still used to this day to refer to any construction document or detailed plan (although now they use computers and printers to generate these documents).
The Science Behind Cyanotype Art
This is where things get fun, and teachers have an opportunity to fully scale this project into a chemistry experiment. The chemical reactions here are fascinating.
Cyanotype works because of a chemical reaction between two substances: light sensitive ferric ammonium citrate and potassium ferricyanide. These chemicals are mixed together to form a solution that is spread onto a surface like paper or fabric.
When the treated paper is exposed to sunlight or a UV light, a chemical reaction happens. Ultra Violet (UV) rays trigger the reduction of the iron(III) ions in ammonium iron(III) citrate to iron(II) ions. At the same time, the potassium ferricyanide is oxidized, forming ferrocyanide ions.
The oxidation of potassium ferricyanide produces a stable compound and pigment known as Prussian Blue. This blue color is what makes cyanotype art unique.
There is a fantastic, highly detailed scientific explanation of the chemical process available here.
Video Tutorial of Sun Art Project using Cyanotype
Check out the whole process in this video of us making Cyanotype Sun Art projects. Note, we did the rinsing outside so we could video the whole process, but we recommend doing that step indoors. Can’t see the video, find it on the STEAM Powered Family YouTube Channel.
How to Make a Cyanotype Sun Art
OK, now we know all about the history and science of this fascinating process, how can we make art? It is a really simple process your kids are going to love!
Supplies
To do this sun art project you will need:
A Sunny Day
Lots of fresh, cool water
Objects (see below for ideas!)
Plus you will need a Cyanotype Kit. There are a few options you can pick from:
- Prepared Cyanotype Paper or,
- Prepared Cyanotype Fabric or,
- the Chemical Solutions to create your own project on natural materials (great for older students).
I have all three of the options listed above, and highly recommend the Cyanotype Paper Kit for getting started with your students. It includes everything, even an acrylic plate so you can secure flat items. This prevents them from blowing away or shifting while you are exposing your sheets in the sun. Plus it has 15 sheets of paper and is very reasonably priced. It gives you a quick, big win science and art project for the summer.
Directions
Creating this sun art is so easy and fun! Just make sure you follow a few important steps. I will walk you through using the prepared paper as that is the perfect one to use for a group of students doing cyanotype the first time. The package contains 15 sheets of paper. I recommend getting enough for each student to have two sheets.
Work in the dark!
Before we start, remember this is a UV sensitive process, when you open the package, make sure it is away from any UV rays. Draw those blinds or work in a space where there are no windows, fluorescent lighting, or UV lights.
Place one sheet of the prepared paper on a piece of cardboard or a book. Make sure you only have one sheet. I found they tended to stick together and I often didn’t realize I had two sheets.
Object Ideas
Arrange your objects and design your art layout! You can use anything. Experiment with different objects and see how they affect the final print. Here are some ideas based on what we did:
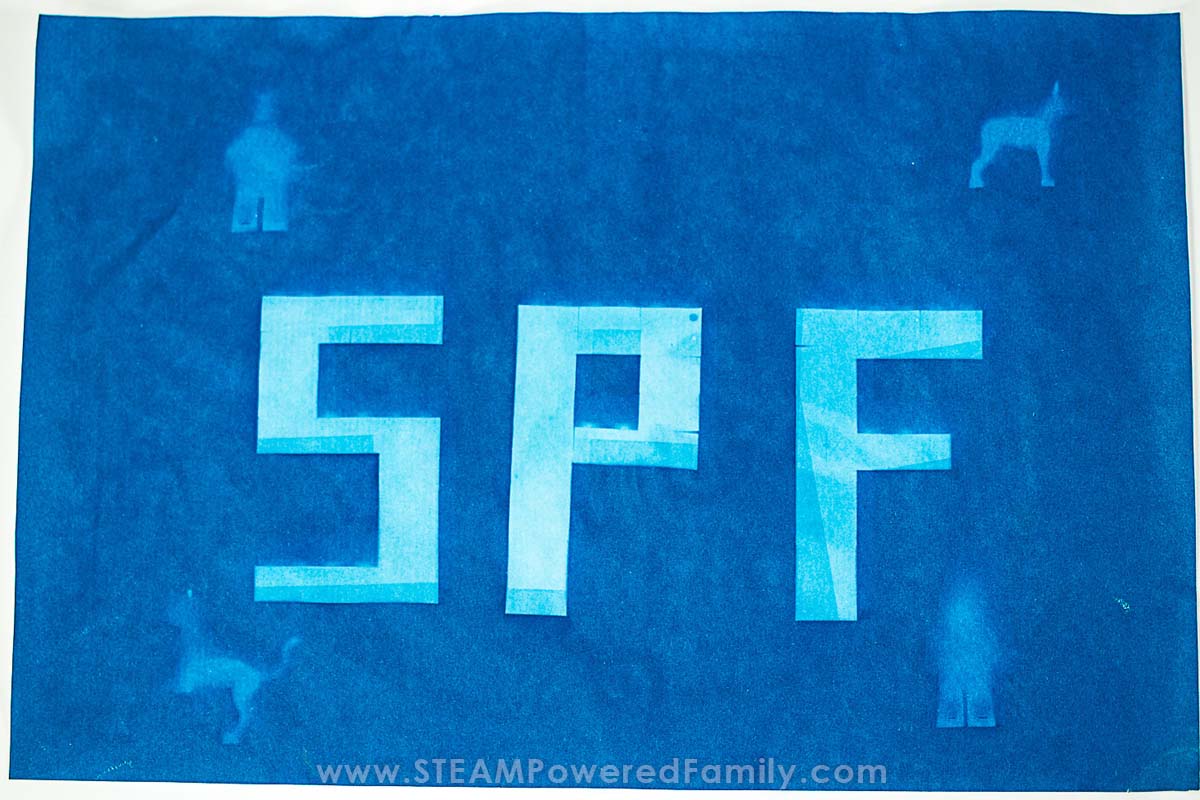
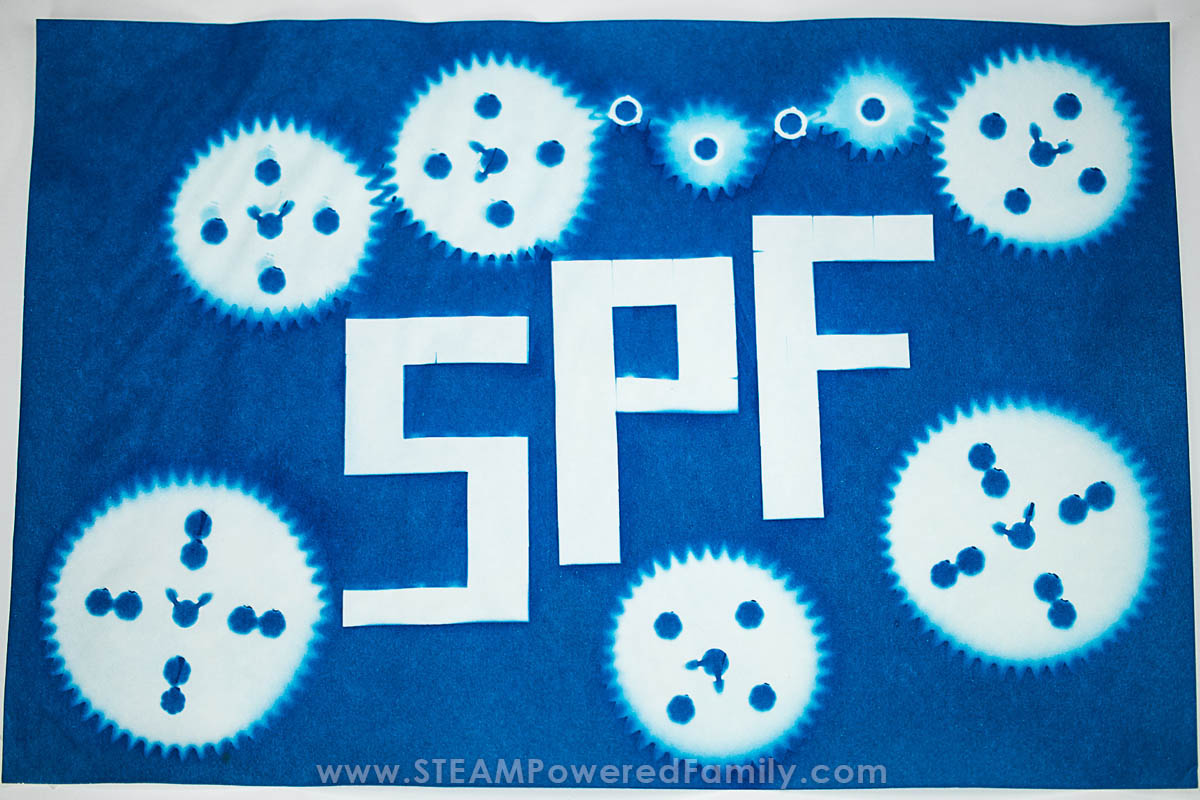
- Make shapes out of Lego, (we made our SPF out of Lego)
- Use plants from the garden,
- Cut out shapes from construction paper (we took circles and triangles and made a sun for the solstice),
- Cut out pictures,
- Use small toys or other items
- Use stencils
Take your time and make it perfect. Once you are in the sun, you can’t change anything!
If you are doing flat items like paper or plants, place an acrylic sheet over top to hold everything in place. You don’t want anything blowing away. You can secure everything together with bulldog clips, if you wish. Another option is to pin everything in place but that is more tedious and difficult for little ones to do.
Bring on the Sun!
Now, I found it easiest to cover my piece with another book until I got to my place outside. This allowed me to check and make sure everything was still in place before I exposed the paper. But you don’t need to do this.
Once outside, set your piece in direct sunlight for about 3 to 5 minutes until the paper goes white. It is really fun watching the paper change from blue to white!
Exposure times will vary based on the intensity of the UV rays. If your paper is still a little blue, continue to expose it to sunlight a little longer.
Rinse
After exposure, bring your paper out of the sun. Remove the objects. Now rinse it for 1 to 2 minutes in a bin filled with fresh, cool water.
NOTE: You will want to use fresh water for each sheet of paper.
As you rinse you will notice the paper seems to lose all colour. Don’t panic! After about a minute it will start turning blue. It is really fascinating to watch the transformation as the chemical reaction takes place.
Important Rinsing Tip!
Bring your papers out of the sun to rinse them. In the video I rinsed outside in the sun because it was the easiest way to video the process, but the paper continued to react. So those art prints are variations on blue (maybe that is the look you want!). To get crisp white prints with the dark blue, bring it out of the sunlight for rinsing.
Drying
Let the paper dry completely. It will wrinkle up and curl a bit as it dries.
If you want the paper to stay nice and flat, place it between two pieces of wax paper, then pile large books on top. This will keep it flat during the drying process, but it will take longer to dry, about 24 hours.
Your Cyanotype Sun Art is now complete! Frame your art and show it off!
Extension Ideas
Use the chemical solutions to create cyanotype prints and art on t-shirts or other natural fiber clothing. This is a fun twist on Tie-Dye Projects.
Use the solutions to create prints on different natural materials. What cool natural material can you use to make innovative and exciting art? This is a great challenge for high school students.
Play with the opacity of your objects to see how the art changes if you use opaque objects.
What happens if you place your objects standing up and casting a shadow on the paper?
Try and find the best technique for capturing the most detail in plants. In the cyanotype print of some of the leaves you could see the veining. It was really cool.

What if you draw on a piece of acrylic and place it over the paper? Can you make a copy of your drawing?
Add things to the water rinse to see what happens. Adding some hydrogen peroxide to the water will make it instantly blue. Or try adding tea, coffee, dish soap, vinegar or even food dye to your water rinse to see how it affects the final art.
Feeling artistic? Paint the final piece to give it more dimension.
Cyanotype Chemistry Art
Cyanotype is a great way to learn about chemistry. It’s a fun and creative way to explore the science of light and chemical reactions! If you want to play a bit more with UV rays, we found this cool sunscreen science experiment from NASA or why not harness the power of the sun and create a Solar Oven.
Looking for a printable unit study on the Sun? Check out our shop for a great resource!
More Fun Sun Art
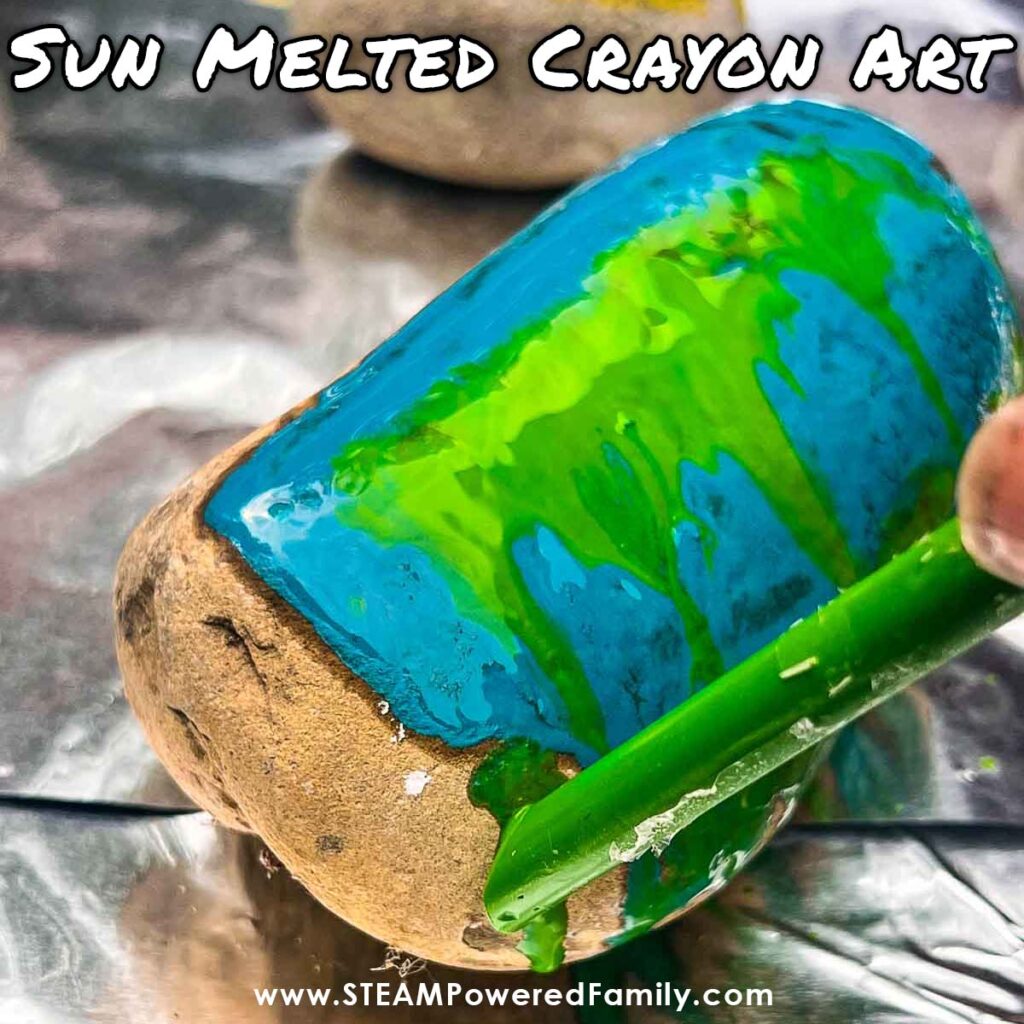
Try this Melted Crayon Art using the sun and rocks as a fantastic summer STEAM project with your kids!
Happy learning in the sun!