Easy 3 Step Sharpie Tie Dye Project
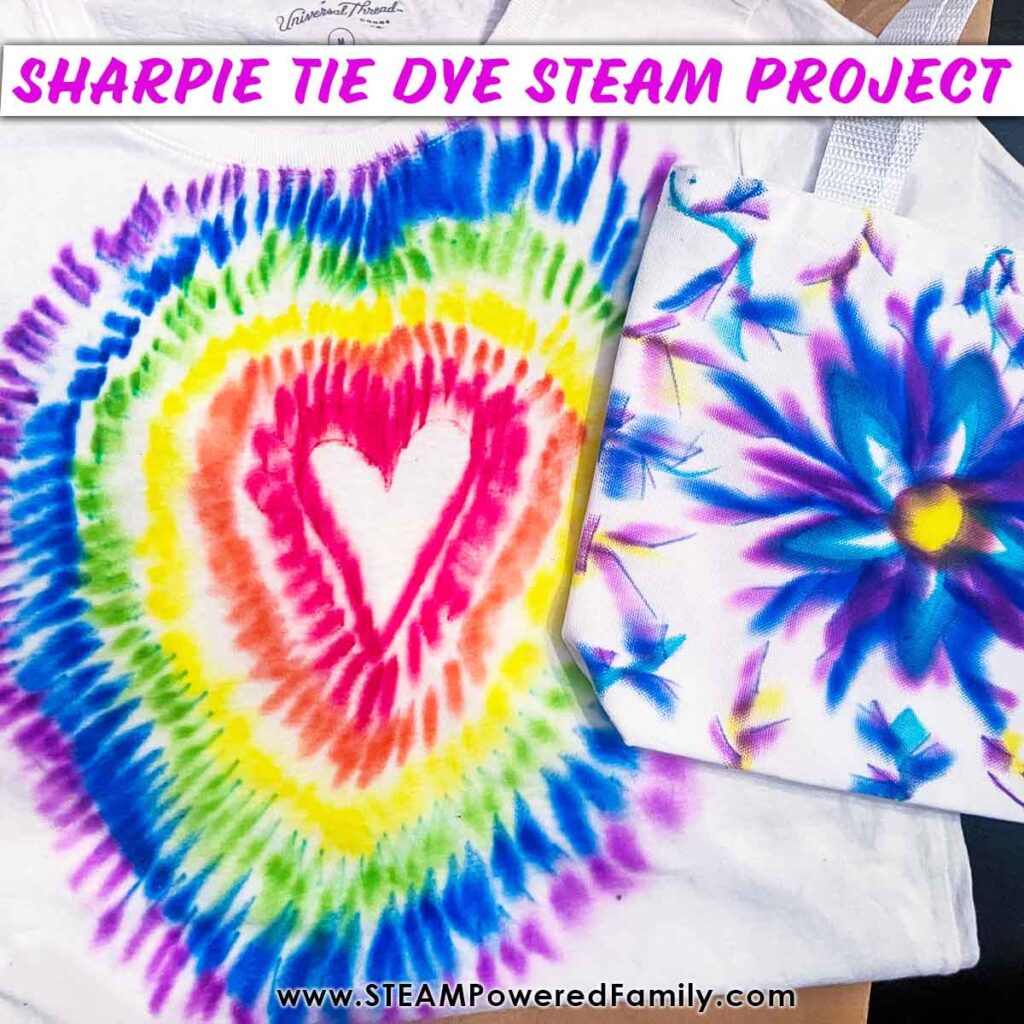
Looking for a quick and creative way to add some art to your science lessons? With only a handful of affordable materials, kids will love this easy 3 step project using Sharpie’s to create their own unique and colorful designs on t-shirts, bags and even shoes! Making Sharpie Tie Dye projects is fantastic for science class and is always a huge hit at summer camp!
Sharpie Tie Dye – Creative Science Project
Table of Contents
Disclaimer: This article may contain commission, paid partnerships, or affiliate links. We independently review everything we recommend. When you buy through our links, we may earn a commission from qualifying purchases.
Tie Dye projects are always fun – kids love them, they’re cute and colorful and always a favorite among with kids in the classroom or summer camp. Traditional tie dye techniques take some time and patience, and can be super messy. Especially if you are working with younger kids. So, if you’re looking for a simple project with a similar wow but cleaner and faster you may want to try a sharpie tie dye project with your group!
Yes, you read that right, you can tie dye with sharpies! It’s super straight forward, quick and easy and as a bonus you can combine the project with a science lesson about soluble vs. insoluble and how different things may be resistant to one solvent like water but not another – like rubbing alcohol which is exactly why sharpies will work for tie dye – they can’t be dissolved by water but spread beautifully with Isopropyl alcohol!
Let’s get to the project!
The Science
First off some simple science on solubility.
What is Solubility?
Solubility is the ability of something to dissolve in a fluid solvent. To show kids what those words mean you could stir some sugar into warm water. They will see the sugar dissolve and disappear to make a sugar solution. From there we want to talk about how different inks are soluble or insoluble in water.
A water based marker like they use in their classrooms is soluble in water where a permanent marker isn’t soluble in water – but is in isopropyl alcohol.
A Quick Experiment in Solubility
To illustrate this, have students draw two lines on a piece of plain paper. Top line with regular marker, second with sharpie. Then on the left side of each line put a drop of water and on the right side of each line put a drop of 91% Isopropyl Alcohol.
Then sit and observe.
You will quickly see the color spread and separate from the water based marker on the water side but the sharpie ink won’t budge. On the opposite side the ink from the water based marker will spread very little where they will be able to see the sharpie ink start to spread (although not as much as the water). From this we can determine that a classroom marker is made of water soluble ink where a permanent ink marker like a sharpie can be dissolved by alcohol but not water. This is because the permanent ink is composed of hydrophobic (resistant to water) material.
If you’re interested in more about soluble ink – check out these fun chromatography projects on the site. Spring Flower Chromatography and Chromatography Earth Day Crafts
Now, let’s learn how to tie dye!
Simple 3 Step Tie Dye Technique
Supplies
What do you need? Only a few simple items.
Colorful Sharpie Markers
91% Isopropyl or Rubbing Alcohol
Mister Bottle or Pipettes
Plus you will need something to dye! You will want white cotton or canvas such as:
Sheet cut into squares (perfect for hanging around the classroom or campsite!)
T-shirts
Bags
Shoes
Bandanas (another great ideas for reunions or camps!)
Plus I highly recommend protecting your table surface with old paper, plastic or other table protectors.
And, if you don’t want your design to bleed through to the back of the shirt or bag, you will need to line the middle with foil, wax paper or a plastic sheet.
Tie Dye Instructions
STEP 1:
Place a protective layer between your work surface and your fabric. The sharpie ink will definitely bleed through the fabric so if you are working on a T-Shirt or a bag you will also want to place a protective barrier between the front and back of the shirt or bag so the ink doesn’t bleed through to the other side. For bandanas or scrap fabric you just need something to protect your table.
STEP 2:
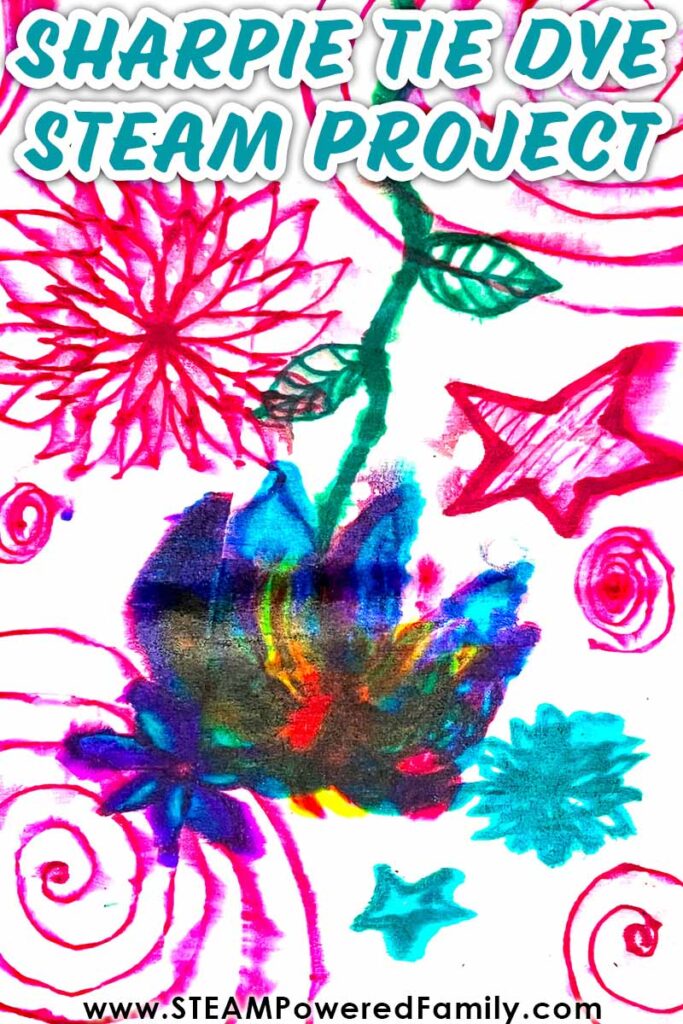
Use sharpie markers to draw designs on your white fabric. You can make any tie dye patterns you like including shapes, stripes, squiggles, pictures – you choose! Some of my students got really intricate with their patterns white some simply scribbled multiple colors all over. Some filled the surface and let the colors bleed into each other.
STEP 3:
When you’re happy with your design mist the entire area with the isopropyl alcohol and let it sit. You can add more alcohol if you want the ink to spread more after it evaporates. We tried both the pipettes and mister – the pipettes can give more of a splash mark if you aren’t careful with them but both worked well. My preference was the mister, just be sure to have the kiddos sit back away from the spray.
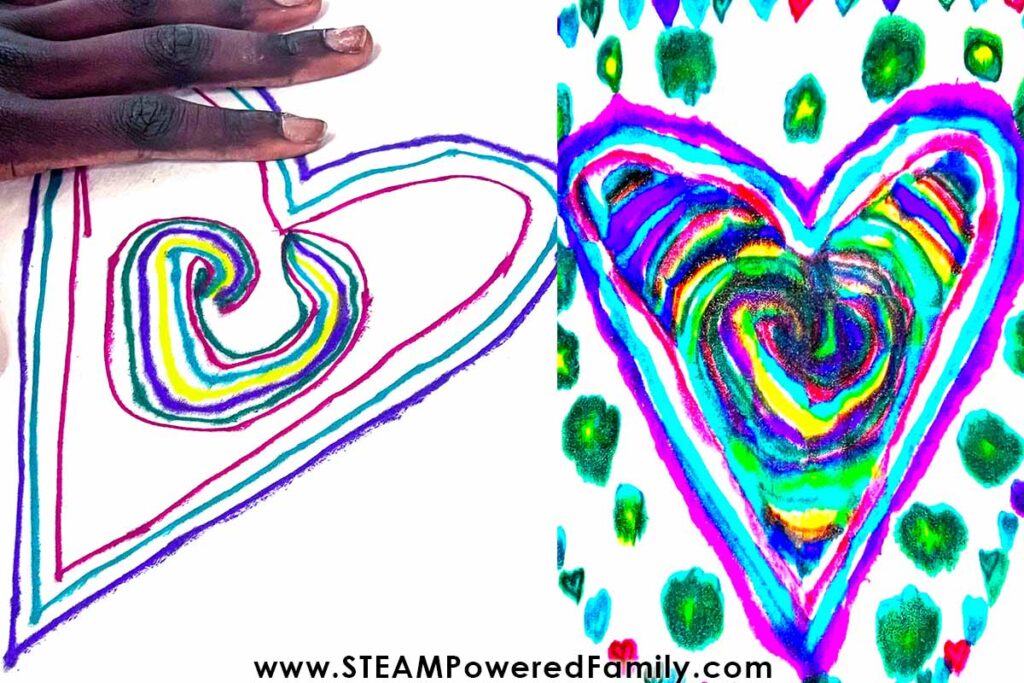
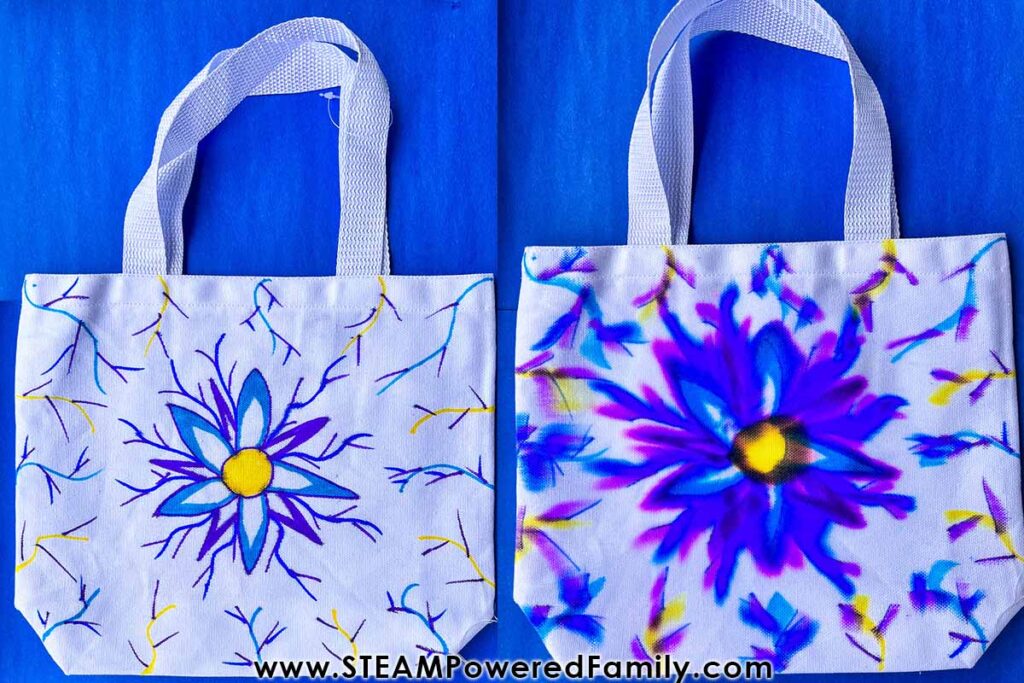
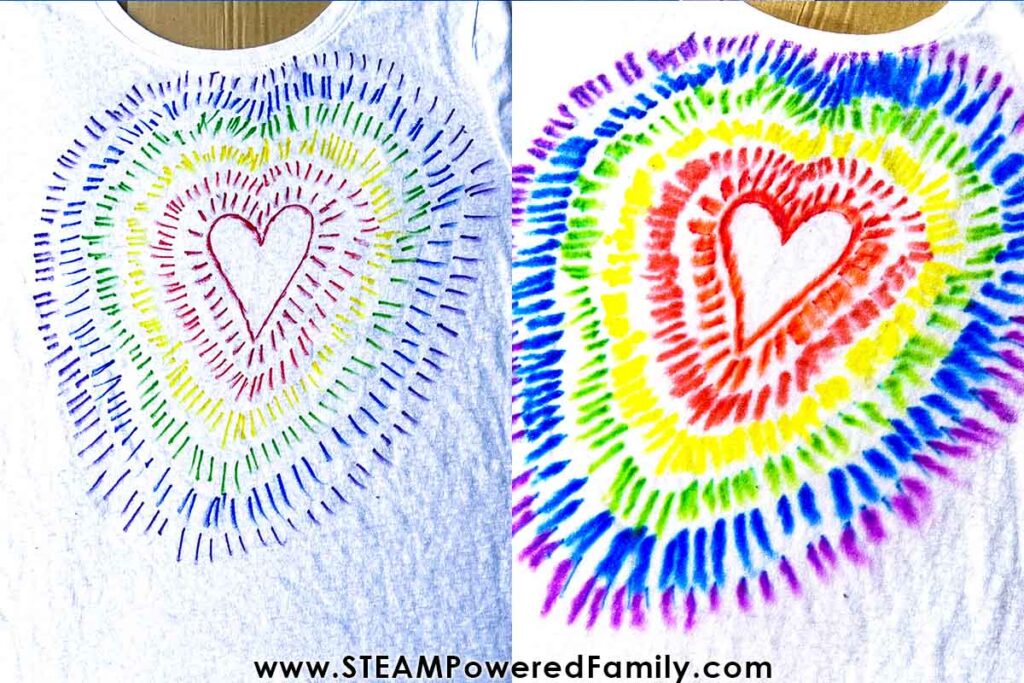
Here are a couple of before and after shots to show what the alcohol does to the designs. The images on the left are of the Sharpie drawings and on the right it shows what happened after we applied the alcohol.
STEP 4 (optional):
Some of my students went back over the outline of their drawings after the color spread to add detail. This step isn’t necessary but an option if the kids want it! Enjoy!
This is a super simple project that we easily finished (including the science part) in my after school STEAM Club which meets for just over an hour. The pieces are fast drying because the alcohol evaporates quickly from the fabric.
I highly recommend this project with your kids. It is inexpensive, the materials are easy to find, it includes a great lesson, it is so easy to do, and the kids absolutely love it! If you make some Sharpie Tie Dye creations, tag STEAM Powered Family on social media, we would love to see your work!