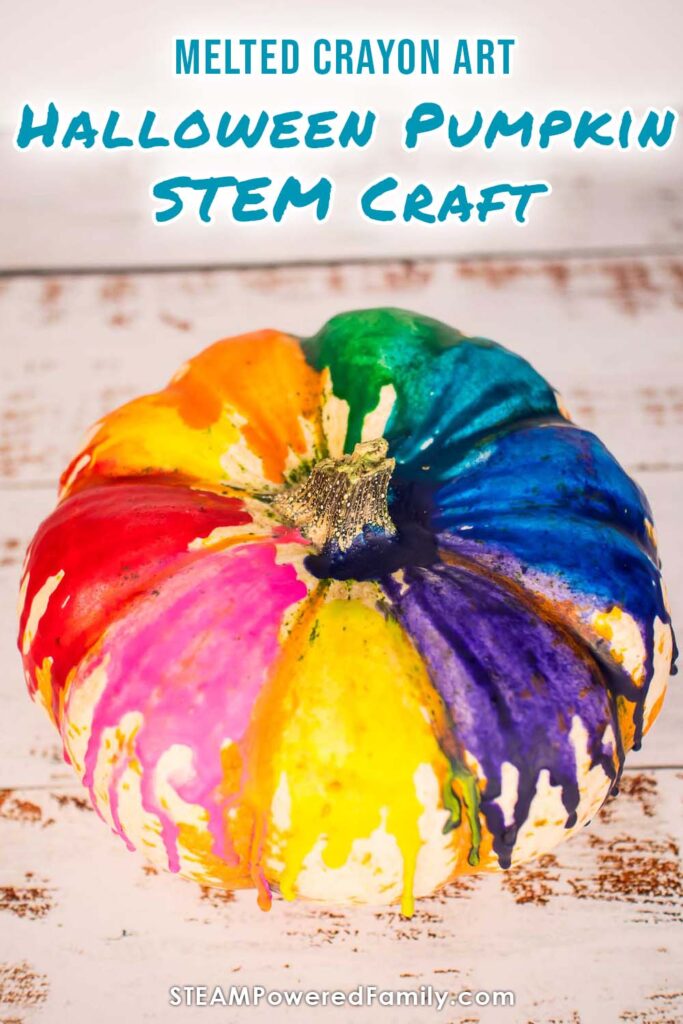
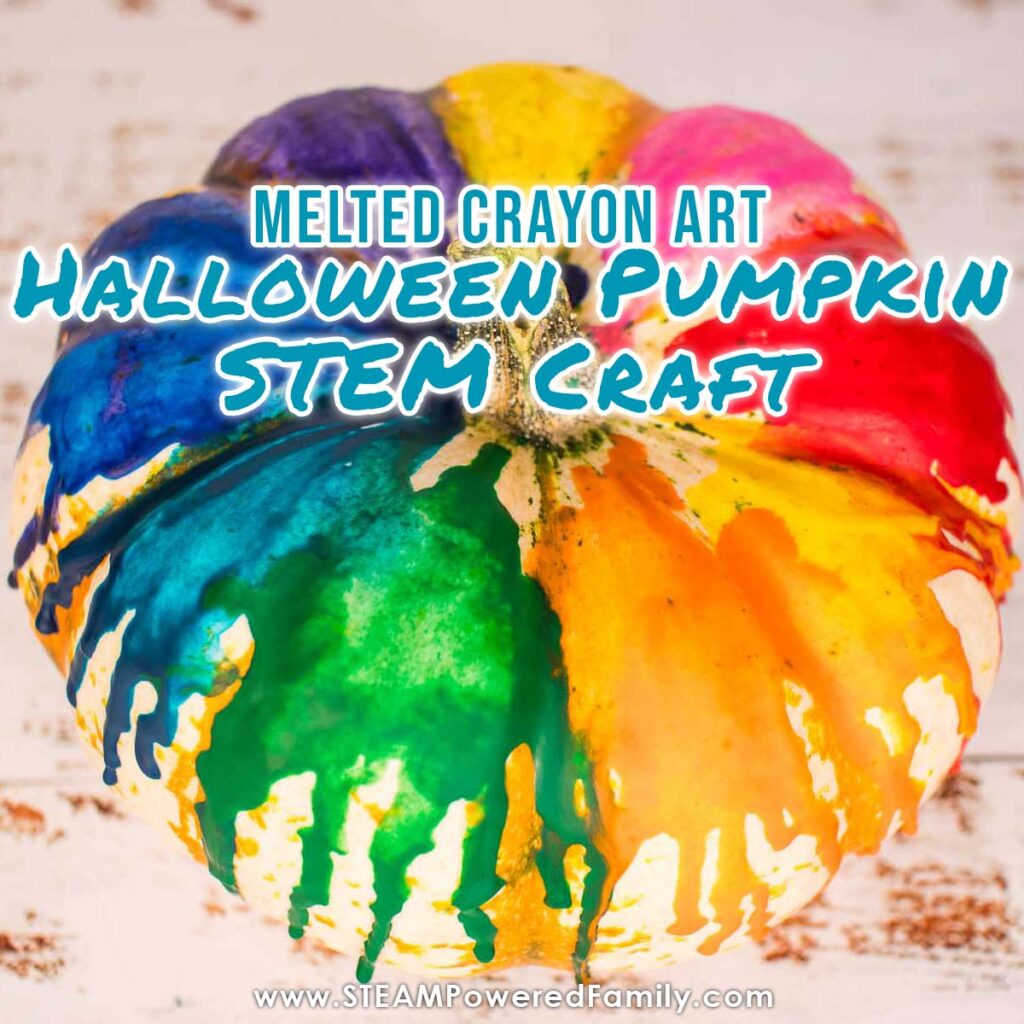
Melted Crayon Art – Halloween Pumpkin STEM Craft
We all know about carving pumpkins. Everyone carves pumpkins. So today we have something a little different. Today we are embracing the A in STEAM and creating Melted Crayon Art on Pumpkins! This is a wonderful, no carve, pumpkin decorating idea that includes some cool science lessons as the kids make beautiful art.
Melted Crayon Art Halloween Pumpkins
Table of Contents
Disclaimer: This article may contain commission, paid partnerships, or affiliate links. We independently review everything we recommend. When you buy through our links, we may earn a commission from qualifying purchases.
This activity will really encourage your kids to get creative. You have probably seen melted crayon art. It is popular in many circles, and a fantastic project for kids to tap into their inner artist. Why do people love it so much? Well it is actually quite easy to do, and once you get the hang of how to do it, you will only be limited by imagination.
That is how we came up with the idea to do Melted Crayon Art with Pumpkins. I wanted a no carve pumpkin decorating activity. We have made Pumpkin Pomanders before, but I wanted something more colourful this time. The Pomanders are fantastic for a scent based sensory STEM project, but this time I wanted visual stimulation.
For that, I decided crayons were the perfect answer!
The best part, is that there are a number of different ways you can do melted crayon art, so you can find the perfect one for you.
But first, let’s learn a little about the science behind melted crayon art.
The Science Behind Melted Crayon Art
When you do this activity, it will inevitably get lots of gasps and the occasional “wow!” from the kids as they watch those crayons change before their very eyes. Those moments are when their minds are alive with curiosity. So let’s embrace that, and explore the science behind this mesmerizing activity.
Crayons are mostly made of wax. Wax has a relatively low melting point. This means that when we apply a bit of heat, the crayon will change states from solid to liquid. Changing states of matter happen all around us, all of the time. Ask your kids to name other times they see matter changing states? Perhaps water turning from liquid, to solid ice, to steam gas.
Now ask your kids if they can think of something else made of wax that melts? The answer is candles! And yes, you can make candles out of crayons. We have made Crayon Candles and shared the tutorial.
Another science concept you can explore in this project is colour theory, primary/secondary colours and colour mixing. Understanding this can help kids plan their melted crayon art pumpkin so it turns out exactly how they want it.
In this activity we are using heat to melt the wax making it run down the pumpkin, mixing with other colours and creating gorgeous, unique art.
Want more Halloween activities? Check out our 31 Days of Halloween STEM!
How to Make Melted Crayon Art on Pumpkins
Check out our tutorial video. If you can’t see the video, or you require closed captioning, please visit the STEAM Powered Family YouTube Channel to watch the video.
Supplies
First you need to gather some supplies. You will need:
Pumpkins – I used smaller pumpkins because it was easier to work with, but you can use any size. I also preferred the melted crayon art look on pumpkins that were cream or white, it made the colours pop more. But a regular orange one works too!
Crayons – You can use broken ones, shavings, or full ones. Whatever you have got!
Heat gun – If you don’t have a heat gun, you can also use a hair dryer, or oven, or even the sun on a hot sunny day.
Directions
First, you need to protect your work surface. Melted wax will be dripping, so I covered my table with parchment paper. Just make sure you don’t use something like wax paper that will melt with the heat!
Set your pumpkin onto the protected surface.
SAFETY NOTE: If you are using a heat gun, make sure you explain to your kids how to use it safely and which parts to never touch or they could get burned. The same applies to any heat source you are using for this project. Always ensure adequate adult supervision.
Decide which crayon colours you want to use. Start with the first colour.
Touch the crayon to the top of the pumpkin and aim the heat gun at the crayon tip. Very quickly you will notice it start to melt. Keep going until you start to see drips run down the side. You can move the crayon around a bit to cover the area you want covered.
Now grab a new colour, and start on the next area. The crayon waxes can mix and create new colours (this is a great opportunity to talk about colour theory, primary vs secondary colours, and mixing).
Continue adding different colours until you have gone all the way around the pumpkin. You can go back over and add more crayon if you wish, or apply the heat gun in certain areas to melt the wax more and mix it or make it drip more, until your pumpkin is perfect.
Once you are finished, let your pumpkin sit for about 5 to 10 minutes so the wax can harden. You are now finished your crayon art pumpkin!
Alternative Techniques
If you don’t have a heat gun you can use a hair dryer, just make sure it is on the hot setting. We used a hairdryer to make stunning crayon melt ornaments for the holidays.
You can also take pieces of crayon and set them on top of the pumpkin, then set the whole pumpkin in a warm oven for a few minutes to melt the crayons, just make sure you watch it closely!
Another option, works if you live someplace hot with a lot of sun. You can use solar energy to melt the crayons like we did in this rock art project. Simply place crayon shavings on top of the pumpkin. Since the sun doesn’t have the same intensity as the heat gun, we want the crayon pieces to be thin and small so it melts easier. You can grate the crayons using a cheese grater to get the shavings. Once you have add the crayon, set it in direct sun to melt the crayon. If you are feeling really adventurous, you could even make a solar oven. Just ensure you make it big enough to accommodate the pumpkin.
Enjoy making beautiful melted crayon art pumpkins this Halloween!