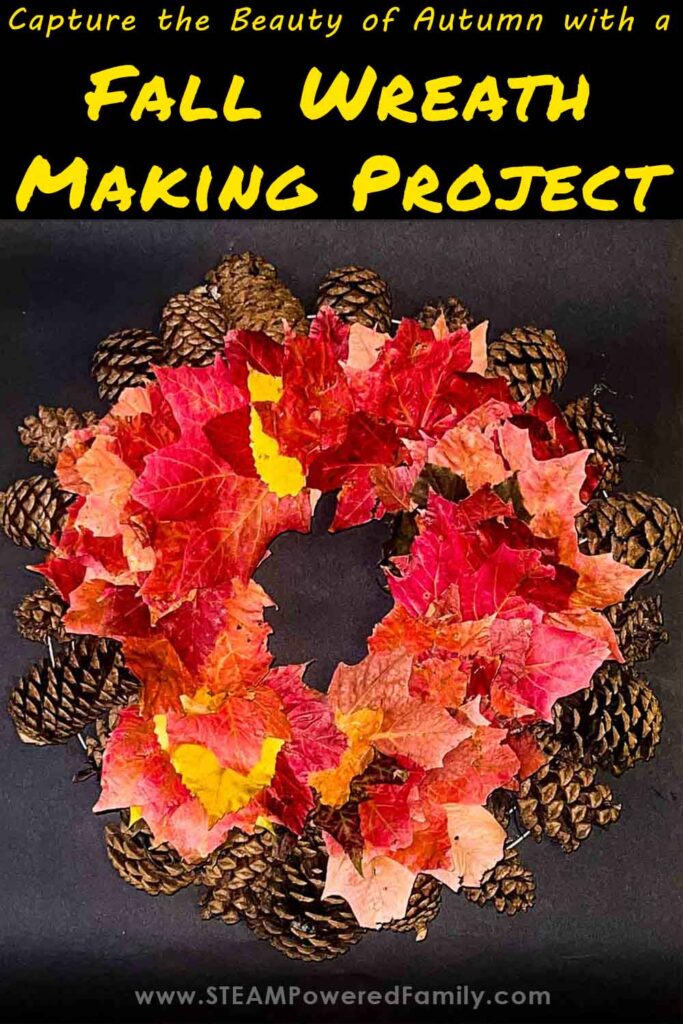
Fall Wreath Project
Fall is absolutely my favorite time of year. Autumn is when the world comes alive for me. I live in New York State so this season means that the trees come alive with vibrant shades of yellow and orange and red. The air gets cooler and the summer heat has subsided, to me there is no better time to get the kids outside and explore nature! In this activity, we are making a Fall Wreath Project that brings all of those magical elements of fall together into a beautiful decorative piece.
How to Make a Fall Wreath
Table of Contents

Disclaimer: This article may contain commission, paid partnerships, or affiliate links. We independently review everything we recommend. When you buy through our links, we may earn a commission from qualifying purchases.
Recently, while we were taking a nice walk down by the lake we found beautiful leaves and pinecones along the path which were perfect for our fall themed decorations. So we gathered up piles of leaves and pinecones and brought them along with us. You could take your kids on a walk in your neighborhood and encourage them to pick up leaves, pine cones, acorns, berries, even small fruits or rocks.
Once you get leaves home you want to quickly preserve them before you try to do any projects with them. Leaves will quickly dry out, becoming brittle, crumbly and won’t last. Ask your kids why do they think this happens?
Preserving Fall Leaves
Did you know you can preserve leaves for projects using wax paper?
To preserve leaves all you need is some wax paper, a cloth, and an iron. Lay a piece of wax paper on a heat proof surface and lay your leaves out in a single pile on the wax paper. Lay a second piece of wax paper over the top. Now place a cloth over the wax paper and iron over the leaves sandwiched between the paper. Make sure your iron is on a dry setting and a lower temperature setting. The cloth prevents wax from getting on your iron.
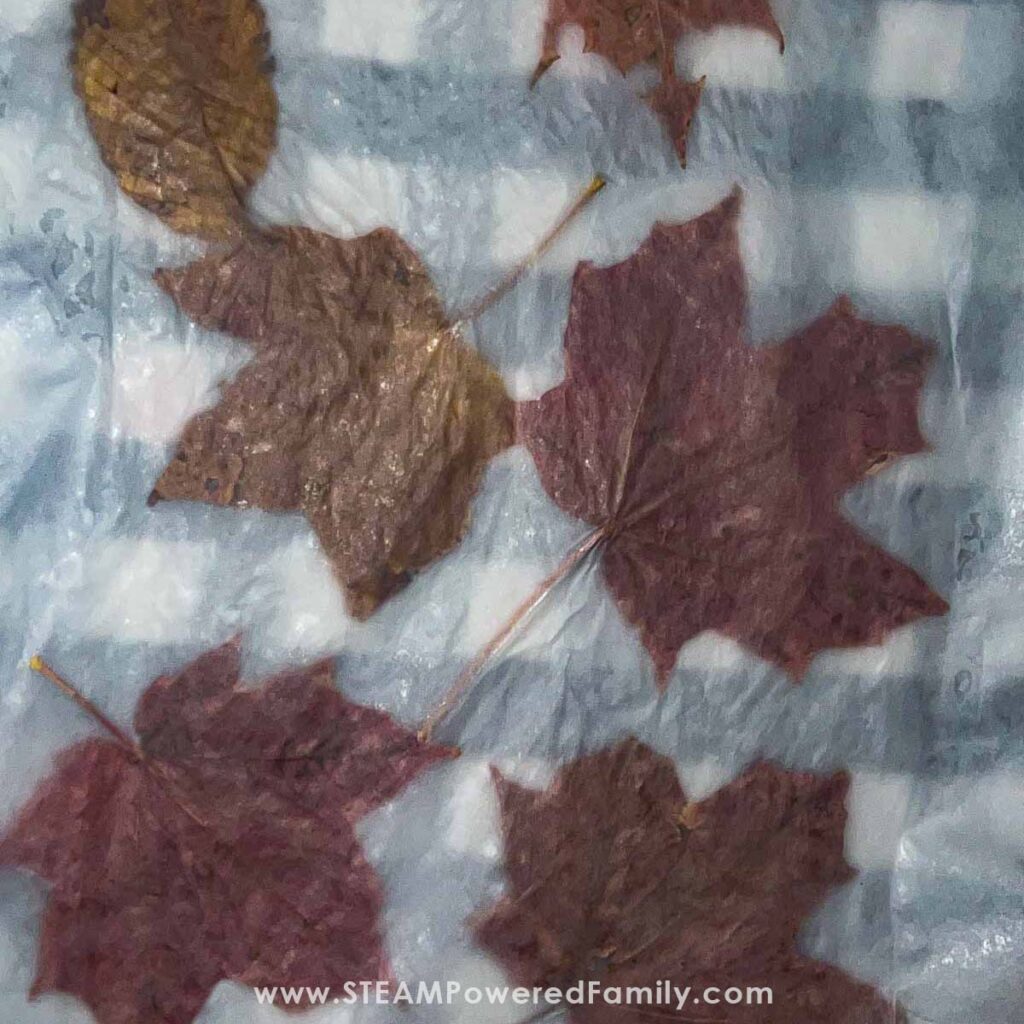
Once you’ve ironed over them you can carefully remove the leaves. Repeat with new paper for each set of leaves until they’re all preserved. Let everything cool completely.
This is a great classroom discussion about why the wax from the paper will keep the leaves from drying out. The heat from the iron helps evaporate any water trapped in the leaves while the wax seals the leaf and provides a protective coating to prevent decay.
You can also preserve flower petals in the same way.
For items like berries, pine cones, acorns, etc. they can be preserved by spraying a couple of light coats of polyurethane spray varnish on them.
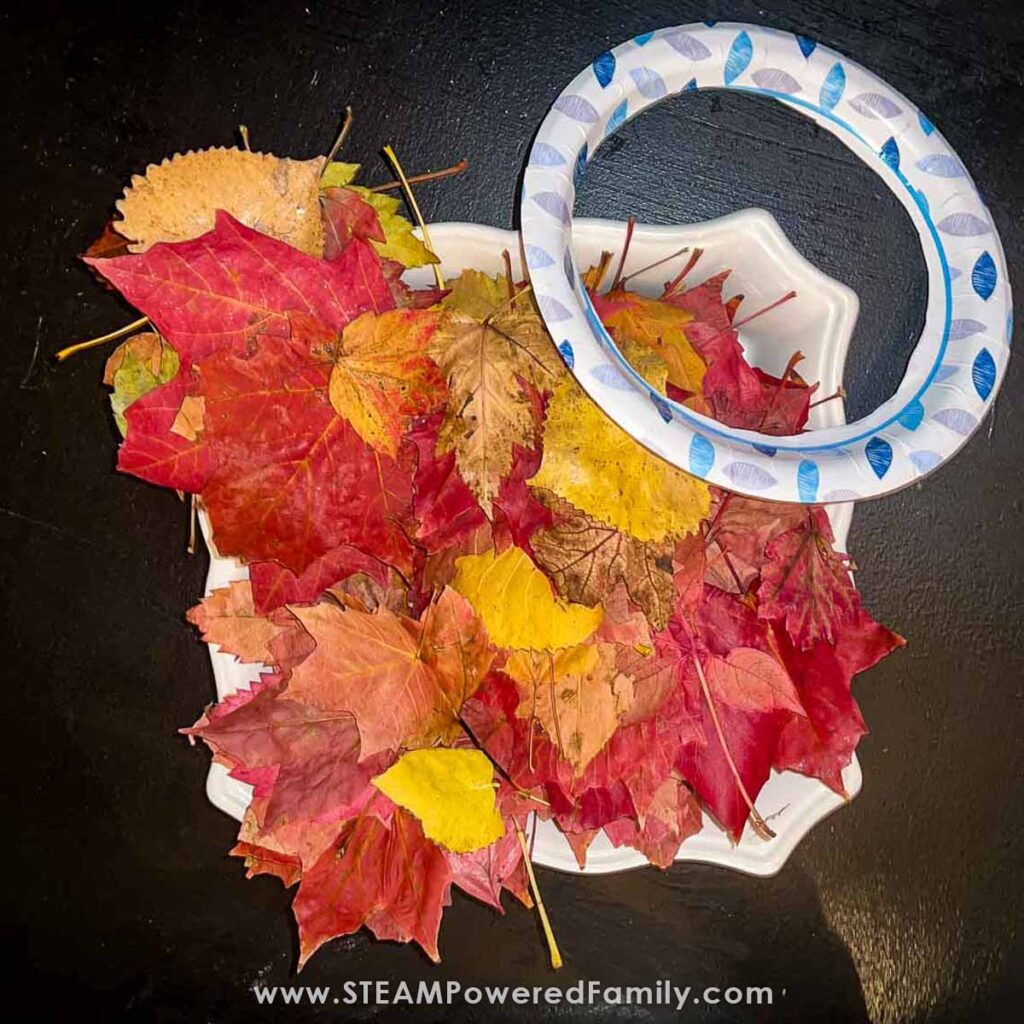
Wreath Making Supplies
A Wreath Form (we used both a simple paper plate with the middle cut out and a metal wreath form)
Glue (for the paper plate we used plain school glue and it worked fine – for the wire form we used a low temp glue gun)
Twist Ties
Floral Wire
Leaves, pinecones or other items from nature.
Optional: Other decorations like twine or ribbon
Three Fall Themed Wreath Ideas
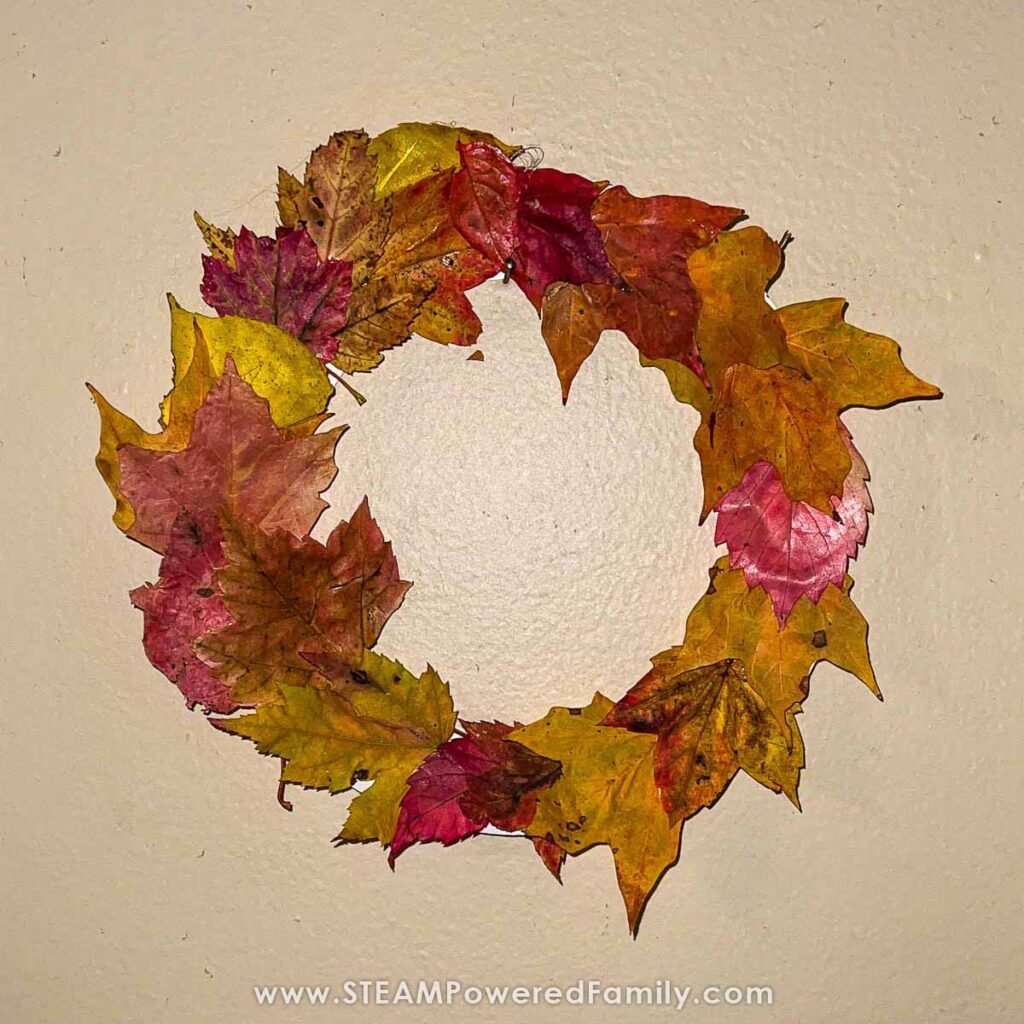
Paper Plate Wreath (Great for a Classroom)
For our small wreath we glued a single layer of small preserved leaves to a paper plate with the center cut out.
We used simple school glue, which allowed the leaves to slide around a little until they were right where we wanted them. The glue held well to the plate and the leaves themselves to hold everything in place. Once everything is as you want it simply set the wreath aside overnight to let the glue dry completely.
Large Wreath
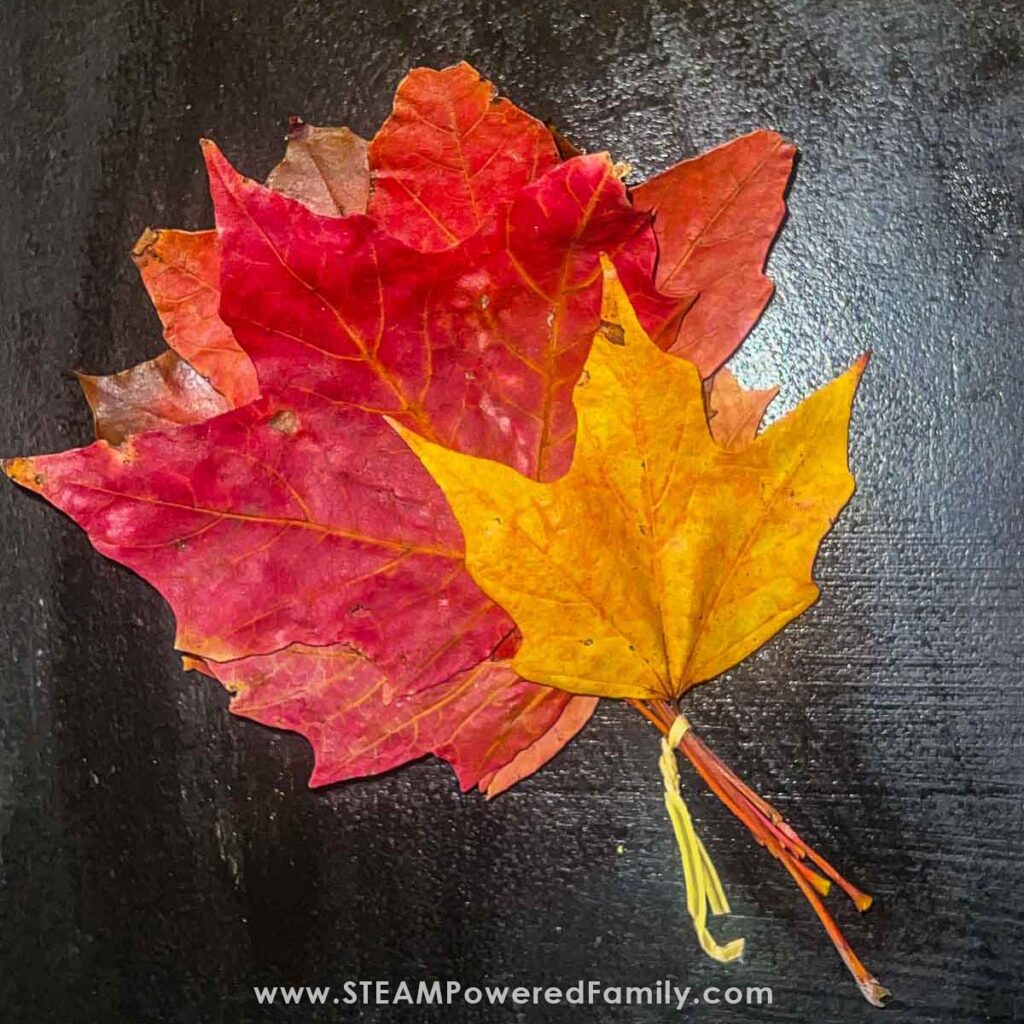
For the second wreath we used small twist ties to make groups of leaves so the wreath would have a fuller effect. We stacked 5 or 6 leaves of varying sizes and colors together and added a twist tie around the stems.
Once we were done grouping the leaves we used a low temp glue gun to secure the leaves to the wreath form. You can also twist the tails of the leaf bunches to the form for added stability.
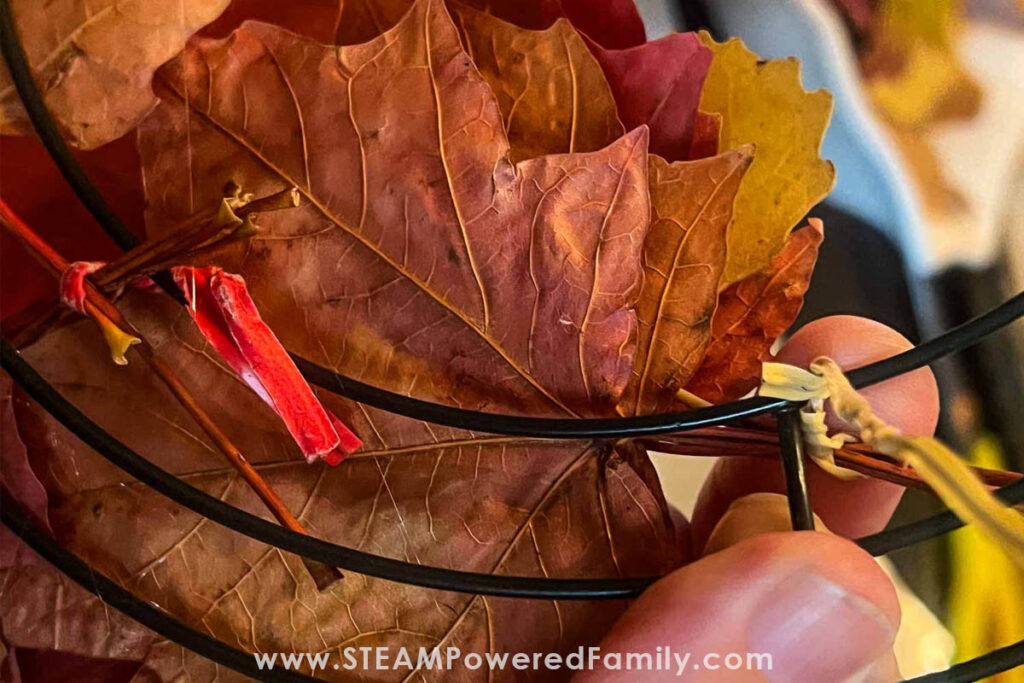
Alternatively you could use floral wire to secure the groups of leaves in place. The result of this was probably my favorite. The waxing preserves the beautiful vibrant colors of the leaves and stacking them up makes the wreath so full and lovely.
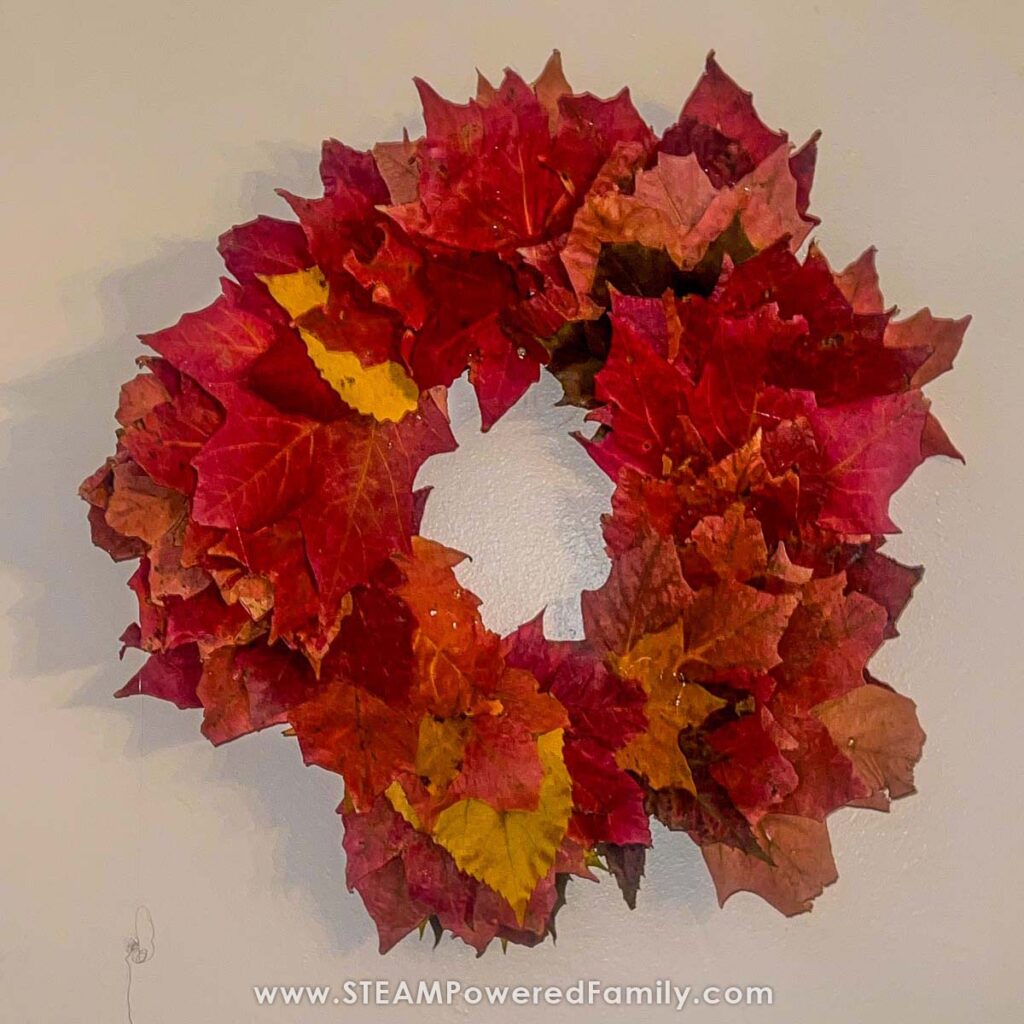
Using the glue gun you can add little extras like pine cones, acorns, ribbon flowers, etc.
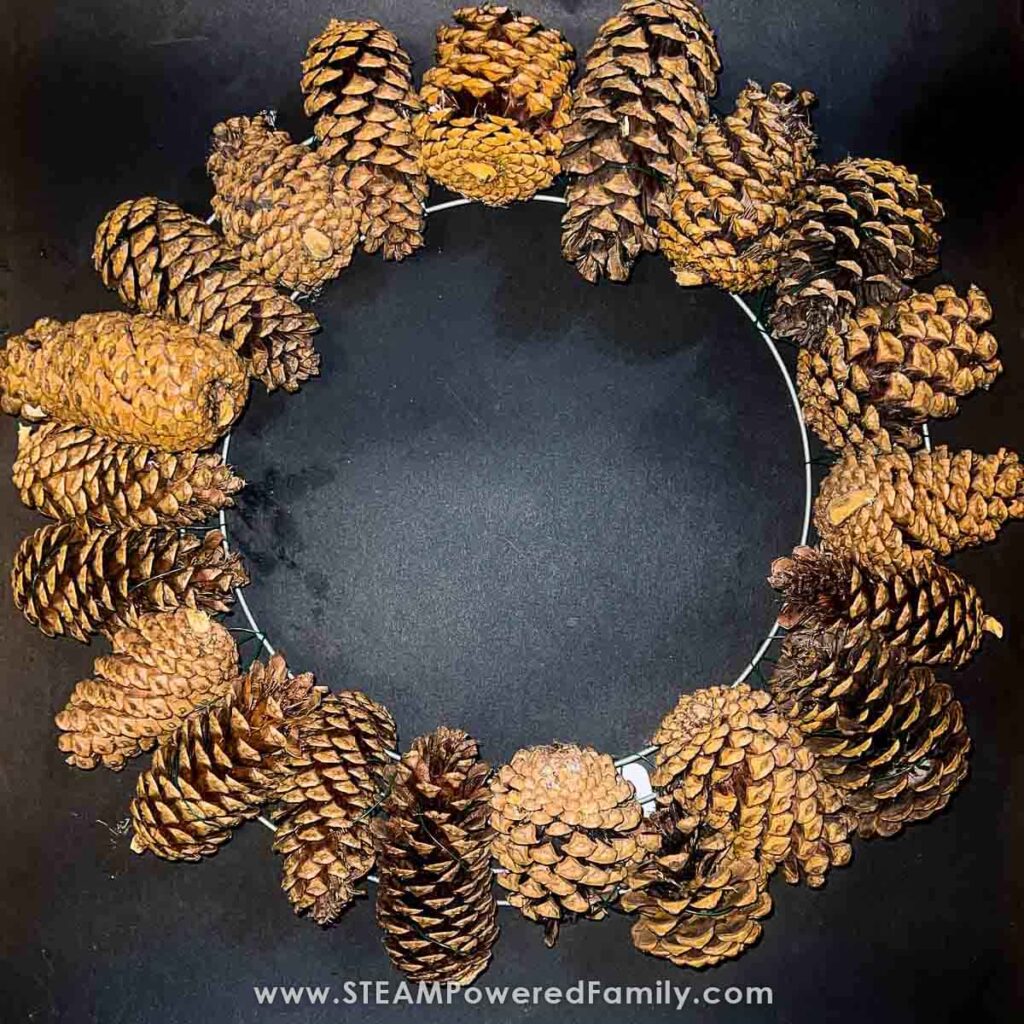
Pinecone Wreath
I love the simplicity of a plain pinecone wreath. To make ours we used a paddle of floral wire to secure the pinecones to a bigger wire wreath form (also from the dollar store). Hold a pinecone in place and weave the wire through the pinecone so you can no longer see the wire, then twist it around the form, repeating the process until the wreath is nice and full.
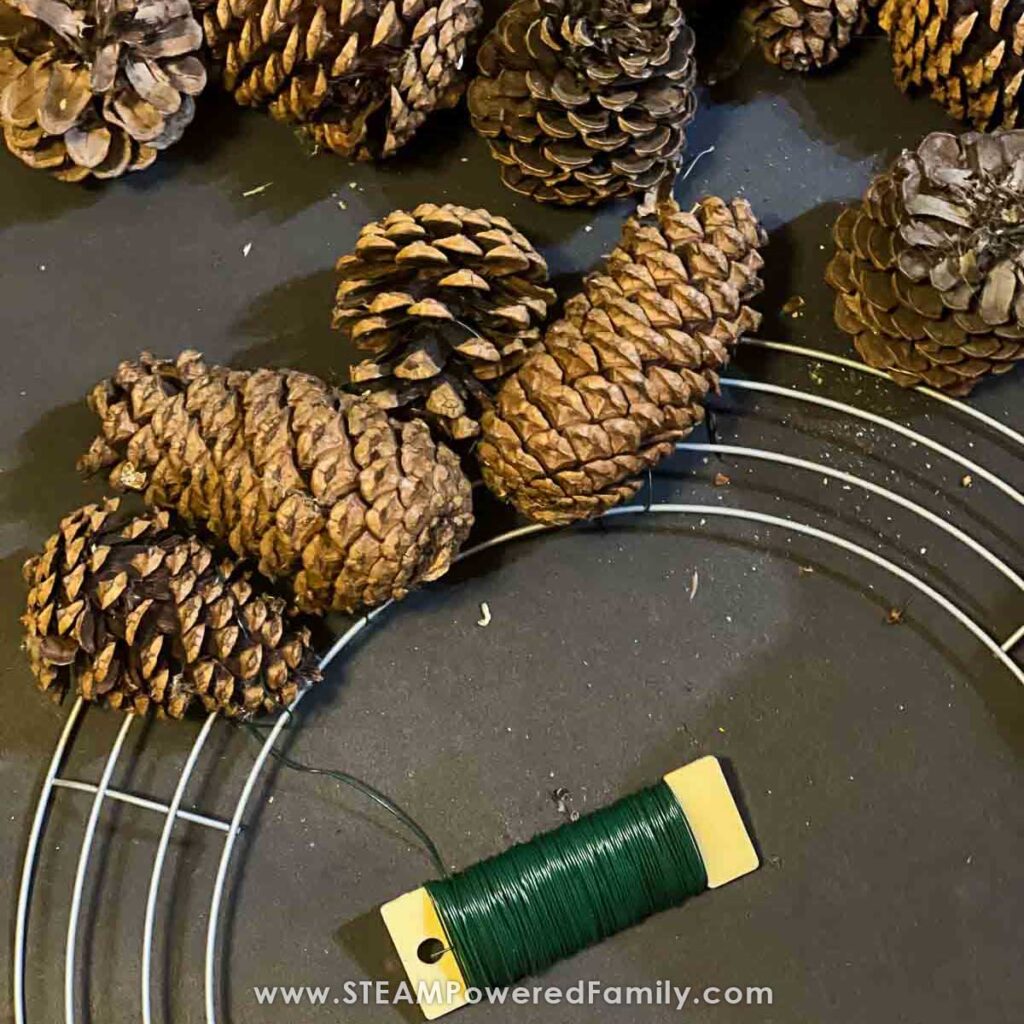
I flipped the direction of the pinecone each time I secured one in place so they all sit nicely together. At the end I pushed some smaller pinecones into any gaps to fill the space.
Once the base of your wreath is finished you can easily add all sorts of embellishments if you want. You could make these early in the fall and change out additional decorations to carry you from harvest, to Halloween right through to Thanksgiving and Christmas.
If you would like really neat embellishment check out this easy Ribbon Flower making project as a way to embellish the wreath. Another pretty option is to lay the wreath flat on a table or plate and add candles to the center for a lovely table decoration.
Got some extra leaves left over? Do a Leaf Lab to explore why leaves change color in the fall, then use the leaf chromatography as beautiful art embellishments on your wreaths.
Find more Fall Activities for Kids here.
Have fun exploring and learning in nature this fall!