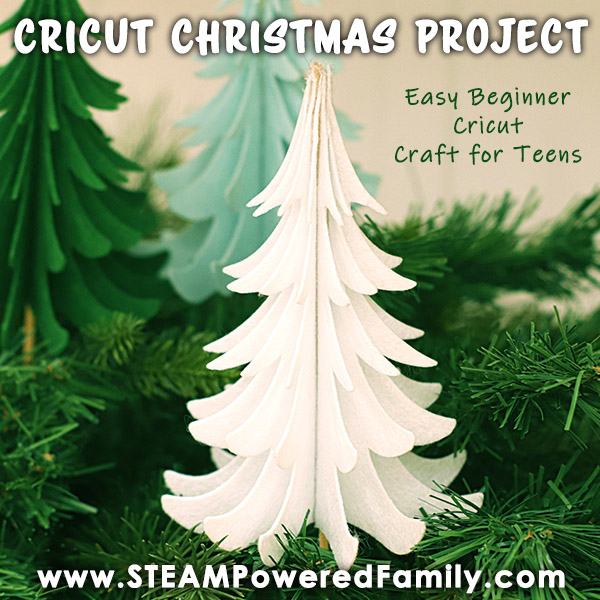
Cricut Christmas Project – 3D Christmas Tree
Recently we made a 3D Christmas Tree Card that could stand on it’s own. It was a really fun crafting project, perfect for younger kids. Now we have a STEAM project for teens that takes this Standing Christmas Tree project to a whole new level with technology! This Cricut Christmas Project is perfect for your teens this holiday season.
Christmas Cricut Project – Evergreen Tree
Table of Contents
Disclaimer: This article may contain commission, paid partnerships, or affiliate links. We independently review everything we recommend. When you buy through our links, we may earn a commission from qualifying purchases.
When the tree goes up, things are getting exciting around here! This is according to my youngest who starts pleading with us to put up the tree right after Halloween. Frankly, I am more of a December only decorator, but I do like to indulge my kids love of Christmas Trees.
Recently we made a 3D Christmas Tree Card that could stand on it’s own, making it a card but also a wonderful decorative piece for the holidays.
This time we decided to bring a little technology into the mix!
Cricut Christmas Tree Project
We are still learning our Cricut but it is a lot of fun and a great way to bring technology into the production of your creations. And here is a tip, using the Cricut makes these crafts much more interesting for teens! Win-Win!
Don’t have a Cricut? No worries, you can do all the cutting by hand too.
If you are new to Cricut, take a moment to read our Gift Box tutorial which includes more tips for those just starting out.
Supplies
This is enough supplies to make 3 trees.
Cricut Cutting Machine
Cricut mat and weeding tools
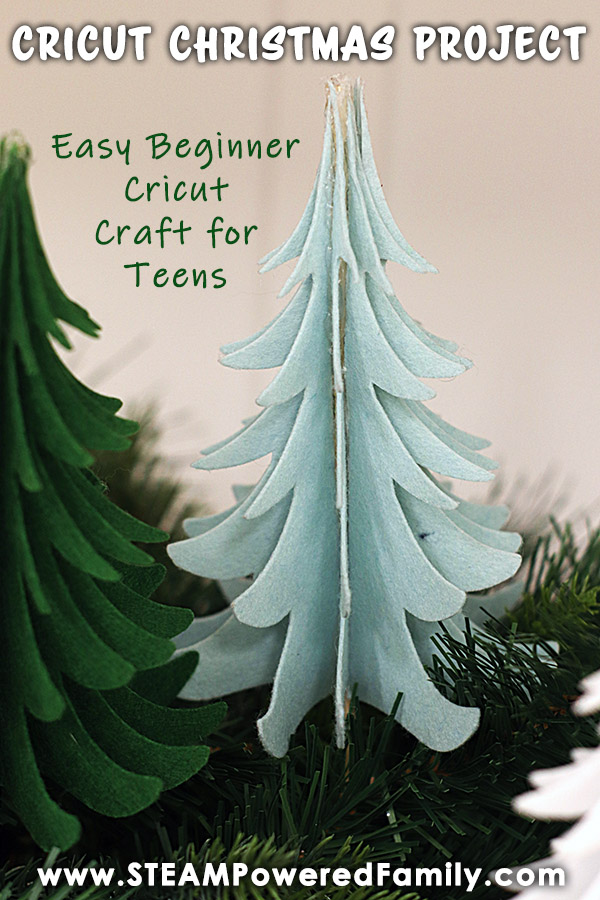
6 pieces of stiff felt trimmed to 12″x12″. Ensure you have at least 2 of each colour if you want your trees to be all one colour.
3 wooden dowels size 12” by ¼”
Hot glue gun


Directions
Load the SVG file into Design Space and multiply it by 6.
Place the first felt on the mat and set the Cricut to cut.
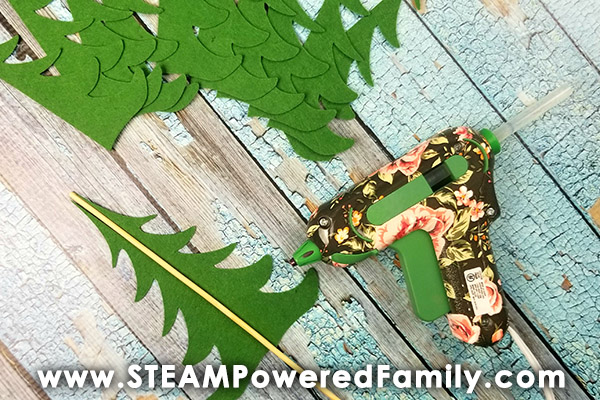
Remove the cut trees/felt from the mat once it is complete and place the second sheet of felt in the matching colour. Cut the next 6 trees.
Use the weeding tool to remove and rough cuts or left over bits and create nice clean edges.
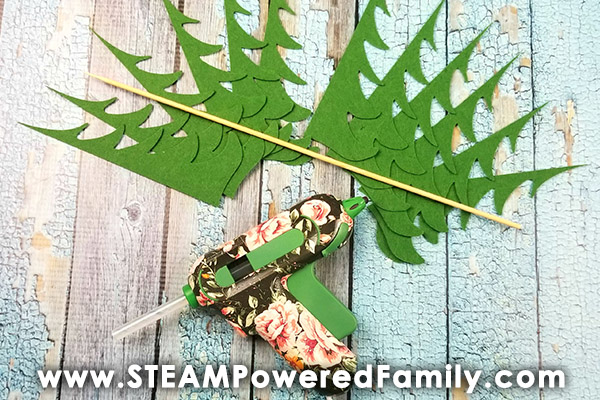
Using a glue gun, add 4 to 6 dots of glue onto the flat end of one of the tree pieces. Line up the top of a tree with the top of the dowel and press into place.
Repeat with the next piece gluing it onto the opposite side of the dowel. Work your way around the dowel this way (gluing opposites) until all 12 pieces are glued into place.
Let the glue set.
Repeat the steps for the other colors to create a small forest of trees in 3 different colours.
Engineer a Base for your Cricut Trees
If you have used a nice thick felt you should find that your tree stands nicely with little help.
But if you want to increase the STEAM aspect, why not challenge your kids to build a base. They can do this with blocks, craft sticks, Lego or any other crafting supplies they have kicking around. Maybe they can even create something using the Cricket or 3D printer.
Add some Art
Continue to STEAM up your Cricut Trees by decorating them. You can do this by gluing on ribbons, sequins, pompoms and more. Or use fabric paints/pens to decorate and customize your creations.
If you are gifting your creation, don’t forget to add a little note for them to find inside your tree to help spread the love this holiday.
Happy Crafting!
More Holiday Projects