Egg in Vinegar Experiment
Did you know you can study cells by examining eggs? Chicken eggs are essentially one big cell making it much easier to study than the teeny tiny cells that make up our body. With this cells unit study on cells we examined raw eggs to learn about their parts. This was a great introduction into the concept of the cell, but we decided to take our study of the egg up a notch. It was time to do an egg in vinegar experiment and the always fun rubber eggs study.
Naked Egg Experiment and Cell Study
Table of Contents
Disclaimer: This article may contain commission, paid partnerships, or affiliate links. We independently review everything we recommend. When you buy through our links, we may earn a commission from qualifying purchases.
To start off our unit study we discussed cells and how they make up all living things. Then it was time to get hands on! We decided to bring some chemistry to our biology lesson and do a simple experiment – the egg in vinegar experiment.
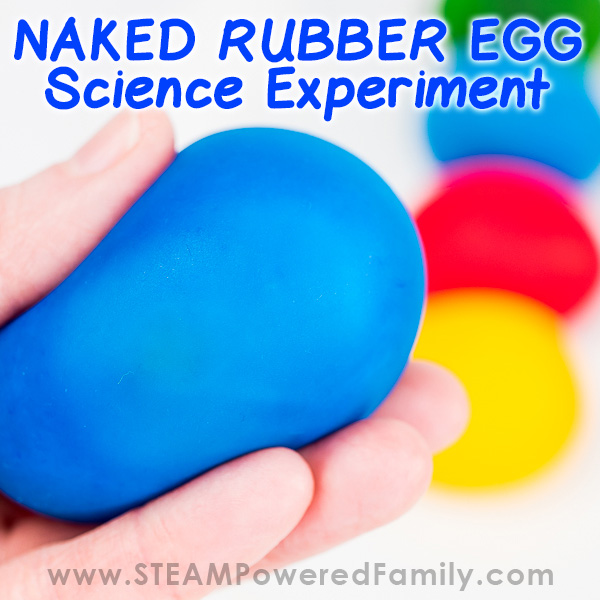
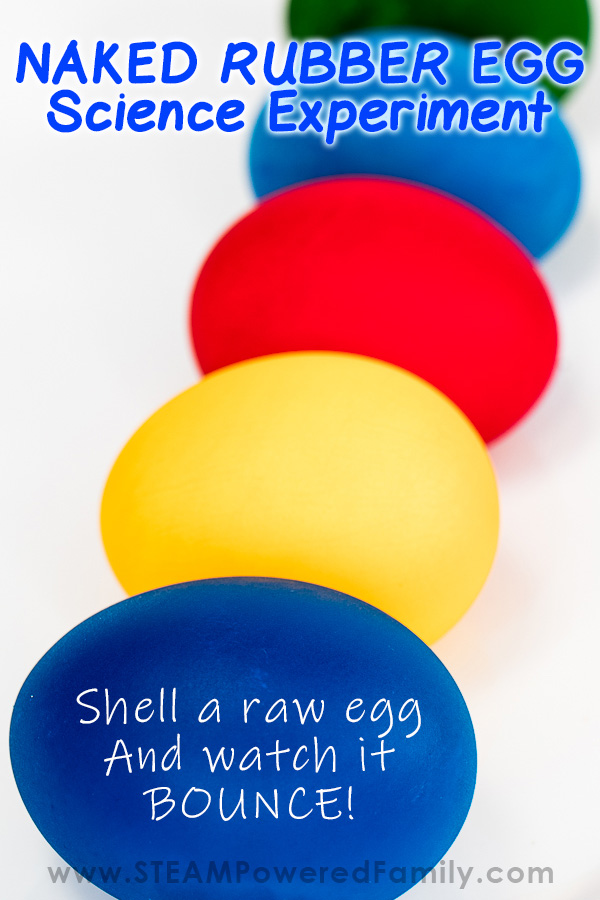
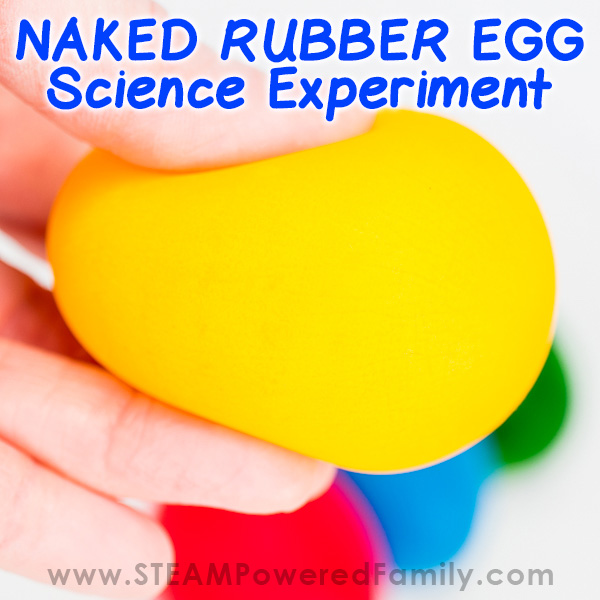
This science experiment has a few names: Rubber Egg Experiment, Bouncy Egg Experiment, Naked Egg Science Experiment or Egg in Vinegar Experiment. No matter what you call it, this is one of our all time favourite simple science experiments. And it pairs perfectly with an egg cell study.
With this experiment we remove the shell of a raw egg with a chemical reaction, leaving us with a naked egg. The inside of this naked egg provides an excellent opportunity to study cells.
Here is a Quick Video Showing the Process
Hands on Exploration
We kicked things off with each child taking an egg and exploring. We encouraged their curiosity as they explored the shell, how fragile the eggshell is, and what it looks like when cracked open.
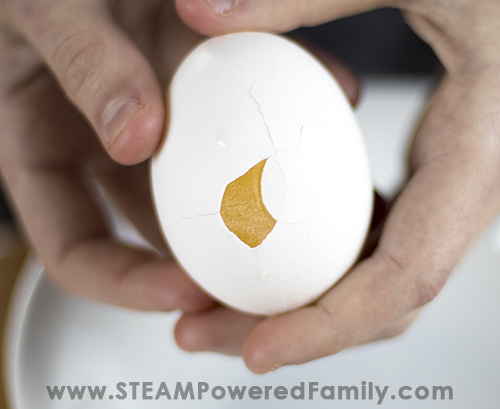
Surprisingly, we were able to remove some of the shell from one of our eggs revealing the membrane! This made the kids even more excited about our experiment to create naked eggs.
Egg in Vinegar Experiment
To remove the shell of a raw egg we need to do a little chemistry experiment. For this you will need:
- Eggs (regular eggs are perfect)
- White Vinegar
- Mason Jars (other wide mouth jars or plastic cups work too)
- Food Colouring
- Large plates or bowls
Extra items you may want available for further investigations:
- Magnifying glass
- Kitchen scale
- Fabric tape measure
- Ruler
- Towels or protective covering for the area while exploring with the naked eggs
Start by testing to make sure your eggs will easily fit into (and out once enlarged) easily. I recommend using wide mouth mason jars for at least one of the eggs so kids can really see the reaction. But if you want to do lots of eggs you can do them in large plastic cups or even do big batches in large bowls.
Tip!
I recommend doing extra eggs. Some may not survive the experiment and even once the shells are removed the membranes are still quite thin and easy to break. Having lots of naked eggs will provide kids with plenty of opportunity to explore and learn with the resulting bouncy, rubbery eggs.
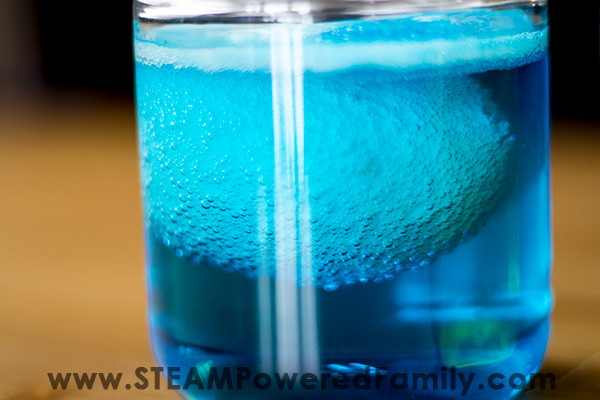
Set the egg carefully in the container, pour vinegar over the egg until it is submersed. The egg may float, this is OK. Add a little food coloring to the vinegar. Now let it sit for 24 hours.
Bubbles form immediately on the shell as the chemical reaction begins. These carbon dioxide bubbles are formed by the vinegar reacting to the calcium in the egg shell.
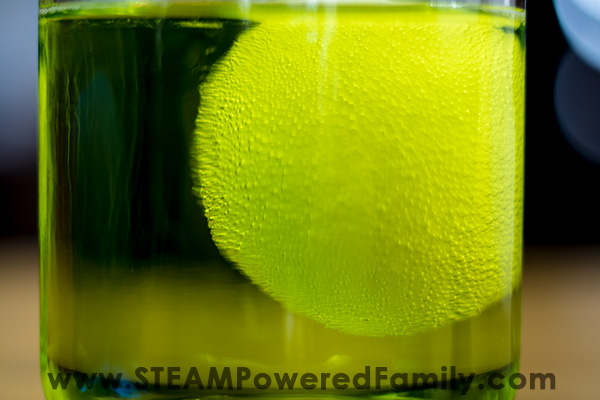
After about 24 hours you will end up with foam on top of your vinegar and the remaining liquid is mostly water. You will end up with a foam on top and eventually you will have only liquid water left.
After 24 hours drain off the liquid and replace with fresh vinegar. You can also add more food colouring if you wish. It is very important to replace the vinegar to ensure there is enough acid for the chemical reaction to finish.
Tip – Getting Vibrant Colours
To get really vibrant colours in your Bouncy Eggs, add a few drops of gel food colouring to the initial vinegar soak. Gel colouring is much more intense in colouration. Then let it soak for 24 hours.
We then soaked our eggs in plain vinegar for the second soak. And our eggs came out very saturated in colour.
What is the Chemical Reaction When You Place an Egg in Vinegar?
Here is the chemical reaction:
CaCO3 + 2 HC2H3O2 → Ca(C2H3O2)2 + H2O + CO2
To break this down you have:
Egg Shell (Calcium Carbonate) + Vinegar (acetic acid) → Foam Floaties + Liquid Water + Carbon Dioxide Gas Bubbles
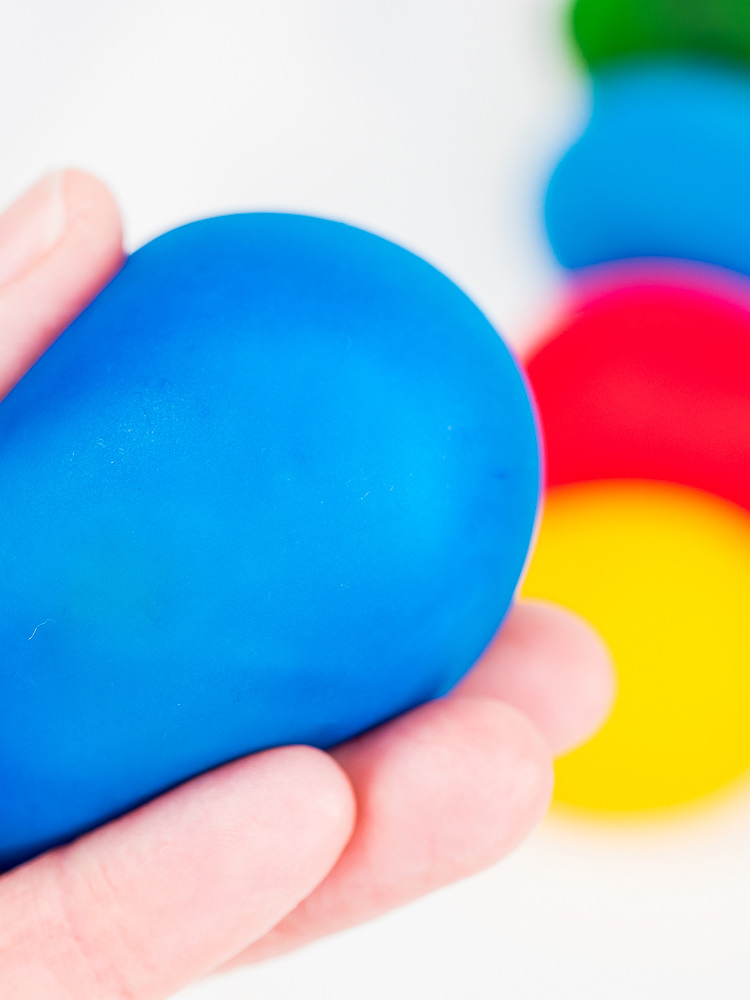
The Result – Naked Eggs
After another 24 hours (2 days in total) your naked eggs should be ready! Carefully drain off the liquid and rinse your eggs under a gentle stream of water.
The membrane of the egg is still quite thin and fragile. So handle with care and do it in a place that is easy to clean!
Studying Naked Eggs
Start by letting the kids handle the eggs. their curiosity should lead them to lots of neat discoveries. Some questions you can ask are:
- What do you notice about the eggs?
- How do the eggs from the vinegar experiment feel compared to eggs still with their shells?
- Can you see anything moving inside? Try holding it up to a light or flashlight.
- How does the size of the naked eggs compare with eggs that have not been through the chemical reaction?
Why does the egg feel rubbery after being in vinegar?
Egg shell is basic and vinegar is an acid. When you place an egg in vinegar it reacts causing the shell to dissolve leaving only the rubbery membrane holding the egg together. If you are lucky enough to get some of the shell off a normal raw egg, you can see the membrane.
Bouncing Eggs
My kids had a great time bouncing eggs in a large bin. As long as you don’t add too much force, you can bounce a raw egg. So cool!
What can you see inside naked eggs?
Hold the eggs up to a flashlight or bright light and move the egg around or gently squeeze it. You should be able to see the yolk and other parts inside the egg floating around.
Why does the egg get bigger in Vinegar?
Did you notice the eggs are larger than before you placed them in the vinegar? This is why we recommend using a wide mouth jar. Otherwise your naked egg could get stuck in the jar! But why does this happen? It’s because of a process called osmosis. Through osmosis some of the liquid (water) moves through the semi-permeable membrane into the egg. It does this until it reaches an equilibrium between the amount of water inside the egg membrane and the surrounding liquid. If it didn’t stop at equilibrium the egg would get so large it would eventually pop! Since there is no hard shell to keep the egg small, it expands and grows.
Learn more about Osmosis with our Rainbow Water Beads Experiment or Gummy Bear Experiment.
Getting Inside – Studying Cells with Eggs
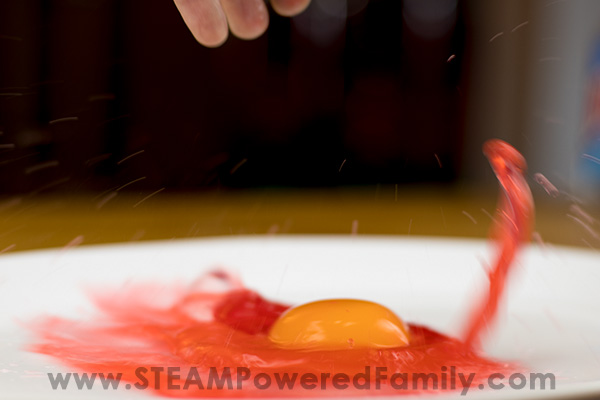
I recommend working over a large bowl or plate as kids explore the eggs. Undoubtedly, some will break. This isn’t the end of the world though, it just means it is time for some new lessons on cells.
If you don’t have any broken eggs take a knife or tooth pick and gently poke the egg to rupture the membrane.
The food dye travels through the membrane into the egg white (this is part of the osmosis process we discussed that also caused the egg to grow), but a special membrane around the yolk stops the dye from traveling into the yolk. This is a great visual for permeability and osmosis.
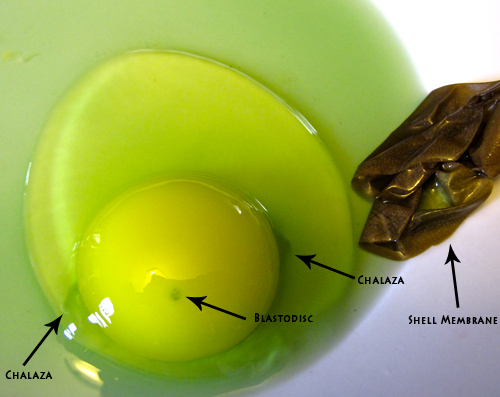
But closer inspection shows that some very special parts of our egg have taken in quite a lot of the dye. The chalaza, stringy bits on either side of the yolk that help to hold it in place, and the blastodisc, a circle in the middle of the yolk, this is where the sperm enters to fertilize the egg and is the nucleus of the egg (just like a cell!).
Dying the egg makes it much easier to see all these parts of the egg compared to when we just cracked open a raw egg. Now kids can see the cells and structures more clearly.
Digging Deeper Science Activities
This is such a fun experiment, why not take it further with some scientific investigative studies? Answer questions like:
What happens if you let the eggs soak in vinegar for a week instead of only 2 days? Compare the differences.
What happens if you boil the egg before placing it in vinegar?
What can you change in your experiment to make the resulting egg more bouncy and less prone to breaking?
Compare before and after. Take measurements, weights and work out how much the eggs changed during the experiment.
What happens if you take a naked egg and place it in corn syrup? (Tip! The result has to do with the process of osmosis).
Explore osmosis further… What happens if you soak a naked egg in water?
Don’t have time to do all of these experiments? Use your critical thinking skills and lessons learned from this experiment to predict what you think will happen. Create your hypothesis then do some research to see the answer when you have time, either by experimenting yourself or reading about experiments done by others.
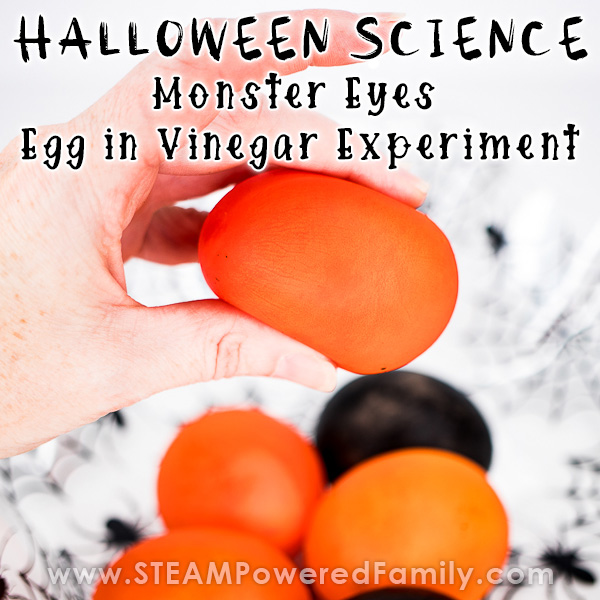
Rubber Eggs with a Halloween Twist – Monster Eyes!
Looking for a fun twist on this activity for Halloween? Why not make a bowl of Monster Eyes! The kids LOVED this Halloween Egg in Vinegar project.
Looking for even more exciting egg science and STEM activities? Why not try:
Creating an Egg Crystal Geode (so gorgeous!)
Or check out all of our Egg Science Projects for even more inspiration!
More STEM Activities
Naked Egg – Egg in Vinegar Science Experiment
Learn how to make a rubber egg with this classic chemistry experiment.
Supplies
- 1 Eggs
- 2 cups Vinegar
- 10 drops Food Colouring
Instructions
-
Carefully place the egg in the jar using the spoon. Cover the egg with vinegar (about 1 cup, just enough to cover it).
-
Add 4 or 5 drops of food colouring.
-
Let sit for 24 hours.
-
After 24 hours, carefully drain off the liquid.
-
Cover with fresh vinegar (add a bit more food colouring if you wish).
-
Let sit for another 24 hours.
-
Remove from vinegar solution and rinse gently with water.
-
Play and explore your rubbery, squishy, bouncy, naked eggs!
Notes
Bubbles will form while the egg is soaking in the vinegar. This is the chemical reaction taking place that removes the shell of the egg, leaving just the membrane. Encourage your kids to explore their naked, rubber eggs as they learn about chemical reactions and osmosis. Examine the eggs with magnifying glass or flashlight. Try bouncing the eggs on a tray (be prepared, some may break!). Break open the eggs to learn about the parts of cells. Dig deeper by measuring the chemical reaction and exploring how osmosis works. Most of all, have fun with your rubber eggs! Learn more about the chemistry and extension activities in the article.