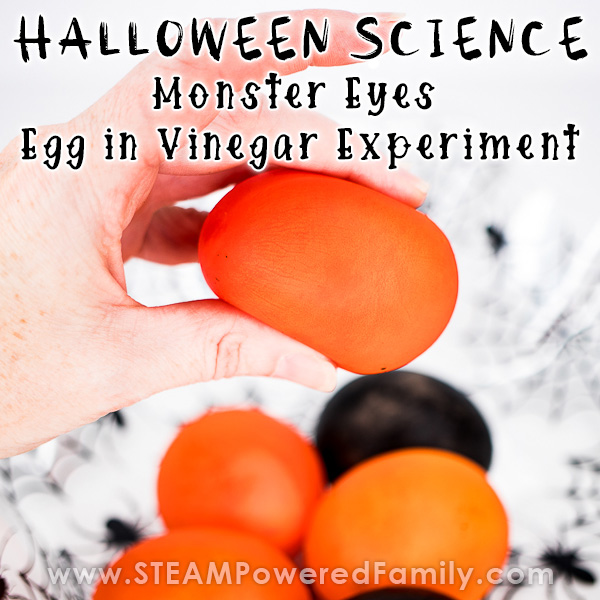
Monster Eyes Halloween Science
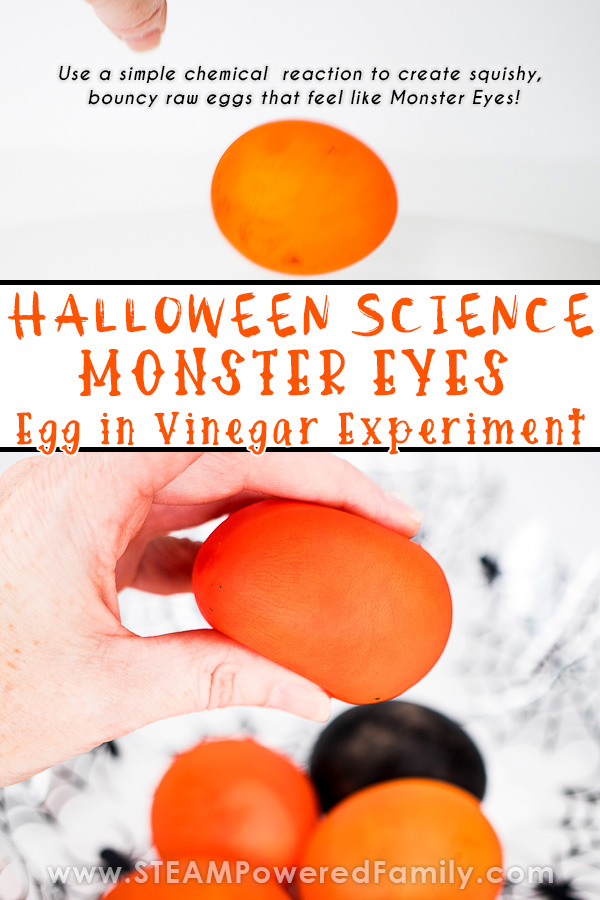
This Halloween make your very own squishy, bouncy Monster Eyes! This classic chemistry experiment uses some basic kitchen science to remove the shell from a raw egg, leaving you with the squishiest egg that you can bounce! With a bit of osmosis magic our monster eyes are black and orange, perfect for a Halloween activity for kids. Try this egg in vinegar experiment this Halloween and WOW the kids!
Halloween Science Activities for Kids
Table of Contents
Disclaimer: This article may contain commission, paid partnerships, or affiliate links. We independently review everything we recommend. When you buy through our links, we may earn a commission from qualifying purchases.
Ready to WOW your kids with this mind blowing chemistry experiment. Ask your kids if they can remove the shell from a raw egg. They will laugh and say nope! But with the magic of science, your little scientists can cast a spell on this Halloween and remove those shells, leaving a squishy, bouncy egg that is kind of like having a bowl full of MONSTER EYES!
So much fun!
We did the classic Rubber Egg or Bouncy Egg or Naked Egg experiment in the past as part of our science studies and learning about cells. It was a hit then, and this version with a Halloween twist was even more fun!
When it comes to Halloween Activities we start celebrating early and celebrate all month long. My kids LOVE Halloween, making it the perfect time to do some fun, hands on learning activities. Check out our 31 Days of Halloween STEM Activities for lots of ideas in addition to this fun activity.
Check out this video and see the eggs BOUNCE!
Looking for even more exciting egg science? Why not try:
Creating an Egg Crystal Geode (so gorgeous!)
Or check out all of our Egg Science Projects for even more inspiration!
Monster Eyes Egg in Vinegar Experiment
Supplies
To remove the shell of a raw egg and create your bowl of Monster Eyes, you will need:
- Eggs
- Vinegar
- Mason Jars (other wide mouth jars or plastic cups work too)
- Food Colouring (orange and black for Halloween!)
- Large plates or bowls
- Tablespoon
- An easy to clean area (including the floor) in case of breakage
When doing this experiment, always plan on making extra eggs. Sometimes they come out really, really strong, other times the membrane is weaker and more prone to breaking. But the strong ones tend to be EXTRA bouncy, which often leads to bouncing off the table onto the floor…. and that level of impact and force leads to breakage of even the toughest membranes! Trust me, we know!
Also, ensure there is enough room in your jar or container for the egg to grow a bit during the reaction. We find a wide mouth mason jar works great.
Directions
Set the egg carefully in the container, pour vinegar over the egg until it is submersed. The egg may float, this is OK. Add a little food coloring to the vinegar. If you wish, you can carefully swirl the vinegar with a spoon to help the colouring mix with the vinegar. Now let it sit for 24 hours somewhere that it won’t be disturbed.
Bubbles will form immediately on the shell as the chemical reaction begins, this might be harder to see if you are using lots of food colouring. Consider doing an egg with minimal or no food colouring so kids can see the reaction taking place. These carbon dioxide bubbles are formed by the vinegar reacting to the calcium in the egg shell. After about 24 hours you will end up with foam on top of your vinegar and the remaining liquid is mostly water. See our science explanation below for more details!
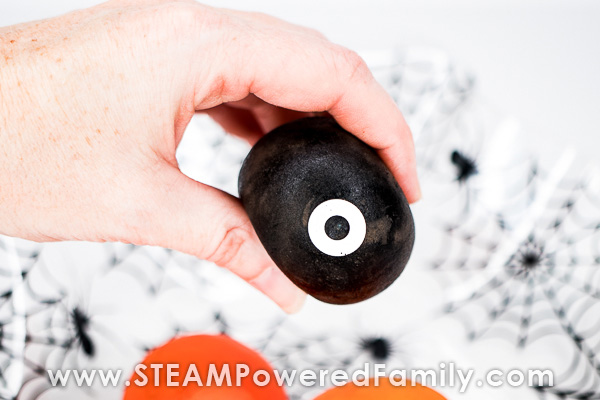
After 24 hours drain off the liquid and replace with fresh vinegar. You can also add more food colouring if you wish. It is very important to replace the vinegar to ensure there is enough acid for the chemical reaction to finish. My kids decided to rush our experiment, because they were sooooo excited to play, and pulled our black eggs after only 24 hours. The colourant tended to get everywhere. Even though it felt squishy and read to play, the eggs needed that second 24 hours to finish the reaction and make the Monster Eyes perfect. Our orange Monster Eyes had the full 48 hours and were perfect!
After a second 24 hour soak in vinegar gently remove the eggs from jar. Rinse in a bit of water and let dry for a few minutes on a paper towel. Now you are ready to play with your Monster Eyes!
Bouncy Eggs!
The results of this experiment will be eggs with no shells that are squishy and bouncy. Put a bunch in a bowl to have some sensory play time and it feels like a bowl full of Monster Eyes!
We even added some loose leaf paper reinforcements (the little plastic stickers you put around the holes in paper so they don’t rip in binders), to add to the Monster Eye effect. It looked really cool, but the stickers didn’t stay on once we started bouncing and playing.
We have done this experiment many times, and sometimes our eggs are more prone to rupturing, other time they are incredibly strong. This comes down to the integrity of the membrane of the eggs you use.
This time, we had eggs with such thick, strong membranes, they were incredibly bouncy and (unless they bounced onto the floor from table height!), were very hard to break. We actually poked them with toothpicks and they developed little squirting fountains the membranes were so strong.
So if you find your eggs are breaking, try a different type of egg. We found smaller eggs are best.
The Egg in Vinegar Chemical Reaction
Here is the chemical reaction for our Monster Eyes experiment:
CaCO3 + 2 HC2H3O2 → Ca(C2H3O2)2 + H2O + CO2
To break this down you have:
Egg Shell + Vinegar → Foam Floaties + Liquid Water + Carbon Dioxide Bubbles
Osmosis Defined – The Magic of Coloured Eggs
The other science at work here is the magic of osmosis which leads to our coloured eggs, making them perfect Halloween colours.
Osmosis is the movement of water from a less concentrated solution to a more concentrated solution through a semipermeable membrane that tends to equalize the concentrations of the solute on the two sides of the membrane.
In this experiment as the vinegar reacts with the shell, it leaves the membrane intact. This membrane is semipermeable, which means it allows water to pass through it.
The water left over from our chemical reaction travels through the membrane bringing some of the food colouring with it. This results in the egg “growing” (getting a bit bigger) and changing colour.
All through the magic of osmosis!
Extensions
This is an incredible Halloween science activity to do with your kids at home or in the classroom. You can dig even deeper into this experiment by exploring things like:
Measure the chemical reaction – like we did when we measured the reaction in our Fireworks Baking Soda and Vinegar Reaction.
Study Cells – Using your naked egg, rupture the membrane and explore the insides of the egg to learn the parts of the cell. We did this with this Naked Egg experiment.
You can also try soaking your naked eggs in corn syrup or water, and compare the results. This is a great demonstration of osmosis at work.
Most of all have fun this Halloween with your science and learning!
More Halloween Activities
Naked Egg – Egg in Vinegar Science Experiment
Learn how to make a rubber egg with this classic chemistry experiment.
Supplies
- 1 Eggs
- 2 cups Vinegar
- 10 drops Food Colouring
Instructions
-
Carefully place the egg in the jar using the spoon. Cover the egg with vinegar (about 1 cup, just enough to cover it).
-
Add 4 or 5 drops of food colouring.
-
Let sit for 24 hours.
-
After 24 hours, carefully drain off the liquid.
-
Cover with fresh vinegar (add a bit more food colouring if you wish).
-
Let sit for another 24 hours.
-
Remove from vinegar solution and rinse gently with water.
-
Play and explore your rubbery, squishy, bouncy, naked eggs!
Notes
Bubbles will form while the egg is soaking in the vinegar. This is the chemical reaction taking place that removes the shell of the egg, leaving just the membrane. Encourage your kids to explore their naked, rubber eggs as they learn about chemical reactions and osmosis. Examine the eggs with magnifying glass or flashlight. Try bouncing the eggs on a tray (be prepared, some may break!). Break open the eggs to learn about the parts of cells. Dig deeper by measuring the chemical reaction and exploring how osmosis works. Most of all, have fun with your rubber eggs! Learn more about the chemistry and extension activities in the article.