Halloween Mummy Circuit Craft
Halloween is one of our favourite holidays of the year. The kids get so excited and it is a fantastic time to embrace that enthusiasm and tackle new and exciting STEM projects each year. Today we came up with this incredibly easy and fun Mummy Circuit STEM Craft for Halloween. We are crafting and building circuits… fun!
Halloween Mummy Craft with Light Up Eyes
Table of Contents
Disclaimer: This article may contain commission, paid partnerships, or affiliate links. We independently review everything we recommend. When you buy through our links, we may earn a commission from qualifying purchases.
A really simple and popular way to craft with kids is to use toilet paper rolls. Not only are they an easy to source material that helps us recycle as part of our crafting, but they lend themselves to all sorts of really cool ideas.
Which is how we created today’s project. Sure we could have made a simple Mummy Craft project for Halloween, but we wanted to power up our crafts.
And that paper toilet roll tube, with its’ hollow inside was perfect for adding in some circuit work.
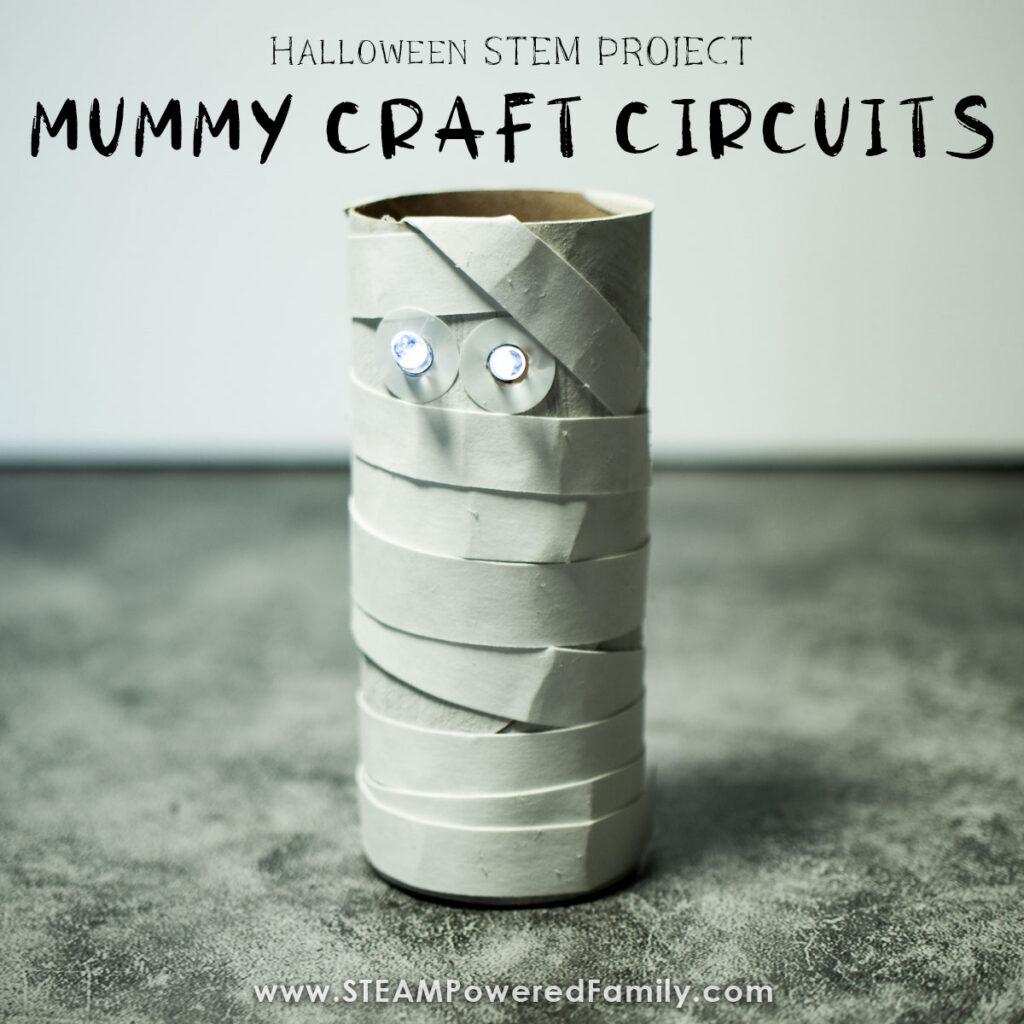
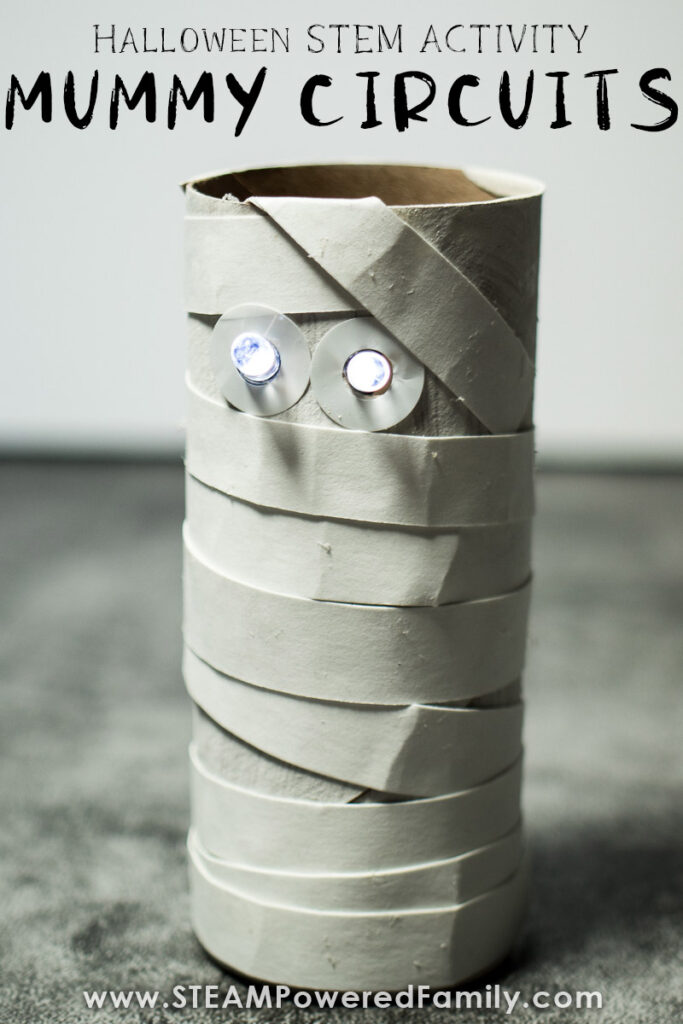
So we took one of our original circuit creation ideas, the Circuit Bug, turned it on its’ side and made a Mummy Craft with eyes that glow. So spooky and perfect for a Halloween STEM Circuit Project. You can use these creations as decoration for your classroom or a Halloween party, or as a fun take home STEM project for the kids.
Mummy Facts for Students
The Mummy is often portrayed as part of Halloween celebrations. So let’s learn a bit about the mummy.
- A ‘mummy’ is the dead body of a person or an animal that has been preserved either naturally or artificially. A preserved body does not decay and can last thousands of years.
- The word Mummy comes from the Persian/Arabic word mummiya, meaning ‘tar’ or ‘bitumen’. When the Arabs discovered the Egyptian mummies in the seventh century CE they thought they were covered in tar which is why that term was used. However, the Arabs were wrong in thinking the remains they found were covered in tar. Although the Egyptians did occasionally use tar in the mummification process, most mummies were coated in dark resins, which gave the skin a black colour.
- Recently the mummified remains of a 30,000 year old mummified wholly mammoth baby were found in the Yukon.
- The type of mummy often referenced during Halloween is inspired by mummified remains found from ancient cultures such as the Egyptians. Egyptians wrapped their dead in linens as part of the mummification process. Which is why Halloween Mummy references involve cloth wrapped figures.
- Although Egyptian mummies are the most popular, mummification has been practiced around the globe by many cultures, for many thousands of years.
Mummification Experiment
Want to try a mummification experiment at home? Check out this really cool mummification science experiment we did with Gummy Bears.
Now we know a bit more about Mummies, let’s make our Mummy Circuit Craft!
Halloween Mummy STEAM Craft with Circuits
Watch a video of us building this fun Halloween STEM Craft. If you can’t see the video, try turning off your adblockers as they also block our video feed. Alternatively, you can find our videos on the STEAM Powered Family YouTube Channel.
Materials and Tools
Toilet paper rolls
White craft paper
Hole reinforcement stickers
Prewired 3V LED diodes (These are a game changer when it comes to circuit building with kids!)
Electrical Tape
Coin Battery – CR2032 3V
Clothespin
2″ Long Reach Hole Punch (you can use a regular one if needed)
White paint and paint brush
Glue
Scissors
Directions – Making the Toilet Roll Mummy
The first step is to paint the toilet roll white and let it dry completely.
Once dry we will decorate the TP roll to make our Mummy. First, use a hole punch to make to eye holes. I like to use the 2″ long reach hole punches, it makes the eyes more logically placed, but you can use a regular single hole punch if needed. The eyes will just be higher on your Mummy. Leave about 1cm between the eyes.
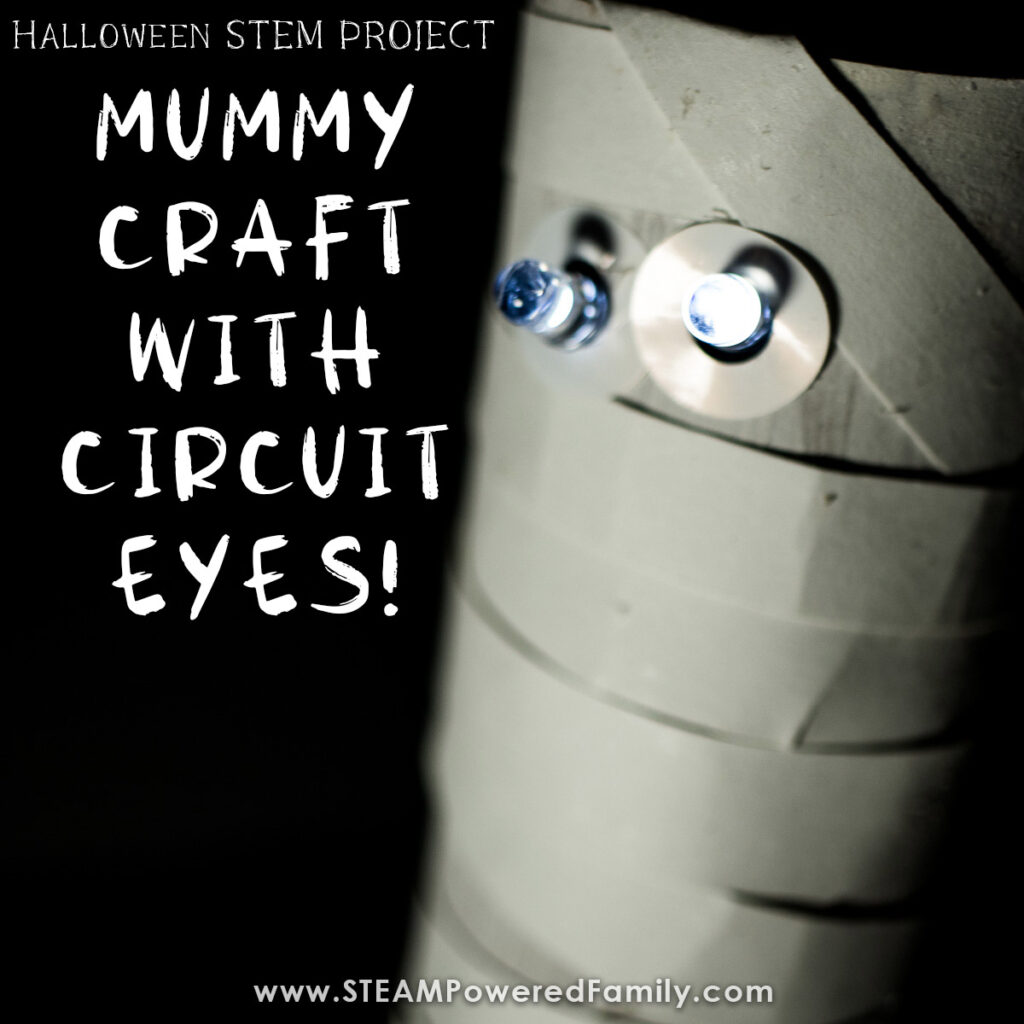
Place hole reinforcement stickers around the hole. These help secure the circuit LED’s in place.
Next cut strips of white paper and glue them onto the toilet roll to make the wrappings of your Mummy. You can do as many wrappings as you want. Make sure to angle some for a more authentic look.
Directions – Making the Simple Circuit
To build the circuit you will need 2 prewired LEDs (one for each eye, we used white LED’s to make the eyes glow white for our Mummy), electrical tape, coin battery, clothespin, and scissors.
Test the Circuit
Always start by testing the LEDs and batteries. Even brand new LED diodes and batteries can come from the manufacturer with defects. There is nothing more frustrating than building a circuit only to discover something was wrong with your LED or battery before you even started.
To test the LED and battery, all you need to do is take the positive lead and place it on the positive side of the coin battery, and the negative lead to the negative side of the battery. With the prewired LEDs each lead is colour coded which makes this whole process so easy!
Lights all lit up? Perfect, let’s move on to circuit building!
If your light doesn’t turn on, try switching the leads in case you mixed up the positive and negative. If it still doesn’t work, try a different LED and/or a different battery.
Once you have ensured everything is working, set the battery to the side.
Wiring the Circuit
Place the clothespin so the part you squeeze together is up. This is going to be the top where the Mummy’s eyes will attach.
Take an LED and place it pointing off the front of the clothespin. Tape the LED into place with electrical tape. Repeat with the other LED.
There can be quite a bit of wire, and it is important to keep things neat and organized. To do this, take the two negative leads and tape them together with electrical tape. Do it near the lights and also near the ends of the leads to keep everything neatly together.
Repeat with the positive leads.
Take all the leads and wrap them around the clothespin. Don’t do this too tightly. You don’t want to break any wires, plus you need to be able to still open and close the clothespin.
Using electrical tape secure everything into the place.
Now take the negative leads and place them on the negative side of the battery, repeat with the positive side. The lights should come on. If they don’t, make sure the wires are contacting the battery. Also make sure the protective sleeve is not cracked anywhere along your leads.
Pro Tip! If the light don’t come on, wiggle and move around the wires to ensure you have not broken the circuit somewhere.
Tape the leads to the battery.
Now open the clothespin and slide the battery inside being careful not to dislodge the wires. Close the clothespin onto the battery. This will help secure the connection. You can also add a bit more tape to secure things if you wish.
It is important to have the ends of all the leads securely in contact with the battery.
Assemble the Halloween Mummy Craft
Now it is time to assemble our Mummy craft and get those eyes glowing!
Simply slide the whole circuit inside the toilet roll tube. Then carefully push the LED’s through the eye holes.
If the LED’s don’t line up with the eye holes, you can move them slightly to make it fit together better.
Your Halloween Mummy Craft with Circuit Eyes is now complete!
To turn it off, simply open the clothespin, pull the battery out, and remove the tape, then take the battery out.
These Halloween Mummies make a fantastic decoration for a Halloween Party, or as a Halloween STEM activity for kids.
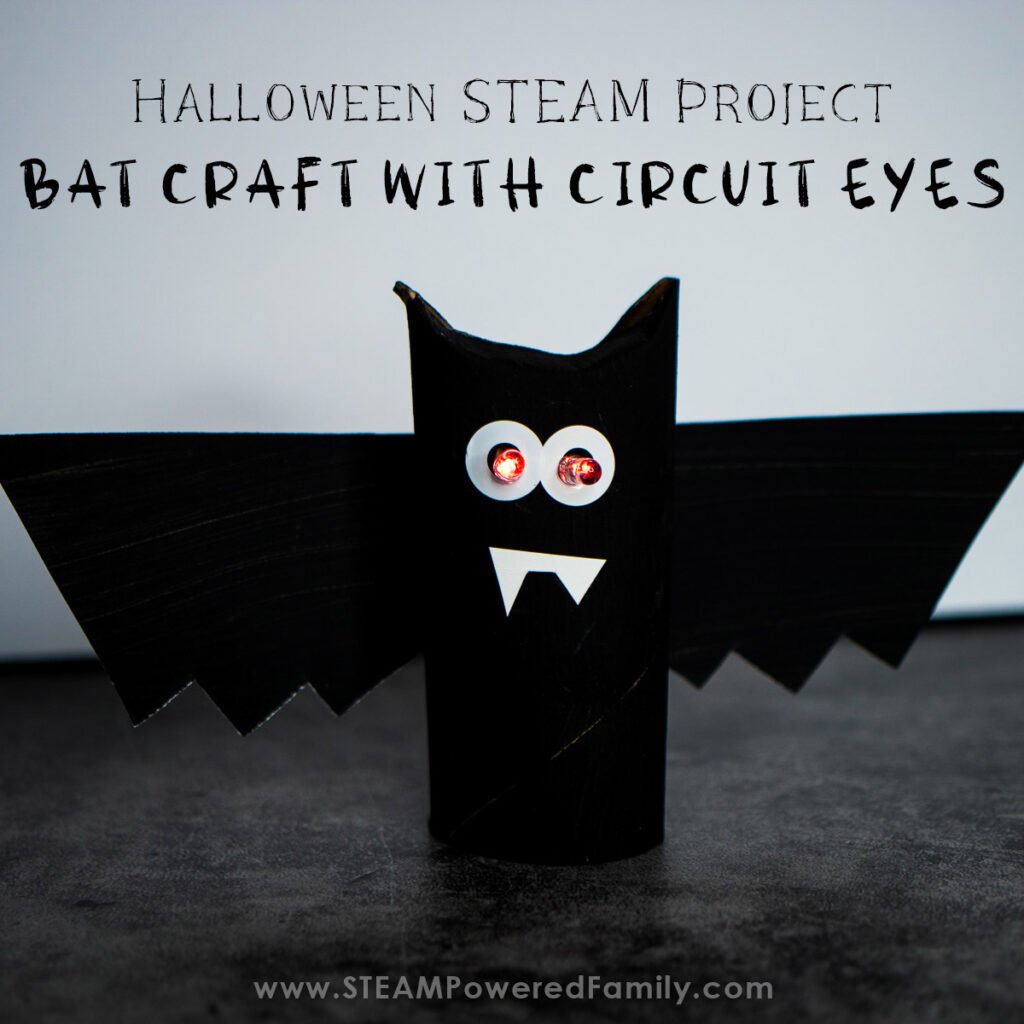
Get Batty with a Halloween Bat STEM Craft
A fun twist on this project is a bat version! Our Bat Craft with Glowing Red Eyes is spookily perfect for Halloween.
Happy Halloween!
More Halloween Activities for Kids