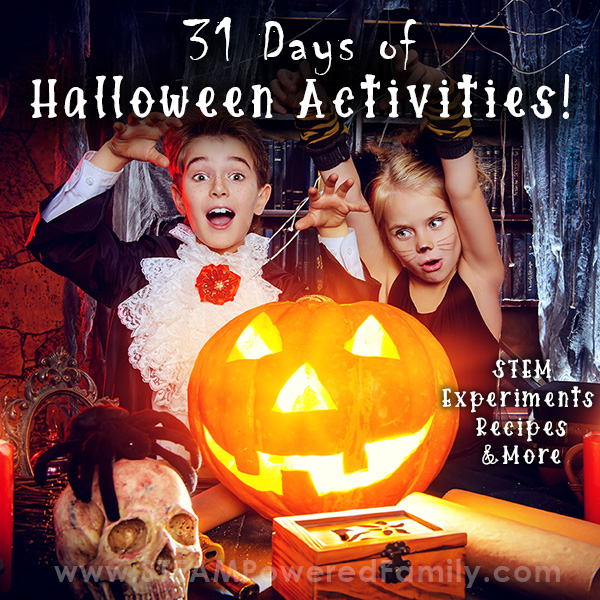
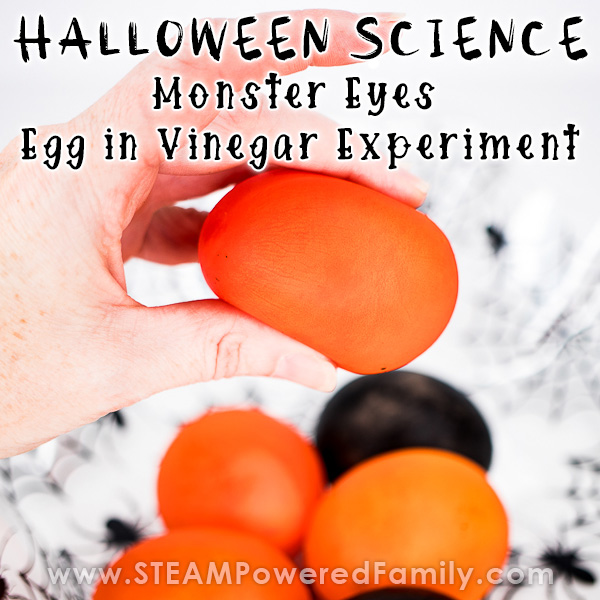
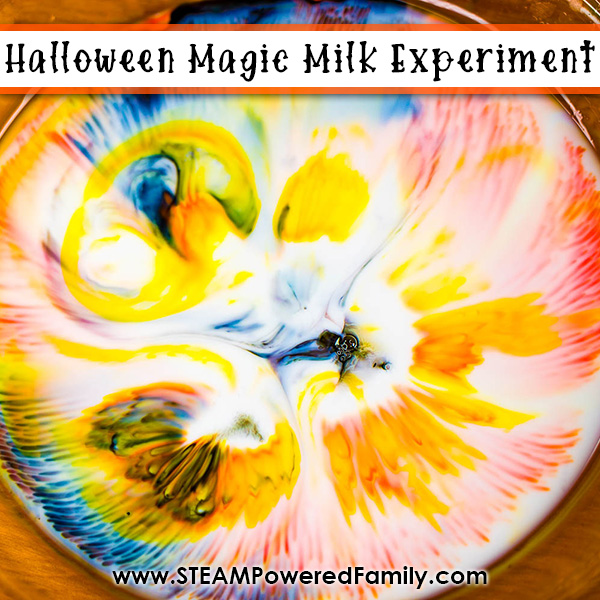
Halloween Magic Milk Experiment
Ready for a simple and incredible science experiment for Halloween? This one was a huge hit! Kids love the simplicity and the mesmerizing display created by this Halloween Magic Milk Experiment. We also included some colour wheel science so kids can learn how to mix their own special Halloween colours. Having problems with Magic Milk experiments? No problem, we solved that too! See below how to make this science activity happen easily!
Magic Milk Halloween Science
Table of Contents
Disclaimer: This article may contain commission, paid partnerships, or affiliate links. We independently review everything we recommend. When you buy through our links, we may earn a commission from qualifying purchases.
As we embark on another year of our Halloween STEM Activity countdown I am excited to add in some new favourites! Every year, starting on October 1, we do a daily countdown to Halloween with a special STEM activity every day. Kids get sooo excited about Halloween it is a great way to harness that energy and passion and funnel it into incredible hands on learning opportunities.
The best part about this particular Halloween experiment is that we combine since and colour wheel theory into a simple science reaction that WOWs kids. It’s a fun way to add in some chemistry learning that even ages as young as preschool can start to understand.
Halloween Magic Milk Video
Check out a video of the Halloween Magic Milk experiment. Note, portions of the video have been sped up. If you can’t see the video, turn off any ad blockers and try again. They also block our video feed. Or, you can find this video on the STEAM Powered Family YouTube Channel.
Halloween Magic Milk Supplies
These are the supplies needed to make this magic milk experiment work.
Shallow dish or shallow pan – our favourite is to use a glass pie dish
Milk – we used 3.5% for this experiment, but have used different types of milk to achieve different results
Food coloring – Not all work… see the explanation below on the correct drops of food coloring
Two small dishes and spoons or sticks – these are for mixing to create our Halloween colours
Pipettes
Dish soap
Small dish
Q-Tips or a thin cotton swab
Not All Food Colouring Works
Picking which food colouring to use is actually more difficult than it seems. If you have tried the Magic Milk science experiment in the past and had it not work, it is your food colouring that is the issue.
The first thing you need to do is ensure you are using liquid food colouring, not gel.
But not all liquid food colouring will work either. I discovered this personally as I was preparing this activity. So many science failures.
This was INCREDIBLY FRUSTRATING!!!
Especially since we have done this experiment many times before.
I have so much food colouring in my cupboards after trying lots of different brands to figure out why some work in magic milk experiments and others don’t work.
Finally I found one that worked (this was the brand I used to buy and is hard to find now in my area) and in comparing the ingredients the key seems to be Propylene Glycol. That ingredient has been replaced with Glycerol and Sorbitol in the food colourings that did not work.
I am not 100% sure of the science behind this but from some research Propylene Glycol is a synthetic liquid substance that is used to absorb extra water (hydroscopic). So in our magic milk experiment it would mix, which would allow the dish soap to create the spectacular, colourful fireworks effect we expect from a magic milk experiment.
The other food colourings using Glycol and Sorbitol, which are alcohols, seemed to glob into their own little balls of colour or sink and stick to the bottom of the plate. The biggest issue is that they did not mix with the milk.
I am still not completely clear on why this happened, but if you find your Magic Milk Experiment not working, hopefully you can find some food colouring that uses Propylene Glycol. Then give that a try and see if you get the spectacular colourful results!
Which Milk Is Best?
We did a great Magic Milk Science Fair Project exploring the affect different fat content milks made on the magic milk experiment. Simply put, we discovered higher fat content resulted in less rapid and diffuse reactions. Who would have thought that the type of milk mattered!
So for this experiment we chose to use 3.5% homogenized milk. This would give us a rapid reaction, but not as fast as 1 or 2%. The kids want time to watch those colours dance!
3.5% also happened to be what I had lots of on hand that was expiring. So win-win!
For more on the science behind how the fat content in the milk affects the results, see our scientific explanation below or head over to our Magic Milk Science Fair Project.
Halloween Magic Milk Experiment Directions
Mixing Halloween Colours
Since the food colouring that works for Magic Milk comes in a very limited number of colours, the first thing we need to do is to create our Halloween colours: Orange and Black. We do this by using the colour wheel and colour theory.
Primary colors are used to create all other colors. They are red, yellow and blue. These three colors are unable to be created through mixing of any other colors. By mixing the primary colors together, they create other colors, such as the secondary colors, which are green, orange and violet. Then from there we can create other colours such as black.
Our food colouring kit came with Red, Blue, Yellow and Green. So that simplified things a bit for us as we also had the secondary colour green.
To make orange we found the best ratio was 25 drops of yellow and 2 drops of red. Mix. The red is very powerful and will overpower the yellow, so use it sparingly.
To make black we added 20 drops of blue, 18 drops of red, and 12 drops of green. Mix. For us this resulted in the perfect black.
Adjust your ratios until you get the perfect Halloween colours! As I discovered, food colouring varies considerably!
Doing the Magic Milk Experiment Halloween Style
Set out your dish and fill it so it has about 1cm of milk.
Using pipettes add drops of your Halloween food colourings to the surface of the milk. Arrange the drops in a pattern like a Jack O Lantern or maybe a bat or ghost.
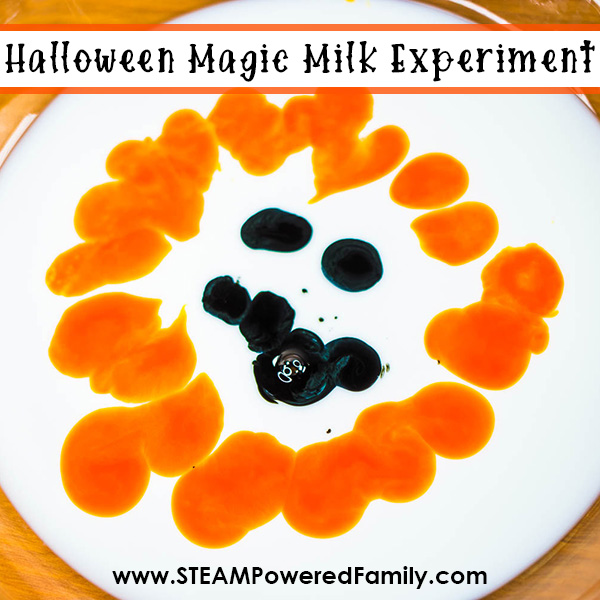
Place a bit of dish soap in a small dish, then dip a Q-Tip into the dish soap and place it in the middle of the plate. Or, if you have a steady hand, use the bottle and just add a drop to the middle of the plate.
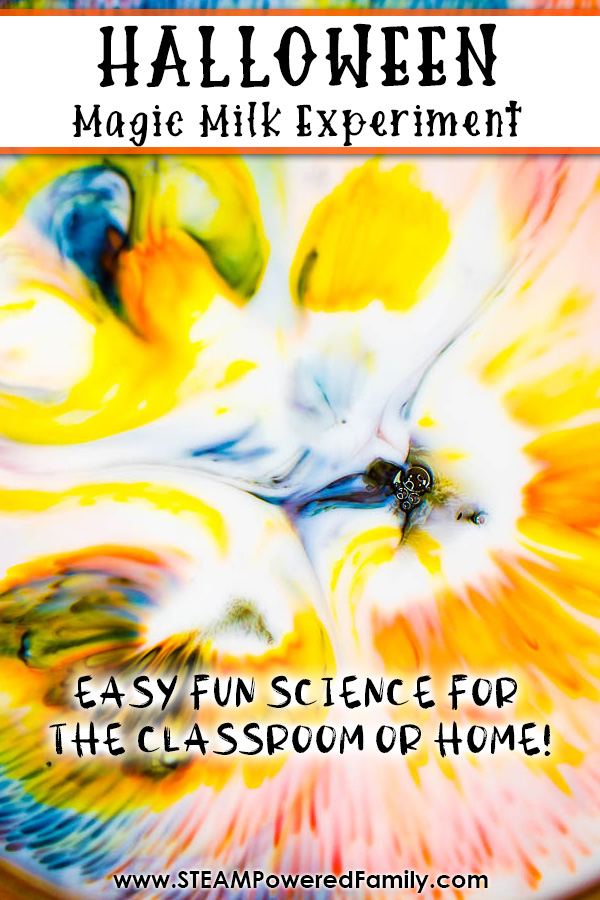
Watch the spectacular, colourful reaction of this easy science experiment!
My kids said that as the colours moved and bounced around it was like ghosts appearing in the plate. We were also able to watch the colours separate and mix into new colours. It was really cool to see the soap molecules and the food coloring work together in the thin layer of milk.
Magic Milk Science Explanation
For such a simple experiment, magic milk has some incredible science behind it and also the opportunity to teach some valuable scientific vocabulary. It’s fun because it combines hands-on creativity with scientific thinking.
Surface Tension
Liquids have something called surface tension. Water, milk, and cream are made up of molecules that have positive and negative charges on their surface. Just like magnets these charges allow them to attract and repel other molecules. When milk or cream is by itself, it’s molecules are surrounded by the same type of molecules, creating a nicely balanced push and pull. The exception is the top which is exposed to air which pushes down on the liquid, creating surface tension on the top of the liquid.
Surfactant
There is a substance that affects a liquid’s surface tension, it’s called a surfactant. Dish soap is mostly comprised of surfactants. It has a hydrophilic part that is attracted to the water and a hydrophobic part that wants to interact with the fat molecules and repels water.
The pushing and pulling of the fat and water molecules in the milk separates them, resulting in a decrease of the surface tension.
Impact of Ratios
We see a big difference between our various fat content milks due to the different ratios of fat to water in the liquids. The higher fat content milk is much thicker. We can see this before adding the dish soap if we just look at the food colouring drops. The food colouring spreads significantly in 2%, spreads a little in 18% and doesn’t move at all in 33%.
This means that in cream there is less water for the hydrophilic part to attract, and way too much fat for the hydrophobic part to interact with. The surfactant (dish soap), has very limited effect on the surface tension, which remains quite a viscous, stable liquid. This leads to the fractal style, very limited spread of colour we see in the high fat milk.
In the lower fat content milk like we uses in our Halloween Magic Milk we have lots of water and some fat, allowing the surface tension to be affected easily. This results in a dramatic dance of color but it doesn’t last as long.
I hope you have a great time doing this Spooky, Halloween Magic Milk Experiment!
For our experiment, we use a combination of milk, dish soap, and food coloring. There are a few other simple materials and supplies needed as well.
As long as you have a good conversation with the kids and adult supervision, it should be safe to complete together. Teaching and talking to the kids about how to stay safe and never attempt experiments unsupervised is key to keeping everyone safe during activities.
This experiment teaches kids about how molecules interact on surfaces. It also helps to teach them how to make predictions, hypotheses, and also draw conclusions from experiments.
More Halloween Activities