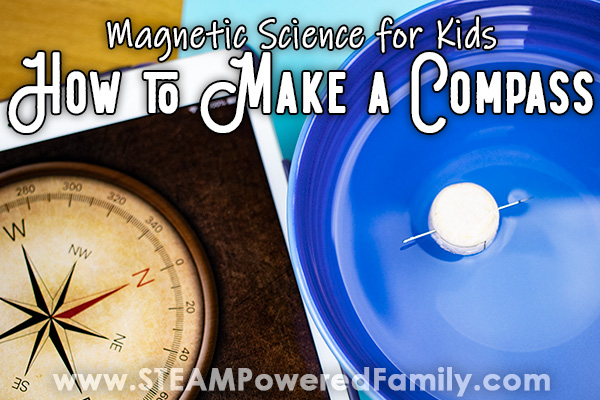
How To Make A Compass
It can seem like magic the way invisible forces move the needle on a compass. In this activity we explore how magnetic forces control the movement of the needle by learning how to make a compass out of household items. This easy science experiment packs a big learning punch.
Simple Magnetic Compass
Table of Contents
Disclaimer: This article may contain commission, paid partnerships, or affiliate links. We independently review everything we recommend. When you buy through our links, we may earn a commission from qualifying purchases.
Recently we were learning about the life and works of Albert Einstein. It was completely fascinating. We love learning about how these brilliant minds lived. It is a wonderful way to inspire kids and teach them the value of perseverance, imagination and about how great discoveries have happened in history.
One of the things that stood out to us was that Einstein was fascinated by a compass given to him by his father when he was only five years old. He was mystified by the invisible forces that could deflect the needle in that compass. And we could totally imagine him watching for hours as he tried different things, watching that needle move. This in turn led to a lifelong fascination with invisible forces.
Talk about a passion pursuit!
So to cap off our lessons about Albert Einstein we decided to build our very own homemade compass. It is incredibly easy to do and the kids were fascinated by the movement of that needle!
I admit it was kind of fun to watch that excitement on their faces and knowing that many years ago, a young boy named Albert was just as fascinated by the same phenomena.
Check out this video of our DIY Compass in action
How To Build A Simple Compass
DIY COMPASS SUPPLIES
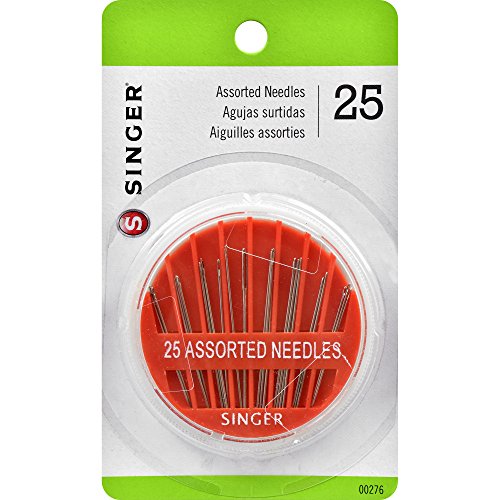
Sewing Needle (go with fairly large sewing needles so it is easy for little hands to hold them)
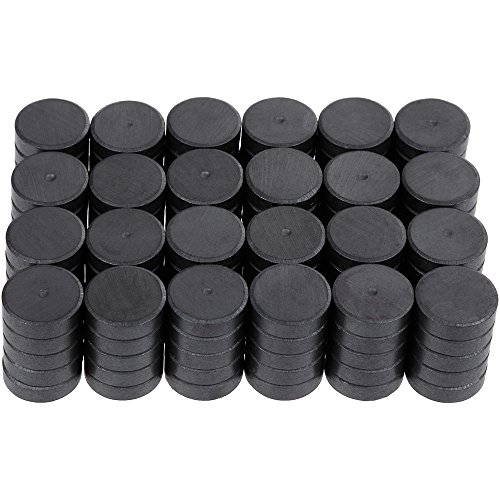
Magnets (the stronger the better)
Cork (other options may work if you don’t have a cork, see below in Troubleshooting)
A medium to large sized bowl
Water
Pliers

DIY COMPASS DIRECTIONS
NOTE: Don’t do this activity with any child that puts things in their mouth. Swallowing magnets is extremely dangerous. The needles are sharp. Ensure you have appropriate adult supervision and children are old enough to behave safely.
Build a compass
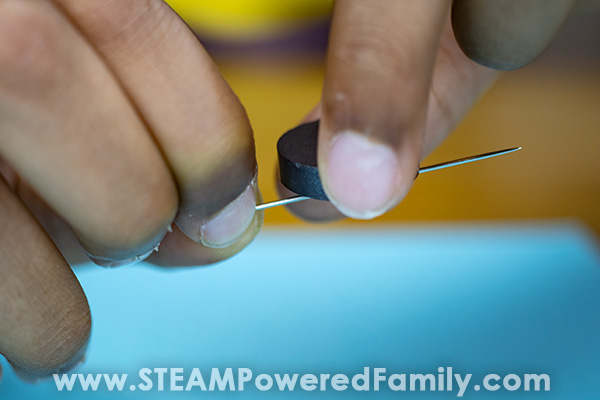
- Magnetize the needle
Hold the needle, and take your magnet and stroke it down the length of your needle 50 times. If you are using a weaker magnet you may need to do this more than 50 times. But for most good quality magnets 50 should be about right.
- Magnetize the other end with the reverse
Now this is very important, take note of which side of the magnet you were using. Flip the needle around so you are holding the other end, and flip over the magnet so you are using the other side of the magnet. Now repeat on the non-magnetized end of of the needle.

- Prepare the cork
Cut a cork so it is about 1 to 2 cm thick.
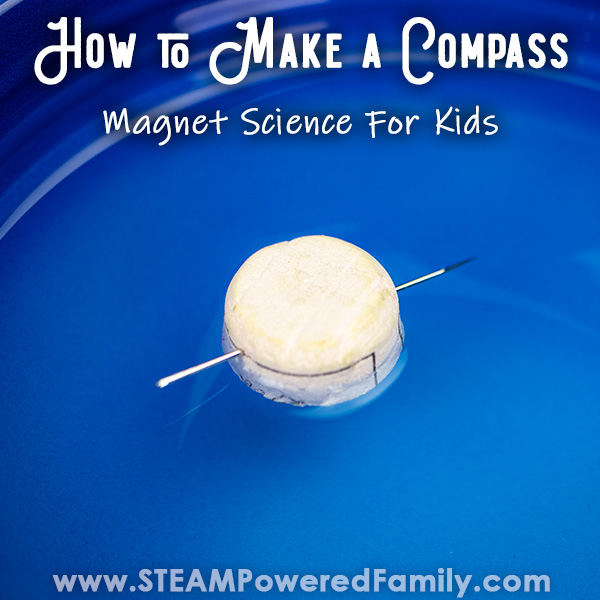
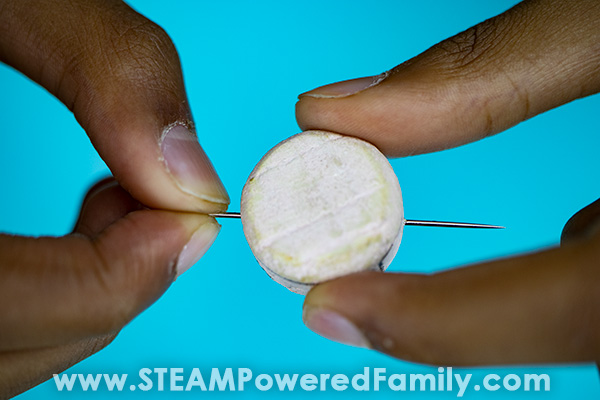
- Insert the needle
Carefully push the needle through the cork. This is best done by an adult with a pair of pliers. I found it easiest if I used a thumb tack to start the hole, then pushed the needle through. You want the cork to be centered on the needle.
- Fill a bowl with water
Set out your bowl and fill it with a few inches of water.
- Test the compass!
Place your cork and needle in the water and see how it moves. It should align itself so it points North.
- Extra fun!
Create a second compass and add it to the same bowl of water. What happens? What happens if you bring your magnet near the water? What happens if you spin the compass?

How A Homemade Compass Works
Magnetism can be seen in action whenever you have two magnets close together. Magnets have a positive and a negative side. This causes them to either push against one another or be pulled together. Two positive sides will repeal each other causing the magnets to push apart. But Flip one magnet over so you have a positive and a negative near each other and they will attract each other.
For almost 1000 years people have been using magnetism to help them navigate the globe. Magnetism can help people navigate because the Earth has its own magnetic field. Compasses use a small magnetized bar or needle that points a certain direction (north or south) based it’s reaction to Earth’s magnetic field.
When we rubbed the magnet against the sewing needle, it magnetized the needle. This means it becomes a weak, temporary magnet. Because magnets interact with one another, either attracting or repelling, the magnetized needle can interact with the Earth’s magnetic field. We use the bowl of water because Earth’s magnetic field is relatively weak. Allowing it to float freely on the water, allows the magnetized needle to freely react to Earth’s magnetic field, causing it to align North to South. If you watched closely, the same end of the needle should always point to the North.
Pretty cool, eh? No wonder Einstein was so fascinated by these invisible forces!
Magnetic Compass Troubleshooting Tips
If you run into trouble try using a stronger magnet or rubbing the magnet more times on the needle. Not getting a proper magnetization is usually the core of most issues. Also, once you have done each side, don’t let the magnet near your needle again. If your kids want to play, give them other little metal items to play with near the magnets.
Remember don’t ever place strong magnets near computers, phones or electronics.
If you are struggling with the corks or don’t have corks, you can use other items to keep your needle afloat. A one inch diameter circle of wax paper with the needle woven through will work, or a small piece of pool noodle material will also work to keep the needle floating.
Have a blast embracing your inner Einstein and playing with magnetic forces!
After building a compass, try your hand at building a Magnifying Glass!
FAQ
This isn’t meant for real navigation; it’s a simple experiment for kids. For accuracy, a real compass is best.
Yes, you can. A paperclip or small piece of steel can work, as long as it can be magnetized.
Give yourself about 10-20 minutes to make. That way, the steps can be followed without feeling like you’re rushed.
More Magnet Experiments for Kids


DIY Compass for Kids
Use these simple instructions to teach the kids how to make their own compass at home.
Supplies
- Sewing Needle (go with fairly large sewing needles so it is easy for little hands to hold them)
- Magnets (the stronger the better)
- Cork
- A medium to large sized bowl
- Water
- Pliers
Instructions
Build the compass
-
Magnetize the needle – Hold the needle, and take your magnet and stroke it down the length of your needle 50 times. If you are using a weaker magnet you may need to do this more than 50 times. But for most good quality magnets 50 should be about right.
-
Magnetize the other end with the reverse – Now this is very important, take note of which side of the magnet you were using. Flip the needle around so you are holding the other end, and flip over the magnet so you are using the other side of the magnet. Now repeat on the non-magnetized end of of the needle.
-
Prepare the cork – Cut a cork so it is about 1 to 2 cm thick.
-
Insert the needle – Carefully push the needle through the cork. This is best done by an adult with a pair of pliers. I found it easiest if I used a thumb tack to start the hole, then pushed the needle through. You want the cork to be centered on the needle.
-
Fill a bowl with water – Set out your bowl and fill it with a few inches of water.
-
Test the compass! Place your cork and needle in the water and see how it moves. It should align itself so it points North.
Notes
Don’t do this activity with any child that puts things in their mouth. Swallowing magnets is extremely dangerous. The needles are sharp. Ensure you have appropriate adult supervision and children are old enough to behave safely.