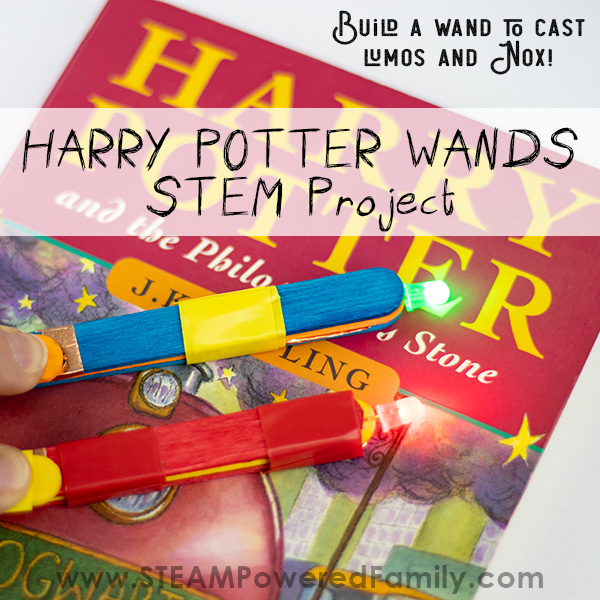
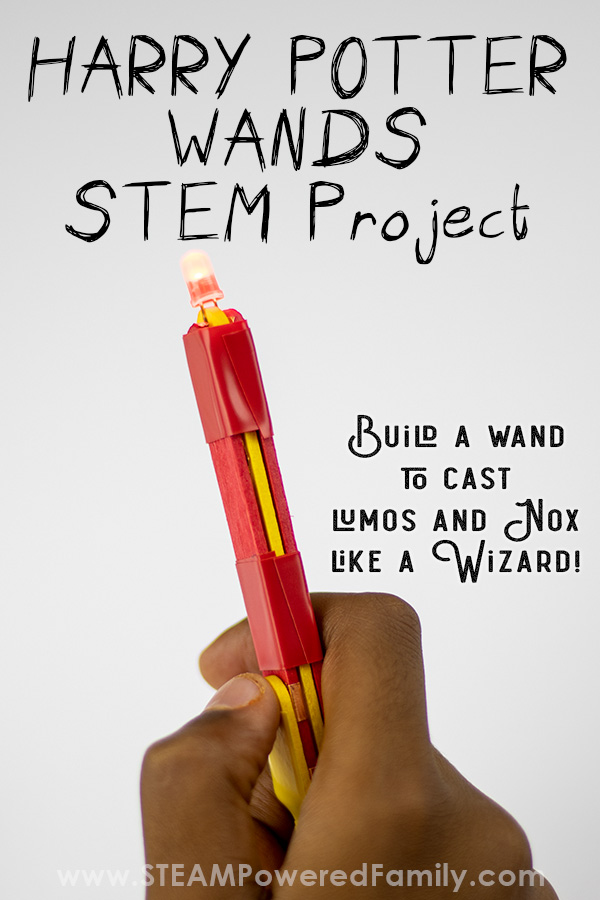
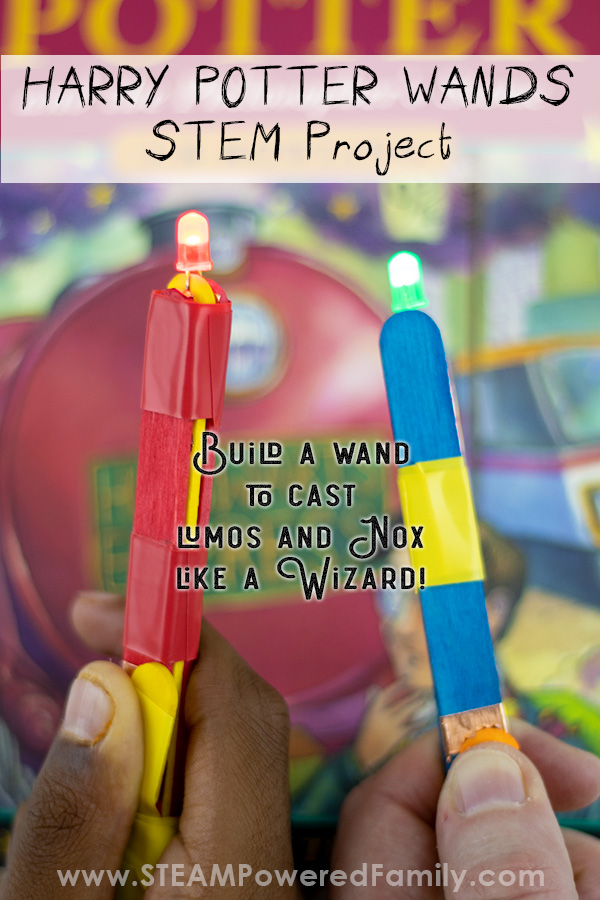
Harry Potter Wands STEM Project
Can one ever have too many wands? As true Potterheads I firmly believe the answer is NO! Especially when you are making the wands yourself and with this DIY Harry Potter Wands project, kids create their very own wand that lights up. LUMOS! All done playing? No problem it also turns off as if by magic. NOX!
DIY HARRY POTTER WANDS SIMPLE CIRCUIT PROJECT
Table of Contents

Disclaimer: This article may contain commission, paid partnerships, or affiliate links. We independently review everything we recommend. When you buy through our links, we may earn a commission from qualifying purchases.
“Happiness can be found, even in the darkest of times, if one only remembers to turn on the light.”
― J.K.Rowling, Harry Potter and the Prisoner of Azkaban
I get goosebumps every time I hear that quote. There are many quotes from Harry Potter that I could read every day. There is just so much wisdom and knowledge shared in the pages. I often feel like we need a little more light in our days. It can feel dark and like the world is a hard place sometimes.
So why not do something fun and amazing? Why not create yourself a wand that lights up with an on/off switch you crafted yourself? Then whenever you need to turn on the light it, it’s there with a flick of of the thumb.
Not only will this simple circuit project bring light into your life, you will light up your child’s passion and curiosity. Once they master this Harry Potter Wand, who knows where their imagination will take them next?
If you have tried our Circuit Bugs or Circuit Flowers activities, you will find this circuit building activity very easy. If you are new to circuit building, welcome! It’s about to get electric in here!
DIY HARRY POTTER WANDS THAT LIGHT UP SUPPLIES
3 Craft Sticks
Copper Tape
LED Light Bulb
CR2032 Battery
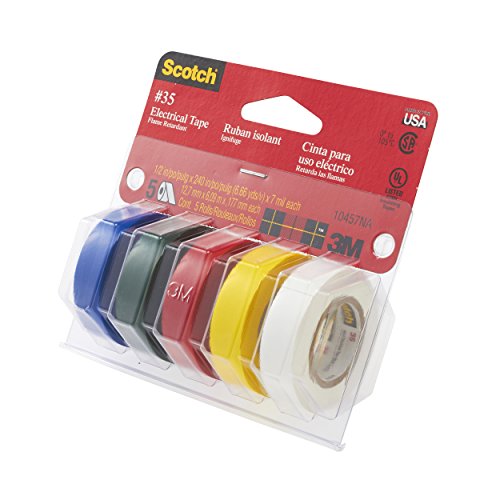
Electrical Tape (or any nice tape that works for your design)
Scissors
No magical abilities required!


HARRY POTTER WANDS TUTORIAL VIDEO
I made a video of me rambling away as I made one of these wands. Sometimes with circuits I know it is easier to see what someone is doing, rather than trying to figure it out from pictures and words. If you can’t see this video your adblockers or firewall are blocking our video feed. You can also find this video on the STEAM Powered Family YouTube Channel.
I did edit the video down a bit, but it only takes about 10 minutes to make these circuit wands. This project is great for tweens and teens. Children 7 to 10 should be closely supervised. Don’t attempt this activity with younger kids who put things in their mouths. Batteries are dangerous and common sense must be used to keep our kids safe.
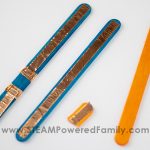
MAKING YOUR VERY OWN HARRY POTTER WANDS AND CAST: LUMOS!
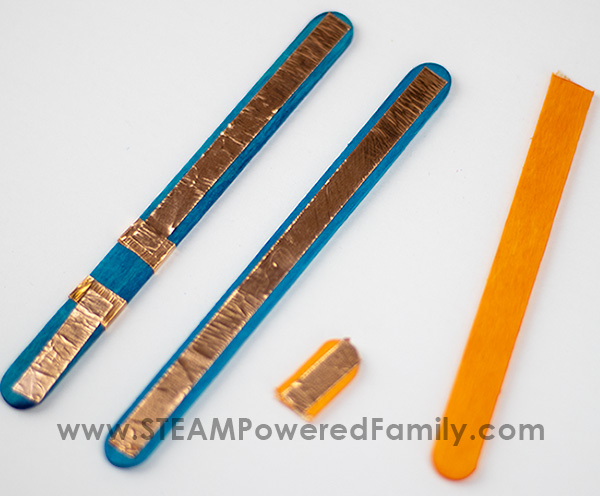
The first step is to take one of your outer craft sticks. I like to use 2 colours. So my outer colours are one colour and my insulating stick is a different colour. It makes it easier to keep track of where you need to place the copper tape.
Group Activity Tip!If you are doing this as a group activity I recommend using coloured craft sticks so it is easier to follow the directions. You can even use 3 colours and have all the kids use the same three colours so it is easier to instruct the group.
One of my kids did complain and say they would prefer to do the wands wood colour so it is more authentic. The choice is honestly yours! It’s your Harry Potter wand!
Start by wrapping a strip of copper tape around the craft stick approximately where you want your on/off switch. Kind of like a ring all the way around the craft stick. Then leave about 1cm of space (a child’s finger width is great) and wrap another strip of copper tape all the way around the craft stick.
Now on one side run a strip of copper tape from the bottom ring to the end of the stick. Repeat from the top ring to the other end of the stick. Make sure you leave the finger width space between the rings with no copper tape. This is your circuit break.
Pro Tip! Copper tape likes to roll and stick back on itself. Sometimes it works best with long pieces to leave the paper on part of the tape and slowly unroll as you stick it.
On the other outer craft stick run a strip of copper tape along the entire length.
Here are all the sticks with copper tape, we will get to the little piece in a moment!
Before you place your LED light make sure you test it! Do this by sliding the battery between the legs. If it doesn’t work flip the battery around and try again. Still doesn’t work? Grab a different LED and test that one. Still not working? Try another battery. Make sure everything works before you start the next step.
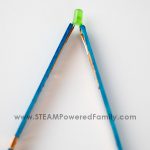
Using copper tape attach the LED light to the end of outer craft stick with tape running the entire length. You want to tape the LED leg to the copper tape.
Repeat on the other outer craft stick, making sure to tape the other LED leg to the copper tape on the craft stick. Secure those legs well with copper tape to ensure your circuits will work.
Here is what it should look like.

Using scissors cut about an inch off the end of your middle craft stick. You want to cut off just enough that your battery will fit in.
The long part of the middle stick will slide between the two outer sticks.
Now we need to make our switch which is going to complete our circuit and make our wand LUMOS!
Add a piece of copper tape to one side of the small piece of craft stick you just cut off the middle piece. Using your electrical tape create a hinge and attach the piece so it will cover the gap between the rings on the outside of your craft stick.
Slide your battery in. Test to make sure it is the correct way and your wand works.
Now tape your wand together!
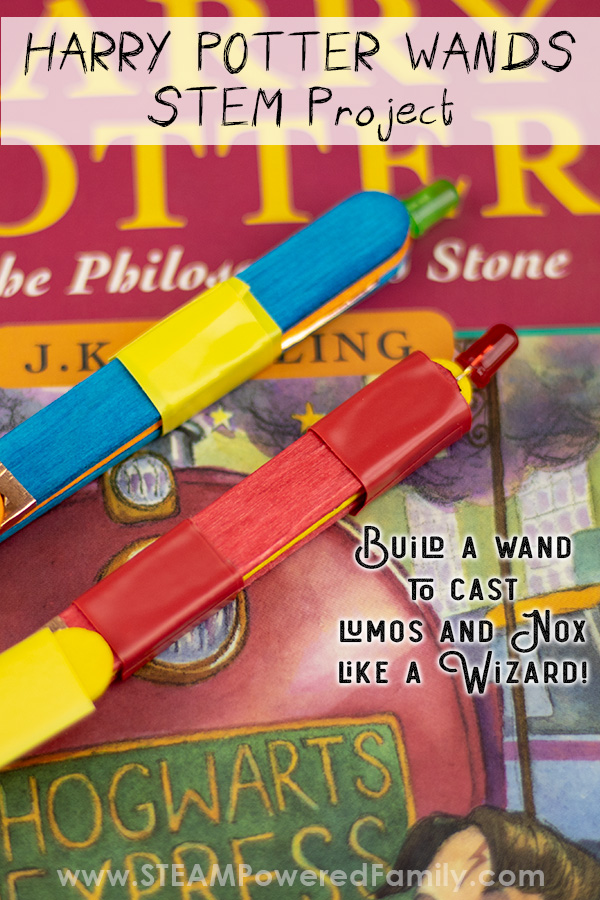
Add a piece of tape to the top to secure the three craft sticks together. Then add more tape at the bottom starting at the bottom of the on/off switch all the way to the end securing the battery in place.
To turn on your wand simply close the flap securely with your thumb.
LUMOS!
All done playing, simply take your thumb off the switch and your circuit breaks and the light turns off.
NOX!
If you have any difficulties please watch the video above to see in step by step details how I built these wands. That should help you troubleshoot!
Happy Wand Waving!
Harry Potter Coding Fun Pack For STEAM Powered Family Members
We LOVE Harry Potter and as a special thanks we are offering a free limited time offer of a Harry Potter Inspired Coding Fun pack. Learn coding like the wizards do! This is a special offer for STEAM Powered Family newsletter members, join now!

MORE HARRY POTTER INSPIRED ACTIVITIES


How To Make A Harry Potter Wand
Simple circuits are key to the magic in this Harry Potter Wands STEM Project. Includes an easy built in circuit break for an on/off switch. Lumos! Nox!
Supplies
Instructions
-
Take one of your outer craft sticks. Wrap a strip of copper tape around the craft stick approximately where you want your on/off switch.
-
Then leave about 1 cm of space (a child's finger width is great) and wrap another strip of copper tape all the way around the craft stick.
-
On one side run a strip of copper tape from the bottom ring to the end of the stick. Repeat from the top ring to the other end of the stick. Make sure you leave the finger width space between the rings with no copper tape. This is your circuit break.

-
On the other outer craft stick run a strip of copper tape along the entire length.
-
Test your LED light.
-
Using copper tape attach the LED light to the end of outer craft stick with tape running the entire length. You want to tape the LED leg to the copper tape.
-
Repeat on the other outer craft stick, making sure to tape the other LED leg to the copper tape on the craft stick. Secure those legs well with copper tape to ensure your circuits will work.
-
Using scissors cut about an inch off the end of your middle craft stick. You want to cut off just enough that your battery will fit in.
-
Slide the long part of the middle stick between the two outer sticks.
-
Add a piece of copper tape to one side of the small piece of craft stick you just cut off the middle piece. Using your electrical tape create a hinge and attach the piece so it will cover the gap between the rings on the outside of your craft stick.
-
Slide your battery in. Test to make sure it is the correct way and your wand works.
-
Now tape your wand together! Add a piece of tape to the top to secure the three craft sticks together. Then add more tape at the bottom starting at the bottom of the on/off switch all the way to the end securing the battery in place.
-
To turn on your wand simply close the flap securely with your thumb. LUMOS!