

Wind Turbine Project for Kids
Looking for the perfect hands-on project to spark curiosity and celebrate Earth Day or Earth Sciences Week? Building wind turbines and windmills with students is more than just a fun activity, it’s a great way to explore renewable energy, sustainability, and engineering principles. Using simple materials students learn how to harnesses the power of the wind. Whether you’re teaching about environmental science, climate change, or energy solutions, this activity is a brilliant way to make those lessons come to life while inspiring the next generation of problem solvers. Scroll to the end to find links to printable resources you can add to your lesson plans.
Earth Science Fair Wind Turbine Project
Table of Contents

Disclaimer: This article may contain commission, paid partnerships, or affiliate links. We independently review everything we recommend. When you buy through our links, we may earn a commission from qualifying purchases.
We all have felt the wind on our faces and bodies and watched how the wind can make a kite “dance” high up in the sky. But wind can also do something else, it can generate electricity or help to get water out of a well that is deep in the ground. People all over the world have used wind to create energy for a very long time. Today we are going to learn about and make our very own wind turbines. This project is a great project for a science fair.
What is a Wind Turbine?
A wind turbine is a machine that uses the power of the wind to spin large blades connected to a generator. As the blades turn, they create electricity—turning wind energy into clean, renewable power we can use in our homes and schools.
What is the Difference Between a Wind Turbine and a Windmill?
While both wind turbines and windmills use the wind to spin blades, they do very different jobs. A windmill uses wind power to do mechanical work—like pumping water or grinding grain. A wind turbine, on the other hand, turns the wind’s energy into electricity. So while they may look similar, windmills do physical tasks, and wind turbines make power for our lights, computers, and more.
How can you tell the difference? Look at the blades!
Windmills typically have more blades—often four or more, especially in traditional designs. The extra blades help them catch more wind at slower speeds, which is ideal for mechanical tasks like grinding grain or pumping water. They’re built for strength and steady movement, not speed.
Wind turbines usually have fewer blades, most commonly three. This is because they are optimized for speed and efficiency. Fewer blades reduce drag and allow the rotor to spin faster, which helps generate more electricity from the same amount of wind.
While it’s not a hard rule, blade count is often a visible clue to whether you’re looking at a windmill or a wind turbine.
How do wind turbines work?
A wind turbine works by capturing the wind’s energy and turning it into electricity. When the wind blows, it pushes against the turbine’s blades, causing them to spin. These blades are connected to a shaft or rotor, and as the shaft or rotor turns, it spins a machine inside called a generator. The generator uses magnets and coils of wire to convert the spinning motion into electricity or energy.
How fast do wind turbines turn?
A wind turbine blade is as long as a school bus—or sometimes even longer! When they spin, from far away it looks like they are spinning very slowly, but in fact, they are moving as fast as a racing car or even faster. They can move faster than 200km per hour, which is faster than the fastest animal in the world, which is the cheetah!
How tall is a wind turbine?
A wind turbine can be anywhere between 80 and 104 meters tall. The taller they are the more powerful they are.
How much energy can a wind turbine produce?
The size of the turbine determines how much electricity a wind turbine can make. A big wind turbine can create enough electricity for more than 1000 homes in one year. Small wind turbines might be able to create enough power for only a few homes or one farm. The speed of the wind is very important, it cannot be too fast or too slow. This makes the placement of a wind turbine very important. We discovered how the wind currents change in different areas when we built a weathervane. If the wind is strong and steady, the turbine can make lots of electricity.
Build a Simple Wind Turbine
Let’s build a wind turbine to help us understand how it all works.
Video Tutorial
The easiest way to learn how to do this project with your students is to watch our step-by-step video tutorial. If you can’t see the video below it is likely being blocked by adblockers or a firewall, but you can still watch it on the STEAM Powered Family YouTube Channel. Make sure to subscribe so we can keep bringing you more fun STEM activities!
Materials
School glue or super glue is best if your kids are old enough to safely use it.
Glue stick
Pringles can or a cardboard postage tube
Paper straw
Scissors
Pencil
Wooden skewers. One should fit loosely into the paper straw
Ruler
4 small wooden beads that fit onto the thinner skewer
Side-cutter
1m thin, soft thread or cord
Metal washer, nut, or something small to use as a weight
Awl
Some sand or pebbles
Hair dryer or fan
Directions
First we need to prepare the blades and the topper for our wind turbine. Here is the design. You can right click to save and print this image or simply copy the shapes. You will want to make your blades and topper out of a solid card stock.

Encourage your kids to decorate their wind turbines using craft paper or white paper that they draw designs on to create their own picture. We created a stone look with windows and doors.
Prepare the Tube
Find the middle of the can at the top on both sides.
Mark and make holes on either side of the can, 3cm below the edge of the can at the top.
Use the awl to make the two holes and then use either a thicker wooden skewer or the tip of the pencil to make the two holes the same size as the straw. The straw must not be loose. Check the size using the straw as you make the hole bigger.
Glue your decorations or picture onto your pringles tube, make sure you note where your holes are.
Use a pencil to punch through the picture and the holes you made earlier.
Prepare the Blades
Cut the three slits into the circle where shown.
Find the middle of the circle, make a hole with the awl, and then make it bigger to fit the thinner wooden skewer through it.
Using a pencil, roll each of the blades around the pencil to curl them. Check that they are all rolled in the same direction.
Place each of the blades into the slits and glue into place with a dot of super glue – WATCH YOUR FINGERS!
It is very important that the three blades are glued on in the same direction, so check this before you glue the blades in place.
Mount the Blades
Glue a wooden bead onto the flat end of the skewer with a dot of super glue.
Push the skewer through the front of the circle. The bead should be just touching the circle. Make sure it is not too tight.
Glue another bead onto the back of the circle, on the skewer, leaving a small space between the bead and the circle.
Push the straw with the skewer through the whole can, leaving 1.5cm sticking out of the can on the side with the blades.
Glue another bead just before but not touching the straw.
Glue the fourth bead onto the end of the skewer and cut off the pointed edge with the side cutter.
Prepare the Base
Pour the sand into the tube and close the tube with its lid. The sand is there to hold the tube in place so the “wind” cannot blow it over. It adds a bit of weight and stability. If you don’t want to use sand, you can use pebbles, marbles or anything that has a bit of weight to it.
Tie the piece of thread (or cord) close to the bead at the end of the straw and the washer or your weight to the opposite end of the thread.
The Wind Turbine is ready to go to work!
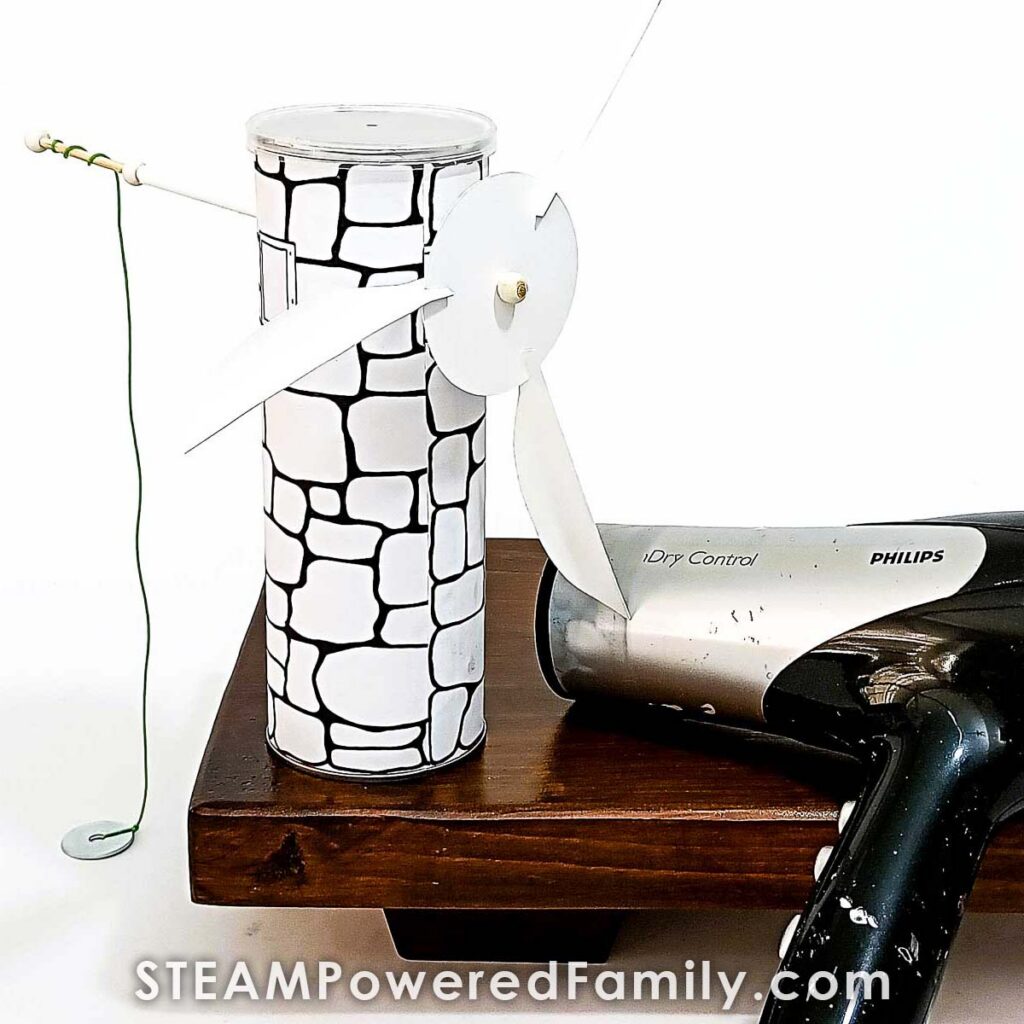
Test your Wind Turbine
Place the wind turbine at the end of a table with the weight dangling in the air.
Place the hair dryer or fan in front of the wind turbine.
Switch it on at a low speed and a cool setting, and find the best angle to spin the blades. You should see the washer or weight being lifted by the “rotor” of your wind turbine.
So, when the wind or air from the hair dryer blows, your wind turbine turns, and the turning helps lift the washer or weight upward without needing any electricity or people to do the heavy work!
Classroom Extension Activities
Lego MiniFig Rescue
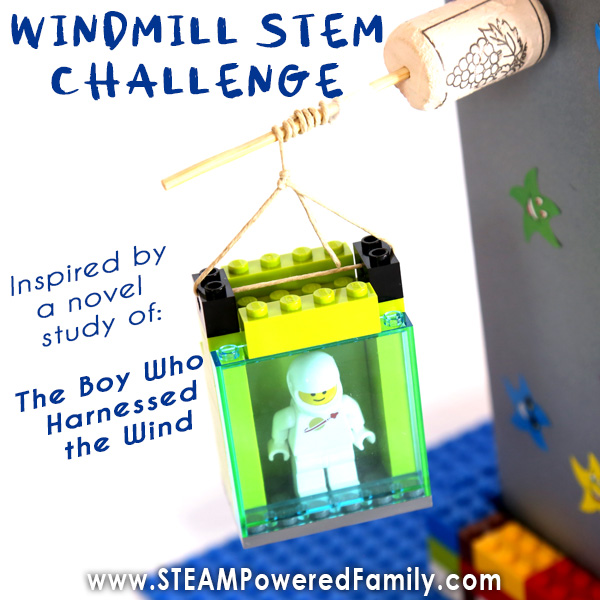
Years ago we did a really fun activity as part of a book study of The Boy Who Harnessed The Wind. In our activity, we performed a minifig rescue using wind power! This windmill STEM project is great for younger kids.
Design Challenge
Now your students understand the principles of wind turbines and windmills, set them a challenge. See if they can build a more effective design. Maybe they change the shape of the blades, change the height of the tube, alter the weight, or add a small motor! Let them get creative and level up their designs.
Enjoy building a wind turbine with your kids and discovering how important they are along with wind power to help our environment!