Valentine’s Day Agamograph STEM Craft
Valentine’s Day is coming up on February 14th and we want to share a love of all things STEM and STEAM by making a heartfelt Valentine’s Day Agamograph STEM Craft. This is a great way to get creative, get crafty and learn the science behind optical illusions and perspective. We love a great Valentine’s Day STEM project, and this one combines art for some Valentine’s Day STEAM!
Valentine’s Day Agamograph Project
Disclaimer: This article may contain commission or affiliate links. As an Amazon Influencer I earn from qualifying purchases.
Not seeing our videos? Turn off any adblockers to ensure our video feed can be seen. Or visit our YouTube channel to see if the video has been uploaded there. We are slowly uploading our archives. Thanks!
The Science of the Agamograph
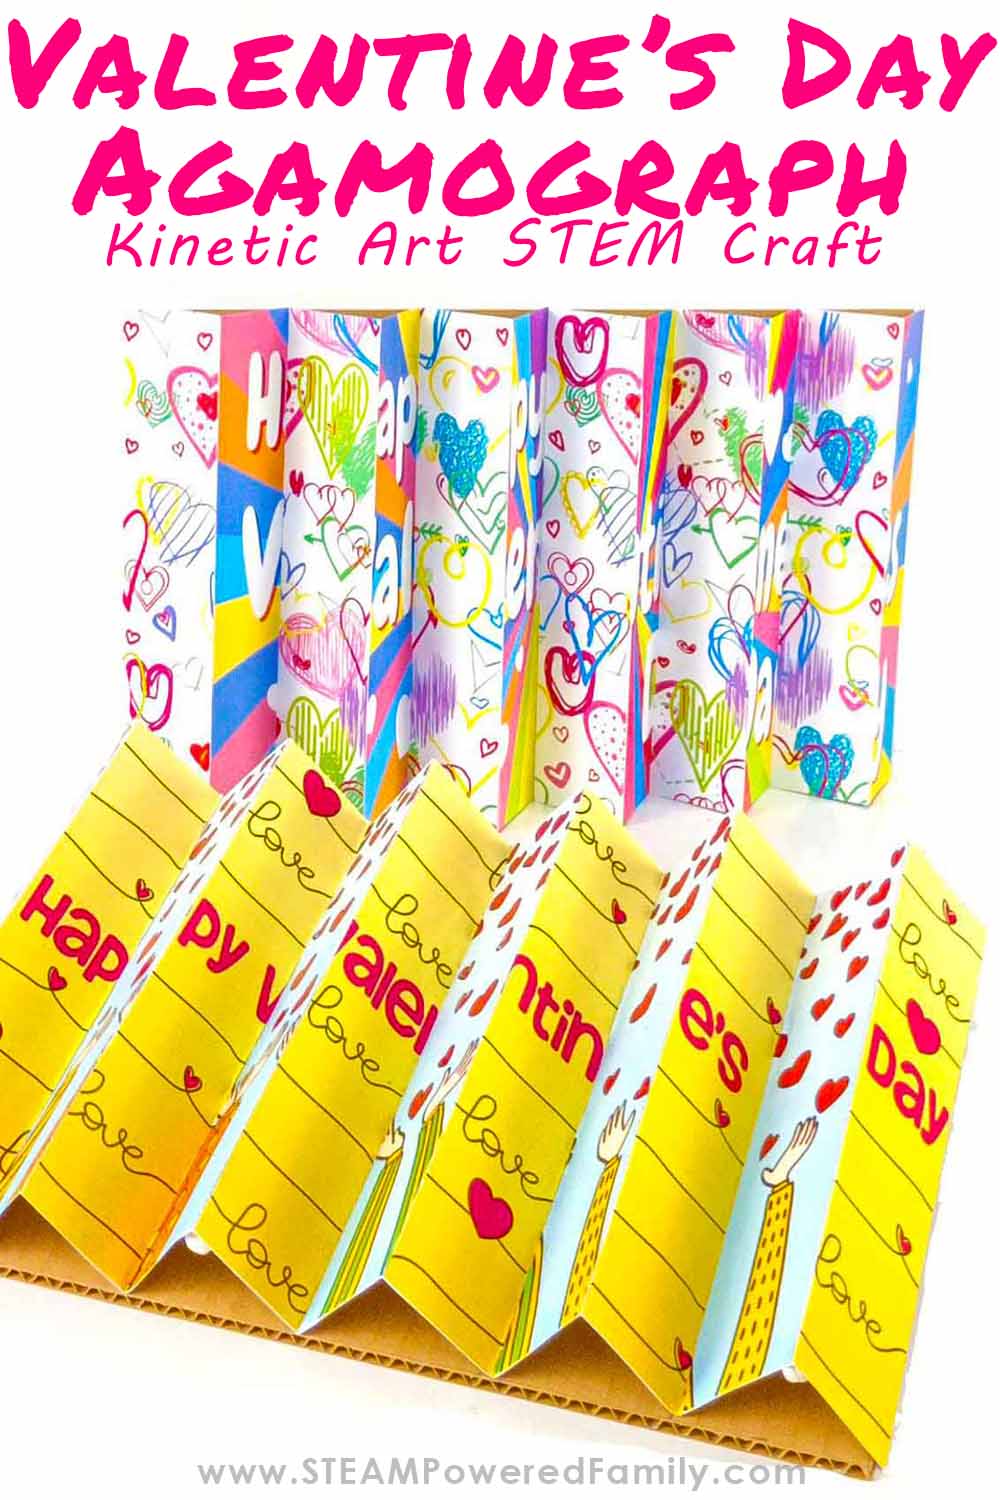
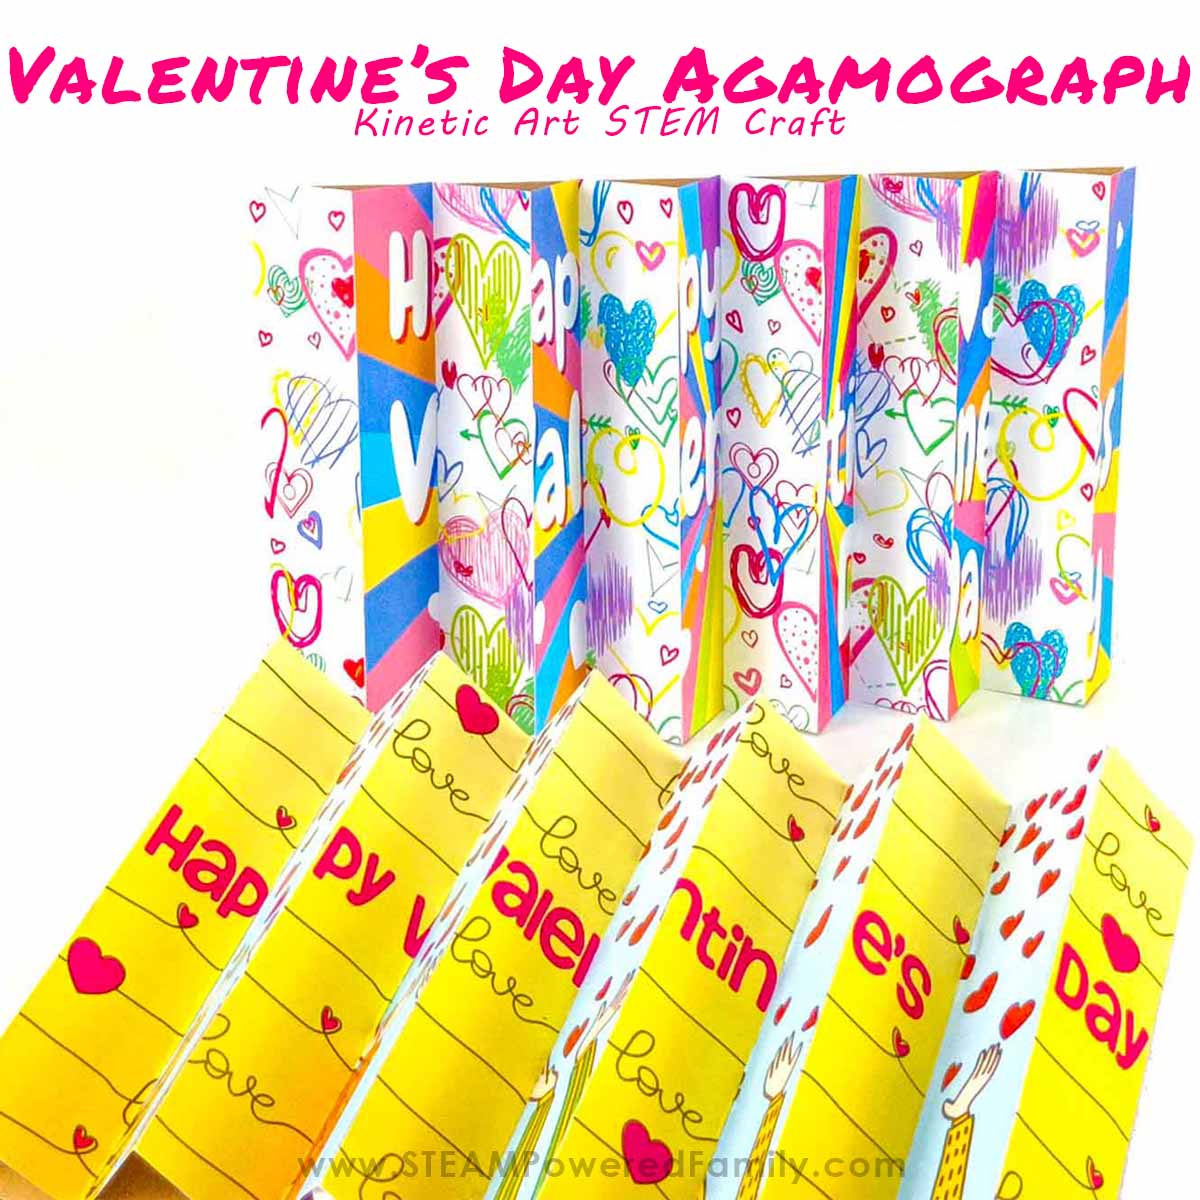
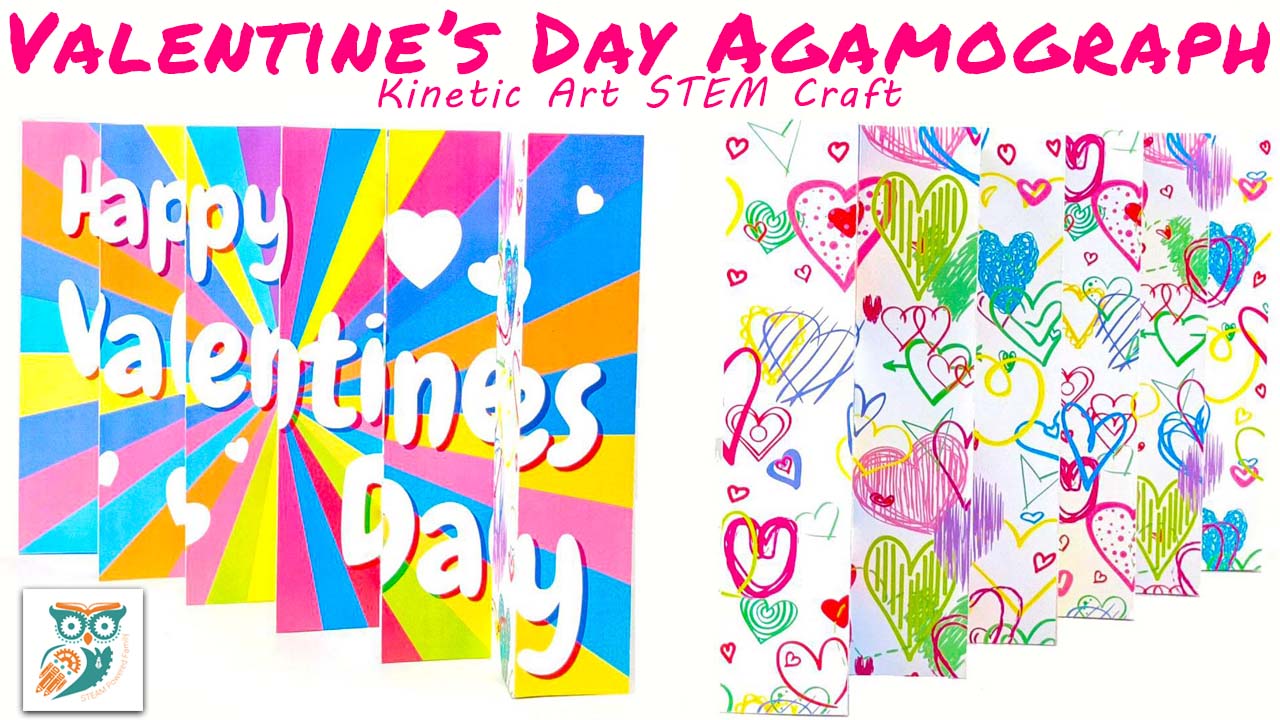
The Agamograph may seem like a really weird word, but it is what we call a piece of art that changes as we change our perspective or the direction we are viewing the art from. It is an optical illusion that is not only fun but also fascinating.
The Agamograph was developed by an artist called Yaacov Agam around 1953. This magical art is known as a form of Kinetic art. This means that the person viewing the artwork must interact with the artwork by moving from one side of the image to the other, changing their perspective, to see the images change from one image, to another.
This amazing artwork can be given to a loved one on Valentine’s Day, hung up at home or to decorate your classroom on this special day. We especially love hanging them around the school so all the students can explore the science and art of these kinetic art pieces.
So, let’s make an Agamograph with love!
Valentine’s Agamograph Video Tutorial
Watch our video tutorial to see how easy it is to make these agamographs and see the kinetic art in action. If you can’t see the video, or you require subtitles, please visit the STEAM Powered Family YouTube Channel and watch it there.
Agamograph Supplies
Printer (that can print on cardstock)
Cardstock
Scissors or a craft knife
Two (or more) pieces of cardboard that measure 30 X 19cm
A screw or a bone folder or anything pointy to score the cardboard
Glue stick
Ruler
Optional – Pencil, pencil crayons or felt tip markers to create your own art!
The Agamograph Templates
There are 3 templates for you to choose from including ones you can color and a blank template to use your own art to create an agamograph. Enter your email in the form to unlock the printable templates.
How to Make a Valentine’s Day Agamograph
If your cardboard is not already cut to the correct size, start by cutting it to measure 30 x 19cm.
Print out the Valentine’s Day Agamograph templates on cardstock paper and cut along the solid lines.
The templates to colour in are labelled A1 and A2, the coloured templates B1 and B2 and the blank templates C1 and C2.
Score the fold lines (dotted lines) with a bone folder or screw.
Glue Template A-2 onto Template A-1 where it shows “GLUE 2ND PIECE ON THIS SIDE”.
Fold the two end pieces marked “FOLD BACK ON DOTTED LINE” backwards. These will
be stuck onto the underside of the cardboard base.
Turn the two pages upside down and fold the whole thing like a fan. Use the handle of the scissors to make the folds flat.
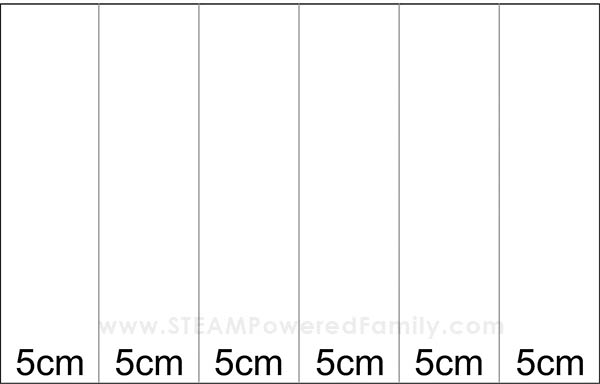
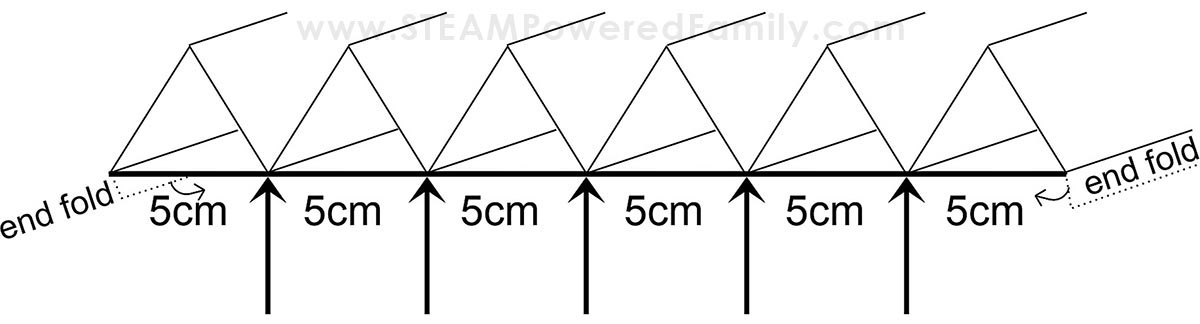
Grab a cardboard base, a ruler and a pencil and make marks 5cm apart across the length of the board and draw in all the lines. See the diagram below:
Let’s stick the Agamograph to the base
Start on one of the ends and stick the end you folded back earlier on to the under side of the base and turn the whole thing over. You may need to use a piece of tape to hold it down.
Turn it over and make sure that the Agamograph can fold easily over the cardboard.
Put glue along the first pencil line. Fold the Agamograph over so you can place the fold into the glue and hold it in place briefly.
Do this for the rest of the folds until you reach the end.
Turn the whole thing over and use the side of the ruler to push each fold into the glue to help ensure it is really stuck down.
Turn the Agamograph upside down again and glue the other end piece to the underside of the base.
It should look like this after gluing everything down. See below:

Your Valentine’s Day Agamograph masterpiece is ready!
Making a Custom Agamograph for Valentine’s Day
Let’s look at the process of making an Agamograph that you have designed yourself if you are artistic or using the black and white template that you can color yourself. This is a great way to make your very own unique designs. You can even pair up with a friend and combine your art works into one optical illusion!
You will once again want to use cardstock to make your designs or color. It is best to not use paints or any coloring medium that will crack when you fold the cardstock.
Once you have completed your designs or colored templates B1 and B2, cut along all the solid lines.
Now cut along all the dotted lines on both pictures. You should have six pieces for each picture.
Get the two blank templates C1 and C2.
All the pieces from the first picture are going to be glued to the template where it is marked “1” and the pieces from the second picture will be glued where it is marked “2”.
When all the pieces have been glued down, cut along all the solid lines and glue the pieces together 1 where it shows “GLUE 2ND PIECE ON THIS SIDE”.
Score the dotted lines and fanfold all the sections like you did with the first Agamograph.
For the last step, mark the lines on the base and stick the whole thing onto the base as before.
Finally, hang it up and step back from your artwork and experience this amazing optical illusion!
Questions for Students
Stand in front of the Agamograph and describe what do you see?
What do you see when you move over to the left side of the Agamograph?
What do you see when you move over to the right side of the Agamograph?
Use your creativity and think about changes would make to your project and the optical illusion better?
Agamographs are amazing examples of kinetic images which are an optical illusion.
More Agamograph Ideas
Did you love making this Agamograph project? Try making even more Agamograph kinetic art.
Get creative and give it a go!