

Rubber Band Instrument: DIY STEM Activity for Exploring Sound, Vibration & Pitch
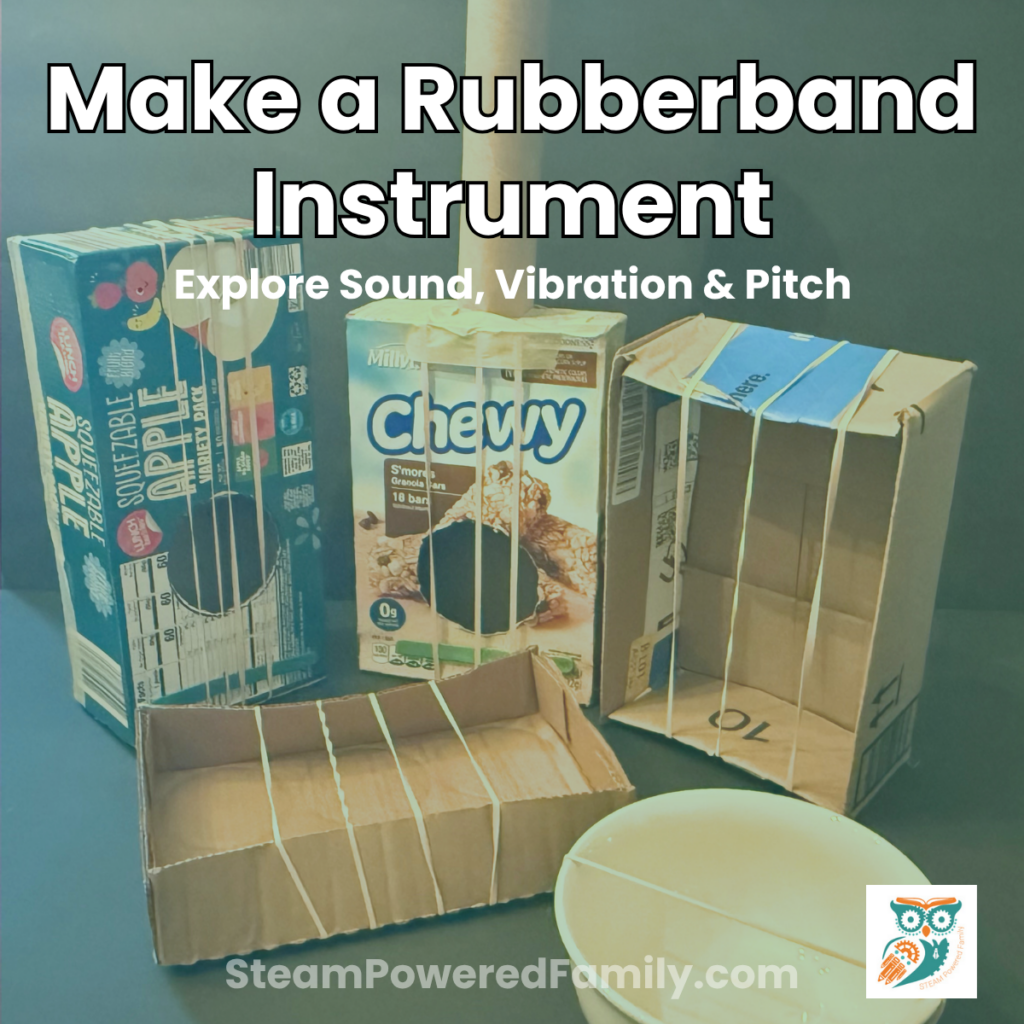
Twang. Thrum. Boing. Those are the sounds you get when you pluck a rubber band stretched between your fingers — and they’re also the starting point for one of our favourite STEM activities. Building a rubber band instrument from everyday household materials gives kids a hands-on way to explore the science of sound that they can actually hear, see, and feel. We’re going to make a great old-fashioned rubber band instrument that kids will definitely remember long after your lesson is over!
What You’ll Learn Making a Rubber Band Instrument
Table of Contents
Disclaimer: This article may contain commission, paid partnerships, or affiliate links. We independently review everything we recommend. When you buy through our links, we may earn a commission from qualifying purchases.
This activity packs a serious amount of science and engineering into one simple build. By the time kids are done, they will:
- Know that sound begins with vibration.
- Understand how vibration affects pitch.
- Have investigated how rubber band length, thickness, and tension affect sound.
- Discovered how a container can amplify and change sound.
- Applied the Engineering Design Process to improve their original design.
- Recorded observations and compared experimental results.
The Science Behind Rubber Band Instruments: How Do Rubber Bands Make Sound?
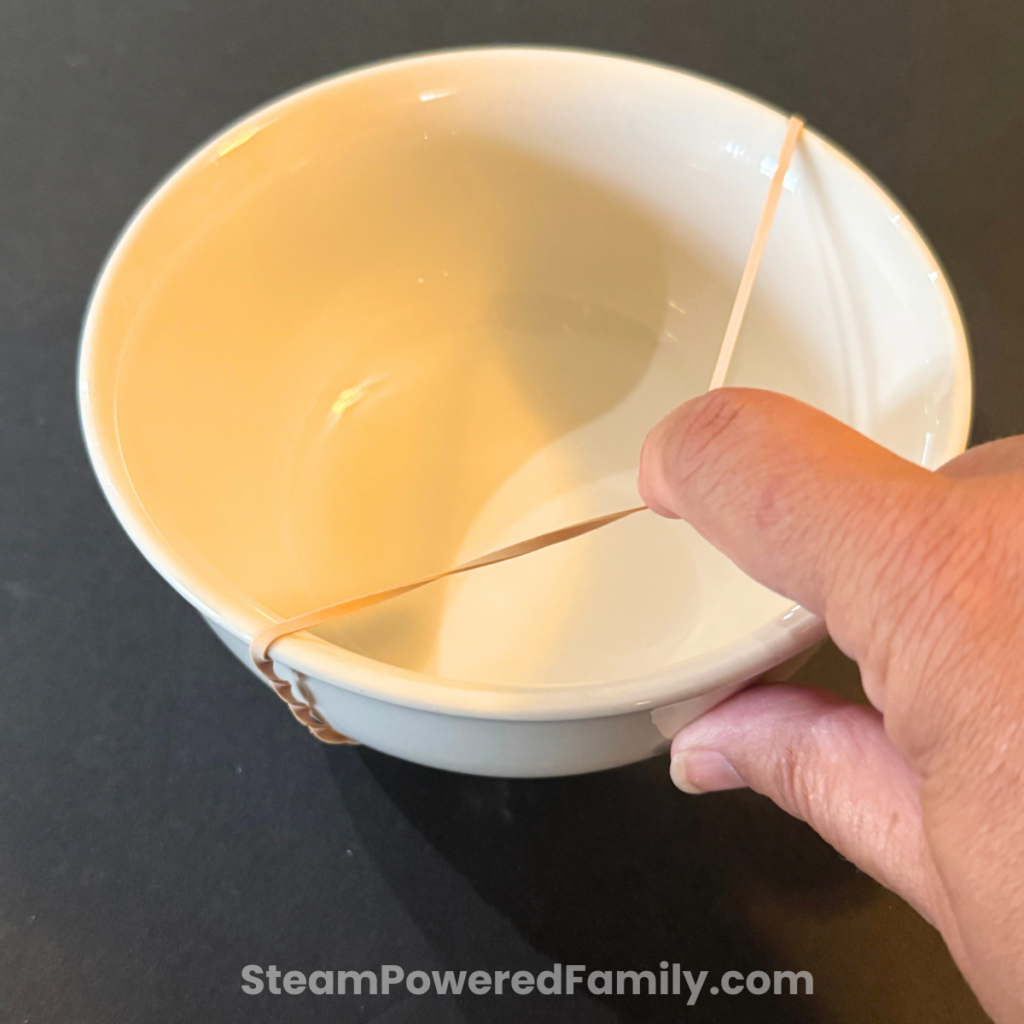
Before you let the kids loose with a pile of rubber bands, it helps to demonstrate this one directly. Stretch a rubber band across a bowl, then pluck it with your finger. Watch what happens.
When you pluck a stretched rubber band, it moves back and forth very quickly. That movement is called a vibration. The vibrating rubber band pushes against the air around it, creating sound waves that travel outward — and eventually reach your ears.
Pitch vs. Volume
Two sound concepts that often trip kids up are pitch and volume, so it’s worth separating them clearly before building.
Pitch describes how high or low a sound is. The tighter a rubber band is stretched across an opening, the faster it vibrates — and the higher the pitch. A loosely stretched rubber band vibrates more slowly and produces a lower pitch.
Volume refers to how loud or quiet a sound is. The force you use to pluck affects the volume — a strong pluck creates a larger vibration and a louder sound, while a gentle pluck produces a softer one.
Fun Fact for the kids: Scientists measure how quickly something vibrates using frequency. Higher frequencies produce higher-pitched sounds, and lower frequencies produce lower-pitched sounds. That’s why a thin guitar string sounds higher than a thick bass string — even when you pluck them with the same force.
What You Need to Build a Rubber Band Instrument
One of the best things about this activity is how little it requires. Chances are you already have most of this at home or in the classroom.
The Basics:
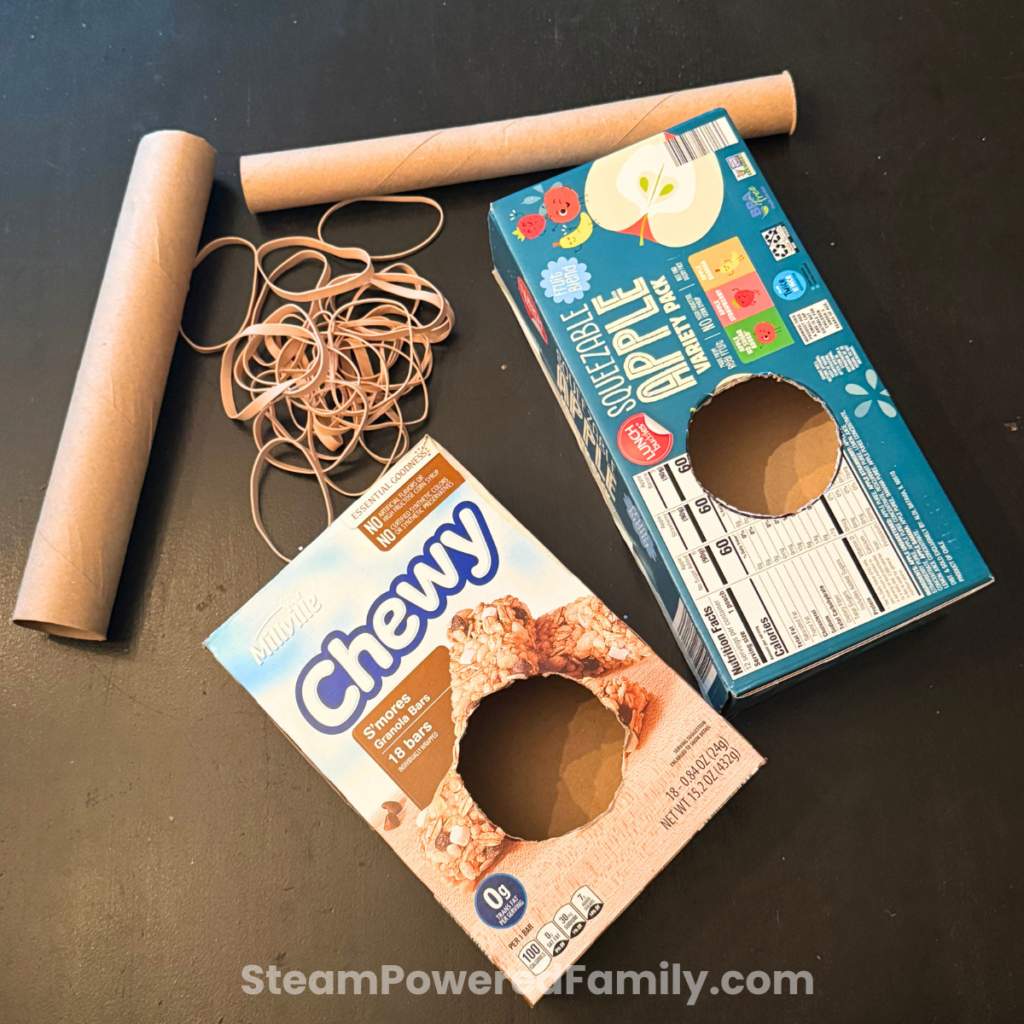
- Rubber bands in different sizes and thicknesses
- Small cardboard box, plastic container, or tissue box
- Pencils, craft sticks, or wooden dowels
- Tape
- Scissors
- Ruler
- Paper and pencil for recording observations
Optional Add-Ons:
- Paper towel tube
- Sound analyzer or frequency app on a classroom device
- Decorating supplies
Safety note: Rubber bands can snap, so remind kids to always stretch them away from their face when putting them onto their instruments, and to never point them toward someone else.
How to Build a Rubber Band Instrument
The goal here is exploration, not perfection. Give kids an array of rubber bands and containers, let them design and build, and then use the investigations below to deepen the learning. Make sure each child includes at least one thin, one medium, and one thick rubber band in their design — you’ll need that variety for the pitch investigation.
Step 1: Choose Your Container
A shoebox, tissue box, cereal box, or sturdy food container all work well. The container will become the body of the instrument.
Step 2: Add an Opening
If your box doesn’t already have an opening, cut one so the rubber bands have space to vibrate freely. Without that open space, the sound will be muffled.
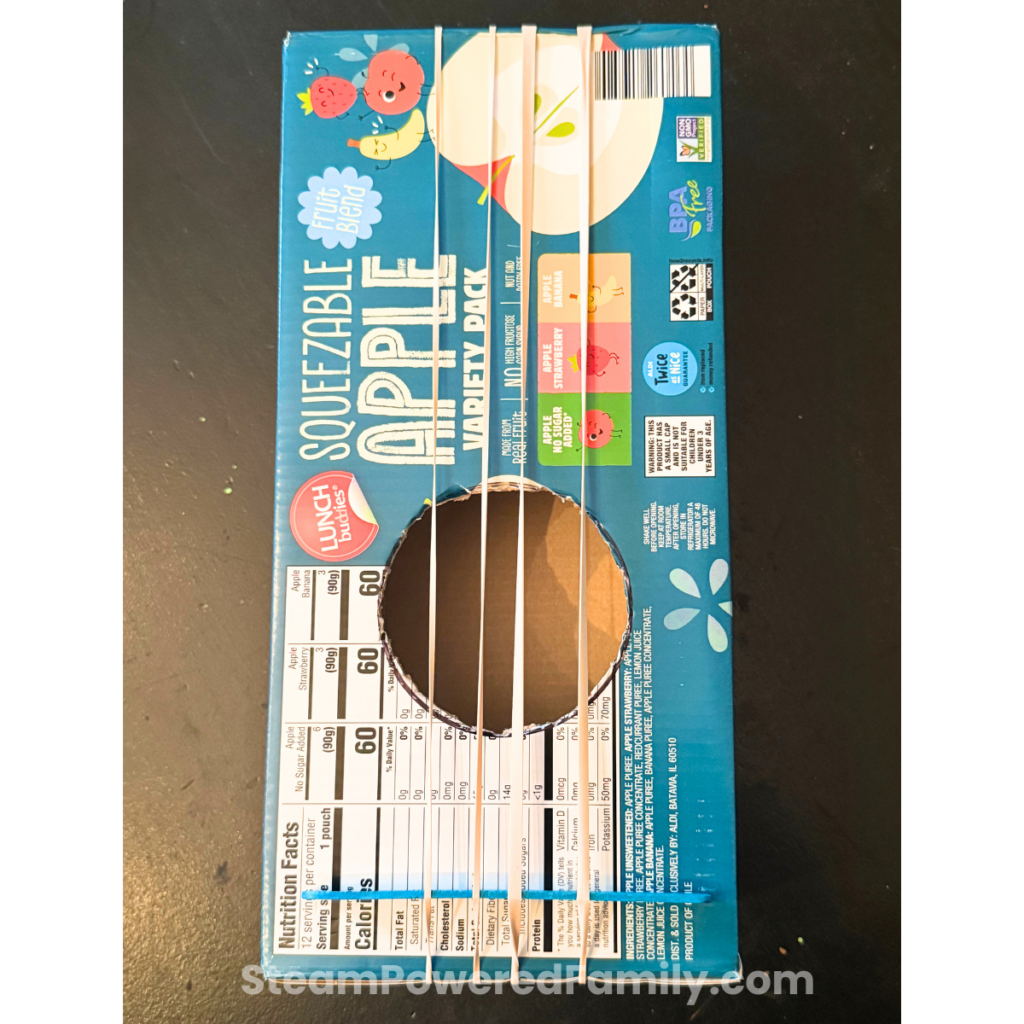
Step 3: Stretch Rubber Bands Around It
Place several rubber bands around the container so they cross the opening or create a playing surface. This is where the actual sound will come from.
Step 4: Add a Bridge
Slide a pencil or craft stick under the rubber bands at one end. On a real guitar, a bridge lifts the strings off the body of the instrument so they can vibrate freely and produce a clearer sound. This homemade version works exactly the same way.
Step 5: Test It Out
Pluck or strum each rubber band and listen. Do they all sound the same? Does one seem to vibrate longer than another? What do the kids notice about the sounds each rubber band makes?
Exploring Pitch: Can You Change the Sound?
Now for some real fun. Have kids adjust the tension on a rubber band by moving the bridge or repositioning the bands.
- Tighten the rubber band → the pitch goes up.
- Loosen the rubber band → the pitch goes down.
Next, have them slide the bridge up and down the instrument and pluck after each move.
- Shorter vibrating length → higher pitch.
- Longer vibrating length → lower pitch.
Exploring Resonance: Does the Container Matter?
Ask the kids: have they ever noticed that string instruments are hollow inside? That’s not a coincidence. The shape and material of the body can have a real effect on the sound it produces.
Set up a series of containers — a plastic food container, a hollow tissue box, an open cardboard box, and even a bowl. Have kids test rubber bands on each one and listen for differences. The container doesn’t create the vibration, but it can amplify and shape the sound. This is called resonance. You can even open a note-identifier app on a classroom device to see how notes change with different container sizes and shapes.
Engineering Challenge: Improve Your Instrument
Now that kids understand how their instruments work, it’s time to level up by applying the Engineering Design Process.
Ask them to reflect on what they observed during testing, then pick one of these design challenges:
- Can you make it louder?
- Can you make it play more notes?
- Can you reach the highest pitch possible?
- Can you reach the lowest pitch possible?
Walk them through each step:
Ask: What do I want my instrument to do? How can I change my original design?
Imagine: What do I really like about the current design? What changes might help?
Create: Build or adjust the instrument based on your plan.
Test: Play it and listen. Did the changes accomplish your goals?
Improve: If needed, make more changes and test again.
After the challenge, bring the group back together for the essential questions: Which variable had the biggest effect — thickness, tension, or length? Which change created the biggest difference in sound? Were you surprised by the results?
If your students are ready for another Engineering Design Process challenge after this one, the rollercoaster engineering challenge puts the same design-test-improve cycle to work in a completely different context.
Cross-Curricular Connections
One of the things that makes this rubber band instrument activity so valuable is how naturally it extends across subjects. Once the building is done, the learning is far from over.
- Art: Initial design and decoration of the instruments.
- Technology and STEM: Engineering, iterating, and testing the instrument designs.
- Music: Playing a simple tune and learning about instrument families and how they produce sound.
- Physical Education: Take it outside and form a full marching band.
- Science: Sound exploration, wave properties, frequency, and resonance investigation.
- ELA: Recording observations, writing up results, and researching the lives of musicians and inventors.
If you want to extend the music science angle even further, our DIY xylophone activity is another hands-on STEM music experiment that pairs beautifully with this one — kids can explore how a completely different type of instrument produces and changes pitch.
Learning about abstract concepts like sound becomes so much more memorable when kids can hold the instrument in their hands, feel the vibration under their fingers, and actually hear the difference their changes make. This rubber band instrument challenge is low-prep, low-cost, and high-engagement. It genuinely hits all the notes. For more open-ended STEM challenges that build critical thinking and problem-solving, our Make It Move STEM challenge is another great place to take that engineering energy next.
Frequently Asked Questions
A rubber band instrument is a simple homemade instrument that creates sound when stretched rubber bands are plucked or strummed. The vibrating rubber bands push against the surrounding air to create sound waves. They’re easy to build from everyday household materials, which makes them a perfect starting point for exploring the physics of sound with kids.
When you pluck a stretched rubber band, it vibrates — moving back and forth rapidly. That vibration pushes against the surrounding air and creates sound waves that travel to your ears. The same basic principle is at work in every stringed instrument, from a guitar to a violin, making this a great hands-on way to introduce kids to real instrument physics.
Pitch changes when you change the tension or the length of the vibrating rubber band. Increasing tension by stretching the rubber band tighter raises the pitch. Shortening the vibrating length by sliding the bridge closer to the center also raises the pitch. Loosening the tension or lengthening the vibrating section does the opposite, producing a lower pitch.
Four main variables affect the sound: rubber band thickness, rubber band length, tension, and the resonance of the container. Thicker rubber bands tend to produce lower sounds, while thinner ones produce higher sounds. A larger, hollow container amplifies sound more than a small or solid one. Exploring these variables is where the real scientific investigation happens.
Kids explore physics concepts — vibration, sound waves, frequency, resonance, and energy transfer — through direct observation and experimentation. They then apply the Engineering Design Process (ask, imagine, create, test, improve) to redesign and refine their instruments. The result is a single activity that authentically combines science investigation with engineering thinking.
Yes — it works well for science centers, makerspaces, music lessons, and STEM challenges. It scales easily from a single student to a full class and doesn’t require any special equipment. The cross-curricular connections (science, music, math, ELA, art, PE) make it a flexible fit for different classroom contexts and standards.
The core materials are rubber bands in different sizes and thicknesses, a container or box (shoebox, tissue box, or food container), and a pencil or craft stick to use as a bridge. Optional add-ons include a ruler, decorating supplies, and a sound analyzer app to measure frequency changes in real time.
This activity covers vibrations, sound waves, frequency, pitch, volume, resonance, and energy transfer. It also introduces the Engineering Design Process, making it a strong fit for physical science standards at the elementary and middle school level. Students practice scientific inquiry skills — predicting, testing, observing, and revising — throughout the whole activity.