Light Up Learning with a Simple Circuit Project
In this simple but effective project, you will learn how to make a simple circuit using a 9-volt battery, LED, and pencil drawing. This project is a fun way to explore and learn about the science of electricity and circuits. Perfect for elementary students and can easily be done during a standard classroom period.
A SIMPLE CIRCUIT PROJECT FOR KIDS
Table of Contents
Disclaimer: This article may contain commission, paid partnerships, or affiliate links. We independently review everything we recommend. When you buy through our links, we may earn a commission from qualifying purchases.
Simple Circuit Project Video
Check out the video tutorial for this project. If you can’t see the video due to your technical settings, find it on the STEAM Powered Family YouTube Channel along with lots of other fun videos for your lessons.
What is a Circuit?
First, let us look at what a circuit is exactly.
A circuit is like a path for electricity to flow. It’s a bit like a road for cars to drive on. In a circuit, tiny particles called electrons move around this path in a loop, creating energy that can power many things.
In this project, the first thing you need is a 9V battery to give these electrons the energy they need. Imagine the battery as a little power source. It’s like a tiny, magical box that can provide electricity. The battery has two ends, one positive and one negative.
Next, you need an LED. An LED is a special light bulb that can light up when electricity flows through it. It’s like a little light that can shine when we give it power. The letters LED stand for the words: Light Emitting Diode.
To draw your circuit, you will use a special kind of pencil called a graphite pencil, which has a material inside it that allows electricity to pass through. Graphite is a conductor of electricity but is not strong enough to power up large electrical things.
When the circuit is complete, electric current flows from the battery’s positive terminal through the graphite pencil and then back to the negative terminal of the battery. The flow of electrons through the pencil drawing creates a closed loop, allowing the current to flow.
For more comprehensive look into this topic, visit Electric Circuits for Kids
Safety Note
Remember, it’s important to be safe when working with electricity. Always ask an adult for help, especially when dealing with batteries and other electrical components.
How to Make a Simple Electric Circuit
Materials & Tools
This simple circuit is brilliant because all you need are some basic circuit elements: pencils, paper, LED and a battery!
Scissors
6B or 8B graphite pencil
9 Volt battery
5mm LEDs
Long-nose pliers
Cello tape (clear tape)
Plus you will need the printables to go with this project. They are available for all STEAM Powered Family mailing list members. Simply enter your email to unlock the printable.
Directions
Print out the worksheet you just accessed through the above form.
Using the graphite pencil (6B or 8B) and pressing hard, color between the outlines of all the objects in the worksheet.
Tips for Success
Press hard and evenly, and do not leave white spaces. This is the conductive path that the electricity will move along. You should not see any parts of the page showing through, as it will cause your circuit not to work. Do not let the side of your hand rub against the pencil, as it will smudge all over the page. Keep turning the page as you color in.
Bend the legs of each LED using the long-nose pliers, or if you don’t have pliers you can do this with your fingers if you are careful. Ensure that both legs are bent in the same place, as you may want the LED to stand upright.
Now that you are done coloring all the objects and getting the LEDs ready, let the fun begin!
Testing First!
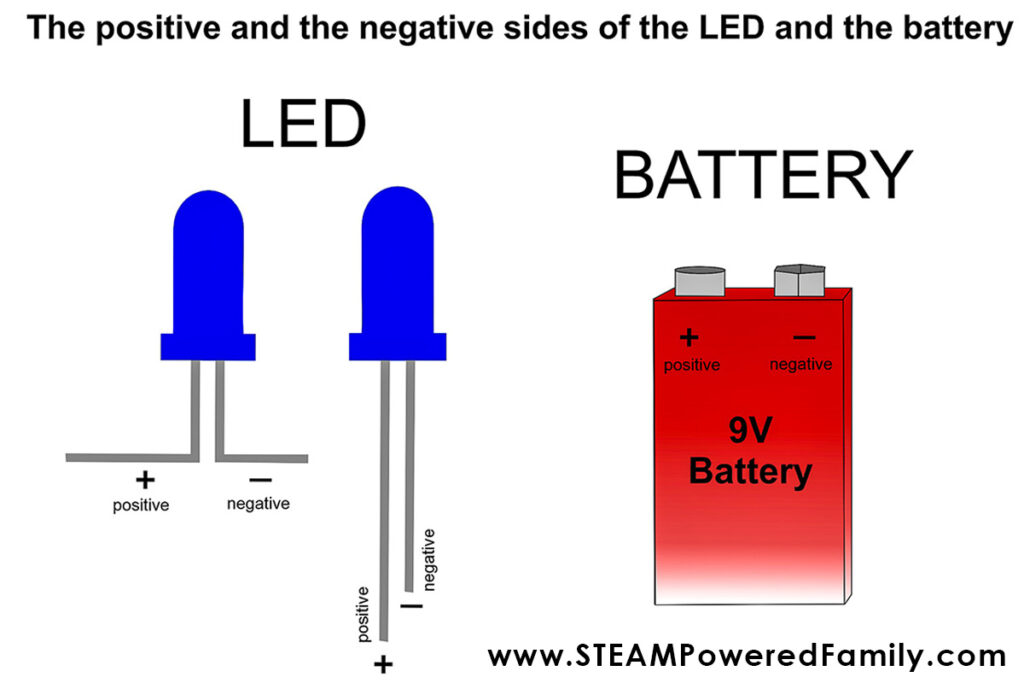
First we are going to test the circuit and make sure everything works. Place the LED where indicated on the drawing. Make sure the longer leg is on positive. Hold that in place, now place the contacts of the battery as indicated. Again make sure the positive side is lined up with the positive side. Did the LED light up? Perfect, now we can finish the circuit.
Completing the Circuit
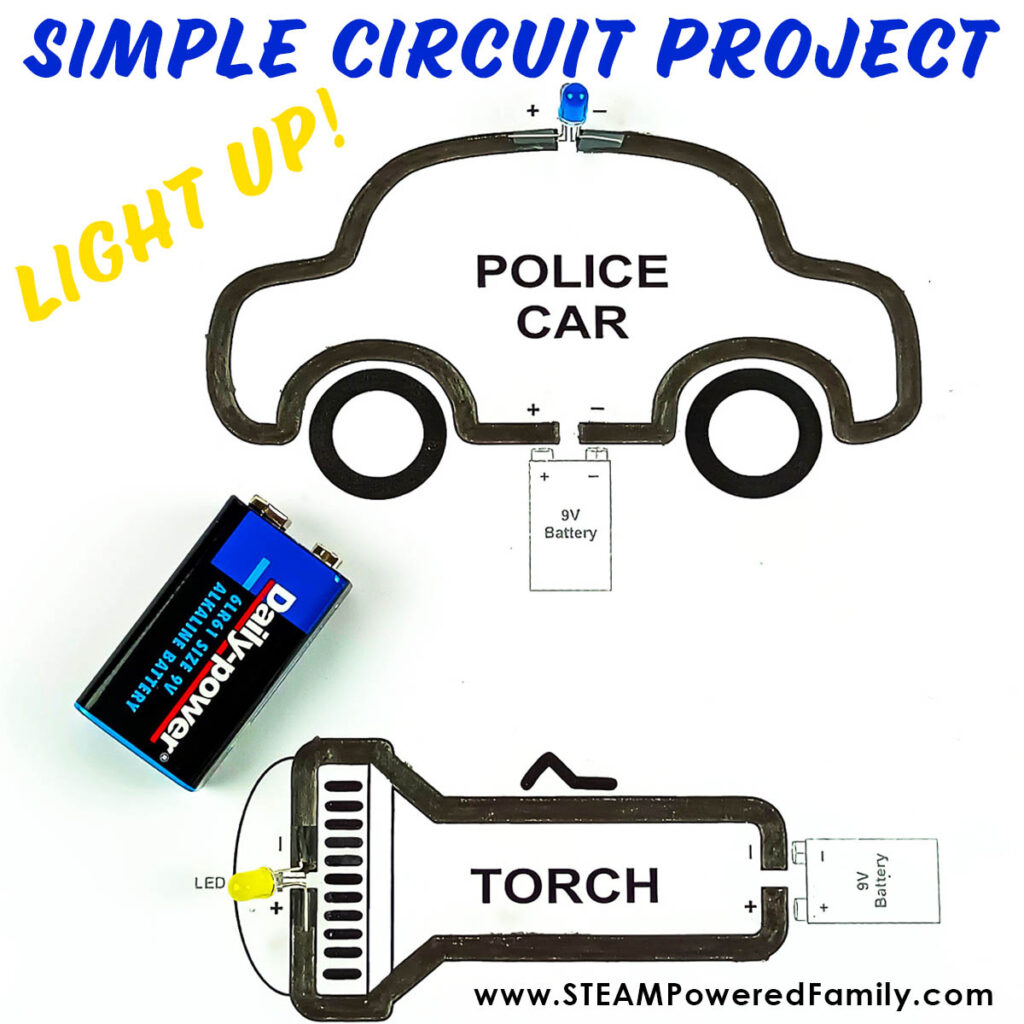
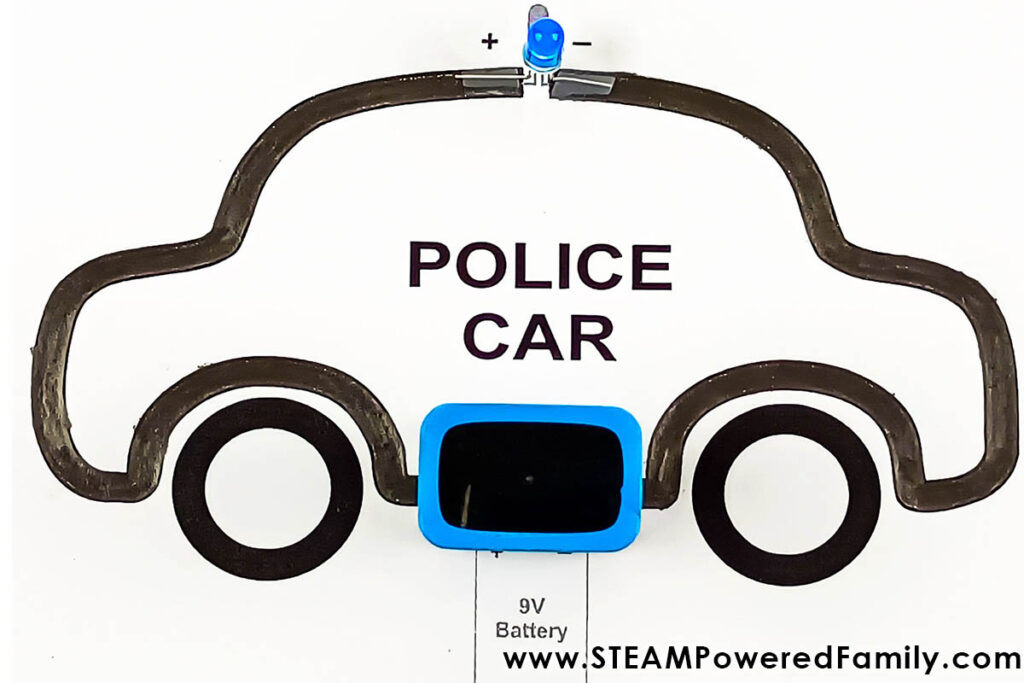
Starting with the police car, stick the LED in place with some Cello tape, making sure that the longer leg, the positive, is on the plus sign, and the shorter leg, the negative, is on the minus sign.
Now place the contacts of the 9-volt battery onto the drawing where indicated. Make sure the positive terminal of the battery and negative terminal are placed correctly. Once you have it right, watch the LED light up!
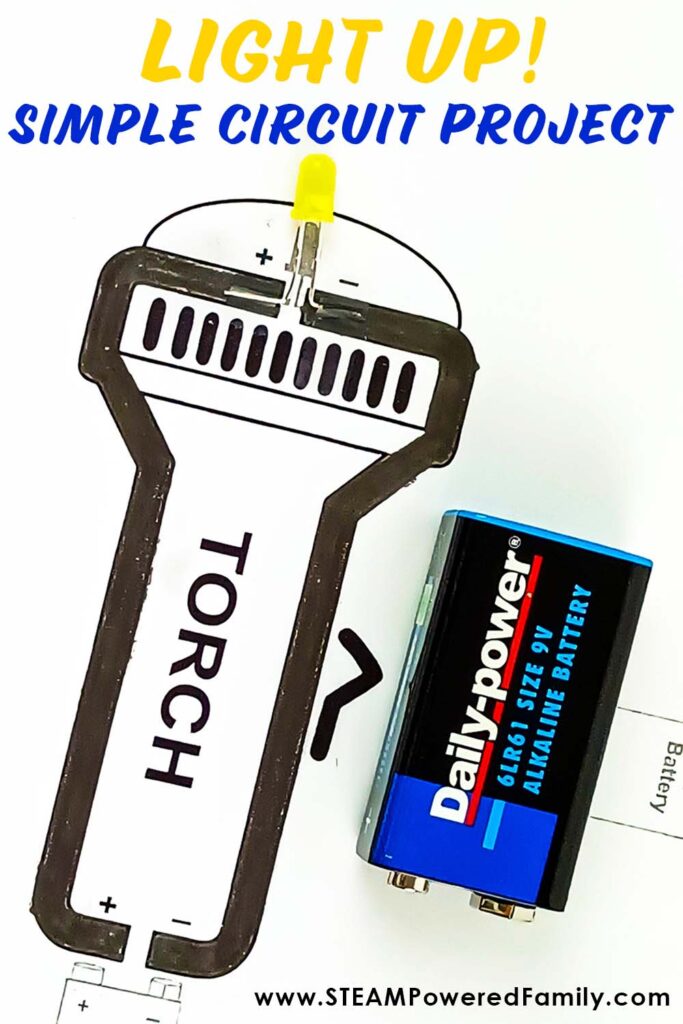
Do the same thing with drawing of the torch or flashlight.
Let there be light!

Troubleshooting
Don’t give up if the LED doesn’t light up the first time! You can try the following tricks to get it working:
Check that both legs are touching the pencil drawing. You may need to push down on the legs with your fingers for it to light up.
Double-check that the battery and LED are both placed properly with the positive and negative sides properly aligned and connected.
Try making the pencil lines thicker and darker to give the electricity from the battery more room to flow through.
Extension Ideas
Did you notice that the length of the lines in all the drawings is different? What difference did this make to the LED on each drawing?
Do you think it would be possible to use more than one LED? How would you redesign the circuit to work with 2?
Try your hand at a different type of circuit project. Salt Circuits and Squishy Circuits are both fantastic circuit building projects for elementary students.
Want something even more challenging? Why not try building a battery out of food? You can use Lemons, Pumpkins and even Potatoes to build a battery that will light an LED.
Use the blank square on the worksheet’s second page to design your circuit. Be creative!
STEM Lessons Learned from Circuit Building
Creating a simple circuit is a great way to introduce kids to STEM (Science, Technology, Engineering, and Mathematics) concepts. Here are some important STEM concepts and skills used in creating this simple circuit for kids:
Electricity and Conductivity
Children will learn about the basics of electricity, such as understanding that electricity flows through conductive materials.
Components
Introduce children to the components used in a circuit, such as batteries and light bulbs. This project teaches them how these components connect to form a complete circuit.
Circuit Diagrams
Children learn which symbols represent circuit components and their connections. Children can draw their own simple circuit diagrams to plan and understand their circuit designs. Plus they learn about the positive and negative terminals of batteries and the importance of placing them properly to complete a circuit.
Problem-Solving
This project encourages kids to think critically and solve circuit-related problems. For example, they may need to troubleshoot a circuit that isn’t working by identifying faulty connections or components.
Hands-on Skills
Developing practical skills is crucial. Children should learn to safely handle and connect circuit components and make proper connections using pliers.
Creativity and Design
Children are encouraged to design their circuits creatively. They can experiment with different component arrangements and explore how circuit changes affect their behaviour.
Observations
Children will learn to observe the effects of different properties in their circuits. For example, the circuit with shorter lines will allow the LED to glow brighter than the drawings with longer lines.
Safety Awareness
Children will learn about electrical safety. Kids should gain a solid foundation in understanding circuits and electrical systems by focusing on these concepts and skills. It’s a great way to foster their interest in STEM and encourage further future exploration of more complex concepts.
Learning how to build this simple circuit project provides children with a range of valuable skills and knowledge that can benefit them academically, creatively, and professionally. It cultivates their curiosity, critical thinking, problem-solving abilities, and prepares them for a technology-driven world. Plus it is perfect for the classroom or summer camp as an easy, fast circuit building project. Have a blast lighting up your students’ world with this simple circuit project!