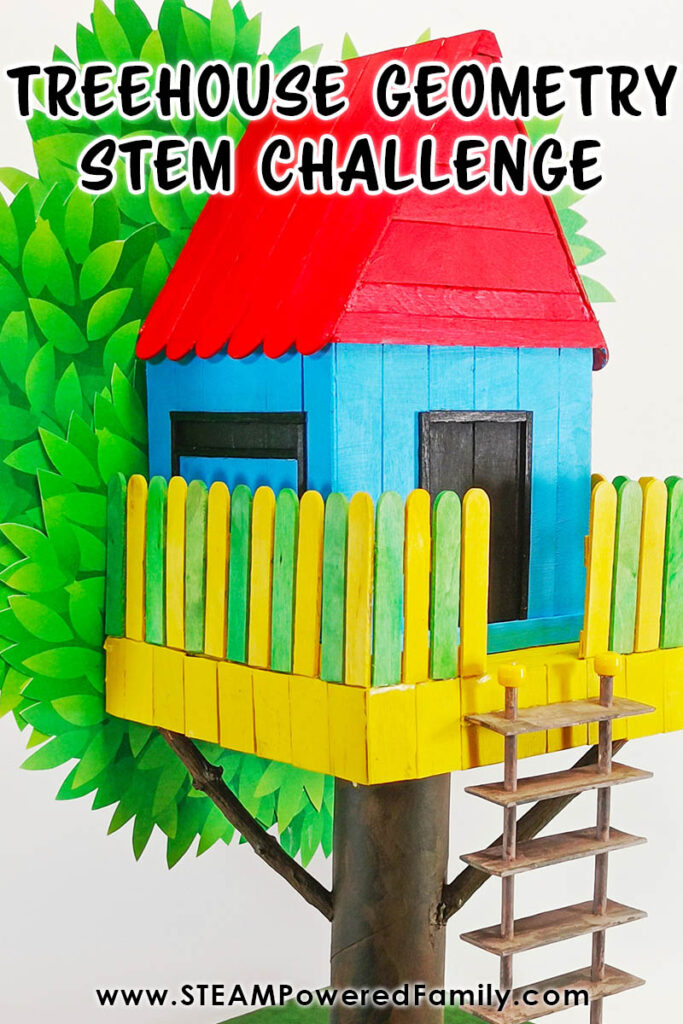
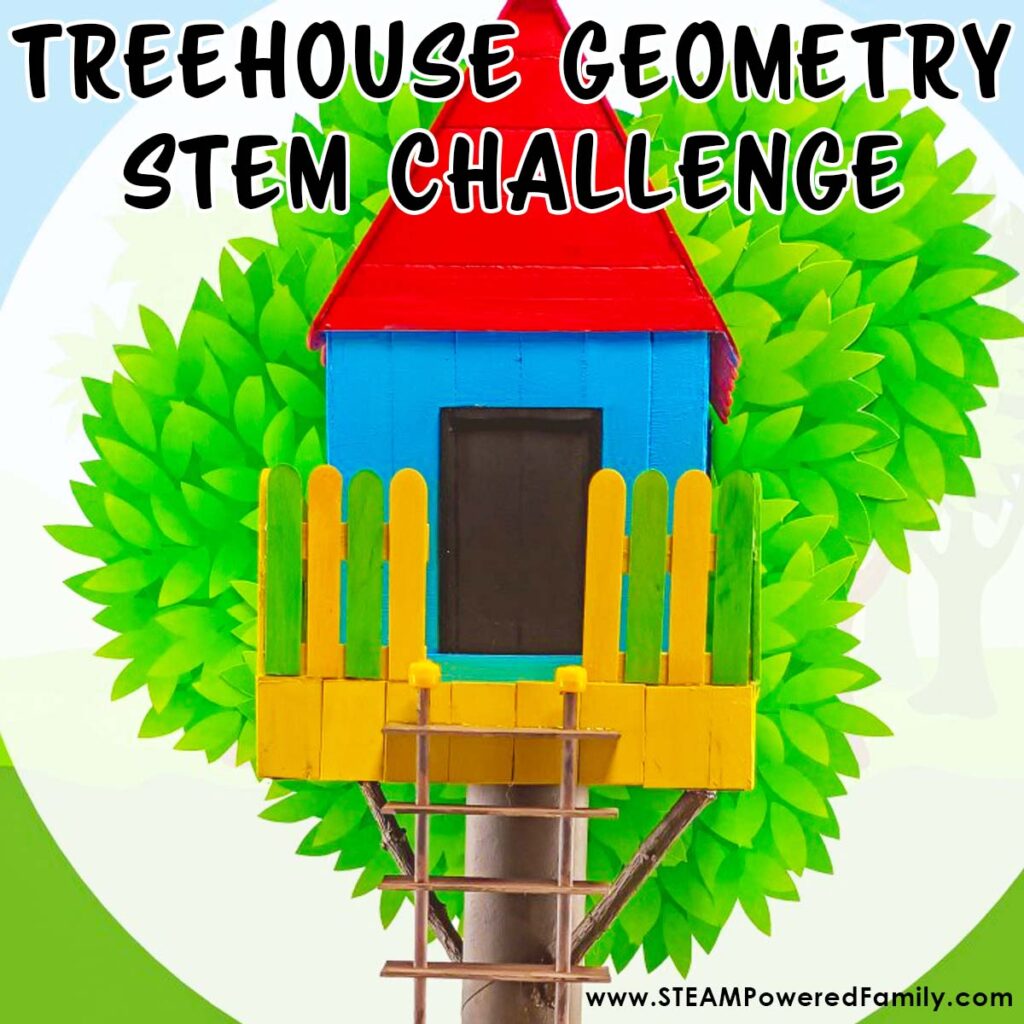
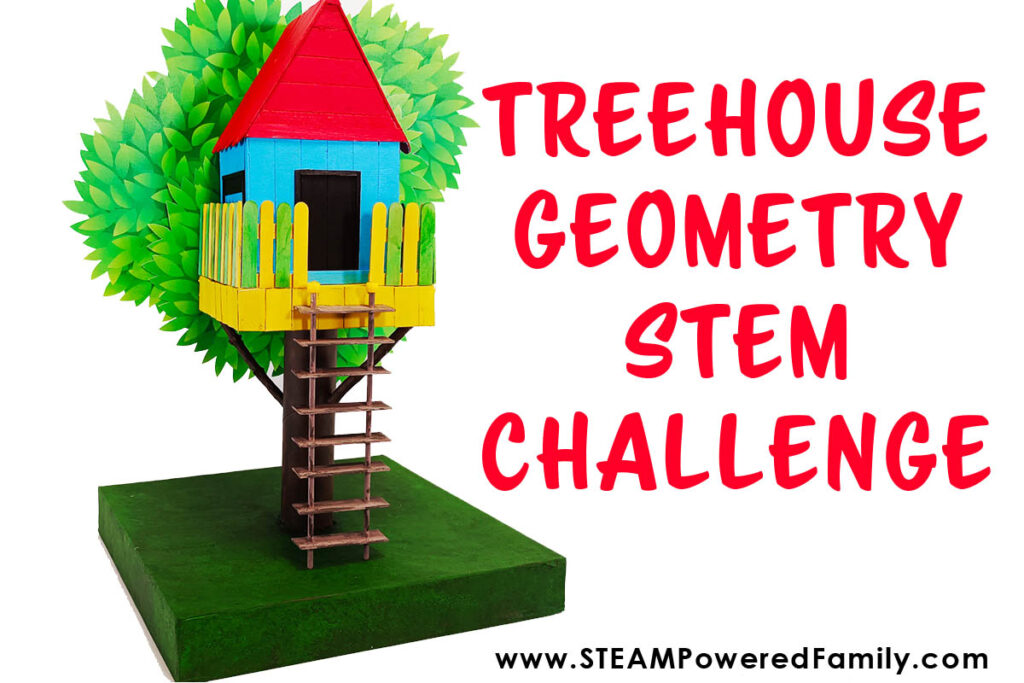
Geometry Challenge – Treehouse STEM Activity
You have decided that the large tree in your garden would be the perfect spot for a dream treehouse but where do you start with making this dream a reality? In this fun STEM engineering and math project, you will design and build a model of your dream treehouse using 3D shapes. This will put your math, engineering, and artistic skills to the test.
GEOMETRY STEM PROJECT
Design a Treehouse using 3D shapes
Table of Contents
Disclaimer: This article may contain commission, paid partnerships, or affiliate links. We independently review everything we recommend. When you buy through our links, we may earn a commission from qualifying purchases.
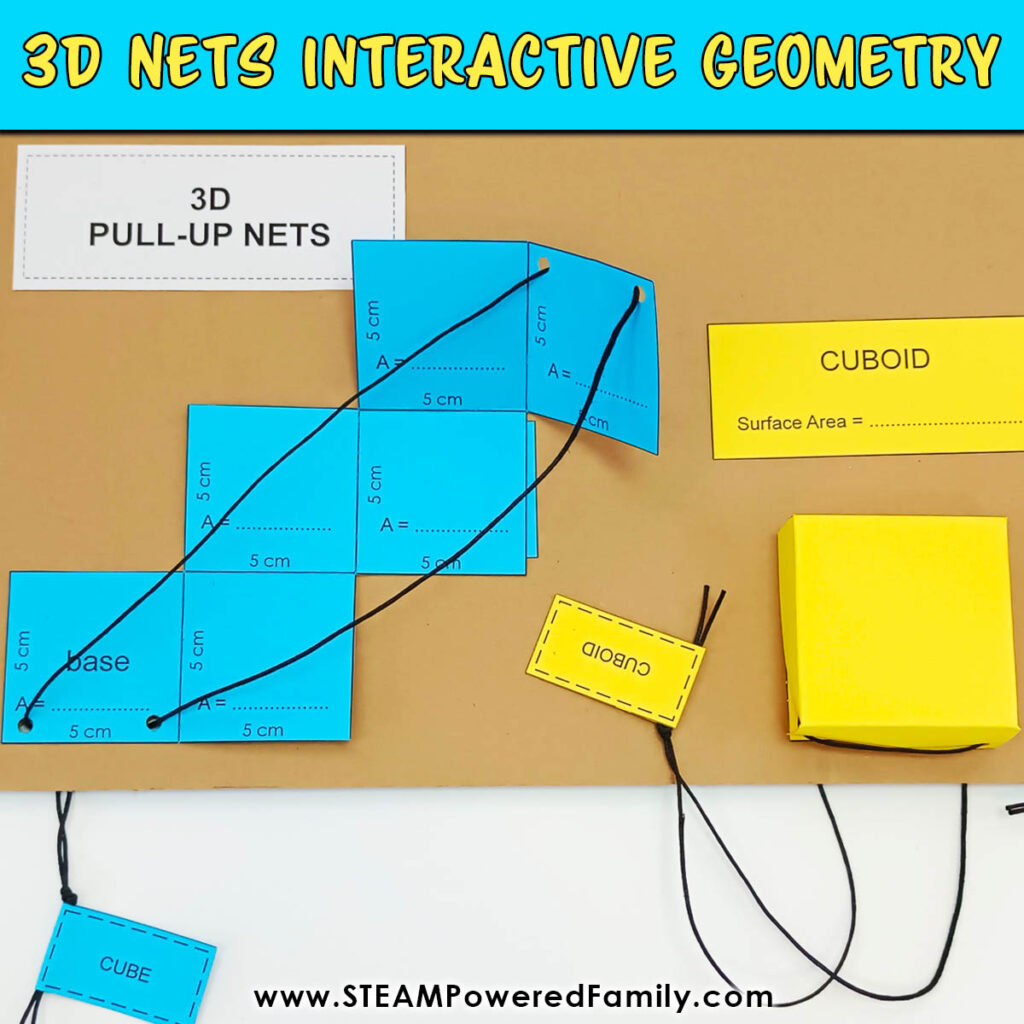
Recently we learned about Geometry and how shapes can have dimensions with a special Pull Up Nets STEM Project. It was a lot of fun and was a fantastic interactive way to discover 3D shapes. Now it is time to flex those math muscles and put our knowledge of 3D shapes to the test by building a treehouse.
The Challenge
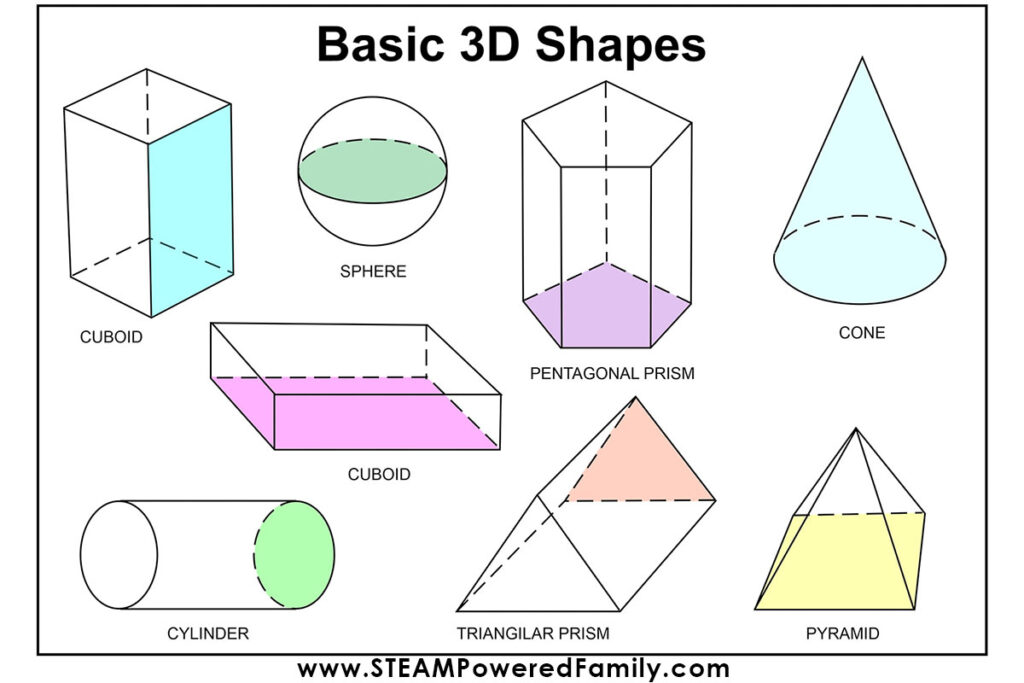
It’s time to use your engineering and creative skills to design and build a model of your dream treehouse using only four 3D shapes – a cube, a cuboid, a triangular prism, and a cylinder. These are just four basic construction shapes (see images below to refresh your memory on what these shapes look like). You may only use these four shapes, but you may use more than one of each shape if you choose, but first, you must make them.
Teacher note: Feel free to adjust this challenge to suit the ability of your students or your specific lesson goals. You can use different 3D shapes, or set other rules around the build to make this the perfect classroom STEM challenge.
First, get some paper and do a sketch of your dream treehouse, then gather all the materials, tools, and templates you will need from the list below and let’s get building!
Treehouse Geometry STEM Challenge Video
Watch the video of how we built our treehouse. If you can’t see the video you can also find this video on the STEAM Powered Family YouTube Channel.
DESIGN AND BUILD A TREEHOUSE WITH 3D SHAPES
Things you will need to build the structure:
Single-wall cardboard
An empty kitchen towel tube (this is your 3D cylinder!)
Scissors
Ruler
Large hobby knife
Small hobby knife
Pencil
Glue-gun
A few small twigs
Gummed paper tape
You will also need the printable template which is available to STEAM Powered Family subscribers. Simply enter your email in this form to unlock the printable.
Supplies to decorate the Treehouse:
Acrylic paint and paintbrush
An assortment of wooden lollipop sticks, wooden skewers, pony beads and anything else you would like to use to make your treehouse amazing.
GEOMETRY TREEHOUSE INSTRUCTIONS
Cut all the pieces for the 3D shapes you will need, using the templates provided.
Glue all the individual pieces together, taking careful note of the orientation of some of the pieces.
PRO TIP! Always place the pieces in place before gluing them down as two of the sides of most of the shapes are slightly shorter due to the thickness of the cardboard.
You may need to trim some of the sides if necessary.
Once all your pieces are glued together, you need to mark the centre of both the Cuboid Base of the Project and the Cuboid Floor of the Treehouse, to trace and make the holes for the cylinder (kitchen towel tube) to fit into.
Cut the cylinder to a length of 20cm (8 inches).
Place the cylinder in the centre of each base and trace the end of the cylinder onto the base.
Use the smaller hobby knife to cut out the circle.
PRO TIP! You may need an adult to help as the knife is very sharp.
At this point, you need to decide whether you would like to cover all the edges with gummed paper tape. You do not have to do this, but it makes the project much neater in the end.
Time To Assemble
Now it’s time to glue all the pieces together!
Start by gluing the cylinder (which will become the tree of the project) into the large cuboid base.
Next, glue the cuboid floor onto the other end of the cylinder.
Now you can glue all the pieces of the actual treehouse into place. I chose to make a single story, so I had the cube for the body of the house and a roof. You might have chosen to make a double story, so you should have other pieces to consider.
To make the tree more realistic, stick some twigs to act as branches of the tree. The branches help to hold the treehouse in place and make it stable.
DECORATING YOUR TREEHOUSE
This is where your creativity comes in and the vision of your dream treehouse comes alive!
You may just copy what I have done or get creative.
Look at the pictures of my treehouse to see how I made the ladder and how I covered the house with lollipop sicks. You may want a rope ladder. You might just want to paint your house and not use the sticks. Remember this is your dream treehouse, so let your imagination run wild and just have fun!
PRO TIP! I have included, in the templates, the leaves of the tree, to make the model of the treehouse more realistic. Just cut out a few of them and glue them to the back of the house.
GEOMETRY LESSONS
Now we have built our treehouse let’s dig into the geometry lesson a little more so we can explore how truly amazing these treehouses are!
WHAT ARE SOME OTHER PROPERTIES OF 3D SHAPES?
3D shapes have faces or sides, edges and vertices or corners.
A face is a flat or curved surface on a 3D shape. A cube has six faces, a cylinder has three and a sphere has just one.
An edge is where two faces meet. A cube has 12 edges, a cylinder has two and a sphere has none.
A vertex is a corner where edges meet. The plural is vertices. A cube has eight vertices, a cone has one vertex, and a sphere has none.
GEOMETRY LESSON EXTENSION
Now that you have completed your amazing tree house, here are fun geometry activities for you to explore:
Using the Pull-up nets you made in our previous lesson to work out the area of all the faces and the surface area of each of the 3d shapes you made.
Make a list of real-life examples of the 3D shapes you have used in this project.
Calculate the number of faces, edges, and vertices of the shapes you used.
Calculate the area of your treehouse. Here are some tips for doing this math:
The area of one face of a cube = Length X Height. (Example: if the length is 5cm and the height is 5cm, the area equals 5 X 5 = 25).
The surface area of a 3D shape = The sum of all the areas of all the faces. (Example: A cube has 6 faces. The area of each face = 25. The surface area = 6 X 25 = 150)