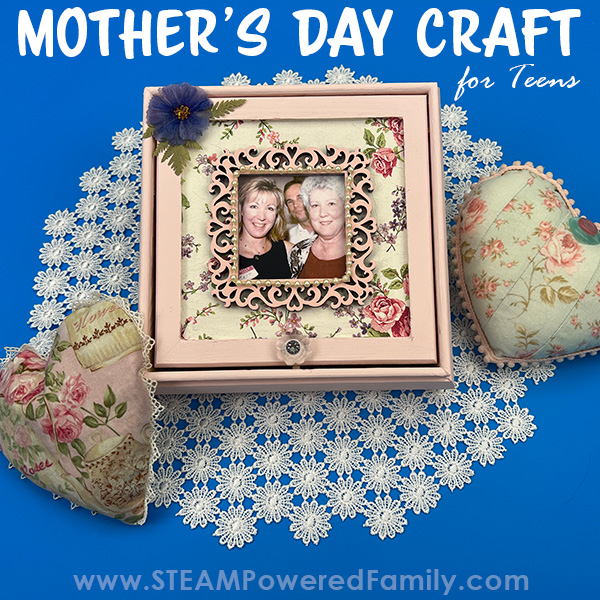
Mother’s Day Craft For Teens
Celebrate the wonderful mother she is with this one-of-a-kind, jewelry box craft! This homemade Mother’s Day gift is personalized by including a picture of you and your mom (or a beloved aunt or grandmother or whom ever that special person in your life that you want to celebrate!). This project is perfect for teens that want to make a special keepsake for someone they love.
Mother’s Day Craft for Teens
Disclaimer: This article may contain commission or affiliate links. As an Amazon Influencer I earn from qualifying purchases.
Not seeing our videos? Turn off any adblockers to ensure our video feed can be seen. Or visit our YouTube channel to see if the video has been uploaded there. We are slowly uploading our archives. Thanks!
In this DIY Mother’s Day project, older kids and teens learn how to create a stunning jewelry box for Mother’s Day, that includes a very special touch, a photo to make this one home decor item mom will cherish forever.
Although this project can be done by younger kids, they will require more adult assistance and make find some of the steps very difficult. Teens should be able to do this entire project with little to no help.
Starting with a pre-made wooden jewelry box, kids will paint the box, before applying a special treatment that provides a gorgeous finish with almost no work. You will love this!
Next this Mother’s Day craft is personalized to make it as special as your mother with decorative elements, such as silk floral stickers, miniature strings of pearls, and a framed picture of you and your mother.
Your jewelry box will make a very special keepsake piece where your mom can keep her treasured necklaces and other jewelry and think of you every single day.
This handmade Mother’s Day gift will surely show how much you care!
Supplies
Pro Tip! You can find a lot of these items at your local dollar store making this a very budget friendly DIY project.
DIY Jewelry Box (there are lots of base designs, pick one you love!)
Wooden picture frame (about 3 x 3” or adjusted to fit the size of your jewelry box)
Floral Napkins (or pick the design that you prefer!)
Pink Spray paint (or the color of your choice)
Pink Chalk paint (or in the color of your choice)
White Chalk paint
Aleene’s Tacky Glue – quick-dry
Decorative Lace ribbon
Decorative miniature pearls on a spool
Mod Podge (regular)
DecoArt Decoupage NAPKIN Glue 8 oz
Decorative Flower sticker (silk-like)
Scissors
Paint brushes for painting box and lid
Paint brush (flexible brush) for applying Napkin Mod Podge
Watch the Mother’s Day Craft Video Tutorial
Watch the video tutorial to see how we created our gorgeous jewelry box for mom. If you can’t see the video, please turn off your adblockers as they also block our video feed.
Directions
This Mother’s Day craft should be done with adult supervision. You can easily adjust this project to suit a variety of jewelry box base designs. Simply adjust the steps as needed. You can also change the colors and napkin designs to make sure your box is perfect for your mom!
Protect your workspace before painting.
Start by applying the pink paint to exterior of box leaving the center square (if your box has one) unpainted. Allow to dry.
Next, if your jewelry box has a square cut out on the lid, apply the white chalk paint to the center square. Let it dry completely.
If your jewelry box does not have the square cut out, you can simply paint the whole box one colour. Just be aware that the color of the paint will show through the napkin design finish.
Preparing the Napkin Decoupage
Carefully separate the layers of the napkin so that only the decorative top layer remains. This will make it a 1 ply napkin and very thin. Be careful with it.
Measure the center of the painted square with a ruler. Add an additional ½ inch to each measurement to allow for a small overlap of the napkin. Cut the napkin to match these measurements.
Place the cut square floral napkin on center square. Gently apply NAPKIN decoupage to the napkin, starting at the center of the napkin and brushing outwards towards the edges.
Pro Tip: NAPKIN Decoupage is easier to work with when decoupaging napkins. It is much more effective at helping to avoid tears. It goes on smoothly and napkins won’t tear unless rubbed over too much.
Allow it to dry completely.
Carefully use a razor blade to trim off excess napkin and make a nice clean edge.
Adding the Photo
Spray paint the laser-cut wood picture frame to ensure all the “nooks and crannies” are painted. Let it dry completely.
Using clear tape or a thin line of liquid glue, attach a picture to the back of the picture frame. Let it dry.
Decorate
Now it is time to decorate! Use tacky glue to apply flowers and leaves to the box. Don’t want flowers and leaves? Use your creativity to add design elements that are unique to you.
Apply a thin line of tacky glue to to the topside of the picture frame, outlining the enclosed picture and attach the beaded ribbon.
Apply a small dot of tacky glue to a decorative knob or button and attach it to the box lid as shown.
If desired, apply tacky glue to a decorative ribbon and use it to make a decorative trim to outside of box.
The exterior of the box is complete!
Inside the Jewelry Box
Decorating the interior of the box is completely optional.
If desired you can paint the interior of the box.
You can also measure each compartment, then cut some scrapbooking paper or other decorative paper and glue it into the compartments to line them. You can also use fabric for this step, if you want a softer, non-slip base for your mom’s jewelry.
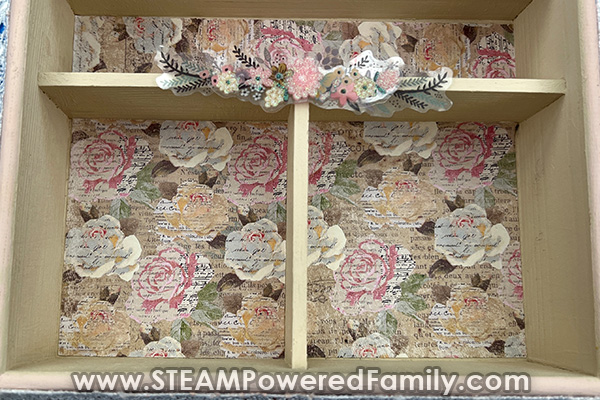
Add a special finishing touch to your jewelry box with some homemade ribbon flowers. You can make these using ribbon in a variety of colours and textures to compliment your design.

Gifting Your Creation
Whether you are gifting your creation to mom or someone else special in your life, you can add little touches if you wish. Maybe add a nice necklace you make yourself with beads. Or you can fill it with some chocolates. Make sure you add a card!
Have fun creating and sharing the love with this Mother’s Day craft!

More Mother’s Day Craft Ideas