How To Make A Solar Oven
Summer is finally here! It is finally the perfect time for picnics, camping, water fun and for harnessing the power of that beautiful sunshine. You read that right! We are going to use the sunshine to learn some science and have some snacks! I have a really simple project that is sure to wow the kids! You can easily create a solar oven with only a few simple items, a sunny day, and some snack-building ingredients. Solar ovens are a fantastic Summer STEM project!
SOLAR OVEN SUMMER STEM PROJECT
Disclaimer: This article may contain commission or affiliate links. As an Amazon Influencer I earn from qualifying purchases.
Not seeing our videos? Turn off any adblockers to ensure our video feed can be seen. Or visit our YouTube channel to see if the video has been uploaded there. We are slowly uploading our archives. Thanks!
How Solar Ovens Work
Let’s start with the learning and go over the science behind a solar oven. Ask your kids – DO you think that the sun can cook a snack? YES! We are going to use some reflection and retention of the sun! A solar oven uses light from the sun to cook food. It works by reflecting and trapping the sun’s heat – or thermal energy to cook something. We are going to use reflective material to bounce the sun’s rays in the direction we want and a black liner under the food to absorb and distribute that heat to cook our snacks! So the light energy that is reflected into the box is converted to heat energy needed to cook!
Looking for more details on solar ovens? NASA has an excellent resource.
How to Build a Solar Oven
Materials
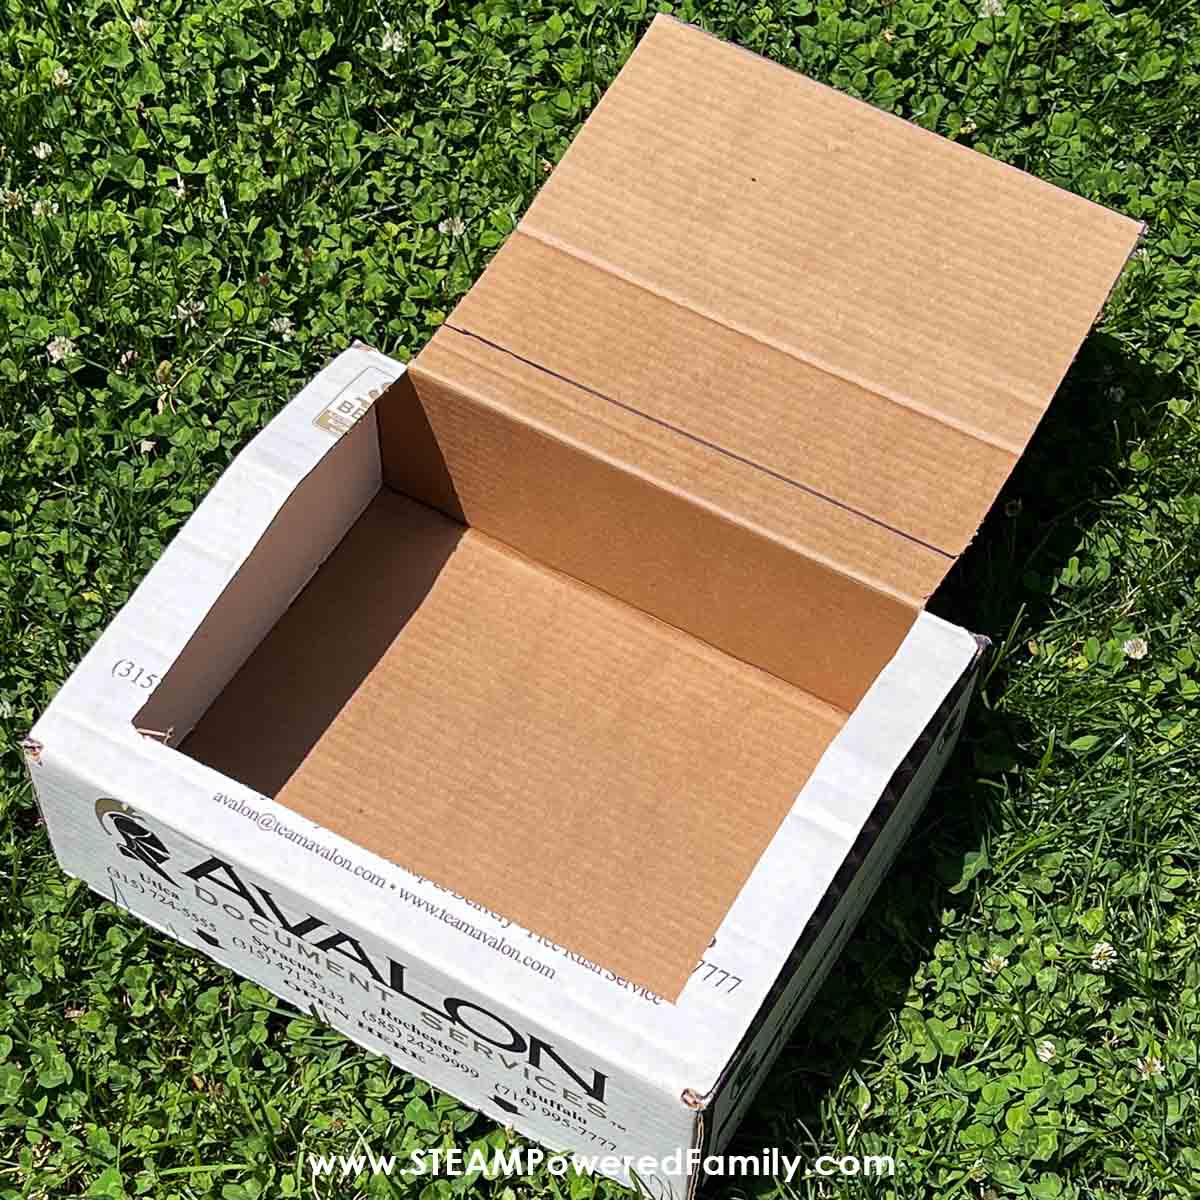
A Box – For this simple project you will need a cardboard box with a lid. It could be a lid that flips up or one that just sits in place. Look for a pizza box or a shoe box. I am using a paper box we had at school.
In addition to the box you will also need:
Aluminum Foil
Clear Plastic Wrap like Saran Wrap
Scissors
Tape
A piece of black construction paper or fabric
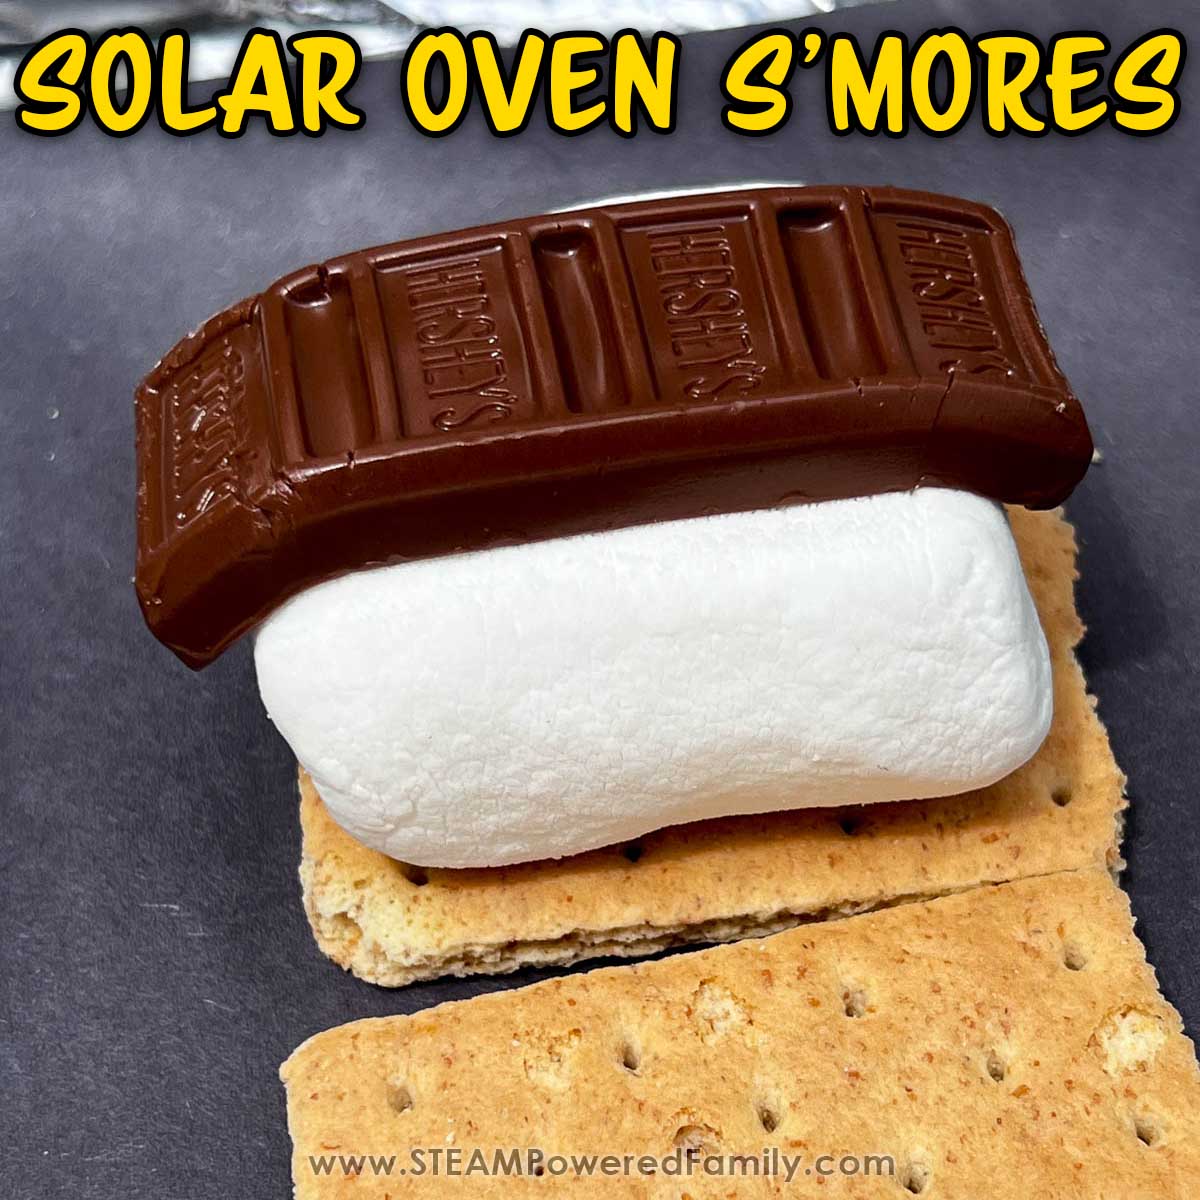
Don’t forget you will also need the food to prepare in your oven! For s’mores you will need graham crackers, chocolate plus marshmallows.
Pro Tip! Instead of graham crackers, you can use cookies with a chocolate topping already on them like Celebration cookies. It is so easy and so good!
Directions
This may seem obvious, but the most important thing you will need for your solar oven to work is a sunny day. Once you have the perfect day it is time to start cooking.
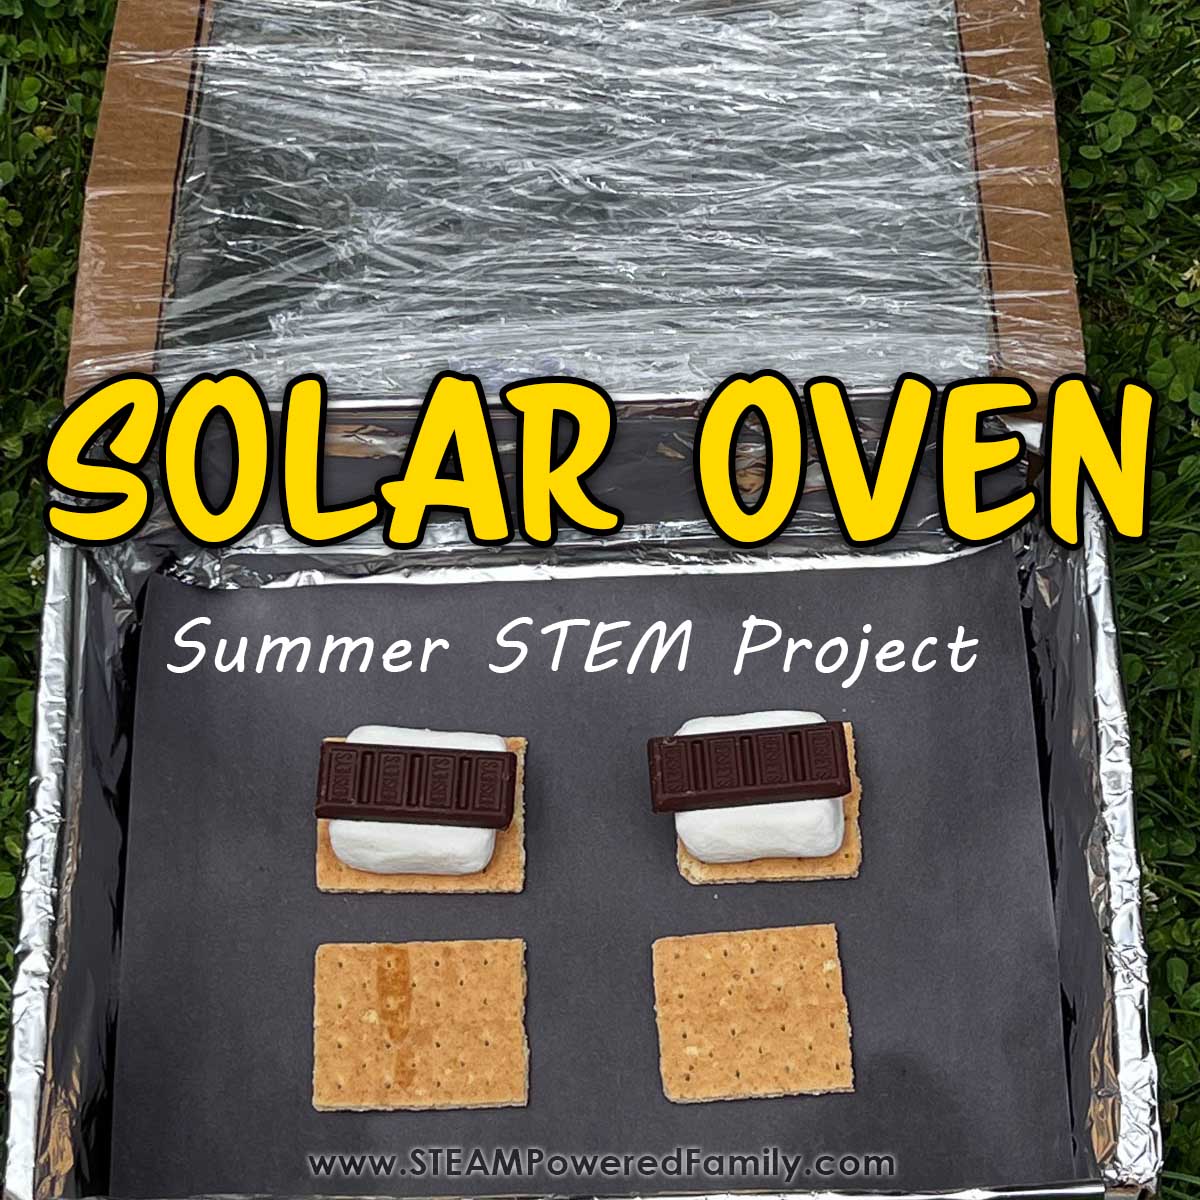
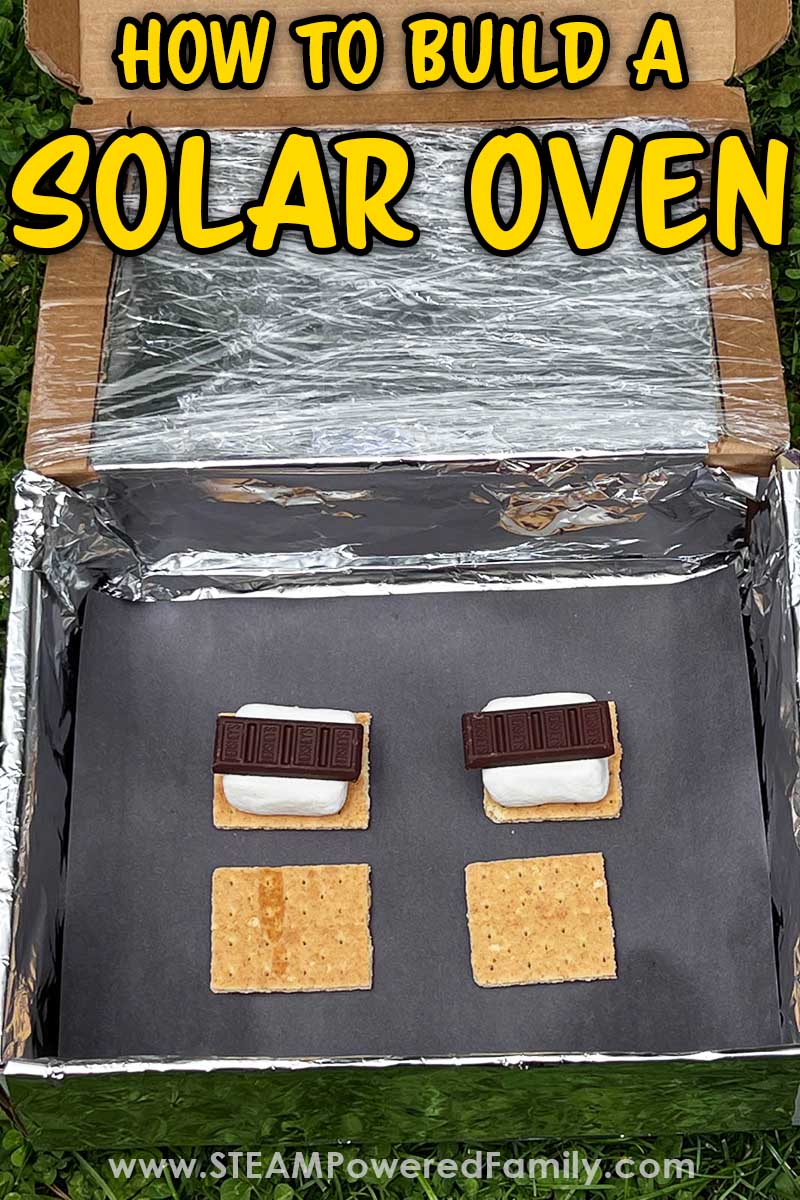
STEP 1: Cut a flip-up section from the top of the box. Ensure you leave a frame around the outside. The frame should be about the width of a ruler and around 3 sides- the front and the two sides. The back of the frame is not cut so you can fold it up. This is the part that will be positioned to reflect the sun. Having it be able to move back and forth will allow you to adjust as needed for maximum reflection.
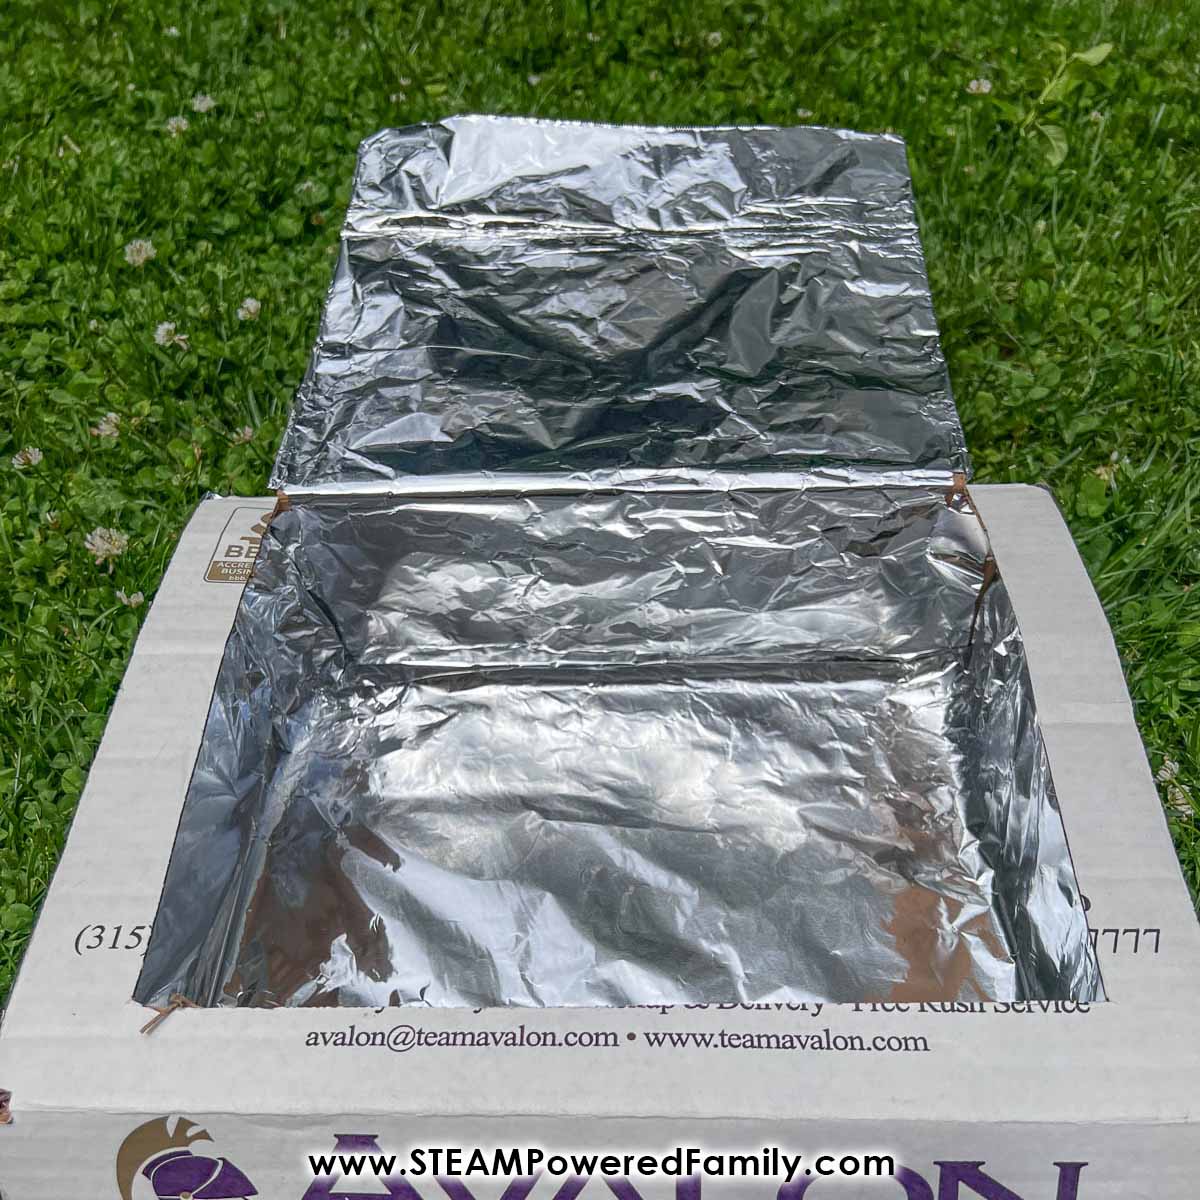
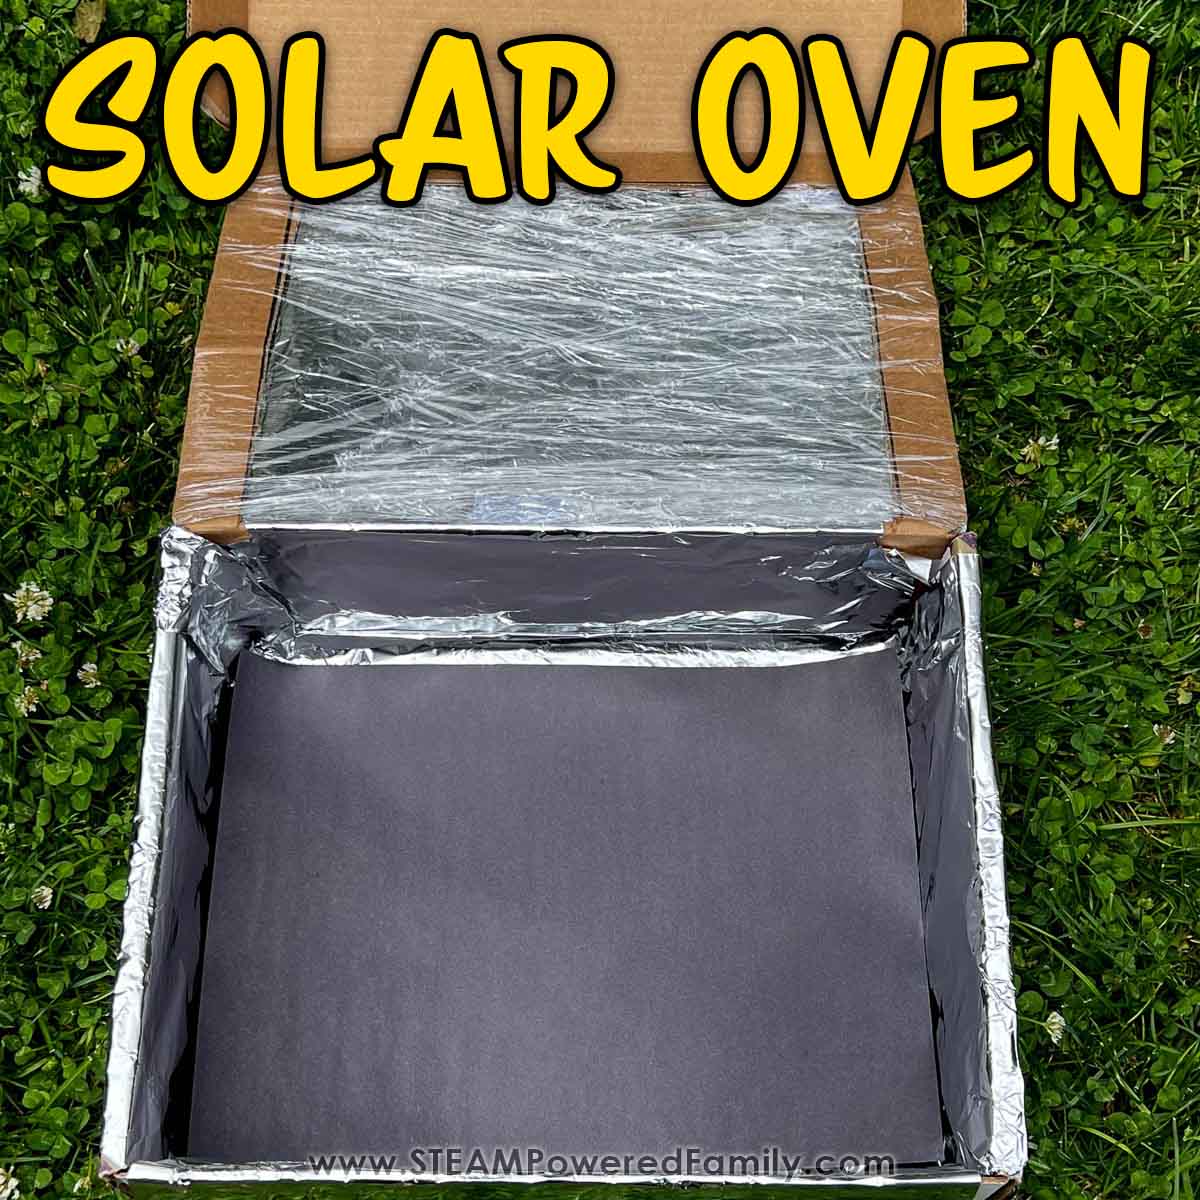
STEP 2: Line the box and the flip-up lid with aluminum foil. Make sure you do this shiny side out for the best results.
STEP 3: Secure plastic wrap over the opening created by the flip-up lid. This will serve to protect your snacks from bugs and weather but also to help absorb direct and reflected light and trap the heat it produces so it stays in the oven. You can either secure it in place with tape or wrap it around the opening a couple of times and secure it to itself.
STEP 4: Line the bottom of the box with black paper or fabric, you could also use a black paper party plate. The black is there to absorb the heat and act as insulation, so either would work. For easier clean up, you can also try a black plastic cutting board.
STEP 5: Position your oven in direct sunlight, then place your snacks inside the box, close the cover so that the plastic wrap top is securely in place, and flip the box lid up so it is reflecting the sun into the box – if needed you can prop it with a pencil or a ruler. Make sure the sun is being reflected into the box onto the food.
STEP 6: Wait! This is not the fastest process, we could see the chocolate starting to melt after about 15 minutes so patience is key. The hotter and more intense the sun, the faster you will see results.
STEP 7: Once everything is soft and gooey, put those Smores together and enjoy!

The Results
It was a really fun process to observe the food in the oven. You could see the chocolate start to get shiny as it heated up, then it started to slowly bend over the sides of the marshmallow.
You could also try reversing the order of your s’more by putting the chocolate directly on the graham cracker, with the marshmallow on top to see what happens. We have had lots of fun with marshmallows in the past!
Throw in some language arts to this project by asking the kids to use their best descriptive voice to tell you about the process!
You can also let the kids play around with the positioning of the flap if the sun moves or to see where it is reflecting better toward their snack.
Build A Solar Oven with Mirrors
As an alternative to using tin foil, you could place a mirror in the flap to reflect the sun.
A fantastic STEM Challenge would be to make multiple ovens side by side, one with a mirror and one with foil, one with the black lining and one without. Have the kids hypothesize: Which do you think is better? Why do you think so?
These questions will certainly teach, but can also distract the kids from the fact it is taking a bit of time!
More Solar Oven Recipes
Solar ovens can make more than just s’mores! Here are a couple of ideas, what else can your kids think to make in their solar ovens?
Make mini pizzas using English Muffins. Simply add pizza sauce, toppings and cheese, then place it in the solar oven until the cheese is all gooey.
You can also make open faced cheese melt sandwiches. Place a slice of bread topped with cheese in the oven until it melts. Feel free to add other deli meats under the cheese if desired.
We had a lot of fun with this project. We made s’mores and then decided to try English muffin pizzas! They were delicious! This was definitely a fun Summer STEM lesson with some tasty results! I hope you go out and see how you might be able to harness the power of the sun too!
MORE SUMMER STEM PROJECTS