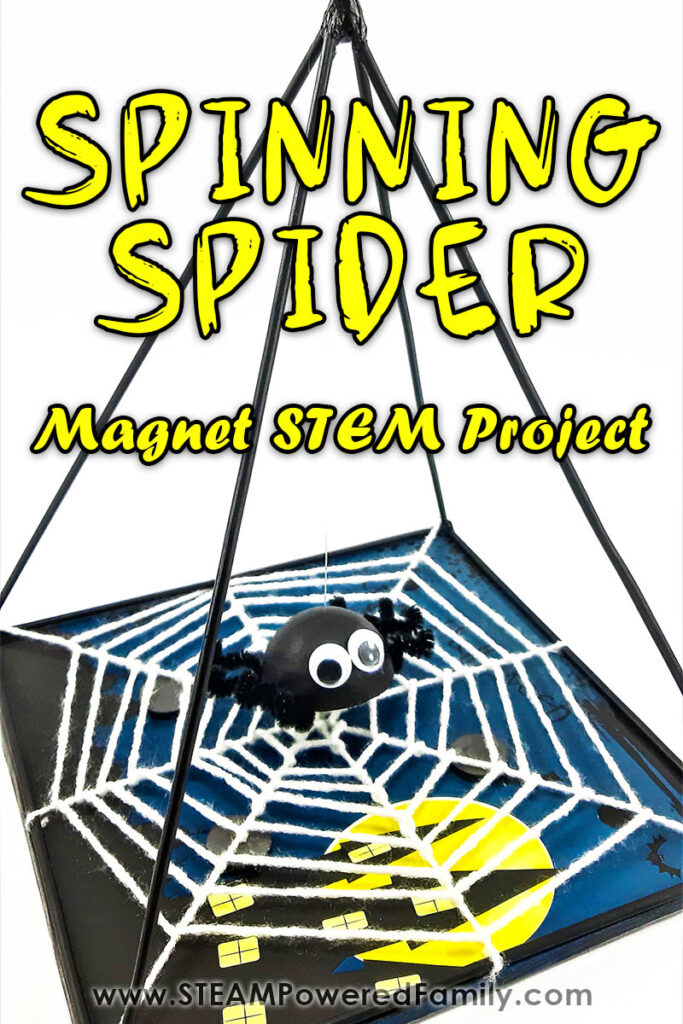
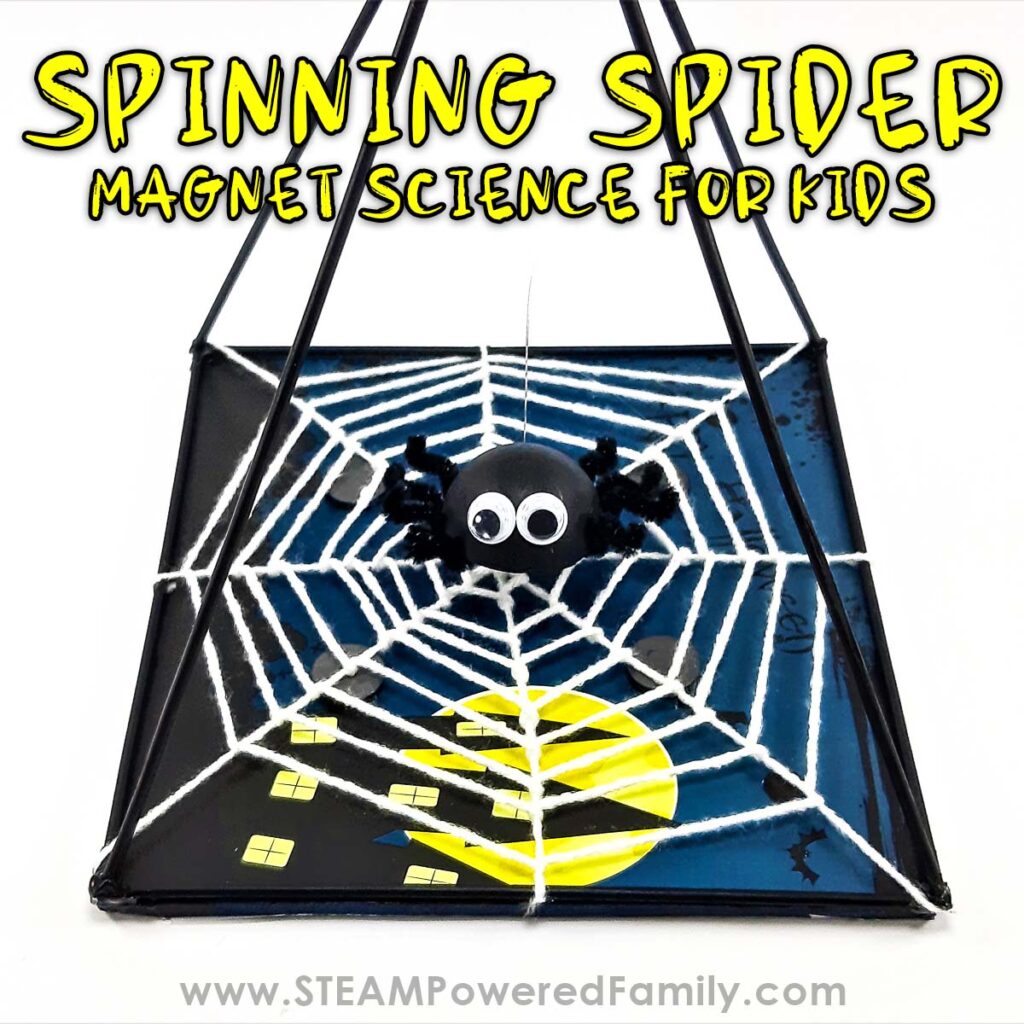
Spinning Spider – Magnetic Science
Halloween is such a great time to learn about STEM. In this project, students will learn about Magnetism while making a creepy, fun magnetic spider on a web. Kids will squeal with joy when they see the spider jump and jitter around the spider web!
HALLOWEEN MAGNETIC PROJECT
Table of Contents
Disclaimer: This article may contain commission, paid partnerships, or affiliate links. We independently review everything we recommend. When you buy through our links, we may earn a commission from qualifying purchases.
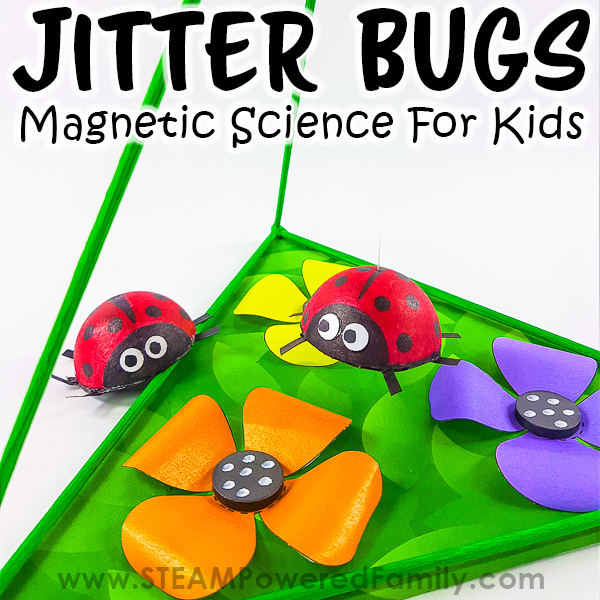
This magnetic science activity is inspired by the incredible popularity of our Jitter Bug Magnetic Science STEM Project. We just knew if you loved that project, this one would be perfect for Halloween STEM activities.
SPIDERS AND HALLOWEEN
The history of spiders with Halloween seems to be tied to their connection with witches. Spiders, along with black cats, bats, and rats, are thought to be wicked friends of witches.
Spiders are a classic Halloween nightmare, and for some people, they have been a scary thought for many years. They should inspire us rather than frighten us.
Spiders have incredible survival techniques and stunning color displays, and they play essential roles in our ecosystems.
REASONS TO LOVE SPIDERS
Spiders have eight legs, so here are eight reasons to love them, not hate them:
- They love dress-up! Some spiders look nothing like a spider to avoid being eaten up by their prey.
- They love their kids! Some spiders carry their babies on their backs until they reach adulthood to prevent predators from eating them.
- They are fantastic roommates! Spiders are quiet, clean, and are the best pest controllers – they eat all unwanted bugs.
- They are very creative! Spiders make the most incredible spider webs with all kinds of patterns. Young spiders often make a circle of zigzags.
- They are the best fishing partners! Spiders live near water and catch small fish, tadpoles, and insects that could be used as fishing bait.
- They are very musical and love to dance! Some spiders drum with their back legs and front legs to attract a female. Some love to attract attention by using their colorful bellies in a courtship dance.
- They are very friendly! Spiders live and work in groups to raise their young and catch their food. Some spiders live in groups of up to 300 spiders.
- They are not all dangerous! Most spiders are beneficial to humans rather than dangerous. Less than 0.5% of spiders are harmful to humans.
HALLOWEEN STEM MAGNETIC SPIDER ON A WEB VIDEO
Check out our video demonstrating how to make Magnetic Spinning Spiders. It really helps to see all the steps of bringing this amazing project to life!
If you can’t see this video, please turn off your adblockers as they also block our video feed. You can also find this video on the STEAM Powered Family YouTube Channel.
How to make a Spooky Spider Dance with Magnets
Supplies
Double-wall cardboard
Craft paint
Glue gun
Glue stick
Ruler
Pencil
Hobby knife
Scissors
Ping pong ball or the same size polystyrene ball
5 X Magnets-18cm/7inches
Fishing line – 30cm/12 inches
8 X Wooden skewers
Side-cutters or Wire cutters
Small pliers
2 Black pipe-cleaners
A ball of white wool or thin string
Tape
Googly eyes or white punched paper pieces
Reusable Adhesive
Magnetic Spider DIY Directions
Getting your pieces ready to make the prism
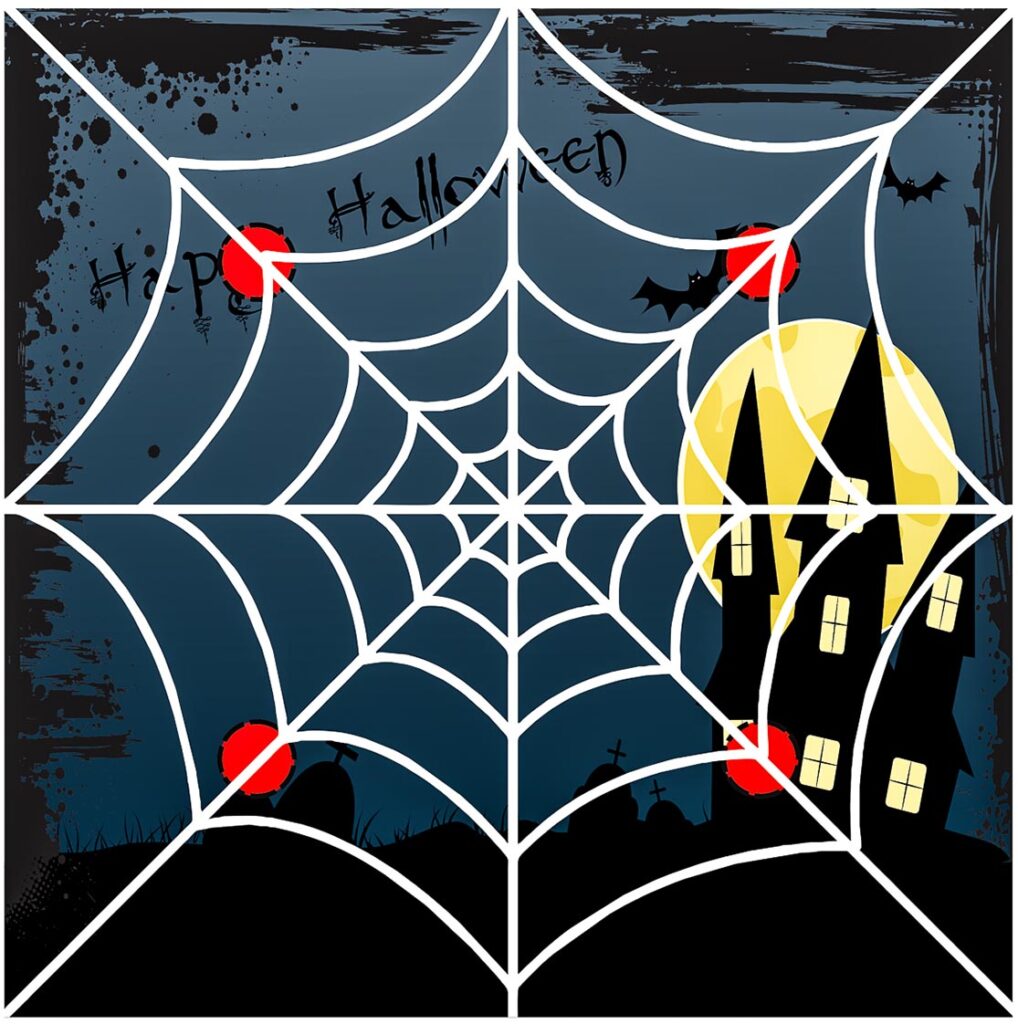
Print and cut out the background template, or you can make your own illustrations and bring your special art to the piece. To access the background template we used, simply complete this form.
Cut a square piece of double-wall cardboard – 18cm/7inches X 18cm/inches.
Cut four wooden skewers to a length of 25cm/9½inches.
Next, cut the other four wooden skewers to 18cm/7inches.
Cut a polystyrene ball or a ping pong ball in half with a craft knife.
Cut four pieces of black pipe-cleaner to a length of 10cm/4inches.
PRO TIPS!
You may need an adult to help with cutting the balls in half.
Cutting the ends of the wooden skewers
Cut the ends of all the skewers at an angle to make the base. The angles should make it easier to make the square and the pyramid’s apex.
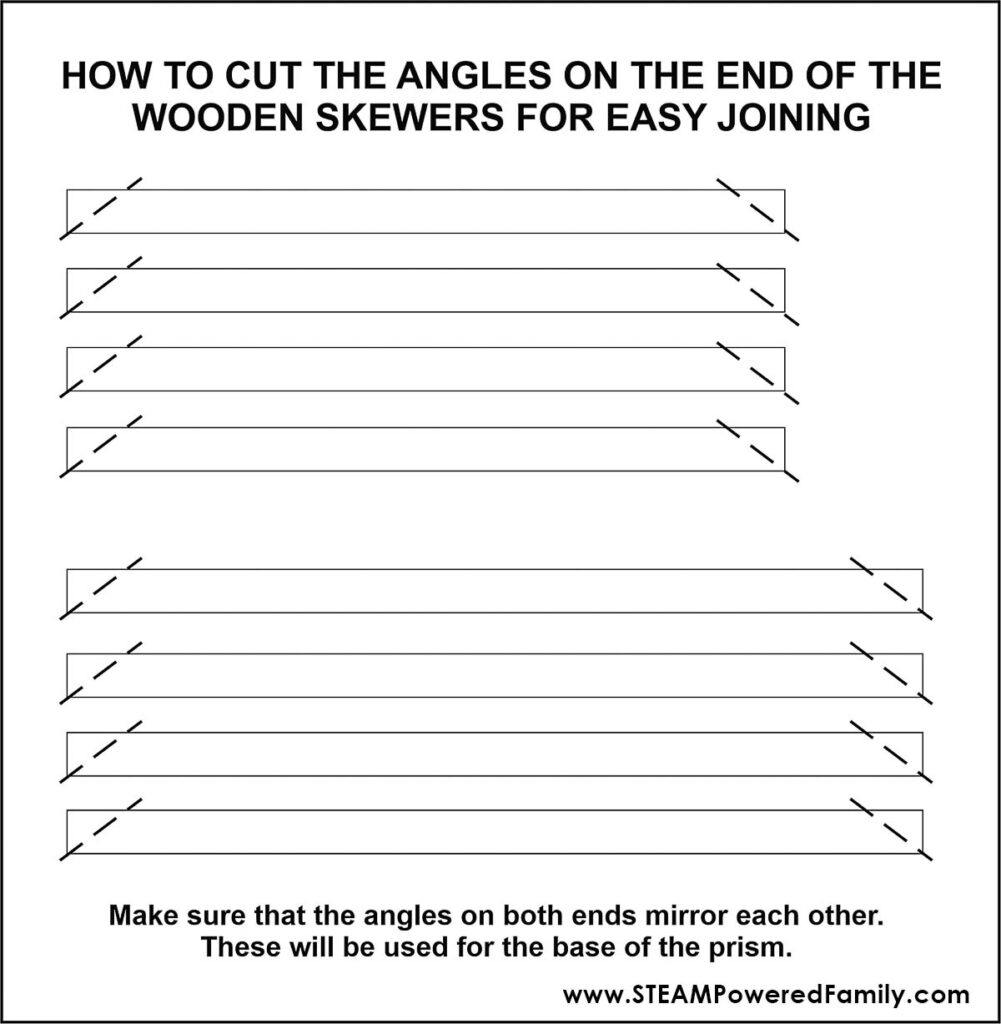
Before you start gluing, check that the angles on all the skewers mirror each other. The easiest way to cut the skewers at the angles is with side-cutters or wire cutters. It is so much easier than using a pair of scissors or a hobby knife.
Gluing the wooden skewers together to make a Pyramid
Making the square base of the pyramid:
Put a small blob of hot glue on the end of the shorter skewers, and join another skewer onto that. Then glue the third and fourth skewers to the ends of the first two skewers to make a square.
Making the top section of the prism:
Take two longer skewers and glue them together with a small blob of hot glue.
Glue these onto the base in opposite corners.
Glue one skewer at a time onto the opposite sides of the two skewers you have just joined.
PRO TIP!
Now is an excellent time to paint the wooden skewer prism.
YOUR PYRAMID IS READY!
Decorating the base
Put glue onto one side of the cardboard square you prepared earlier.
Turn the Halloween template upside down and place the glued side of the cardboard onto it. You will notice that there is an extra bit all the way around. It needs to be folded to the back to cover the sides of the base.
After some testing we discovered the best way to glue the sides down is as follows. Using the glue gun, put hot glue on one of the sides of the cardboard. Quickly, put that edge down onto the surface you are working on and bring the square up towards you. Do the same on all the other sides and cut off the excess paper on each corner. Glue the edges onto the underside of the base with Sellotape.
Spin a Web like a Spider!
Measure and cut four pieces of either wool or string (see the diagram below).
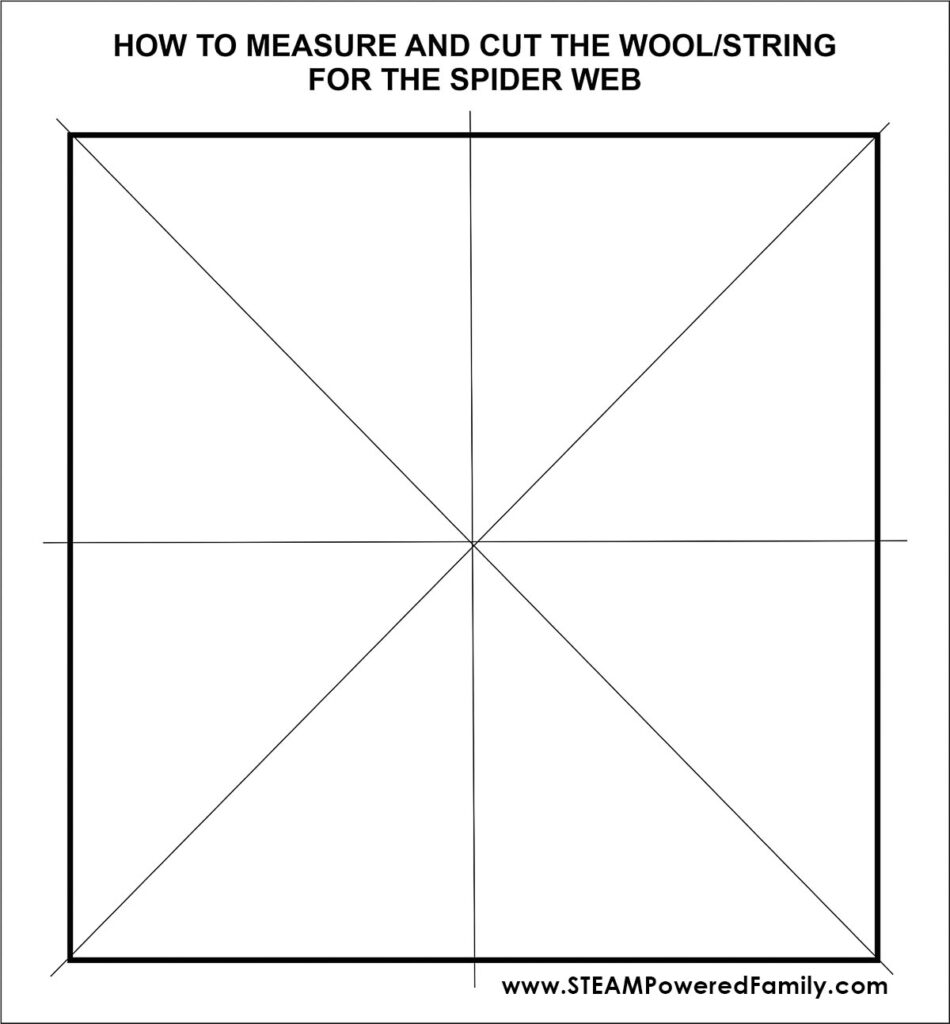
Roll out a smaller ball of wool to make the web.
Attach this to any piece near the center of the web and complete the web.
Now we get to make a spider web by using a special weaving or threading process.
Watch the video to see exactly how to do this step. Once you see how to make your own woven spider web, you will see how easy it is!
The method of threading is as follows: From this piece, take the wool over the next piece, under it, and over to the next piece. Continue in this manner, keeping the wool taught and moving the web to its correct place as you go along. When the web is complete, glue it with the glue gun to any edge and cut off the excess wool.
Making the Spider
Make a small hole in the center of the ping pong ball or polystyrene ball that you cut in half earlier with the pointed side of a wooden skewer.
Paint the ball black or whatever colours and designs you would like your spider to have! Remember, spiders come in some amazing colours and patterns.
Cut a piece of fishing line – 30cm/12inches long.
Put a small blob of hot glue onto the end of it and place it into the small hole you made on the top of the polystyrene ball.
PRO TIP!
If using a polystyrene ball, remember to shake the object you are sticking to the polystyrene as it will melt the polystyrene if it is too hot.
Put the four pieces of pipe-cleaners together and twist them in the middle. It will keep them together.
Put some hot glue onto one side, shake a bit and stick them to the bottom of the polystyrene ball.
Bend the legs into an L-shape and the ends of the legs upwards
with small pliers or your fingers.
Stick the googly eyes onto the spider. If you don’t have googly eyes, use the small circles inside a paper punch.
Adding the Magnets
The magnet under the spider must repel the other magnets on the pyramid’s base.
Take two magnets and find out which way they need to be to repel each other.
Stick the magnet onto the underside of the spider, over the pipe-cleaners, using the glue gun.
Don’t forget, the magnets must always repel each other!
Finishing the Base
Put a blob of hot glue onto each of the four corners of the base and place the prism.
Take the remaining magnets and, one at a time, put them against the magnet under the spider
to see which side repels the magnet under the spider.
Place the magnets close to each of the four corners of the base using Blu Tack or something non-permanent. This will allow you to reuse your magnets for future projects.
Hold the spider in place in the center of the pyramid’s apex and push it around, moving the magnets until you are happy with the spider’s movement. (see my measurements in the diagram
below). You may have to adjust the spider’s legs or the length of the fishing line.
Hanging the Spider
Hold the spider under the middle of the prism. Adjust the height if necessary.
Put a blob of hot glue onto the top of the pyramid and stick the fishing line.
When it is stuck, reinforce it with a small amount of hot glue.
PRO TIP!
Getting the magnets stuck down correctly is the most important thing, as once they are
stuck down, getting them off will tear the Halloween background, so remember, the secret to doing this correctly the first time is: TEST! TEST! TEST!
Your Halloween Magnetic Spider is now ready! Push it around and watch the magic of Magnetism in action!
Troubleshooting
If your spider is not dancing around, it is possibly too far away from the magnets on the base. See if lowering it will make a difference.
Your magnets may be stuck down in the wrong orientation, which causes the magnets to attract and not repel.
The magnets may need to be moved inwards, closer to the middle, where the spider is hanging.
What is a Pyramid?
A pyramid is a three-dimensional (3D) shape. It has a polygon base and flat (triangular) sides that join at a common point (called the apex).
The base can be any shape or size but is generally an equilateral triangle, where all the sides are the same. In this project, you used a square base. If you rotate the pyramid, all the sides look the same.
The pyramids in Egypt have a square base. There are many types of Pyramids:
Square, triangular, pentagonal, and oblique, to name a few.
What is Magnetism?
Let’s take a closer look at what a magnet is.
A magnet is a metal or rock object that may exert a unique force on other metal objects.
Magnetism is a force that can be either a push or a pull. Electricity and gravity are both natural forces.
Magnetism is at work everywhere around us at all times of the day. Magnets are found in everything that uses electricity and motors. Cars start, microwaves cook, and computers work thanks to the magnetic force. Even the planet we call home is a massive magnet!
When a magnetic object, such as a paper clip, meets a magnetic field, it is instantly drawn toward it. Magnetic fields can work underwater too. Plastic, rubber, water, and glass are not attracted to magnets and are non-magnetic materials.
The Science of Magnetism
Magnets are metal or rock objects with an invisible power or force to attract specific metals.
A magnetic field is a magnetically charged area surrounding a magnet. There is a magnetic field in all magnets, regardless of their size. Objects attracted to magnets are referred to as being magnetic.
Metal is the main component of all magnetic things; however, not all metals are magnetic. Iron, cobalt, and nickel are the most common metals attracted by magnets. By rubbing metals with a magnet, you can turn them into magnets! When you rub a piece of iron along a magnet, the north-seeking poles of the atoms in the iron line up in the same direction. The force generated by the aligned atoms creates a magnetic field.
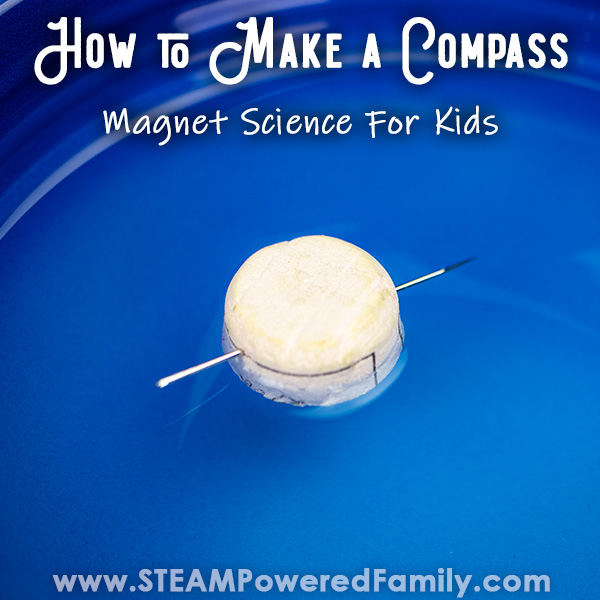
Learn how we did this as part of our project making a Homemade Compass.
Iron and nickel are the two metals that make up the core of our planet. Magnets are attracted to both metals. Earth is constantly spinning in space, and the Earth’s metal core is spinning as well. These movements create a Magnetic Force. This force creates a magnetic field that surrounds the Earth.
Just like Earth has a North and South Pole due to its magnetic field, magnets also have a positive and a negative side or a north and south pole. Opposite poles are attracted to each other, while the same poles repel each other.
That is why it is so important when building your Spooky Spider that you ensure the magnets are set the right way, so they will repel each other, which makes your spider twitter, jitter and dance!
More Magnetic Science and STEM Projects