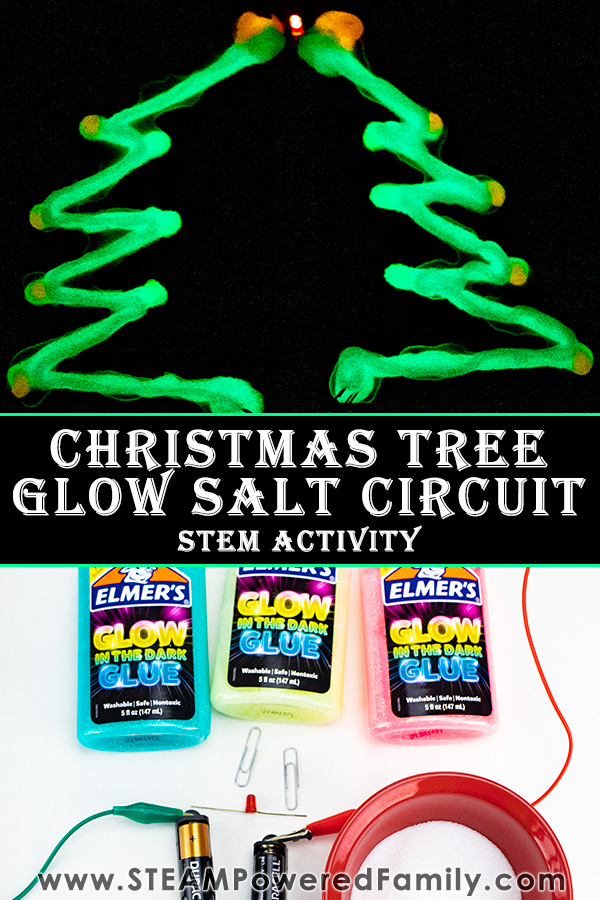
Christmas Salt Circuit STEM
Christmas STEM Activities are an incredible way to keep excited kids engaged and learning during this fun and busy season! If you have never done Christmas STEM activities or are new to STEM and STEAM projects, I have an amazing, simple STEM challenge for you today. It’s an easy Salt Circuit Christmas Tree that glows in the dark. So cool. So fun. And so simple!
CHRISTMAS CIRCUITS STEM ACTIVITY
Table of Contents

Disclaimer: This article may contain commission, paid partnerships, or affiliate links. We independently review everything we recommend. When you buy through our links, we may earn a commission from qualifying purchases.
This time of year is so busy! The crazy pace can seem overwhelming and I know the last thing you want is an activity that is going to be a lot of work, cause frustration, or take a ton of time. That’s why I love this Christmas Tree Salt Circuit project. It is a simple STEM project, building an easy circuit, but has big wow factor!
Not only are you building a circuit, but this salt circuit also glows! We loved building our first glow salt circuit so much the kids were asking to do it again. This time we tried using different glow colours for a fun festive look!
This activity is great for kids of all ages, but early elementary and kinders will need help and lots of supervision. Yes, even your teens will enjoy this one!
Christmas Tree Glow Circuit
Supplies
You will need a few supplies for this activity but you probably have most of them already in your tinker kit.
1 large sheet of parchment paper, a tray or some type of protective covering for the table (this can get messy)
1 sheet construction paper or card stock
Table salt
2 Paperclips
Alligator clips
Double AA battery pack (or we linked two singles with another alligator clip because that is what we had on hand)
LED bulbs
Elmers Glow in the Dark Glue in a variety of colours
Marker or pencil
Directions
Start by putting something down to protect the surface of your table. I used a large sheet of parchment paper.
Take your card stock and cut it in half. Place it on your table with about one inch of space between the sheets.
Draw your design with a pencil. Your light will be the star at the top of your tree.
Build the circuit!
Always start by testing your LED. When building these circuits it is a lot of trial by error so you want to eliminate any possible issues you can early on, and a faulty LED bulb is quite common. So test and make note of the positive and negative leg. Do this by attaching the alligator clips to battery pack, and then to the LED.
Tip! The long leg on the LED is the positive connection.
Detach the LED bulb and set it at the top of your paper. Set the battery and alligator clips at the bottom of your paper, after making note of the positive and negative connections and ensuring you have them lined up properly. Attach the alligator clips to paper clips.
Now start putting the glow glue on your paper by carefully tracing the line you drew. You want a nice thick line of glue.
We added other glow in the dark glue colours at the points so they looked like Christmas baubles.
Make sure you have an extra thick line at the beginning and end of your line (base of the tree and top).
At the base add your paperclips, at the top set your LED legs into the glue.
Sprinkle a generous amount of salt over the whole glue line making sure to get it everywhere.
More than likely your bulb won’t come on yet.
Add another line of glue over the whole thing. Plus another sprinkle of salt. Continue until your LED turns on!
TIP! You may need to turn off the lights to see your LED light up. Plus of course you want to turn off all the lights to see your circuit glow!
Troubleshooting Salt Circuits
If you are having difficulty with your circuit not working, try these tips to troubleshoot.
- Confirm your light bulb and batteries are working.
- Add more glue and salt to the whole line of your circuit.
- Check to make sure your alligator clips are on properly.
- Check your LED pin legs and paperclips, ensure they are fully submersed in the glue.
- Is your circuit built correctly? Remember we need positive to negative to complete a circuit. Is your bulb in backwards?
- Is your glue drying? Make sure your glue is nice and wet!
- Is the room too bright and you simply didn’t notice your bulb is actually on? The light can be fairly faint and difficult to see under bright lights.
Glow Circuit Tree Video
Best of all, watch a video of us building this circuit to see the steps in action, sometimes seeing the video makes everything suddenly much easier and makes sense! If you can’t see the video, please turn off your adblockers as they also block our video feed. You can also find this video on the STEAM Powered Family YouTube Channel.
The Science Behind Glow Salt Circuits
This festive STEM activity involves two types of science. The first allows us to explore the science behind the glow. The second explores the fun science behind the electrical circuit.
The Elmers Glow In The Dark Glue glows thanks to a process called luminescence which is caused by chemicals called luminescent phosphors in the glue. We explored this with our glow in the dark bath bombs, oobleck and slime!
For this glow to work it needs to charge in bright light. You will have the brightest glow when you first turn off the lights, then it will begin to fade. You can “recharge” the glow simply by turning on the lights for a few minutes.
The science behind the salt electrical circuit is as magical as the holidays! Salt in water is very conductive. In this activity we are adding salt to glue (which has lots of water in it) so the electrical current can travel from the battery pack, along your circuit, eventually turning on your LED light. The current travels from salt molecule to salt molecule through the water. That’s why it works best if the salt (and glue) is quite wet. This is why I like to place a line of glue, then add salt, then cover the salty line with another layer of glue with a bit more salt. It all helps move that current along to it’s destination – the LED!
More Science
If you have time, leave your salt circuit for about 2 hours (climate may affect how long you need to wait). You will notice water leaving the glue and forming puddles.
Why do you think that happens? Ask your kids!
Salt causes water to leak out of the glue because it disrupts the attraction between water and the polymer chains in the glue. Salt breaks up into negative and positive ions when added to the glue, those ions are attracted to the water molecules. Each ion is strong enough to attract several water molecules to it. Eventually, when enough salt is added to our glue salt circuit, the water molecules become more attracted to the ions and water leaks out of the mixture.
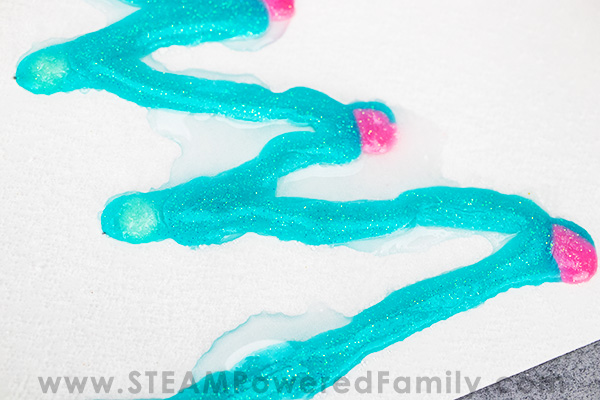
You will also notice some of the colours from the glue will leak into the water. So what happens if you turn off the lights now? How does it glow?
So much fun exploration with this project!
This simple Christmas STEM project is so much fun and a great way to celebrate the holidays. If you don’t celebrate with trees, why not make a star circuit or another design that fits your holiday celebrations! This activity is so adaptable!
Have fun and happy holidays!
MORE FESTIVE LEARNING


Christmas Glow Salt Circuit STEM Activity
Build a Christmas Tree Glow Salt Circuit and learn in your classroom or home.
Instructions
-
Start by putting something down to protect the surface of your table. I used a large sheet of parchment paper.
-
Draw your design with a pencil. Your light will be the star at the top of your tree.
-
Test the LED.
-
Detach the LED bulb and set it at the top of your paper. Set the battery and alligator clips at the bottom of your paper, after making note of the positive and negative connections and ensuring you have them lined up properly. Attach the alligator clips to paper clips.
-
Now start putting the glow glue on your paper by carefully tracing the line you drew. You want a nice thick line of glue.
-
Add glue ornaments in a different glow glue colour if desired.
-
Make sure you have an extra thick line at the beginning and end of your line (base of the tree and top).
-
At the base add your paperclips, at the top set your LED legs into the glue.
-
Sprinkle a generous amount of salt over the whole glue line making sure to get it everywhere.
-
More than likely your bulb won’t come on yet. Add another line of glue over the whole thing. Plus another sprinkle of salt. Continue until your LED turns on!