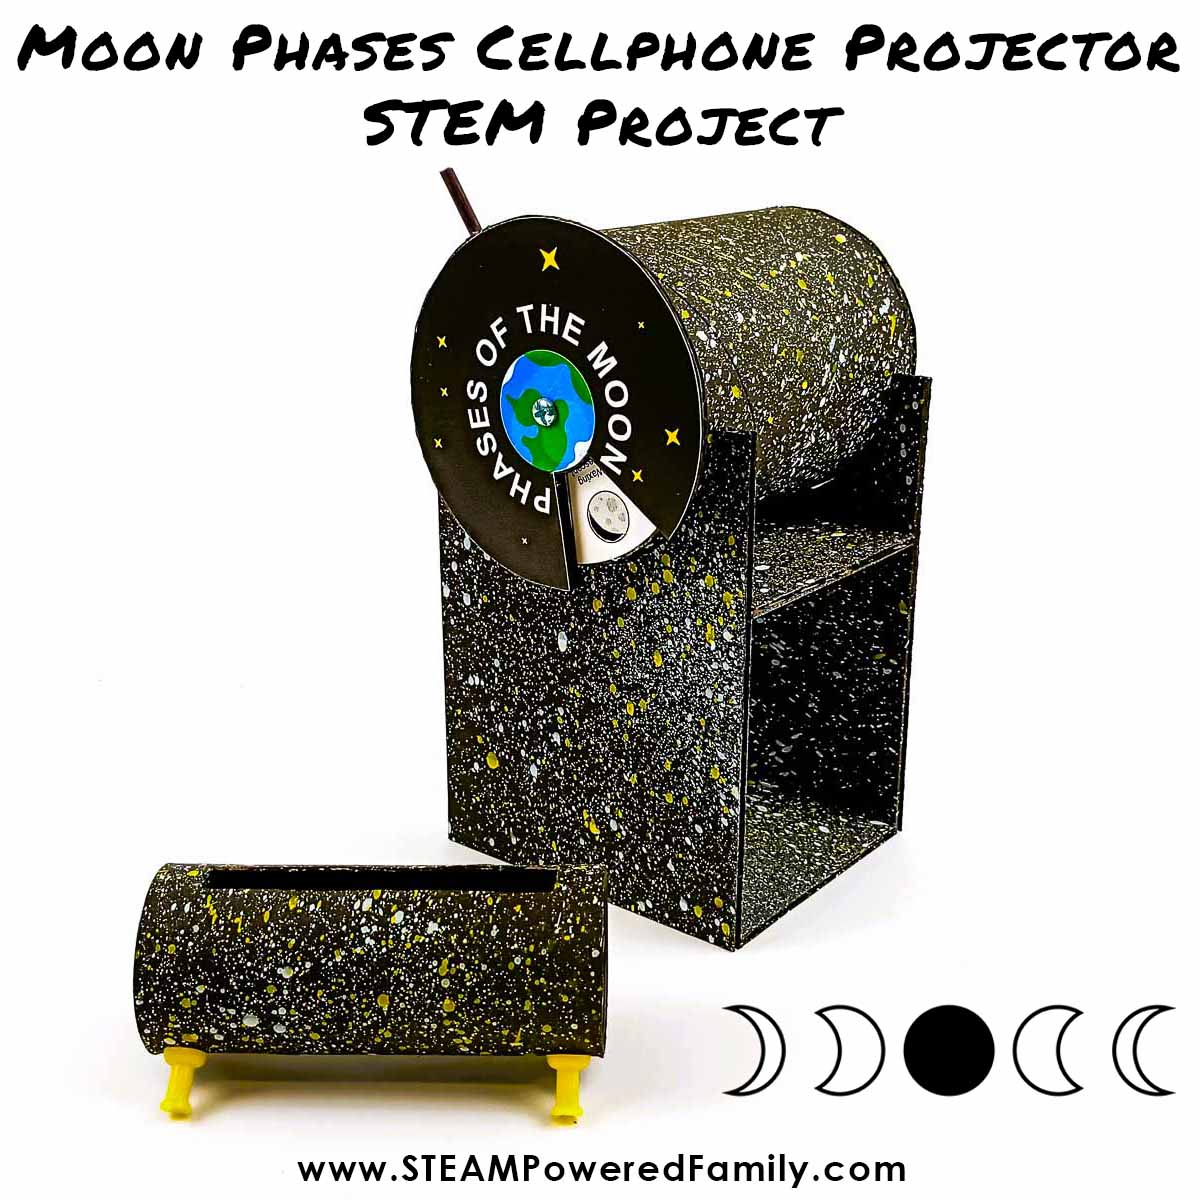
Moon Phases – A DIY Cellphone Projector Project
Are you curious to learn about the mysteries of the Moon? We love space activities around here and today we are learning more about the Moon with a Moon Phases Project that involves making a Cellphone Projector. In this unique project, you will uncover the secret of the Moon’s ever-changing appearance by making a simple cardboard projector to teach you the Moon’s phases.
DIY MOON PHASES PROJECTOR
Disclaimer: This article may contain commission or affiliate links. As an Amazon Influencer I earn from qualifying purchases.
Not seeing our videos? Turn off any adblockers to ensure our video feed can be seen. Or visit our YouTube channel to see if the video has been uploaded there. We are slowly uploading our archives. Thanks!
Do you look at the Moon every night and notice that it changes shape each night? On some nights, the moon is extremely large and completely round; on others, it is a thin slice of light in the sky.
Surprisingly, the Moon’s appearance has everything to do with the Sun and the Earth. Even though the Moon remains perfectly round, we don’t always see it that way.
The amount we see of the Moon depends on how much light the Sun projects. Why is this so?
The Moon revolves around the Earth every 29 days, called a lunar cycle. As the Moon moves around the Earth, we only see the part lit by the Sun. All the different shapes of the Moon we see last approximately seven days. These are called the phases of the Moon. There are eight distinct phases, and all together, they make up the lunar cycle. Let’s look at each phase.
The Phases of the Moon
New Moon
This is when we cannot see the Moon from Earth because it is between the Earth and the Sun, so the side lit up by the Sun is facing away from us.
Waxing Crescent
We see a thin crescent of the Moon as it moves away from the New Moon phase, and the light we see on the Moon starts getting bigger. The word “waxing” means getting bigger.
First Quarter
During this phase, half of the Moon’s face is lit up and appears as a half-Moon in the sky.
Waxing Gibbous
In this phase, more than half of the Moon is visible, and the Moon continues to grow in brightness.
Full Moon
The whole face of the Moon is visible in this phase, and it appears as a complete circle in the night sky.
Waning Gibbous
The light on the moon starts getting smaller after the full Moon. The word “waning” means getting smaller. This phase always occurs after a full Moon. The largest half of the Moon is in darkness, and we see only a tiny piece of the Moon.
Last Quarter
Half of the Moon’s face is visible again, but we are seeing the opposite part of the Moon we saw in the First Quarter.
Waning Crescent
In this phase, we see a thin crescent of the Moon, and we know that the New Moon phase is near, and the lunar cycle is about to complete and start over again.
What’s a Supermoon?
Have you ever heard someone talking about a Supermoon? A Supermoon occurs when the moon’s orbit is closest to Earth during the full moon cycle. During a supermoon the full Moon will appear especially large and bright. This is a great time to break out the telescope and take a look at the Moon in detail.
Fun Moon Phases Fact
Did you know, the ocean tides are caused by the Moon? The high and low tides in the sea happen because the Moon’s gravitational pull pulls on the ocean’s water, creating different types of tides. Check out this fascinating animation created by NASA that explores this.
In this project, we will make a cardboard Moon Phases Projector to help you understand the Lunar Cycle. Let’s get started!
DIY Moon Phases Cellphone Projector Tutorial Video
I highly recommend watching the tutorial video before starting this project. It helps to see the visual of all the steps. If you can’t see the video, it could be your adblockers or firewall blocking our video feed. You can also find this tutorial complete with closed captioning on the STEAM Powered Family YouTube Channel.
How to Make a Moon Phases Cellphone Projector
Materials & Tools
Thin, sturdy cardboard – cereal box or small postage box
Glue gun
Ruler
Pencil or marker
Box cutter
Exacto knife
Scissors
Screwdriver
Side-cutters
Awl
Thin wooden skewer
Cardboard tube with a diameter of 3″ or 8cm (a postage tube is perfect)
A toilet roll tube
2 bottle tops (to fit into the sides of the toilet roll)
4 plastic push pins
Sandpaper
A nut, bolt, and washer
Cellphone (or a small flashlight/torch)
Black, white, and yellow acrylic paint
Plus you will need the printable templates – see below to unlock the printable.
Project Printable
This printable is available for STEAM Powered Family mailing list members. Simply enter your email to unlock the file. It includes templates for this project, plus a moon phases activity.
Directions
Getting the Pieces Ready
Cut the cardboard tube with a box cutter to a length of 10cm.
SAFETY NOTE: You may need the help of an adult with this as the tube is quite thick and may be hard to cut.
Print, trace, and cut out all the template pieces as indicated on the template. Some are on box cardboard, and the others are on regular cardboard.
When cutting the pieces for the stand, place the template onto the cardboard so that the fluted side is as indicated on the template. This method gives the stand strength.
Copy all the markings on the template to the relevant cardboard pieces.
Cellphone or Flashlight/Torch Stand
Cut a slit that measures 1cm X 8cm into the side of the toilet roll.
You do not need the toilet roll if you use a small flashlight or torch instead of a cellphone for light. See below for the instructions to glue a holder onto the back of the tube for a torch. I found the cellphone to be much better but you can test both and see what you think.
Using a flashlight in place of a cellphone
If you are going to use a flashlight, on the template is a circle that fits the back of the tube. Cut it out of box cardboard, place your flashlight in the middle of the circle, and trace and cut out the hole for the flashlight. Make sure that the torch fits in snugly! Gently push the flashlight into the hole and glue the whole thing onto the back of the tube.
Gluing the Stand Pieces Together
Use the glue gun, glue the middle pieces of the stand onto the sides. First, glue the bottom middle piece onto one of the sides, then the top part onto the same side you are working on.
Now, glue this piece onto the other side, starting with the top and then gluing the bottom.
Glue the ring you cut out of the box cardboard onto one of the ends of the tube.
Decorating the Cellphone Projector
This step is optional. You can decorate your projector in any manner you wish.
I painted all the pieces black first. Then I took an old toothbrush, dipped it in yellow paint first, and using my thumb, I pulled my finger down the length of the bristles to splatter the paint onto the pieces. I repeated the process with the white paint.
Creating the Moon Phases Spinner
Cut out the spinner and, using an Exacto knife, cut out all the black pieces of the Moon. A small sharp knife is needed here. It would be best to have a clean cut on all the Moon phases, as this is what your projector will project on the wall.
SAFETY NOTE: You may need the help of an adult with this, as the Exacto knife is very sharp. If you are doing this, remember to keep your fingers away from the blade and rotate the spinner as you cut.
Using one of the push pins, make a small hole in the middle of the spinner, then glue the spinner onto the other side of the tube.
Use an awl to make the hole slightly larger and then a wooden skewer to get the hole the right size for your bolt. The bolt should fit snugly into the hole, not loose. Keep testing the hole size with the bolt as you go along.
Cut the section from the spinner top and the box cardboard you cut out earlier. Glue the spinner top onto the cardboard, lining up the area you cut out.
Repeat the process with the plastic push pin, awl, and wooden skewer to make the same-sized hole in the spinner top for the bolt.
Push the wooden skewer a short way into the flutes of the box cardboard in line with the cut out between the words “Moon and phases.”
Remove it, put some glue onto the end of the skewer, and push it back into the cardboard.
Using the side cutters or scissors, cut the skewer to 5cm. Use sandpaper to smooth the edge of the handle.
You can paint it black now.
Putting the Spinner Together
Place the washer on top of the moon phases picture on the top of the tube.
Put the bolt into the top of the spinner, through the washer, and into the tube.
Screw the bolt in as far as you can by hand.
Turn the tube upside down and fit the nut onto the screw with your hand or use long nose pliers. It is a bit of a challenge, but it can be done! Little hands may have an easier time.
Once the nut is on the end of the bolt, use one hand to hold the nut and use a screwdriver in your other hand to screw the nut into the bolt.
Turning the spinner with my hand was more straightforward than using the screwdriver!
Ensure the spinner is on tight enough to turn it, but it must not be loose.
Making the Cellphone Stand
Push the bottle tops into the sides of the tube, keeping it sturdy.
Turn it upside down so the slit you cut is on the table.
Push the four push pins into the tube, two on each side of the tube. These will be the legs of the stand.
I pushed them into the bottle tops. You may need an adult to help you with this step.
Do not put the “legs” on each side too far apart. You can remove them and replace them quickly.
Keep checking that the stand stands up straight and is not unstable.
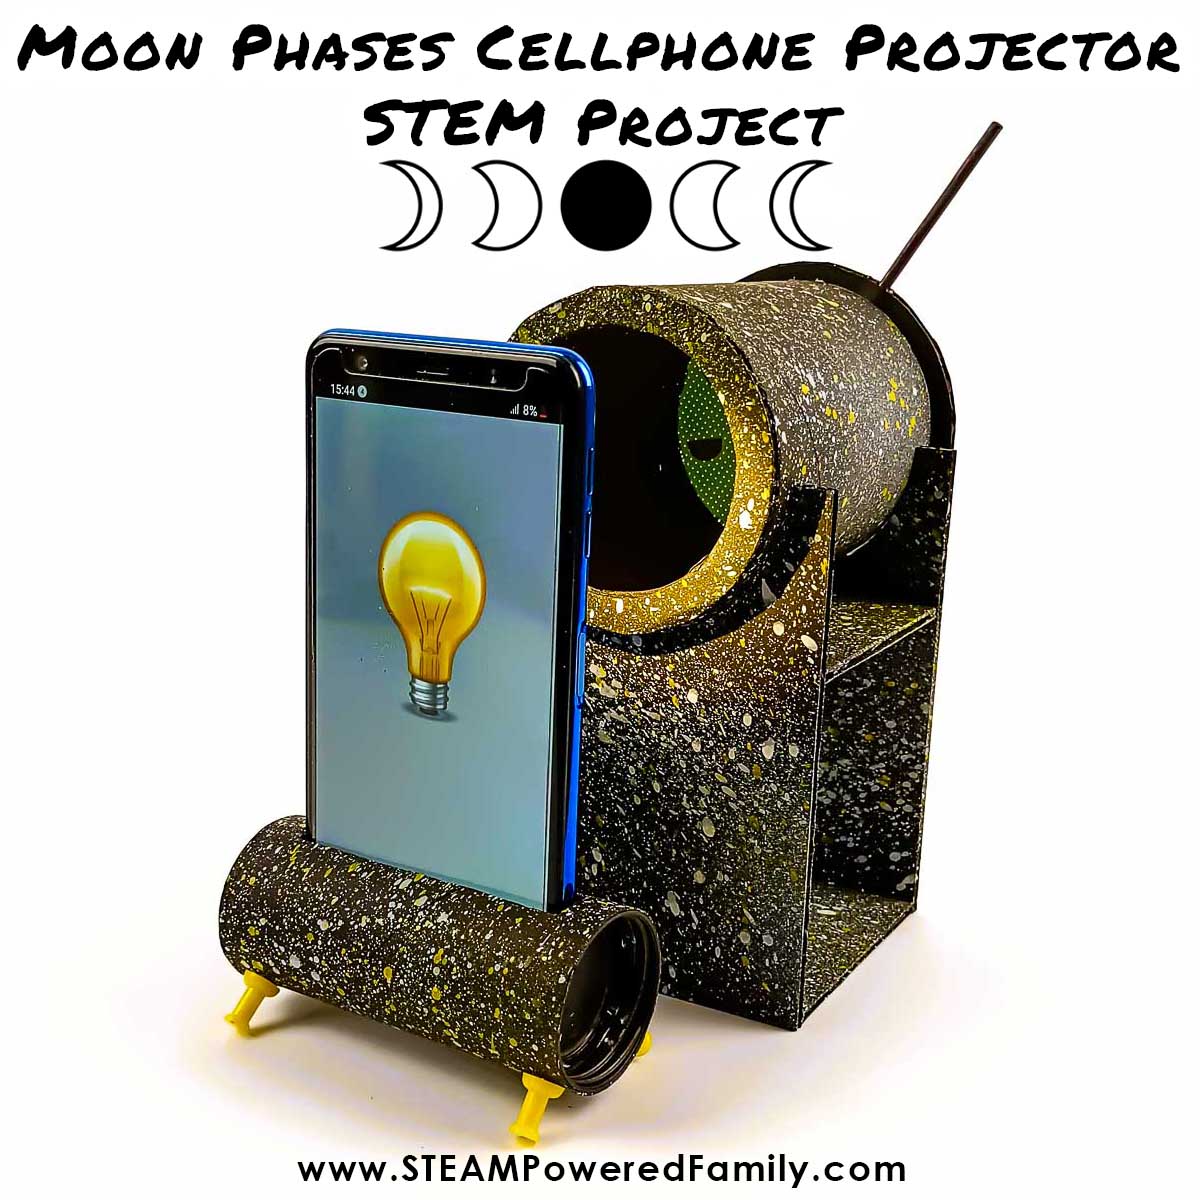
Using the Moon Phases Cellphone Projector
Place the tube onto the stand with the spinner facing the wall or sheet of white paper you will project onto.
If you are using a cellphone, place the phone into the stand behind the tube, turn off the lights, turn the flashlight app on, and explore the Moon phases!
If you are using a flashlight, turn on the flashlight, then move the spinner and explore.
See if you can memorize the names of all the Moon phases without looking at the spinner.
Test your classmates, siblings, and family!
Extension Ideas
Create different cellphone projector themes by creating different discs and replace the moon phases disc with your own designs. This is a great way to learn more about shadow and light.
Moon Printables
If you are looking for a printable to go with this project we have a Moon Lesson Pack in the Shop.
Interesting Facts about the Moon
You don’t have to be an astronomer to see the Moon’s features up close. All you need is a telescope, astronomy binoculars, or visit a local observatory. There are many different types of surfaces on the Moon, and these devices help us see them from Earth.
When asteroids hit the Moon’s surface, they create different kinds of craters and lines on the surface. If the asteroid hits the moon straight on, the surface material on the Moon flies off and forms a crater. The material from the crater appears as bright lines called rays. These rays can go in all directions and extend for hundreds of miles.
If the asteroid hits the Moon’s surface at an angle, the rays only fan out in one direction.
There are darker areas on the Moon’s surface called Lunar Maire. Ancient volcanic eruptions on the Moon cause them.
We can also see curved lines of bumps on the Moon’s surface. These bumps form the most extensive mountain range on the moon. This is where Apollo 15 landed on the Moon in the 70’s.
The United States is the only country to land people on the Moon successfully. The Americans landed six times between 1969 and 1972. The first mission to the Moon was Apollo 11. On this mission, Neil Armstrong became the first man to walk on the Moon. He also made his famous statement: “That’s one small step for man, one giant leap for mankind.”
I hope you enjoyed making a Moon Phases Cellphone Projector!