Homemade Air Dry Clay Ornaments – Easy Holiday STEM Craft
If you’re looking for a cool and easy classroom parent gift that kids can make while also learning real science and math, try making homemade air dry clay ornaments. These can be as simple as a handprint or as detailed as pressed textures from doilies, leaves, or evergreen branches. This easy DIY clay project combines chemistry, measurement, math, and art, and you’ll end up with a lasting keepsake parents are sure to treasure.
Easy Classroom STEM Craft – Homemade Air Dry Clay Ornaments
Table of Contents
Disclaimer: This article may contain commission, paid partnerships, or affiliate links. We independently review everything we recommend. When you buy through our links, we may earn a commission from qualifying purchases.
Scientific Marvel – Polymers at Work!
The magic of this no-bake clay recipe is a simple chemical reaction called polymerization followed by evaporation during the drying process. Polymerization is a chemical process where small molecules called monomers bind together and form large, long chain molecules that we call polymers. You can compare polymer chains to “links in a paper chain” to make the concept more visual for younger students.
This activity is a great opportunity to introduce kids to polymer science, states of matter, and observation skills.
Homemade Air Dry Clay Recipe: (Also known as porcelain clay)
1 cup cornstarch (plus extra for dusting)
1 cup white school glue (PVA glue)
1 Tbsp baby oil (or mineral oil)
1 Tbsp white vinegar (prevents mold and improves long-term durability)
Other things you will need for this project:
A small bowl and a spoon for mixing
Saucepan for heating on the stove or a microwave safe bowl
A rolling pin
Cookie Cutters
A dishtowel or fabric napkin
Extra Cornstarch
Acrylic Paints
Paint Brushes
Extra Glue or Mod Podge
Cookie Sheet
Wax paper or parchment paper
String or ribbon for hanging ornaments
Optional: second cookie sheet for flattening during drying (prevents curling)
How is it done?
This no-cook clay recipe works on the stovetop or in the microwave, making it adaptable for both classrooms and at-home learning. Homemade air dry clay is made by mixing the ingredients and then heating it until it forms a pliable dough.
Important Safety Note: Always supervise heating steps, and ensure the mixture is stirred constantly to prevent scorching.
Step-By-Step Directions
Combine the cornstarch and glue until well combined. Stir in the oil and vinegar and add to a pot and stir constantly over medium heat. The liquid mixture will thicken after a few minutes, pulling away from the sides.
Let students observe how the mixture thickens — this is a visible sign of polymerization beginning!
As it cools it will form into a firm, soft ball of dough.
Microwave Instructions: Alternatively, you could mix the ingredients in a microwave safe bowl and microwave the mixture in 30 second increments until the clay forms.
Kneading and Rolling the Dough
Turn the dough out onto a piece of waxed paper dusted with some extra cornstarch and let it cool to the point that you can knead it. Knead with clean, dry hands for best texture. You will want to gently knead until it is no longer sticky.
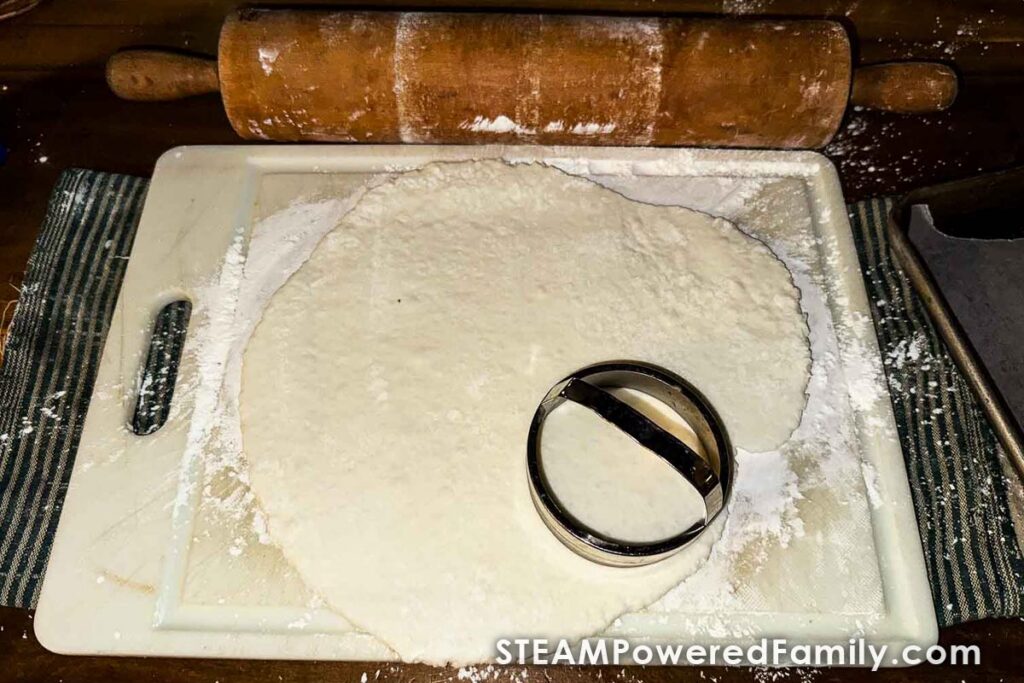
Using a rolling pin dusted with a little more cornstarch, and roll the clay to about ¼ inch thickness for reliable drying. Thicker shapes may take 48+ hours. Then use cookie cutters to cut out the shapes.
Or, if you would rather, you can give balls of dough to the kids and let them form their own ornaments. But keep in mind the thicker the ornaments, the longer they will take to dry.
Texturizing the Ornaments
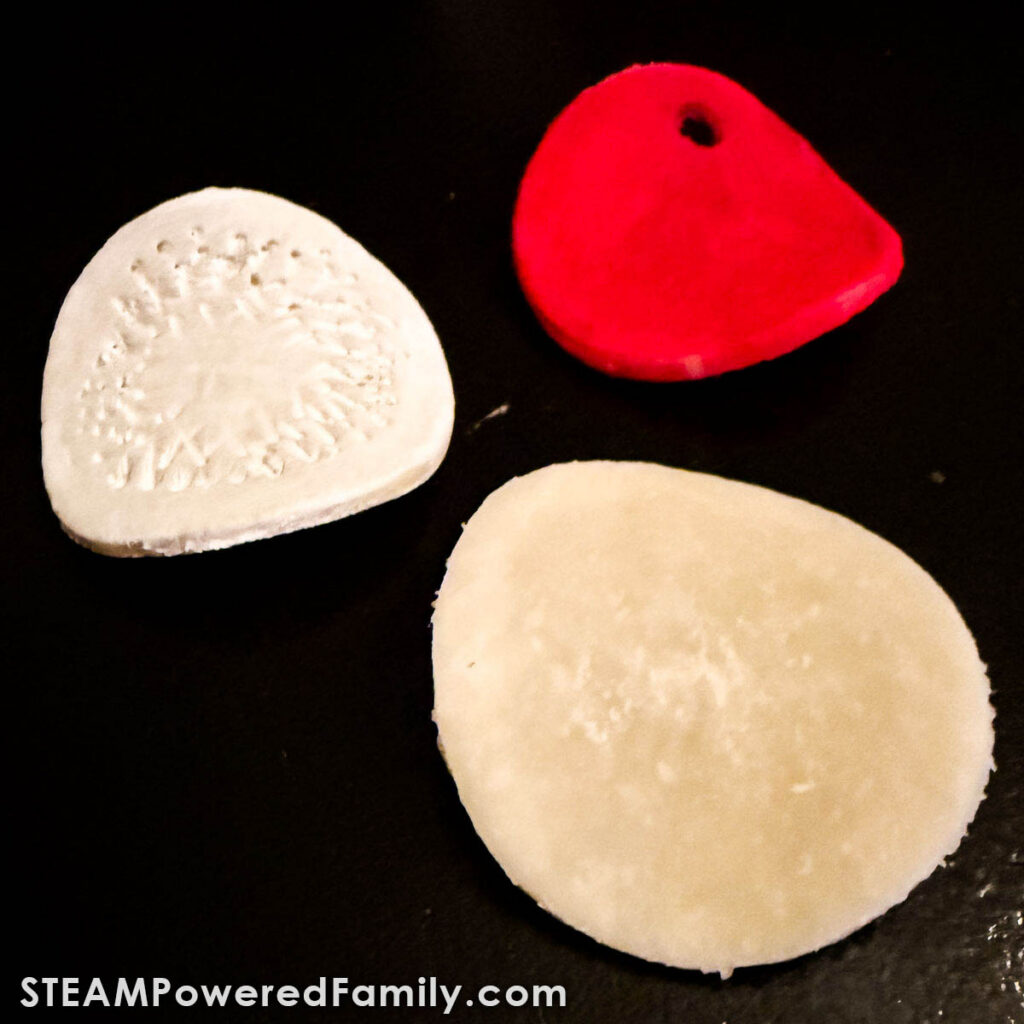
If you would like to add texture to the ornaments try rolling or pressing different materials into the dough and then carefully pulling them back off to see the pattern left behind in the clay. Things I’ve used that make a nice pattern include doilies, knit items like mittens, pine branches, leaves. You could also roll something over it with texture like a patterned vase or the side of a wicker basket.

Encourage students to test textures and predict which objects will leave the most defined patterns, this creates a mini scientific investigation!
Lay all of the ornaments out on a cookie sheet and make sure you add a small hole for adding a hanger later on. Loosely cover the ornaments with a dishtowel or cloth napkin and allow to dry. The loose covering will prevent them from drying too quickly which can sometimes cause cracking.
Hardening and Drying Time
Homemade air dry clay typically hardens in 24–48 hours depending on thickness.
Important note: The ornaments should be flipped halfway through the drying time to ensure even hardening. Once dry, these ornaments become lightweight and durable.
If ornaments begin curling, place a second cookie sheet on top to keep them flat.
STEM Connections
For a math connection, have students measure and compare ornament diameters or thickness. You can even have them predict how long the different thicknesses will take to dry, then time and evaluate the ornaments’ hardness to see if their predictions were correct.
Another math extension activity: This recipe is not enough for a whole class – it will make enough for about 2 small ornaments. Have students decide how much clay will be needed for the whole class and then do the math to expand the recipe to make enough clay for the whole class.
Finishing Steps
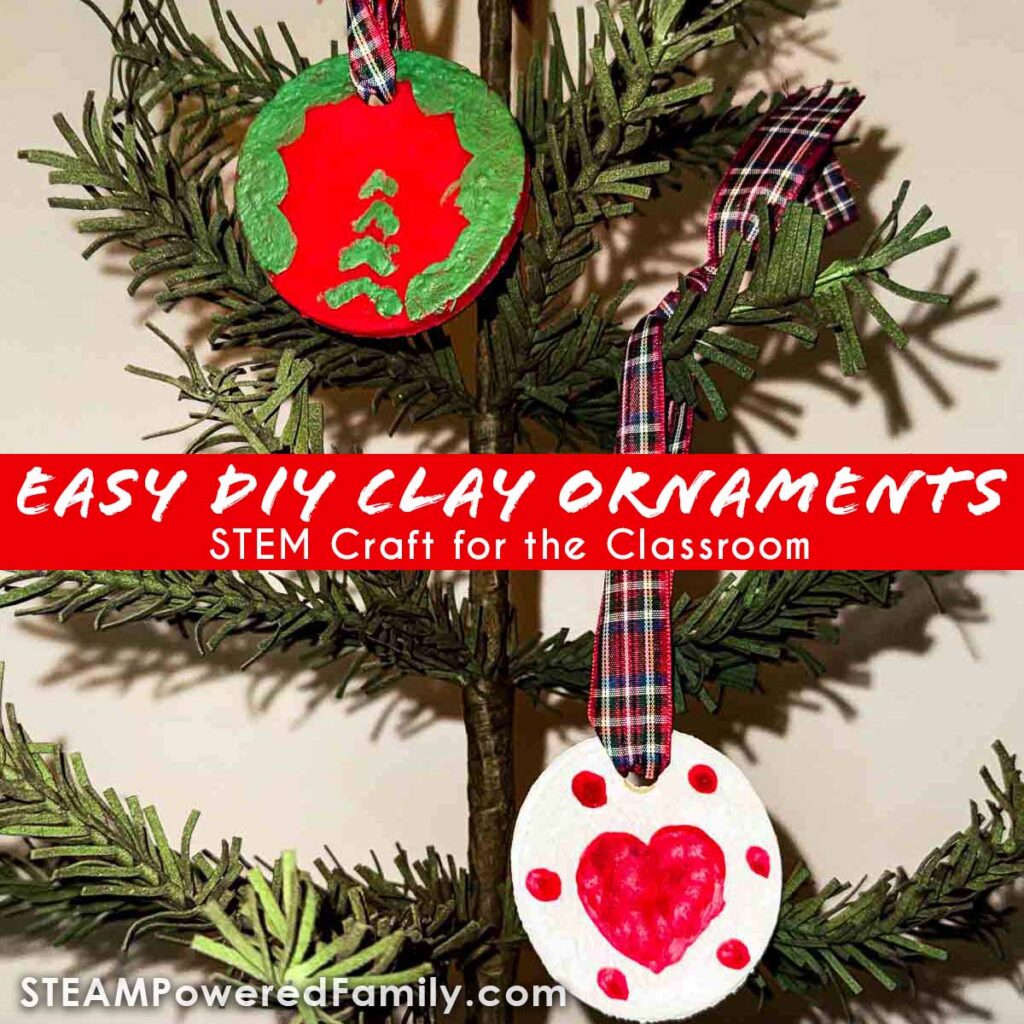
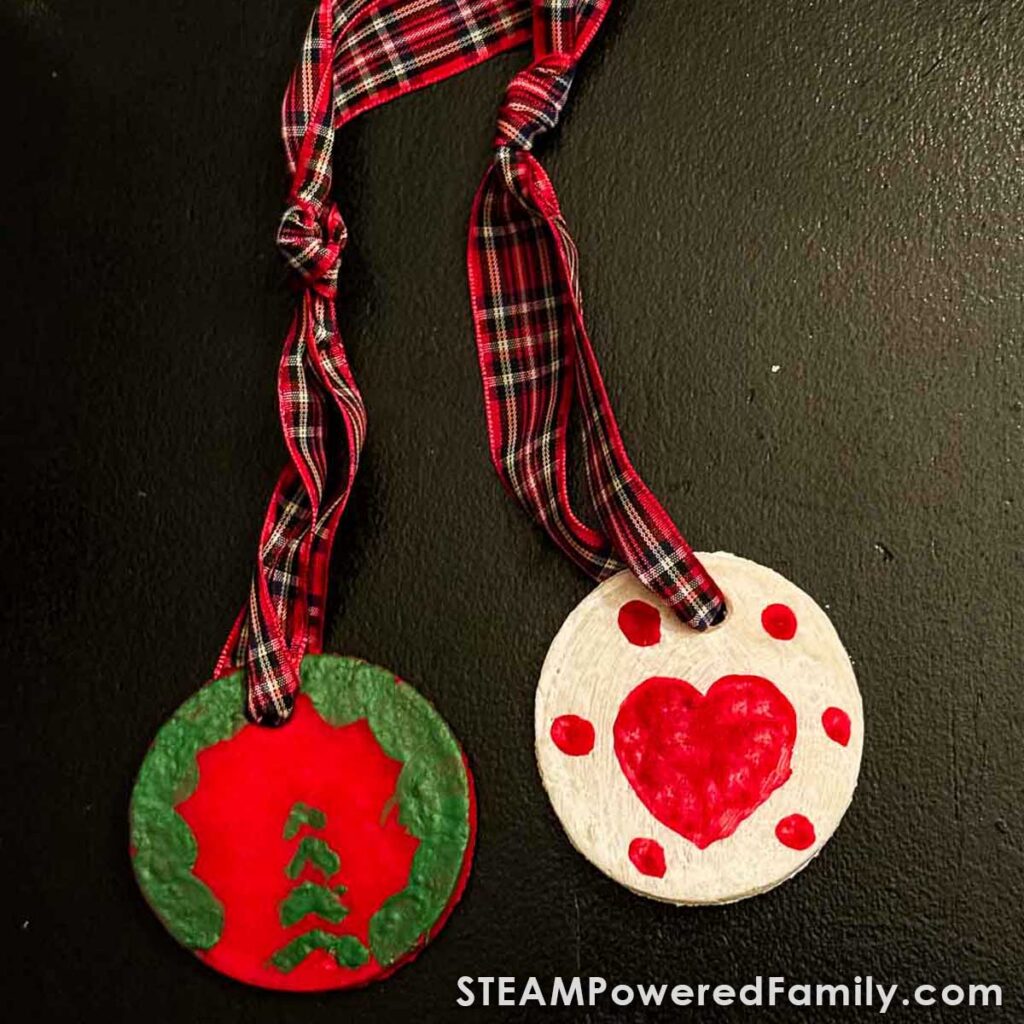
Once everything is completely dry, if the students would like to decorate them with paint they can. Acrylic paints work best for a vibrant, long-lasting finish on air dry clay ornaments. Tempera paint can work but may flake. Once that is dry I recommend painting on a thin layer of white school glue or Mod Podge to seal and protect the ornament.
Add a ribbon and they are ready to hang!
Pro Tip! I did two batches of ornaments, one just left out to dry and one with a second pan on top. Some of the ones I left out to just dry curled a little – they are still very pretty, but if you want flat ornaments you might want the second pan to weigh them down while they dry.
I love the ornaments and decorations my kids made when they were little. They become even more precious as my kids grow older. Family keepsakes like this simple air dry clay recipe and ornament craft are sure to make a memorable project for the kids and one the parents will love too!
This kind of project just proves that some of the best learning happens right in the kitchen. Simple materials – unforgettable learning! For more holiday crafts check out Holiday Salt Dough Ornaments or No Prep Holiday STEM! Happy Holidays!