DIY Jack-in-the-Box: A Fun STEAM Engineering Project for Kids
If you want a project that gets kids building, testing, laughing, and then immediately wanting to try again, this is it. A DIY Jack-in-the-Box is the perfect mix of craft and engineering. It looks simple on the outside, but inside there is a whole lot of science happening. Energy, motion, and a bit of “Oooh! That worked!” magic.
And the best part? You do not need fancy materials. Just a few everyday items and a willingness to experiment. (Some of the best versions do not even have hinges. They just pop when you open them!)
What is a Jack-in-the-Box?
Table of Contents

Disclaimer: This article may contain commission, paid partnerships, or affiliate links. We independently review everything we recommend. When you buy through our links, we may earn a commission from qualifying purchases.
A Jack-in-the-Box is a classic toy with a figure that pops out when you open the lid. The idea is simple, but the science packed inside it is anything but. With a tube, a spring, a lid, and a small character on top, you have a perfect tool for teaching energy transfer, forces, and design thinking to kids.
This DIY Jack-in-the-Box build uses a removable lid rather than a hinged one, which makes the physics even easier for kids to see. When the lid comes off, the stored energy releases all at once, and the surprise factor is unbeatable.
Why This DIY Jack-in-the-Box Project is Such a Winner
This is one of those activities that sneaks in loads of STEAM learning while kids are just focused on making something fun. You will cover:
- Mechanical engineering (how things move). For more along these lines, see our roundup of mechanical engineering for kids.
- Forces and motion (push, pull, release)
- Energy transfer (stored energy becomes movement)
- Design thinking (build, test, improve)
Because it is hands-on, the concepts are easy to understand. Kids are not just told that springs store energy. They feel it, see it, and hear it pop.
The Science Behind a DIY Jack-in-the-Box
At first glance, it is just a popping toy. But inside, there is a whole chain of physics events happening in a split second.
Stored Energy Becomes Movement
The key idea here is energy transfer. When you push the character down and close the lid, you are storing energy.
- The compressed spring stores potential energy.
- When released, that energy becomes kinetic energy (movement).
- That movement is what makes the character pop up.
In simple terms: stored energy becomes released energy, which becomes motion.
Newton’s Laws in Action
Yes, really. This little toy uses all three of Newton’s Laws of Motion.
1st Law (Inertia). The character stays still until a force makes it move.
2nd Law (Force and Motion). More force means a faster, higher pop.
3rd Law (Action and Reaction). As the lid lifts, the tube feels an opposite force and pushes the object inside up and out.
The Role of the Lid on the Tube
This design uses a lid that lifts off the tube rather than a hinge, which makes the science clearer for kids. The lid acts like a barrier, holding the energy in place. The spring itself is doing the work of a simple machine, storing energy and then releasing it all at once.
- Closed lid = energy is trapped.
- Lid opens = energy is released instantly.
That moment is called a release of stored energy, and it is the exact same idea behind trampolines, mousetraps, and pinball machines.
DIY Jack-in-the-Box Video
Watch this activity in action in the video below, if you can’t see the video due to your settings, visit our YouTube channel.
How to Make Your DIY Jack-in-the-Box
What You Will Need
- Jack-in-the-Box template for decorating, outline and colored versions
- Paper clips or small bulldog clips
- Glue stick, wood glue, super glue, and a glue gun (depending on which two surfaces you are sticking together)
- Tissue box or postage box tube with a lid on either end, cut to 14 cm tall
- Compression spring that is about 3 to 4 cm taller than the cut tube (17 cm total)
- 6 cm polystyrene ball
- Small pliers
- Scissors
- Ruler
- Thin permanent black marker
- Pencil
- Exacto cutting knife
- Small dowel stick or old pencil that fits inside the spring, cut to 7 cm long
- Small empty postage box (for the cardboard circles)
- Bottle top
- Paint and paintbrush
Step 1: Get the Tube Pieces Ready
- Use a ruler and pencil to mark 14 cm from one end of the tube, all the way around.
- Use the Exacto knife to gently and slowly cut the tube along the line you just made.
Tip: Keep your fingers away from the knife and use small movements. Do not rush this step.
- Place the cut tube onto a piece of shipping box cardboard. Trace one circle around the outside of the tube, and two circles around the inside of the tube.
- Find the middle of the two smaller circles with a ruler, then use the dowel stick to trace a hole in the center of each.
- Cut out all the circles with the Exacto knife. Do not forget the two holes in the middle.
Tip: Rough-cut all the circles out of the cardboard first. It is much easier to hold a small piece while you trim it to the final shape.
Always keep your fingers away from the blade and never use force. Be gentle. Some kids may need an adult to help. The easiest way to cut through thin cardboard with an Exacto knife is to score it flat on a cutting mat first, then use the point of the blade to finish the cut while you hold the piece in your hand. You can see this in the video above.
Step 2: Build the Base
- Using wood glue, stick the two smaller circles (with holes) together, then attach them exactly in the middle of the larger circle. Leave the same size lip all the way around.
- Leave the base to dry for about 10 minutes.
- Put glue inside the small center hole and around one end of the dowel stick. Push the dowel into the hole.
- Leave it to dry for another 10 minutes.
Step 3: Prepare the Spring and Head
- Using super glue, attach the compression spring to the top of the bottle top. Super glue is the only adhesive that will reliably hold metal and plastic together.
Tip: Keep your fingers far away from the super glue. A pair of pliers helps.
- Set the spring and bottle top aside to dry.
- Optional but recommended: paint the inside of the tube, the cardboard base, and the dowel stick black.
- Paint the polystyrene ball a flesh color (or any color you like).
Step 4: Finish the Tube
- Put wood glue on the lip of the base around the dowel stick.
- Place the tube down onto the base. It should fit perfectly onto the lip you left in step 1.
- Turn the tube over and wipe off any excess glue. Leave it to dry for 10 minutes.
- Once dry, paint the bottom of the tube and slightly up the sides with black paint. Set aside to dry.
Step 5: Decorate the Head
- Use the face parts on the template to trace a face onto the ball, or color and cut the parts out and stick them onto the ball with a glue stick. (Stick to glue stick here. Other glues will eat into the polystyrene.) You can also draw a face directly onto the ball.
- Add wool for hair using super glue, or draw hair on with a permanent marker or paint.
- Cut out the body wrap from the template. You can use the colored version or color in the blank one yourself.
Step 6: Attach the Head to the Spring
- Put some super glue around the edge of the bottle top with the spring, then stick it onto the polystyrene head.
- Add a line of super glue around the bottle top to reinforce the join. Set aside to dry.
Step 7: Wrap the Tube
We are nearly there!
- Wrap the body template around the tube and hold it in place with paper clips to make sure it sits straight.
- Once you have the position right, turn the tube on its side. Glue the end of the wrap and stick it down. Hold both ends with clips and remove the others.
- Work your way around in small sections, applying glue and pressing the wrap down until the whole tube is covered.
Step 8: Install the Spring
Last step!
- Put super glue on the bottom of the spring.
- Place the spring into the tube, over the dowel, and press it firmly onto the base.
- Hold for a minute or two so the bond sets properly. Leave the whole thing to cure for a few more minutes.
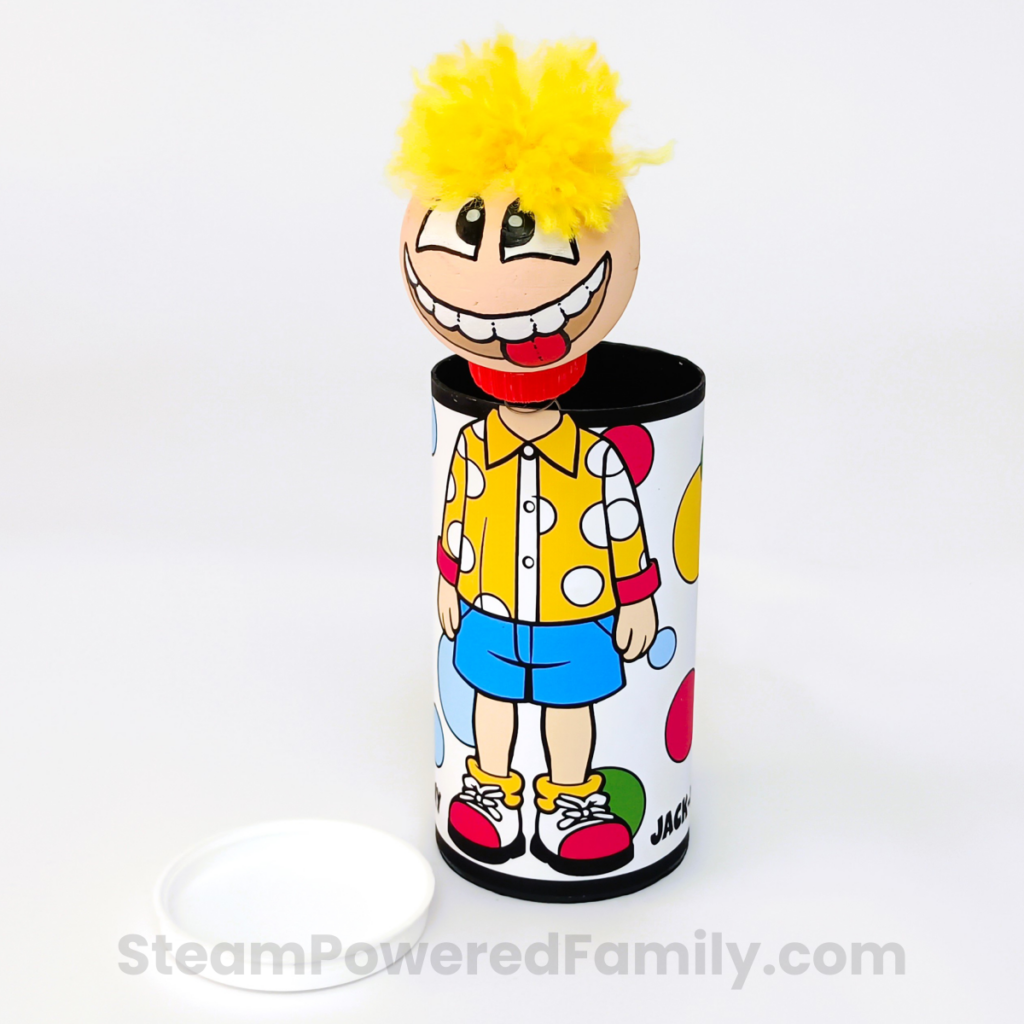
Your DIY Jack-in-the-Box is Ready
Push the head down into the tube, place the lid on, and hand it to someone unsuspecting. SURPRISE!
Boom. Physics in action. When the lid is lifted, the stored energy releases all at once and the character pops up. Every single time.
Turn Your DIY Jack-in-the-Box Into a Mini Science Experiment
Once the build is finished, do not stop there. This is the perfect setup for a real science experiment. The rule of the scientific method is to change only one variable at a time, so pick one of the following and test it:
- Use different sized springs (stiffer, looser, longer, shorter).
- Change how far the spring is compressed before closing the lid.
- Add weight to the character (a small coin, a pebble, a marble).
- Try different sized tubes or boxes.
Then ask the kids:
- Which version popped the highest?
- Which one popped the fastest?
- Why do you think that happened?
What is great about this activity is that the science is not hidden. Kids can see the energy being stored, see it being released, and watch the motion happen instantly. The cause and effect is right there in their hands.
Where Else Do We See This Science?
Once the kids understand stored and released energy, point out everywhere else they meet it in real life:
- Trampolines
- Slingshots
- Springs in toys
- Car suspension
- Pogo sticks
- Mousetraps
Suddenly the world is full of stored energy waiting to be released.
Take Your DIY Jack-in-the-Box Project Further
If your kids are hooked on building things that move, push, and pop, keep the momentum going. Our resources for engineering for kids page has everything you need to keep them creating, from beginner challenges to advanced builds.
Want a structural engineering challenge that pairs beautifully with this one? Try our marshmallow igloo build. It is a low-prep, high-engagement design challenge that gets kids thinking about how shapes hold weight and resist force.
And if your DIY Jack-in-the-Box is giving you spooky vibes (let us be honest, it kind of is), save this build for October and pair it with our Halloween STEM activities. A pop-up surprise toy fits the season perfectly.
Final Thoughts
A DIY Jack-in-the-Box is exactly the kind of project we love at STEAM Powered Family. It is hands-on, it covers real physics, and the payoff (that pop) is so satisfying that kids will want to rebuild it, tweak it, and test it over and over again. That is real learning.
Have fun. Make a mess. Test everything. And do not be surprised when your child is suddenly an expert on Newton’s Laws.
Frequently Asked Questions
A Jack-in-the-Box is a classic toy where a figure pops out of a closed tube or box when the lid is released. It works through stored energy. When you compress the spring and close the lid, you trap potential energy. The moment the lid lifts, that energy turns into kinetic energy and the character pops up.
This DIY Jack-in-the-Box covers mechanical engineering, forces and motion, energy transfer (potential to kinetic), and all three of Newton’s Laws of Motion. It also teaches design thinking, since kids build, test, and improve as they go.
The main materials are a cardboard tube with a lid, a compression spring, a polystyrene ball for the head, a bottle top, a small dowel, cardboard scraps for the base, glue, paint, and a printable decorating template. Most of these are everyday items you may already have at home.
Yes, with adult supervision. The project uses an Exacto knife and super glue, both of which need a grown-up nearby. Younger kids can handle the painting, decorating, and testing steps while an adult does the cutting and gluing.
This project works beautifully for ages 7 and up. Younger kids will love the decorating and testing stages, while older kids can take on the full build and turn it into a real science experiment by changing variables and recording results.