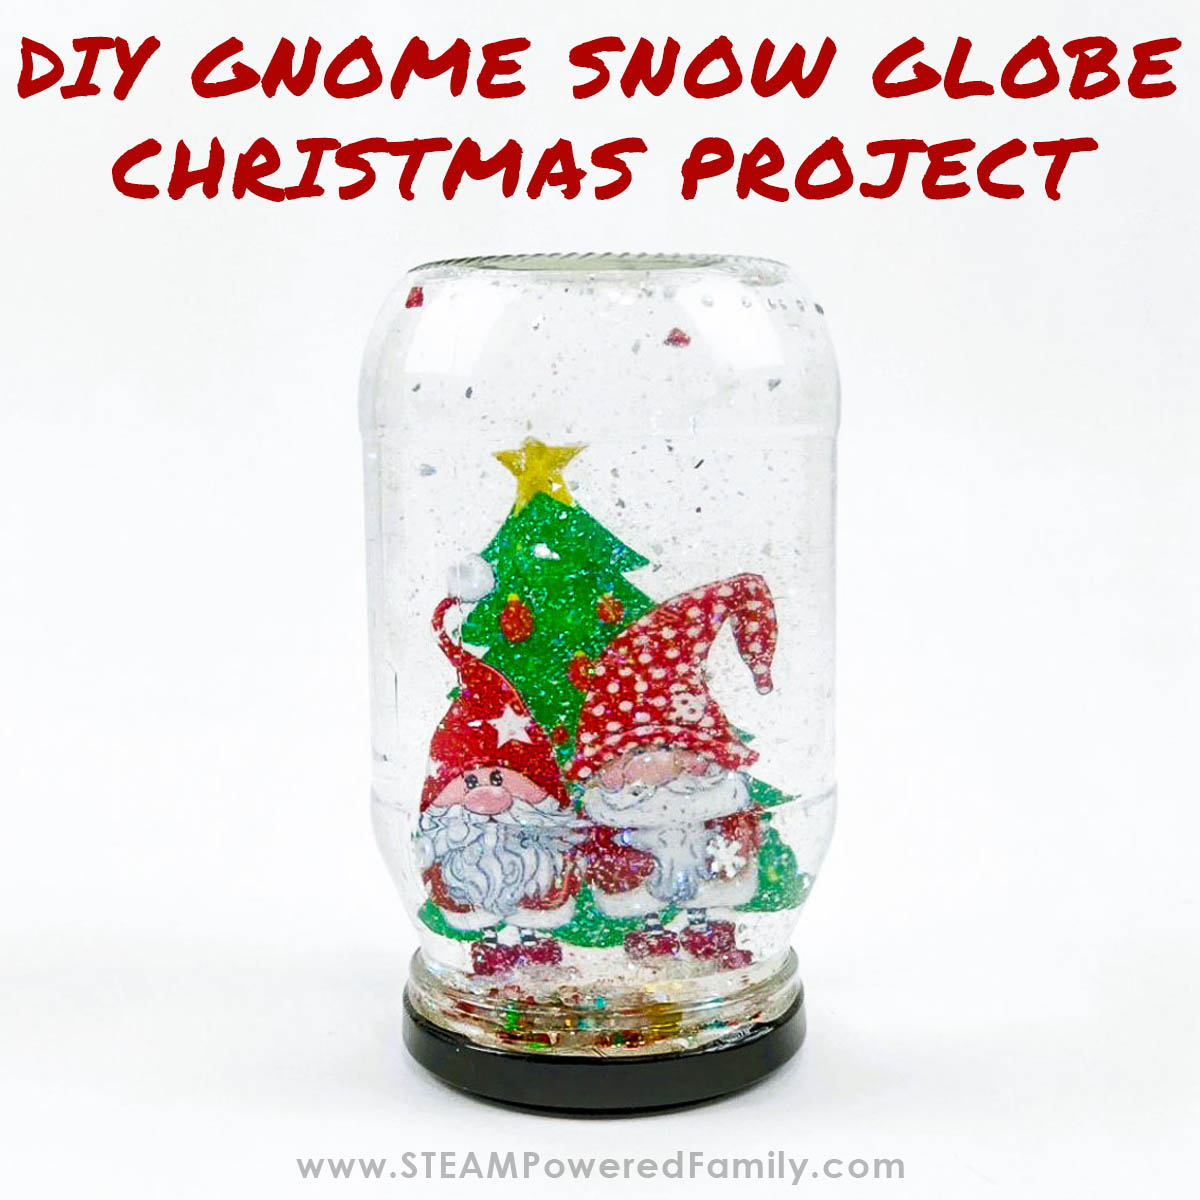
Build a Gnome Snow Globe Project
We love a good science sensory project around here, and making snow globes is a fantastic way to combine sensory and science. Snow globes are basically sensory bottles but with a fun, static scene inside. We wanted to create a snow globe project that would be easily scalable for a classroom or STEM, and today’s project fits the bill perfectly as we learn how to make a snow globe with this cute Gnome Snow Globe Project.
DIY CHRISTMAS GNOME SNOW GLOBE PROJECT
Disclaimer: This article may contain commission or affiliate links. As an Amazon Influencer I earn from qualifying purchases.
Not seeing our videos? Turn off any adblockers to ensure our video feed can be seen. Or visit our YouTube channel to see if the video has been uploaded there. We are slowly uploading our archives. Thanks!
I live in Johannesburg, South Africa, where we do not see snow. I have seen snow here only three times in my life, and what an incredible experience it has always been.
I’m sure that around the world, many countries don’t see snow, so in this simple, quick and easy project, we are going to make a homemade snow globe.
Classic snow globes are small, clear balls that hold a miniature scene of Christmas with fake snow or glitter, and when it is shaken or turned upside down, it looks like it is snowing inside the little ball.
I decided to make an adorable Gnome theme for this DIY snow globe project. These mythical creatures became a Christmas tradition in the 18th century in Scandinavia. The Scandinavians believed that came out on Christmas day to hand-deliver gifts and to spread Christmas cheer. Some people believe that they are a symbol of good luck and protection. Which I think makes this a great idea for a special kid made present that they can gift to someone they love.
Before we make our snow globes, let us look into the science behind the liquid in the snow globe jar!
How Do Snow Globes Work?
The science behind a snow globe is very easy to understand.
The liquid inside the jar is usually a mixture of distilled water and Glycerine.
Why should you use distilled water instead of regular tap water?
Distilled water is purer than tap water and has no impurities that could contaminate it and cloud the snow globe. If you don’t have distilled water, use bottled water instead of tap water.
Glycerine has a very high viscosity. This means it is very thick and does not flow very quickly, so when you add glitter, it takes a while to float down to the bottom of the jar. Just like a real-life snowfall, an illusion of snow falling to the ground is created.
All liquids have density. Density tells us how heavy something is, but it’s about how much space it takes up in a liquid. If you have equal amounts of water and Glycerine in a bottle, the water is lighter than the Glycerine, so it will drop to the bottom because it weighs more than water. This means that it has a higher density than water.
The density of the liquid inside the snow globe is critical because the more dense the liquid is, the easier it is for objects to float around. For this reason, Glycerin is a good option in the snow globe, as it allows any things you have added to the snow globe to fall more slowly to the bottom of the jar. Corn syrup, mineral oil, baby oil and coconut oil can be used instead of Glycerin.
Gravity also plays an essential role in how the objects in the snow globe move around.
When you shake the snow globe, you add energy to its liquids. The objects you have added to the jar move around because of this energy, but after a while, they will drop down to the bottom of the bottle because of gravity.
So, let’s get your crafty and make this fun snow globe!
How to Make a Christmas Gnome Snow Globe
Materials & Tools
Mason Jar or other glass jar
Clear fish tank silicone or craft silicone glue
Box cutter
Ruler
Scissors
6cm polystyrene ball
Any colour glitter (preferably chunky glitter)
Glitter snowflakes (optional)
Coloured sequins (optional)
Q-Tip
Small plate
Teaspoon for measuring
Paper towel
Glycerin
Distilled water
Laminating machine
Paper
The Gnome Templates if you want to make yours look like ours, or grab your own designs. These templates are available for STEAM Powered Family mailing list members. Already a member, simply enter your email to unlock the printable.
Gnome Snow Globe DIY Directions
Video Tutorial
What our video tutorial to see how we did this Gnome Snow Globe. If you can’t see the video, it is likely your firewall or adblockers are blocking the feed. You can also find the video, with a closed captioned version, available on the STEAM Powered Family YouTube Channel.
Make the Interior Scene
Print out the templates in colour. Or if you are making your own designs, take a look at the templates to ensure you add a stand for the bottom.
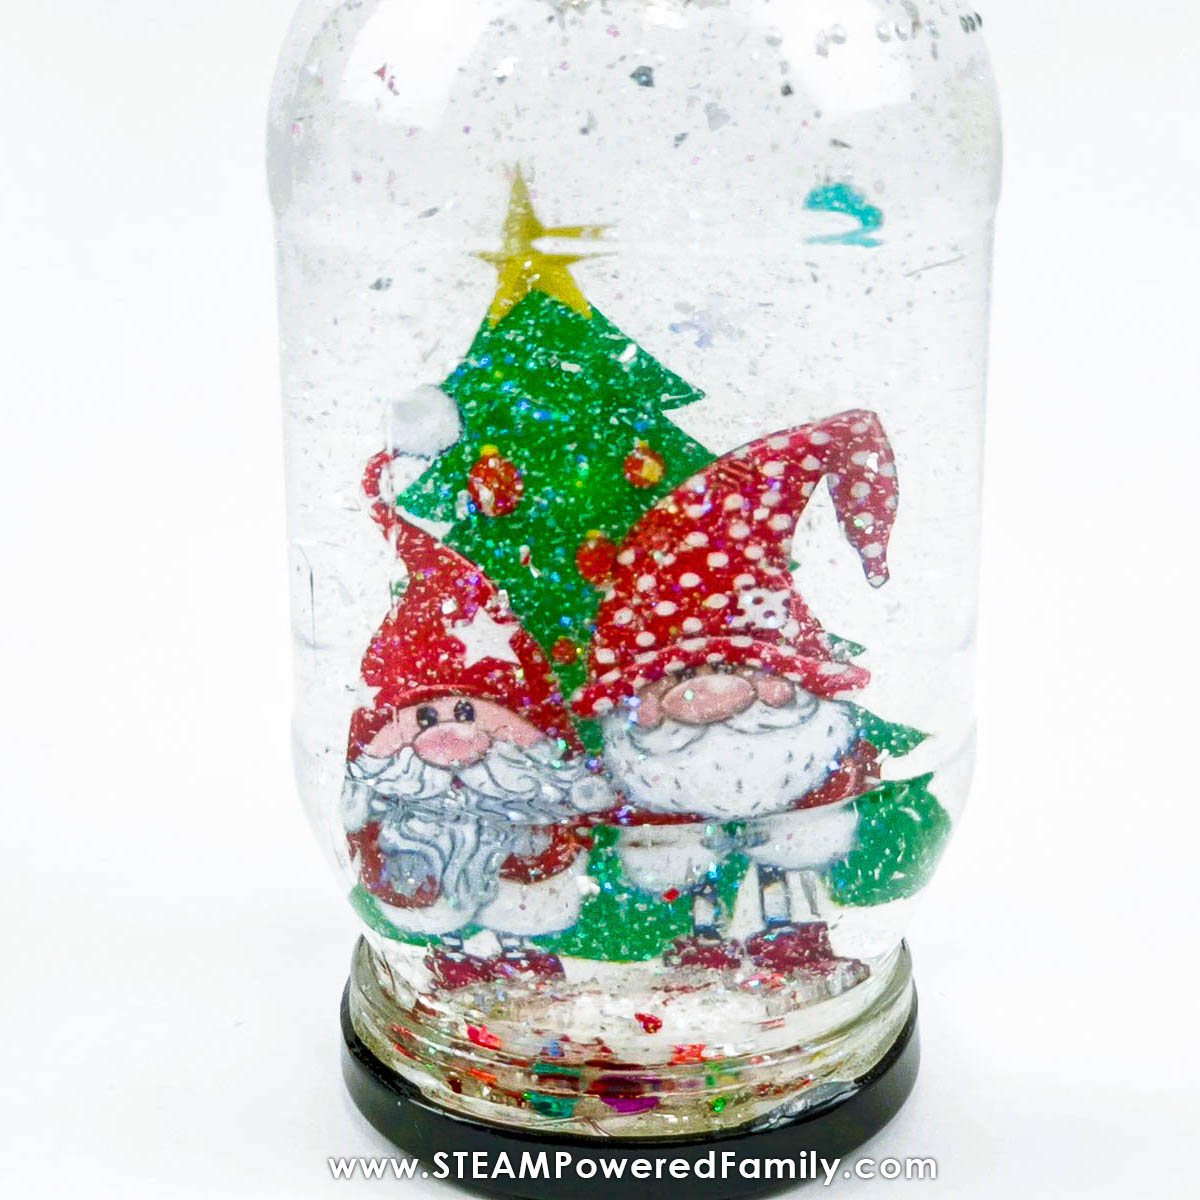
Cut out the gnome picture as shown on the template provided.
Lightly score the picture on the dotted line in the middle.
Fold one side of the template backward and glue the two sides together, back to back, using the glue stick.
Cut around the image, ensuring no white is left in the background or around the edge.
Don’t forget to leave the little white “stand” at the bottom. This little piece will stand between the two parts of polystyrene that we will cut for the inside of the lid in the next few steps.
Laminate the image and cut it all around, leaving 3mm of the laminate all around. This will ensure that the image remains waterproof.
Preparing the Polystyrene Ball Base
This next step should be done by an adult, or only by older children under responsible adult supervision as the box cutter is sharp.
Cut the polystyrene ball in half using the box cutter. Use the line in the middle of the ball as your guide. Make little cuts around the ball, then go a little deeper the second time until the two halves fall apart.
If you do not have a polystyrene cutter, push the blade of the craft knife out entirely and carefully cut through the Styrofoam in a straight line.
Pro Tip! If you want to work quicker in the classroom, you can prep these pieces ahead of time.
The base will be too big for your jar, so we need to trim it down.
Take one of the polystyrene halves and set it on the table, round side up. Take the lid off the jar, and turn the jar upside down. Place the mouth of the jar onto the top of the polystyrene.
Use a pencil to trace the line all the way around the jar mouth where it touches the polystyrene.
Cut along the line carefully with the box cutter, remembering to make little cuts until the two parts fall apart.
Make a slit across the middle of the small dome. Do not cut through this piece. The gnome picture needs to be placed into this slit.
Gluing Together the Scene
Using the silicone glue, stick the dome into the lid, ensuring it is in the middle. Test before final gluing to ensure the mouth of the jar fits over and you can screw on the lid. Once you are sure it all fits, glue it down.
Squeeze a little glue onto the ends of the “stand” at the bottom of the picture and push it into the slit in the polystyrene.
Get some scrap paper, as the next part can get messy!
Place the lid onto the paper, squeeze some silicone glue onto the polystyrene dome, and spread it evenly with a Q-Tip.
Get some glitter and sprinkle a lot all over the dome. Shake and tap the lid to get the glitter all over the dome.
Please leave it to stand for about 10 minutes.
Tap to get excess glitter onto the paper. Then put the excess glitter back into its container by picking it up, bending the sides inwards to make a funnel. Then carefully pour. See, NO MESS!
Let the glue dry for at least an hour. You do not want your snow globe to collapse when you put the liquid in because the glue wasn’t dry enough!
Assembling the Snow Globe
Gather all your glitter and snowflakes, the distilled water and the Glycerine.
Place the bottle onto a plate or tray to catch the liquid that overflows when you close the lid.
Fill the bottle almost to the top with the distilled water.
Put one tablespoon of Glycerine into the distilled water.
Add all your glitter and embellishments to the bottle, too. You can gently stir the liquid with a teaspoon to mix everything up inside the bottle
You may want to add more later. Perhaps your snow is not falling slowly enough for you, or you need more glitter. Instead, add little at first! You can always add more, but it is really difficult to fix if you add too much.
Now that everything is in, top the bottle up with distilled water to the top of the mouth of the bottle.
Gently place the lid with the gnomes in place and twist it closed. The excess liquid will spill out onto the plate.
Shake the bottle gently to mix everything up inside. Now is your chance to see if you are happy with the snowfall action in the bottle.
If you are happy with the result, use a paper towel to wipe up all the water and ensure the bottle is completely dry and properly closed.
If you need to adjust the amounts of Glycerine, snowflakes or glitter, open the bottle and add a little extra at a time, now.
Now, we need to seal the bottle closed. Squeeze a line of silicone glue around the edge of the bottle where the lid joins it and leave it to dry for an hour.
Your DIY snow globe is finished!
How to Use a Snow Globe
Shake it up, place it on any surface and watch the magic happen!
More Snow Globe Ideas
If you enjoyed this project, make other snow globes for friends, family, or even your teachers. They make great year round gifts, and you can make your snow globes very unique and special.
Maybe you could make a dinosaur themed one using small toy dinosaurs. Just glue the dino toys to the lid. You can even add little plants.
Or you could make a special one that says “thank you and your teachers name” as a teacher gift.
Lego is a fun way to build different scenes inside of a snow globe, just build and glue it all together, then glue it to the lid.
Perhaps you have a friend who loves fish, make a “snow globe” that is an aquarium with little fish in it.
Or make a beautiful fall themed snow globe with falling leaves instead of snow.
There are so many cool ideas you can do with snow globes.
More Gnomes
Do you love gnomes? Try our Gnome Ornament Project with Crystal Beards. This is a fantastic science experiment combined with crafting as kids grow crystals for the beards before creating their gnome ornaments.
Let your imagination run wild!