DIY Drum Craft for Kids
Today’s project is one we get a lot of requests for, musical STEM projects! There is something really magical about making a musical instrument, then seeing the joy and excitement as the kids make music with something they created. It is a powerful moment and a wonderful way to combine lessons in math and the science of sound, music, and sensory exploration. Ready to build a DIY drum and watch the magic? Let’s go!
HOMEMADE MUSICAL INSTRUMENTS PROJECT
Table of Contents
Disclaimer: This article may contain commission, paid partnerships, or affiliate links. We independently review everything we recommend. When you buy through our links, we may earn a commission from qualifying purchases.
Imagine a world without music. Movies would be nothing more than moving pictures. Music helps us relax and feel happy. It also reminds us of happy or sad times in our lives.
Music is all around us! We hear it on the radio, TV, at the grocery store, the mall, waiting rooms and even some elevators!
To make this music, we need different instruments and because there are so many different cultures in the world, there are many kinds of instruments and many different designs of certain musical instruments we know as well.
Each of these instruments is played in a specific way and they all have their unique sound.
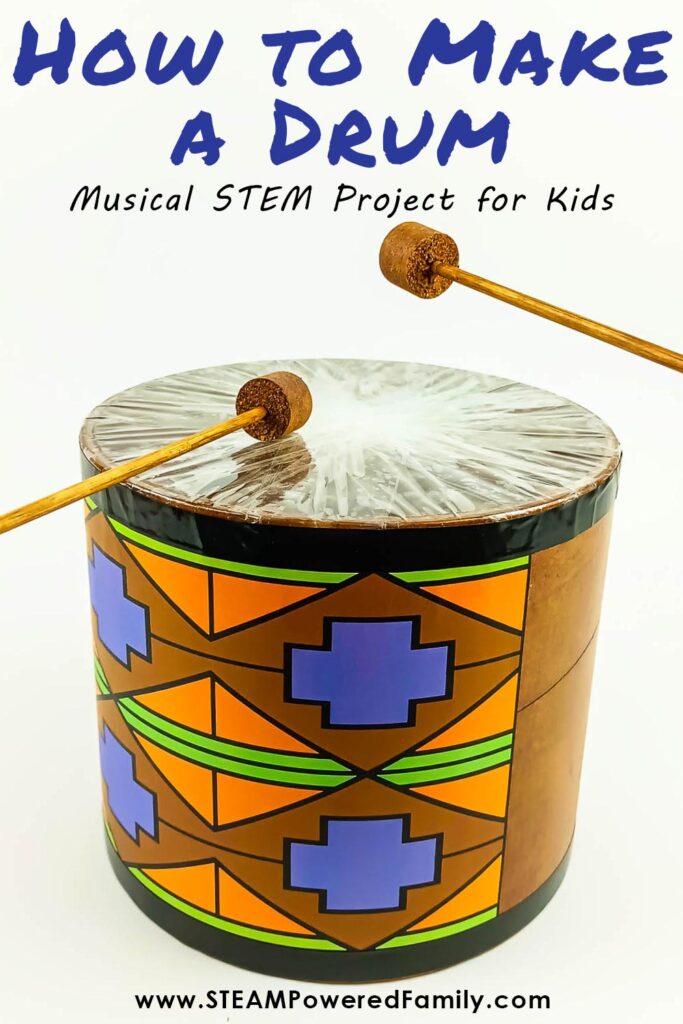
In this fun and easy project, we are going to make an effective, inexpensive DIY drum from simple materials you would find at home or your local stores.
I live in South Africa and the drum is used by many African cultures, so it has a special place in my heart. At most of our schools here, the children make some form of a drum and it plays a large part in their music curriculum. I am excited to share this DIY drum project with you!
Types of Instrument Families
There are three main families of musical instruments. Let’s explore them.
Wind Instruments
Wind instruments are hollow tubes that make a sound when you blow either into or across a mouthpiece that is attached to the tube. These tubes can be a variety of shapes, which make different sounds. They either have holes, keys, or valves that change the pitch of sound.
There are two main categories of wind instruments: brass and woodwind. These names originated from the materials they are made with.
The flute, clarinet, bassoon, and oboe are part of the woodwind family and the saxophone, trombone, trumpet, tuba, and French horn belong to the brass family.
Another wind instrument is the harmonica. Learn how to make a simple harmonica with your kids here.
String Instruments
String instruments come in many shapes and sizes. They are great instruments to create sounds with, as the pitch can be changed by tightening or loosening their strings.
Today many string instruments are electric or digital.
The cello, bass, violin, guitar, harp, and sitar of some popular string instruments. The strings are plucked with a finger, strummed with a hand or guitar pick, or a bow can be moved across the strings to create a variety of sounds.
When a string is played, it vibrates causing the air particles around it to vibrate in a wave allowing the sound to travel to our ears.
Percussion Instruments
Drums of all types, chimes, tambourines, gongs, cymbals and your DIY drum are all percussion instruments. All these instruments are either hit, scraped, or shaken, which causes the surface to vibrate and sound waves are emitted into the air. The harder they are hit or shaken, the louder the sounds are.
A piano is a percussion instrument. When you press a note on the keyboard, a hammer strikes the string that produces the note.
You can use parts of your body as percussion instruments like clapping your hands, snapping your fingers, stamping your feet, or even clicking your tongue. Or you can make your very own drum like we are doing today.
Video Tutorial for How to Make a Drum
Check out our video on how to make a DIY drum. This is a great way to learn how to do the project before tackling it yourself. You can watch it yourself or with your kids, as we show you step-by-step how we created our drum. If you can’t see the video, it may be your firewall is blocking the feed. You can also find the video on the STEAM Powered Family YouTube Channel.
How to Make a Homemade Drum
Materials & Tools
Cardboard Core/Tube* See Note Below
Roll of 5cm wide clear tape (packing tape works great)
Glue stick
Roll of duct tape or electrical tape
Two thick wooden skewers
Wine bottle cork
Scissors
Craft knife with cutting mat
Pencil
Ruler
Some paint and a paintbrush
*NOTE ON CARDBOARD TUBE (CORES)
We used one that was 21cm (8″) in diameter by 18.5cm (7″) tall. But you can use whatever size you want. You can find concrete forms or tubes at your local hardware store that work great. Packing tubes from the post office are another fantastic option, they are smaller, but you can get lots of different sizes to make a drum set. Another place to check is a local carpet shop. The carpet shops in South Africa have empties all the time, and it is likely the same in North America. Another idea is to use an empty plastic or metal 5litre container or pail, but the bottom of the container needs to be cut out which should be done by a responsible adult.
IMPORTANT!
For your DIY Drum the height must be greater than the diameter to get a good tone.
Directions for Making the Drum
If you have purchased packing tubes, they may be extra long. You will want to cut the tubes so they are slightly taller than they are wide. At Uline I was able to find an 8″ packing tube that is 72″ long. This long tube could then be cut into 8 drum cores. It would be easiest if an adult does this before your drum making session with the kids.
Once the drum cores are ready, it is time for the kids to get to work making drums!
Make the Top of the Drum
Stick the beginning of the clear (cello) tape about 3cm down onto the side of the drum, stretch the tape across the top of the cardboard tube as hard as you can and stick it down 3cm on the opposite side of the drum.
See the diagram below, of the steps to follow:
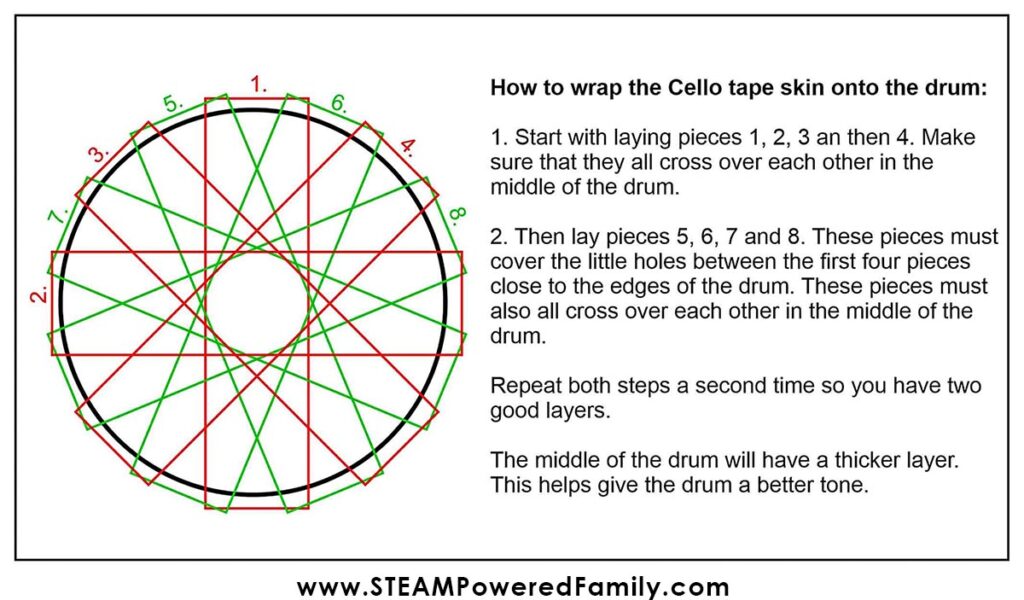
You should have eight pieces of tape across the top of the drum (in the first round of tape).
Repeat the round to give you a total of 16 pieces of tape.
NOTE: If you have a smaller cardboard tube, you may find you need less tape, or more narrow tape. Play with it to find the perfect ratio for your drum design and size.
Turn the drum upside down and using your hand or fist, push down on the tape so that all the pieces stick together.
Use the handles of the scissors to flatten all the tape around the sides of the drum.
Decorate the Drum
Now it’s time to decorate your drum. You can paint it, use stickers, create a design on the computer and print it out and glue it on (like we did), use different coloured/patterned tapes, whatever creative way you want to make your drum unique is perfect!
Using duct tape or electrical tape, wrap the top and bottom of the drum to secure the cello tape down.
Making the Drumsticks
Cut the cork in half using a craft knife.
SAFETEY NOTE: This step should be done by an adult. Responsible older kids can do it with adult supervision. The craft knife is very sharp and you are cutting a round object that may roll. Always ensure safety of the participants.
Find the middle point of both pieces and push the wooden skewers into each cork piece until you can feel the point almost come out of the opposite ends. You may need a little force to do this.
You can paint the drumsticks now if you wish to.
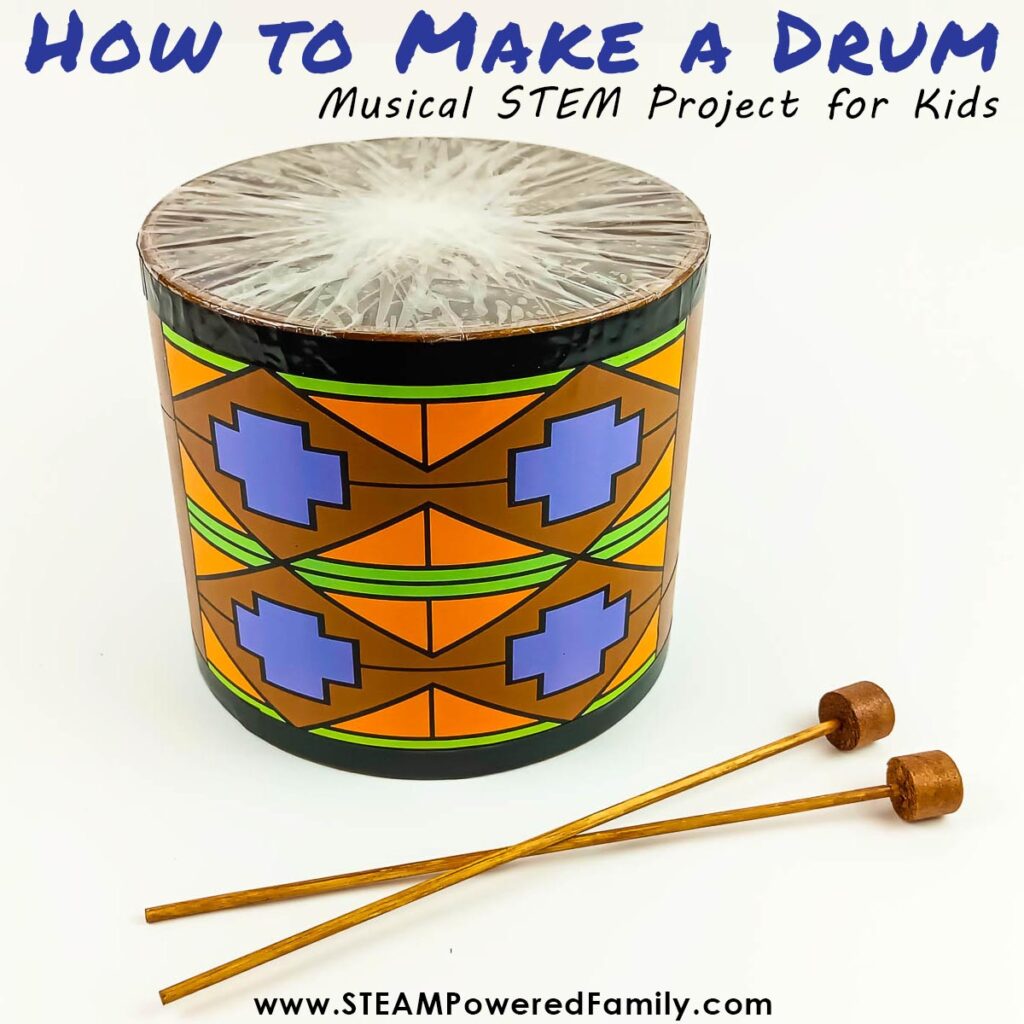
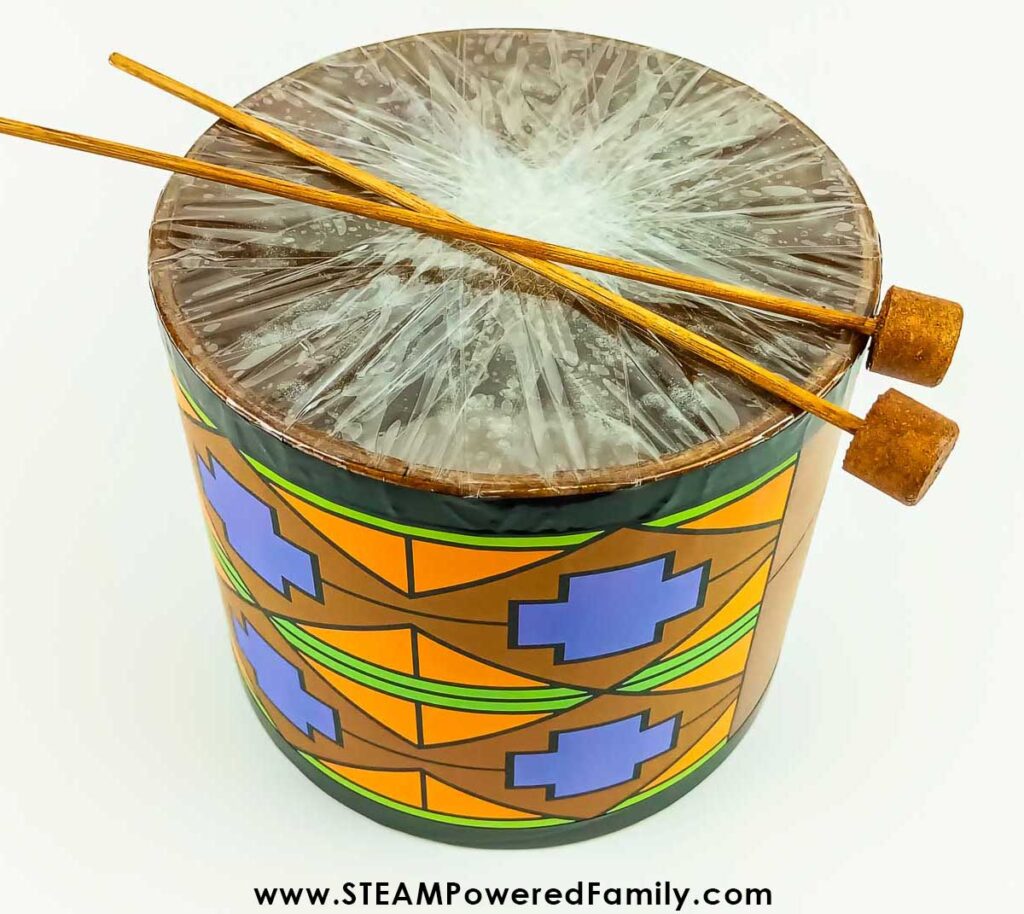
Your African DIY Drum is ready to play. Happy drumming!
Playing Your DIY Drum
An African drum can be played using drumsticks or your hands. Remember to keep the bottom of the drum open, as this will give you the best quality of sound.
The best way to play the drum is to hold the drum under one arm and use the tips and the palm of your other hand on the edges and the middle of the drum (to create different tones and sounds).
You can also sit on a chair with the drum between your knees and play the drum.
Extension Activities and Ideas
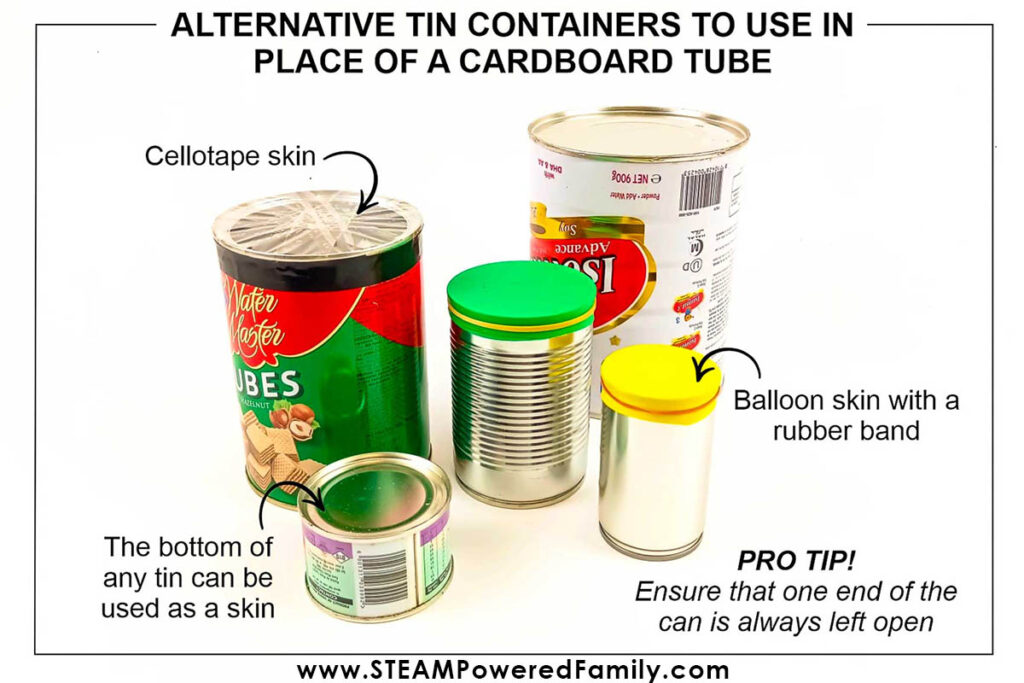
As you can see, this drum was not a difficult instrument to make. Below is an image of alternative objects you could use to make a drum. Most of them come from the recycle bin!
You don’t have to make just one drum. You could make a set of drums in different sizes and materials, as each drum has its unique sound or tone.
Test each drum’s tone to see in which order you would like them to be played, then see if you can play a popular song, or compose your own special melody.
Making other musical instruments at home
There are many instruments you can make at home. Here are two simple examples:
I’m sure a lot of you have asked “I wonder how to make a guitar?” Well. It’s quite simple. You can use a cereal box, a kitchen towel tube, rubber bands, a few popsicle sticks, some paint, and a bit of creativity.
You can make a harmonica at home too. With some tongue depressors, a few toothpicks or plastic straws, rubber bands, and some paper scraps, you can have a homemade harmonica in a jiffy!
Another fun project comes from our friends at the OT Toolbox who created this really fun rainbow xylophone project.
The History of Drums
Drums date back to thousands of years ago. People would beat on the drums during different events, and religious ceremonies, to communicate or as signals of imminent war.
The very first drums made in history (that we know about) were made in China using alligator skins around 5500 BC. From there they spread to other parts of Asia.
Cymbals, those brass parts of a drum set, were used by the Chinese, Turkish, Egyptians, and Israelis in 1100 BC.
Between 1000 and 500 BC, the Sri Lankans and Africans discovered drums and used them as a form of communication. They would beat out different sounds, kind of like morse code.
Drum culture then spread to Rome and Greece in 200 BC and from there it slowly spread into Europe, by around 1200 AD.
The African drum arrived in America in 1500 AD with the slave trade.
Originally drums were played just with the hands, but then, in the 1300’s, drumsticks were invented.
Drum kits as we know them today were first used in the late nineteenth century and included drums like the snare, cymbals, and the bass drum. Over time, other percussion instruments have been added to drum kits. Today you can find lots of incredible options. Maybe you can make a DIY drum kit!
Basic Music Vocabulary
Rhythm
The beat of music is called rhythm. A rhythm is a series of sounds, like the beats of a drum. The rhythm helps musicians play at the right speed. They count the beats to follow the same rhythm.
Tempo
The speed of a musical piece is the tempo.
Melody
A single musical sound is called a note. Notes placed in an order create a melody. The melody of a song is the hook.
Harmony
When many musical notes are played at the same time, a harmony is created. Different harmonies can make music sound happy, sad, or even scary.
Musical Notes
Musical notes are like an alphabet of letters. They can be high or low and are generally played together to make a tune.
There are seven musical notes. They are named after the first seven letters of the alphabet—A, B, C, D, E, F, and G.
How do we use Math in Music?
We learned about the science behind music earlier, but did you know that music also involves math? That’s right, musicians have secret math powers! Math and music seem like very different subjects, but they’re linked in a really cool way. Musicians are experts at counting beats, and clever composers create patterns in musical compositions.
Have fun making these simple musical instruments, and making music with your kids!