Quick & Easy Candy Cane STEM Activities
As December rolls around, attention spans get short, so let’s channel the holiday buzz into learning. These quick, low-prep Candy Cane STEM challenges keep students engaged while building engineering, forces & motion, and basic chemistry skills. Use classic canes, minis, peppermint sticks, or circles. Bonus: your room smells like peppermint, and scent cues can support memory so the learning sticks! Try one or run a rotating set of stations for a festive STEM day.
Candy Cane STEM: Low-Prep Holiday Projects Kids Love
Table of Contents

Disclaimer: This article may contain commission, paid partnerships, or affiliate links. We independently review everything we recommend. When you buy through our links, we may earn a commission from qualifying purchases.
This is a fantastic set of activities to do in the classroom, homeschool or as part of a festive holiday party. Best of all it is budget friendly and smells incredible! See the end of the article for Teacher and Classroom Tips.
Materials & Prep for All Candy Cane Challenges
Materials (Building & Engineering)
Candy canes, peppermint circles, peppermint sticks
Low-temp glue gun (adult use/supervision only) or Glue Dots
Tape, string/yarn, popsicle sticks
Small paper cups, cupcake liners, plastic plates
Small “presents” (light wooden blocks work well)
Materials (Peppermint Reactions)
Clear plastic cups/plates
Peppermint candy
Hot water, cold water, vinegar, vegetable oil
Quick Prep to Make the Activity Easier in the Classroom
Pre-open candy boxes and sort by type for faster station setup.
Pre-cut string/yarn in short/medium/long lengths for the zip line.
Protect tables with plastic plates/trays for easy cleanup.
Safety talk before hot water/glue (see Safety below).
SAFETY NOTE!
Remember safety always comes first in the classroom. Adapt activities as needed and always ensure adult supervision is provided.
Choking hazard: Peppermint and small parts—no eating during activities; supervise closely with younger students.
Allergies: Check for mint/food sensitivities; consider mint-free alternatives (e.g., red/white paper straws).
Heat: Hot water and low-temp glue guns used by adults only; students observe or use Glue Dots as a no-heat option.
Slips/spills: Keep liquids on trays, wipe spills immediately.
Don’t Eat Experiments: Candy used for experimentation shouldn’t be eaten. Have a different stash to snack on for after class is finished!
Challenge 1: Candy Cane Building (Engineering & Geometry)
For this challenge we want to apply engineering principles to build structures with unconventional materials.
Fundamental STEM Focus: Engineering, Structural Stability, Geometry
Objective: Design and build a stable structure using candy canes and optional connectors that can either stand on its own, reach a target height, or hold a set weight.
Key Concepts/Vocab: foundation, load, reinforcement, tension/compression, triangles vs. squares, center of mass
Candy Cane Construction
Make your challenge a little structured and a little open-ended to help the kids use their imaginations. For example you can challenge them to make a structure rather than say a house, or a bridge or a tower. Build the tallest structure you can with a box of candy canes that can stand on its own. Or build a structure that can hold a certain amount of weight. Or build me a structure that you could write a story about.

Lesson Prompts you can use
- Tallest free-standing structure using 1 box of candy canes
- Bridge that spans 20–30 cm and holds 10–20 coins
- Story-worthy structure students can write about afterward
- Try different connectors like popsicle sticks, cups/liners, tape, or Glue Dots.
- Test orientation: Is a candy cane stronger on its side or end? Why?
- Reinforce with triangles for stability…or try other shapes.
Tip! Students may use the connectors provided or they could try wetting the candy and letting the sugar melt and harden to keep them together.
Discuss with the students
What makes some candy cane structures stronger than others? We are looking for understanding of structural engineering concepts like strong foundations, structural reinforcements and solid building materials (is a candy can stronger on it’s side or on its end, does building the foundation in different shapes make it more stable, etc.).
Assessment Prompts
- Explain where your structure is strongest and why.
- What change most improved stability? (triangle brace, wider base, etc.)
Differentiation
Younger students: Use template cards with triangle/square patterns to copy.
Older students: Add a weight-to-materials ratio goal and make it an efficiency challenge.
Cross Curricular Links
#1: Encourage students to identify and use geometric shapes like triangles and squares in their designs. Discuss what shapes and angles have more structural integrity than others and how that can help them build.
#2: Have students build their structure and then write a narrative about the structure, like a Holiday Fairy Tale based around their peppermint structure.
Challenge 2: Candy Cane Zip Line (Forces & Motion)
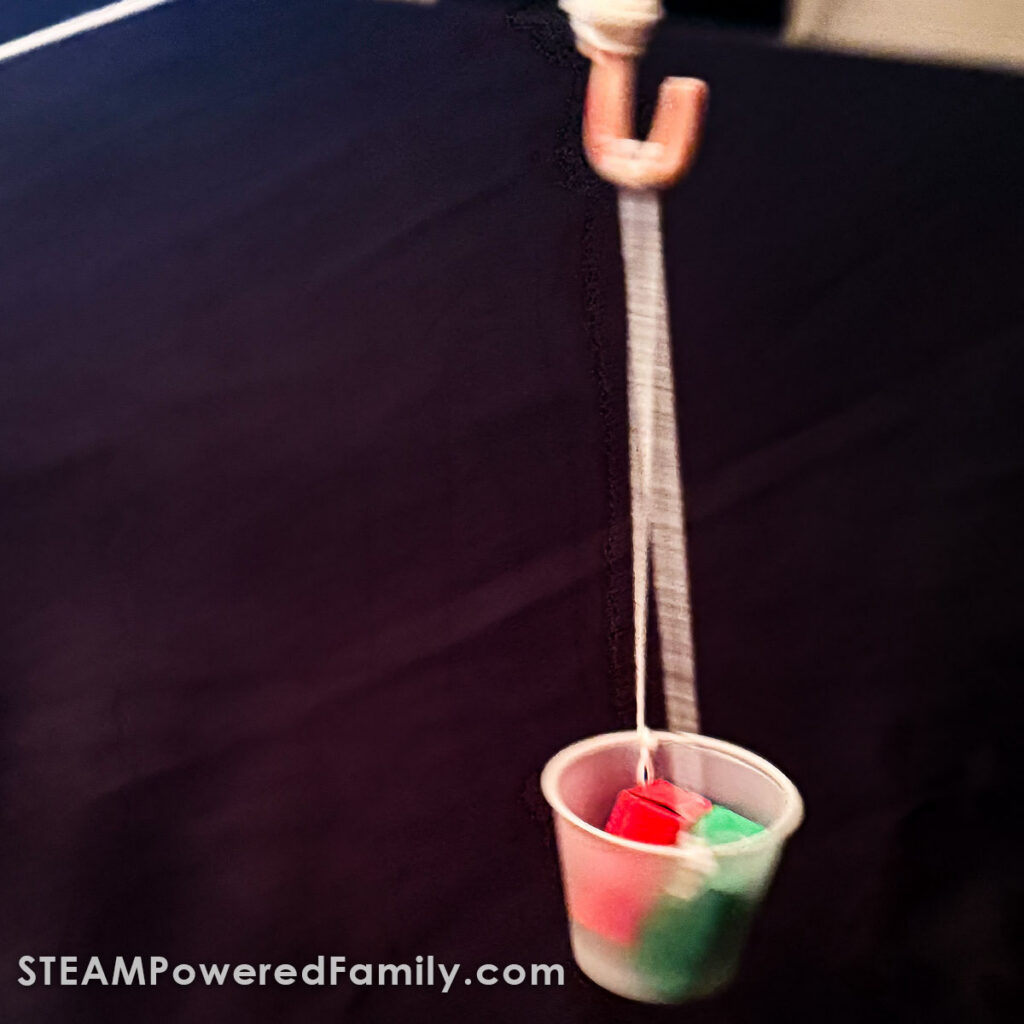
This activity is an amazing illustration of forces and motion. Students must design and build a zip line that can safely carry a holiday package from one point to another.
Force and Motion
Let’s talk about force and motion. We have three forces at work in a zip line Gravity, the driving force that pulls the vehicle down the sloped string toward earth or the ground. The bigger the slope or the steeper the angle, the more of the gravitational pull which will result in faster acceleration and a higher speed. A flatter slope has less motion because there is less driving force at work. The second force at work is friction, the resisting force that fights against motion between surfaces. The friction in our case is between the zip line string and the candy can hook. The third force is Tension or the supporting force. How tight the string is being held can help or hinder the action of the zip line. A tighter line will allow the vehicle to travel more smoothly and therefore faster.
In addition to the forces we can see working, we also have some of good old Newton’s Laws of Motion at work here. The first and second laws specifically. The Law of Inertia says that an object in motion stays in motion, and an object at rest stays at rest, unless acted upon by an unbalanced force. So both the starting and stopping of the vehicle are examples of this law of motion. Second Law: Force equals mass times acceleration. You can explore how adding things like coins or washers to the load of the gift increases the acceleration of the vehicle.
Potential and Kinetic Energy
We can also see Energy Conversion in this project, it demonstrates the conversion of Potential Energy (or the stored energy due to the vehicle’s height above the ground. At the start the potential energy is at it’s maximum. ) and Kinetic Energy (or the energy of motion. As the vehicle moves down, its height decreases, potential energy is converted into kinetic energy and makes it speed up).
Directions
Setup
Tape one end of a string or yarn high on a shelf or table and the other end lower to create a slope. The key to success is to ensure you anchor the string/yarn at an angle, going from high to low to create a visible slope.
Design
Show the students their “gifts” they have to transport and give each of them an array of items to choose from to make their zip line vehicle. They must use the candy cane as the hook over the zip line, but other than that the design is up to them. Students can design the carrier from cups, liners, sticks, tape.

Test
Run the vehicles down the zip line. Have students observe how well they travel, how fast and how far they go.
For more of a challenge try a timing the runs. You could do 3 trials per design, record the time with a stopwatch, then average your times for fair comparison. This will give you concrete data to compare designs and variables, plus it works in some math!

Ask
This is where we want students to explain what they learned and do a concept check to determine their understanding. Here are some questions you can ask.
How can we change the design of the zip line to make it faster or slower? Some investigation variables you can test as part of your experiments include:
- Slope – Steepen for more acceleration.
- Friction – Smooth tape on the hook vs. bare candy.
- Mass – Add coins/washers and time the run.
- Tension – Tight vs. slack line—track consistency.
Where do you see Newton’s 1st law? (start/stop)
How does adding mass affect acceleration on the same slope? (F = m·a)
When is potential energy highest? (At the start, due to height)
Challenge 3: Peppermint Reactions (States of Matter & Dissolving Rates)
Explore basic chemistry through dissolving and melting peppermint candies, and learn about states of matter.
Objective: Compare how hot water, cold water, vinegar, and oil affect dissolving and diffusion of peppermint candy.
Key Concepts/Vocab: dissolving, solvent/solute, diffusion, temperature, mixture vs. solution, reaction rate
The Lesson
Peppermint Candies are made mostly of sugar, which makes them perfect for a simple science experiment that explores dissolving, diffusion, and reaction rates.
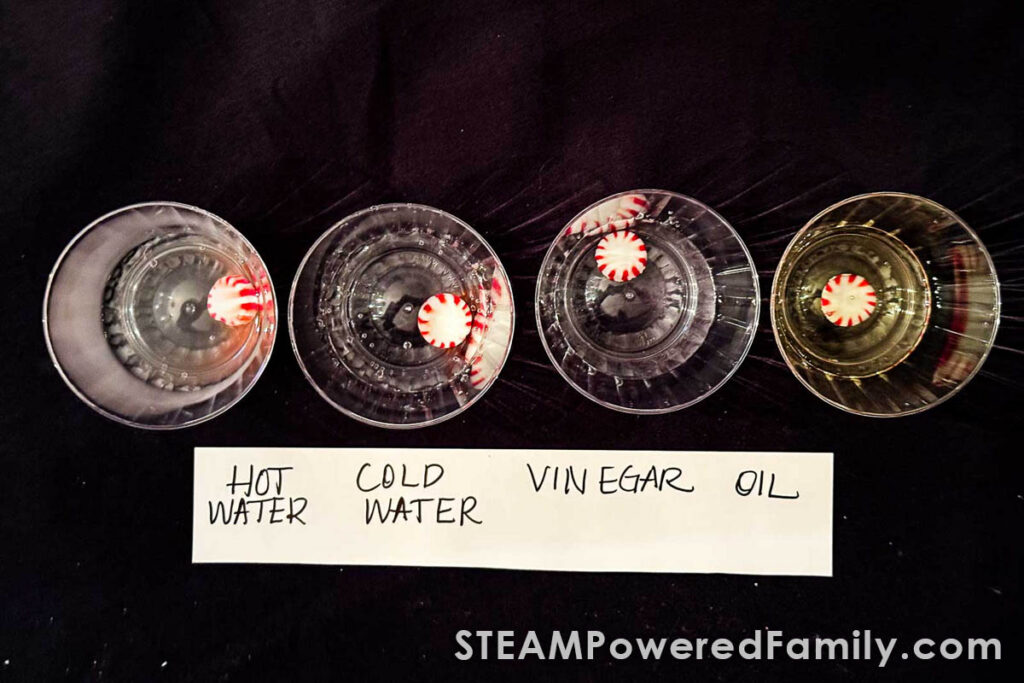
The first step is to fill four clear containers with four different liquids: hot water, cold water, vinegar, and oil. Before you put the candy in the containers, have a chat with the kids, ask some leading questions and have them do some predictions about what might happen when we drop the candy in each cup.
- What happens if you suck on a piece of candy?
- What do you think will happen when we drop them in the liquids?
- Will the color mix in with the liquid?
- Which one will melt the candy the fastest?
Set up a timer and have four people (or two people with two hands each) drop the candies in at the exact same time that someone starts a timer. Then sit back and watch what happens!
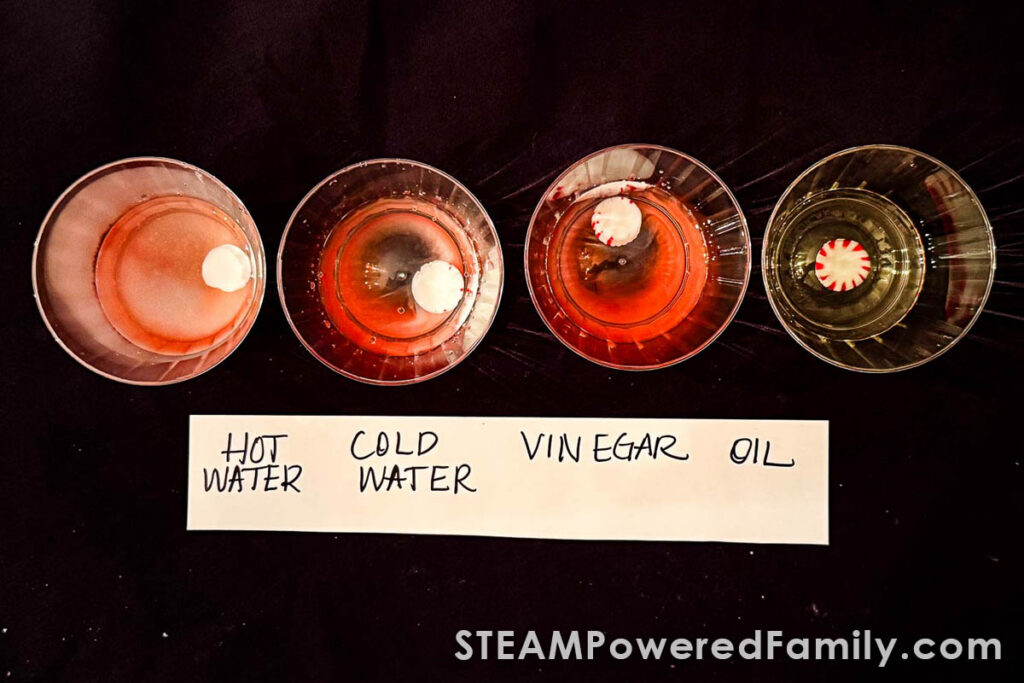
Take some notes as the kids start to see changes. Observe and record color spread, candy size change, time to dissolve.
Check out our experiment and the results!
Prompts for Deeper Learning
- Which was fastest, which was slowest.
- Which mixed the most, which mixed the least.
- Why do you think this happened?
- Which liquid dissolved peppermint fastest?
- Why might temperature matter?
- Where did diffusion show most clearly?
- What didn’t mix well? Why?
Extension Activity
For students needing more of a challenge have them dig into the data and do some writing. They could create a bar chart of time to dissolve by liquid, or challenge them with a CER: Claim–Evidence–Reasoning paragraph using observations.
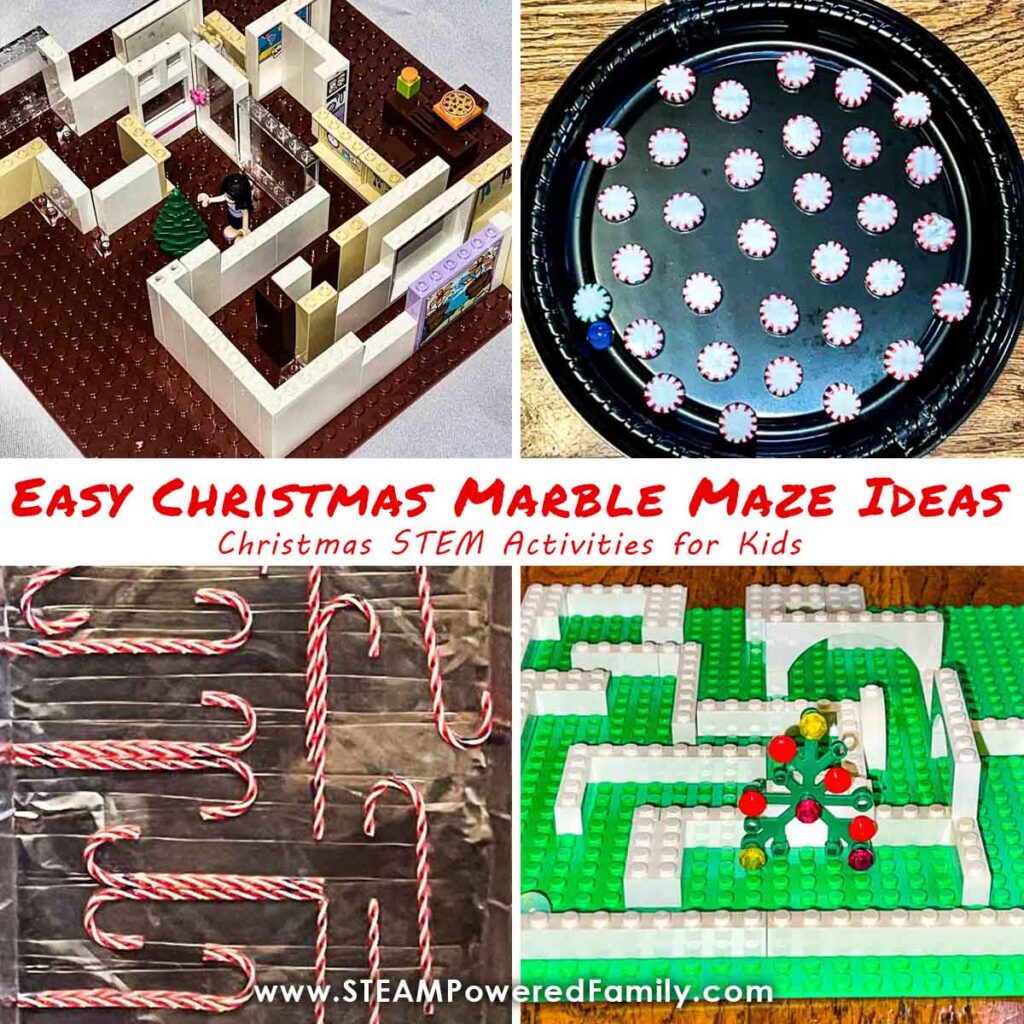
Challenge 4: Candy Cane Mazes (Problem Solving & Design Thinking)
Last holiday season we did some fun mazes with candy canes included in this Christmas Marble Run Ideas. You can use peppermint candies or regular candy canes for these challenges. Candy cane mazes are a great teaching tool that just feels like fun.
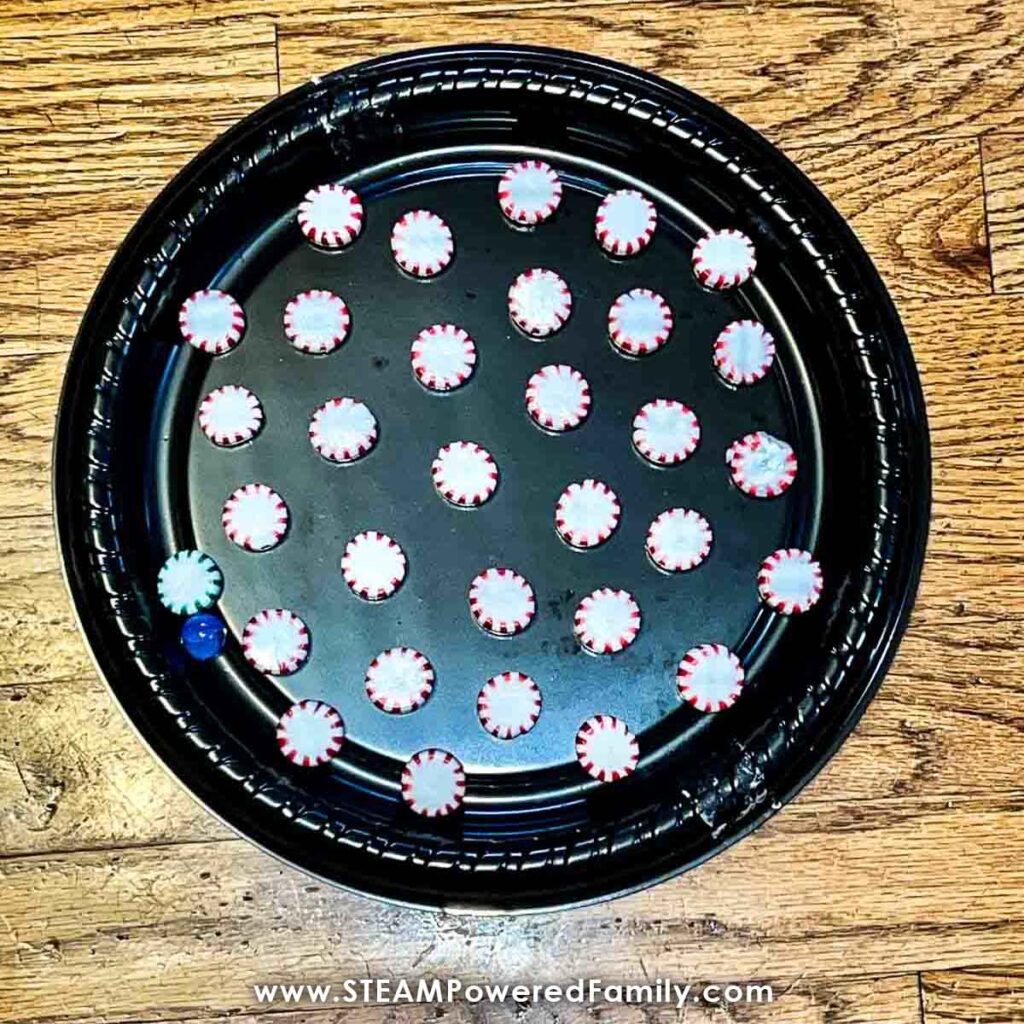
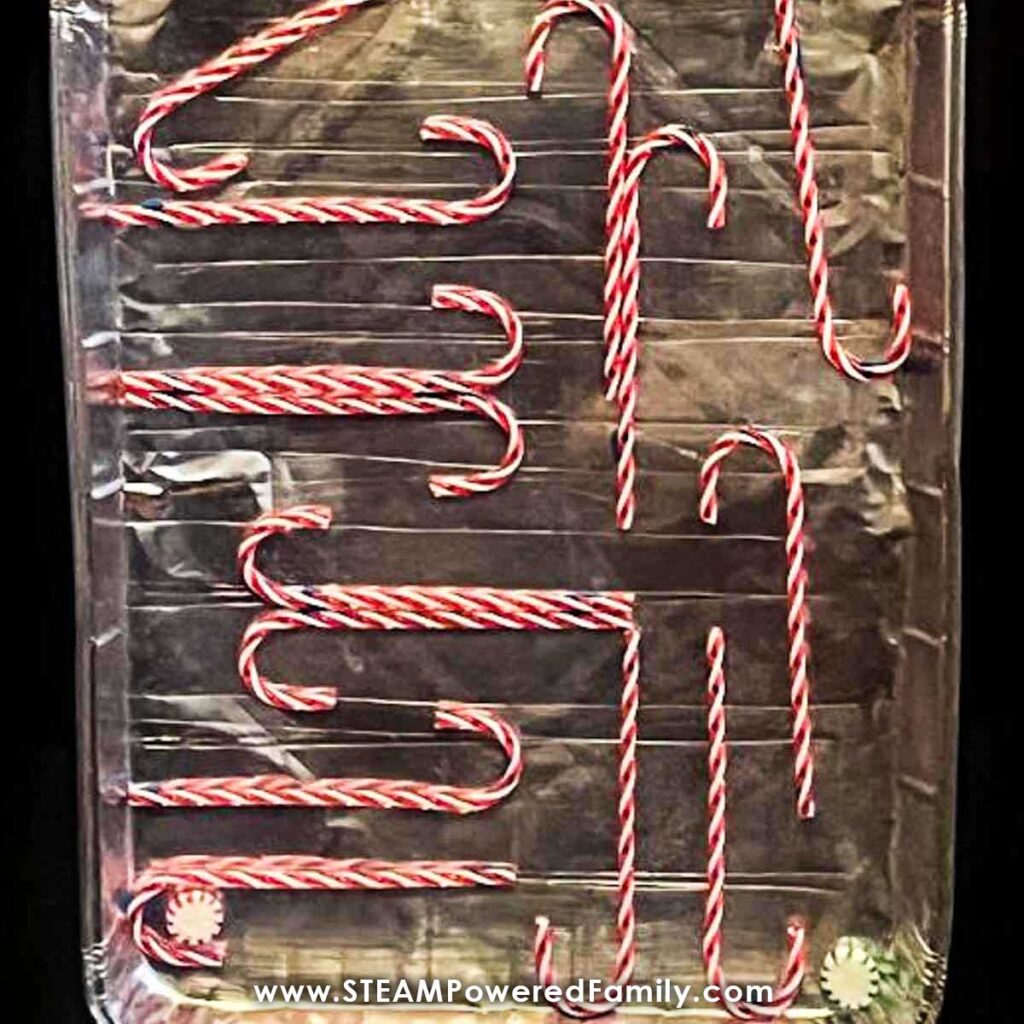
Objective: Build a marble maze using candy canes/peppermints as rails and obstacles, then test and iterate to improve path reliability.
Key Concepts/Vocab: iteration, constraint, path planning, dead ends, debugging
Build & Test
Lay out a start/finish on a plastic plate or tray. Use canes/circles as walls, tape to secure, test with a marble. Add challenges to make it more fun like: switchbacks, U-turns, gates.
Assessment Prompts
How many trials to a successful run? What changed each time? Where does the marble lose speed and why? How can you make your maze more challenging?
A maze is a puzzle, it requires solving both to build it and navigate it. You must think critically to create a path that ensures the marble can get from start to finish but also add challenges and dead ends for the players. This process encourages problem-solving skills, logical thinking, and the ability to adapt to changing circumstances.
Explore more holiday marble run ideas for maze inspiration.
Teacher Tips and Lesson Planning Tools
Troubleshooting
Structures collapsing? Broaden the base, add triangle braces, shorter spans.
- Zip line too slow? Steepen slope, reduce hook friction (add smooth tape), tighten line.
- Reactions “stalled”? Refresh hot water, use room-temp candy, use clear cups for visibility.
- Mazes too easy? Increase walls, narrow passages, add timed challenges.
Planning Tips
Best for: Grades K–6
Time: 10–30 minutes per challenge
Groupings: Pairs or small teams
Classroom Stations Setup: To run these during class time as stations plan 10–15 minutes per station, keep materials in labeled bins, and use printable task cards and timers.
Assessment & Rubrics (Quick Version)
- Process (4–3–2–1): Plans & tests multiple ideas → tests at least two → single attempt → limited effort.
- Evidence (4–3–2–1): Uses data/timing to justify changes → cites observations → vague reasoning → no evidence.
- Collaboration (4–3–2–1): Shares roles & listens → shares roles → uneven roles → conflicts.
Extensions & Cross-Curricular Ideas
- Math: Measure height/span, calculate average times, graph results.
- ELA: Holiday Fairy Tale about the structure/maze; procedural writing for a lab notebook entry.
- Art/Design: Decorate carriers/mazes, poster explaining forces at work.
- Technology: Record slow-motion video to analyze start/stop and friction points.
- NGSS alignment (general): Planning & carrying out investigations, analyzing/interpreting data, defining problems.
All of these Candy Cane STEM challenges will really get the kids thinking, involved and learning while they’re having a ton of holiday fun! Truly unforgettable learning. These challenges may seem like simply playing with food but in fact they’re applying real-world science, technology, engineering, and math principles and help you unwrap the joy of holiday learning!