The Greenhouse Effect Experiment
When it comes to our environment, it is so important that our children learn about the effects of climate change. One way we can start to educate them on environmental sciences is through a simple science experiment that creates the Greenhouse Effect in a jar. This activity is fantastic as a homeschool experiment, science fair project, classroom demonstration, and most importantly, as part of Earth Day lessons.
Climate Change Science Experiment
Table of Contents
Disclaimer: This article may contain commission, paid partnerships, or affiliate links. We independently review everything we recommend. When you buy through our links, we may earn a commission from qualifying purchases.
In recent years the climate crisis has become one of the most important challenges facing Earth and all of Earth’s inhabitants. Understanding how the greenhouse effect works is a fundamental lesson we need to be teaching all of our students. Throughout their lifetime they are going to witness massive environmental changes. Many of which, we have already seen in our lives. I can only imagine what is to come, and I know it weighs heavily on my tweens and teens. But through education and changing our practices and lifestyles, there are things we can all do to make a difference and protect our planet.
Let’s start with this science experiment that demonstrates the greenhouse effect.

What is the Greenhouse Effect?
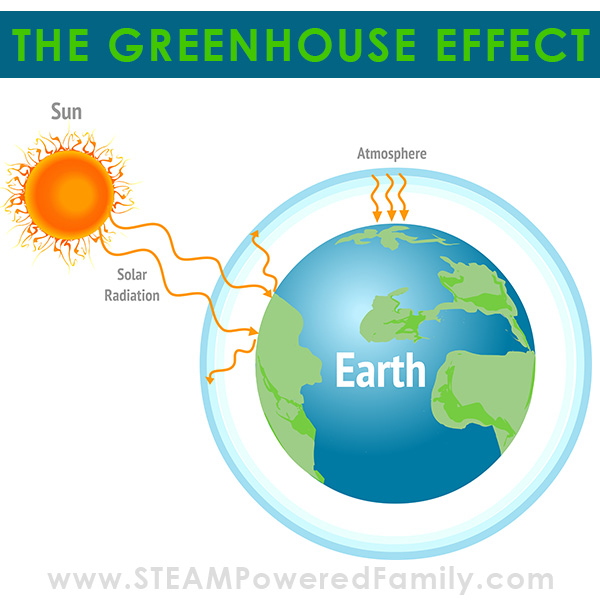
First off, we need to explain the term: Greenhouse Effect. A greenhouse is a building with glass for the walls and roof. That glass structure traps heat inside, making it a great place to grow plants where it stays all warm and cozy, even after the sun goes down or it is cooler outside.
Instead of glass, our planet is surrounded by an atmosphere made up of gases. Like a great big puffy coat of gas wrapped around the entire planet. The atmosphere traps the sun’s heat on the Earth’s surface making our planet perfect for living organisms.
The balance of those gases is delicate, and due to a number of different factors, in particular the burning of fossil fuels, that balance is being disrupted and it is affecting the quality of that protective layer around our Earth.
One of the most important greenhouse gases is carbon dioxide. When we drive our cars and burn fossil fuels like gas and oil, we are putting more carbon dioxide into the atmosphere. This in turn causes more heat to be trapped on the Earth, leading to an increase in the average temperatures. This affects all living organisms, including humans.
The Greenhouse Effect Science Experiment
Now we know about the greenhouse effect, let’s do some science! For this experiment we are going to use our much beloved and simple, baking soda and vinegar chemical reaction.
Supplies
5 Large Jars – Using all 5 jars provides an opportunity to apply scientific theory and the scientific method.
Vinegar – White, standard vinegar is best.
Baking Soda – Also known as sodium bicarbonate or bicarb. Don’t use Baking Powder! It is a completely different chemical formula. You can learn more here about the differences between baking soda and baking powder.
Measuring cups and spoons – Important for accuracy during testing.
Plastic Wrap – Also known as clingfilm. It must be clear and able to seal tightly without tearing. I know we don’t want to use plastic, but in this case it is what we need for this science experiment. You can try it with other materials, but we struggled to get the desired results. You can always save the plastic and reuse it!
Elastic bands – Large enough to fit over the mouth of the jar to secure the plastic wrap.
Heat Source – You can use a sunny window sill if you live somewhere with lots of hot direct sunlight, or use a heat lamp, space heater, or in our case we used a heat vent/radiator. It just needs to provide lots of heat evenly between the jars.
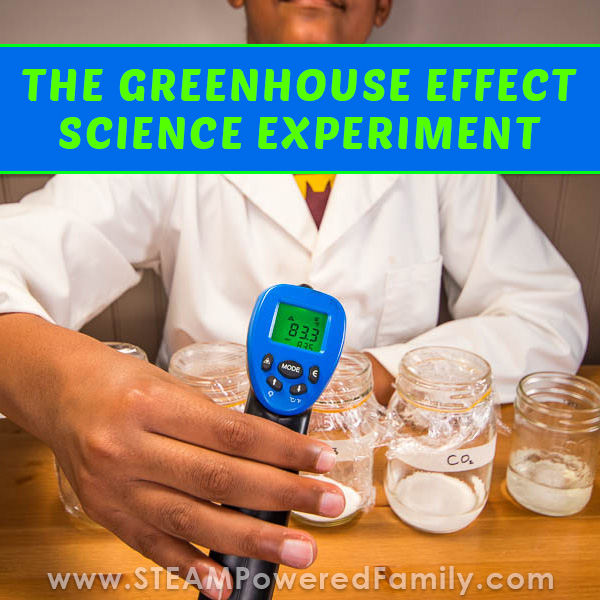
Thermometer – We have a non-contact infrared thermometer that worked perfectly. The kids LOVE using this type of thermometer in their science experiments but you can also use standard thermometers. If you use standard thermometers you will need one for each jar and a small knife or sharp scissors.
Masking Tape and Sharpie – For labeling the jars
Directions
Prepare the Jars
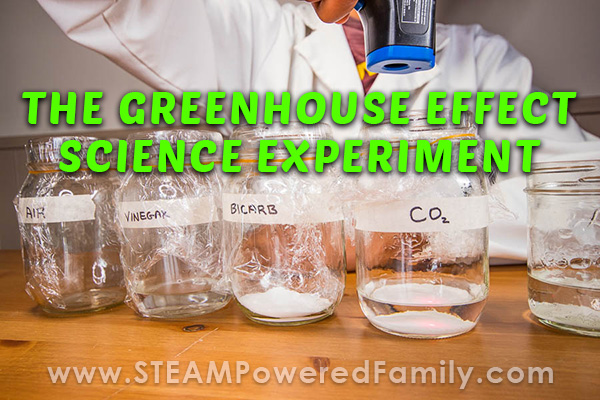
Start by labeling the jars. You will want:
- Air (control)
- Vinegar (control)
- Baking Soda (control)
- Reaction
The fifth jar does not need to be labeled, that one you will also be doing the reaction in, but without the plastic covering. However, if you want to label it, go ahead!
The reason we are doing all of these controls, is that we want to show that it is not just the vinegar or just the baking soda, or just the chemical reaction causing our result. We want to prove it is the trapped carbon dioxide gas.
Prepare a piece of plastic wrap big enough to cover the mouth of the jar with a bit of extra down the sides so it can be sealed completely. Repeat for 4 jars. Also add an elastic band for each piece of plastic wrap.
Place plastic wrap on the air jar and secure it with an elastic.
Add 1/4 up of vinegar to the vinegar jar, then cover with plastic wrap and secure with an elastic.
Add 1 tablespoon of baking soda to the baking soda jar, cover with plastic wrap and secure with elastic.
Reaction Time!
This next step is easiest with two people. Have one person read with the plastic wrap and elastic. The other person will add the baking soda to the jar, then add the vinegar. VERY QUICKLY place the plastic wrap over the mouth of the jar and secure it with an elastic. We need to capture the gases from the reaction, so work fast!
Here comes the sun
Now place the jars in front of your heat source. Ensure they are positioned so they will all be heated evenly. We used a heat register/radiator to evenly apply heat. A windowsill in the bright sun would work well too. Leave the jars with the heat for 5 to 10 minutes. We tested at both the 5 minute and 10 minute mark.
This heat source is replicating the warming effect of the sun.
Chemical Reaction Comparison
While the four jars are warming, take your fifth jar. Add 1 tablespoon of baking soda and 1/4 cup of vinegar. Watch the bubbly reaction! After about 30 seconds take a temperature reading. What do you notice? Baking soda and vinegar is an endothermic reaction! This is extremely interesting in the context of this greater experiment.
Temperature check
After your jars are warmed, it is time to take temperature readings.
If you are using a non-contact infrared thermometer, have your students take temperature readings from each jar, we found it best to aim straight down into the jar.
If you are using a standard thermometer, make a small slit in the plastic top of each jar, just big enough to slip the thermometer in without letting too much air escape. Place a thermometer in each jar. Wait one minute, then remove the thermometer and check the temperature readings.
What do you notice about the temperature readings? Record your results!
Greenhouse Effect Results
The chemical reaction in the enclosed jar is warmer than all the other jars with plastic covering. Those control jars are all about the same temperature. The coldest jar is the chemical reaction with no plastic covering. So cool!
The Greenhouse Science
The chemical reaction between baking soda and vinegar is an acid-base reaction. Baking soda is a base and vinegar is an acid. When we combine them, they react in a bubbly, endothermic reaction. Endothermic means it becomes colder during the reaction.
Here is the chemical formula of this reaction
C2H4O2 + NaHCO3 -> NaC2H3O2 + H2O + CO2(g)
vinegar + sodium bicarbonate -> sodium acetate + water + carbon dioxide(g)
The carbon dioxide is a gas, just like it is in the atmosphere, where it is one of the greenhouse gases.
In this experiment we are trapping the carbon dioxide gas in the jar. When heat is applied, the carbon dioxide traps more heat in the jar than our controls.
Where this became really interesting for us, was when the kids realized the reaction was endothermic, as demonstrated in our open chemical reaction jar. That means our jar with the trapped carbon dioxide not only trapped heat, but it trapped enough heat to counteract the endothermic reaction, and still make that jar warmer than the controls.
That is one powerhouse of a greenhouse effect!
Troubleshooting
If you have problems with this experiment there may be a few things to look at.
First, make sure your jars are being evenly heated. Depending on how you heat your jars, certain jars my be getting more heat than others. If you are using heat lamps, you may want to ensure you have one heat lamp per jar and place them equal distances from each jar.
If you used a standard thermometer, make sure your slit is not letting too much of the carbon dioxide out of the jar, it will take the heat with it.
When the reaction is triggered, make sure you act fast to get that plastic wrap on there and trap those gases!
Learning More About Climate Change
We really enjoy learning from NASA’s incredible resources. They have an entire site dedicated to climate and kids called Climate Kids that is packed with learning resources.
If you have Netflix, definitely look for any documentaries by David Attenborough. My tweens and teens have watched many of his documentaries and learned so much.
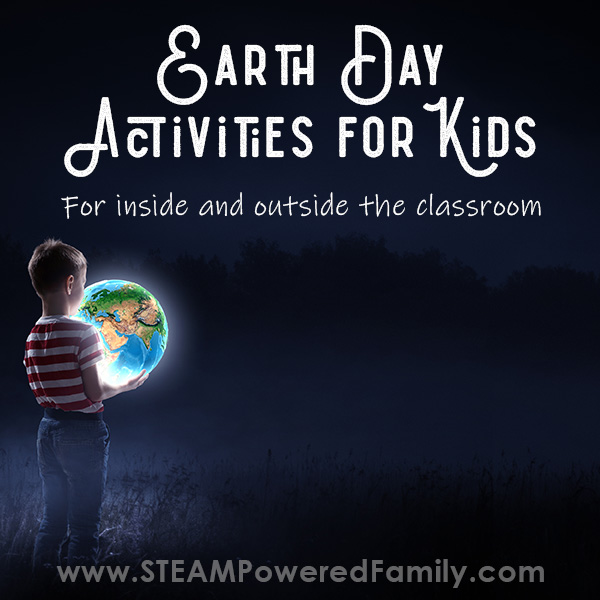
Tackle more Earth Day and Environmental Sciences projects with your kids, with our collection of Earth Day Activities.
Enjoy learning about our planet and start putting your lessons to work to protect our home. The more we know, the better we can all work to project our Earth.
More Educational Resources
FAQ
Typical setups take about 10–30 minutes to show temperature differences.
The greenhouse experiment is meant to introduce the concept, but it doesn’t fully explain it. Doing more research on the topic after the experiment would be a great way to branch out and extend the learning.