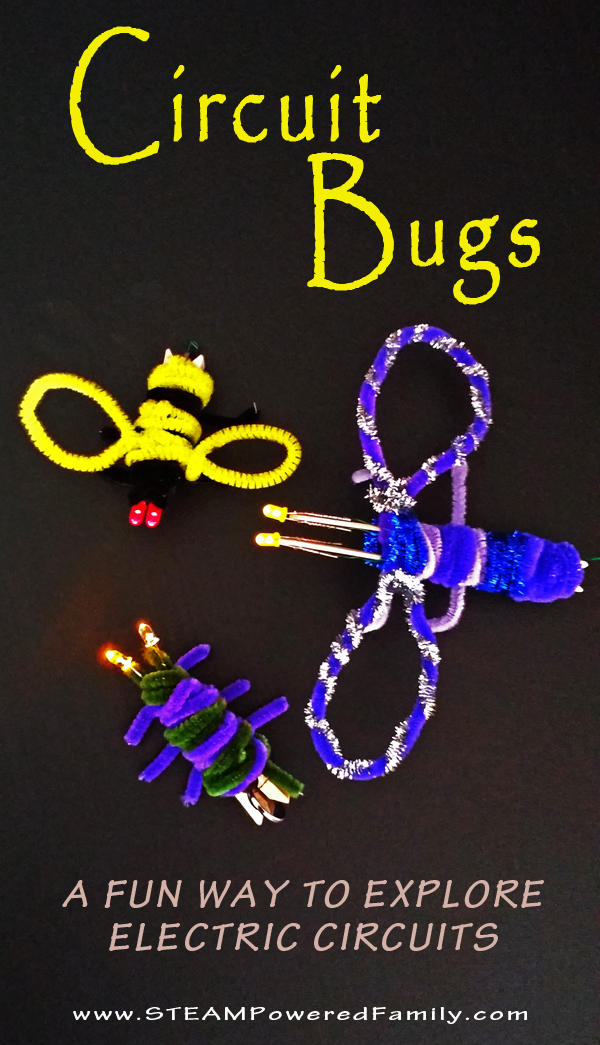
Circuit Bugs – The original creator of Circuit Bugs!
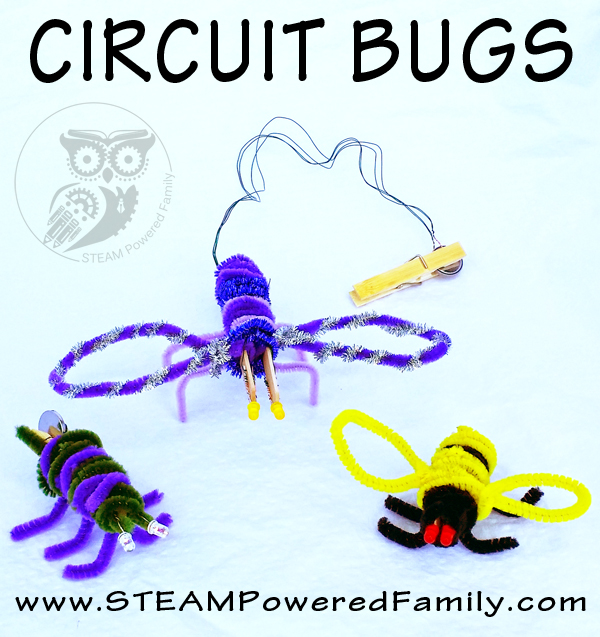
Want a new craft that really brings the wow factor with some super easy circuit work for kids? Check out these adorable Circuit Bugs!
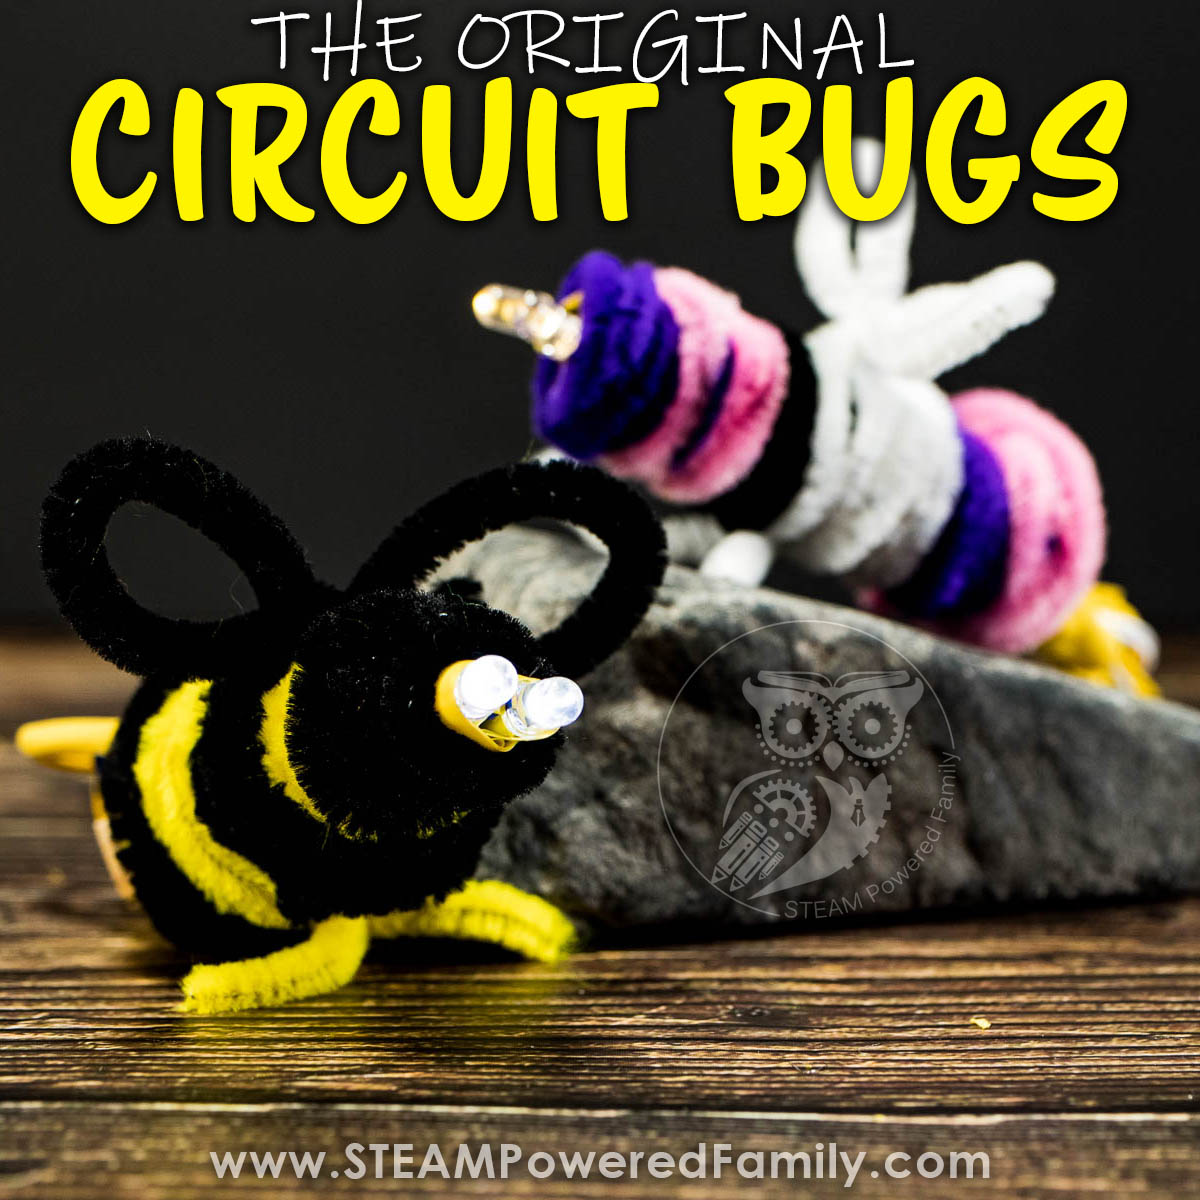
The Original Circuit Bugs
Disclaimer: This article may contain commission or affiliate links. As an Amazon Influencer I earn from qualifying purchases.
Not seeing our videos? Turn off any adblockers to ensure our video feed can be seen. Or visit our YouTube channel to see if the video has been uploaded there. We are slowly uploading our archives. Thanks!
Kids love building circuits. There is something incredibly satifisfying about building a circuit and seeing it come to life. One of our favourites kits is Snap Circuits but sometimes you need something that allows for more creativity and challenge. That is when we came up with the incredible idea of Circuit Bugs. It took some trial and error, but these cute little bugs provide incredible learning opportunities for students.
Circuit Bugs incorporate great fine motor and creative crafting skills, but also circuit work that will keep your older kids enthralled and challenged.
This Circuit Bugs tutorial was originally published and created in 2015. In 2022, we updated this article to include video, plus a second, easier way to build Circuit Bugs with new prewired LED diodes!
This activity is best for upper elementary, middle school and high school students. Working with the circuits and batteries is something that should only be done under adult supervision and only by older children that can understand not to put anything in their mouth! It is also quite complicated, so I would say this activity is for 8 and up with lots of parent supervision and guidance.
Circuit Bugs Tutorial Video
We are excited to now offer a Circuit Bugs tutorial video! If you can’t see this video, please ensure your adblockers are turned off. If you continue to have issues, please check the STEAM Powered Family YouTube Channel for the video.
Circuit Bug Supplies
2 LED Diode Lights
Insulated Copper Magnet Wire
Batteries – CR2032 3V
Electrical Tape in multiple colours
Clothespins
Pipecleaners
Popsicle Sticks (Optional depending on your design)
Scissors
Wire Strippers
Pro-Tip! You can now get LED diodes that are prewired. This makes building your circuit bugs so easy. Check out the second half of our tutorial video to see how we used these LED diodes to simplify Circuit Bug construction.
Circuit Bug Directions
Prepare the Lights
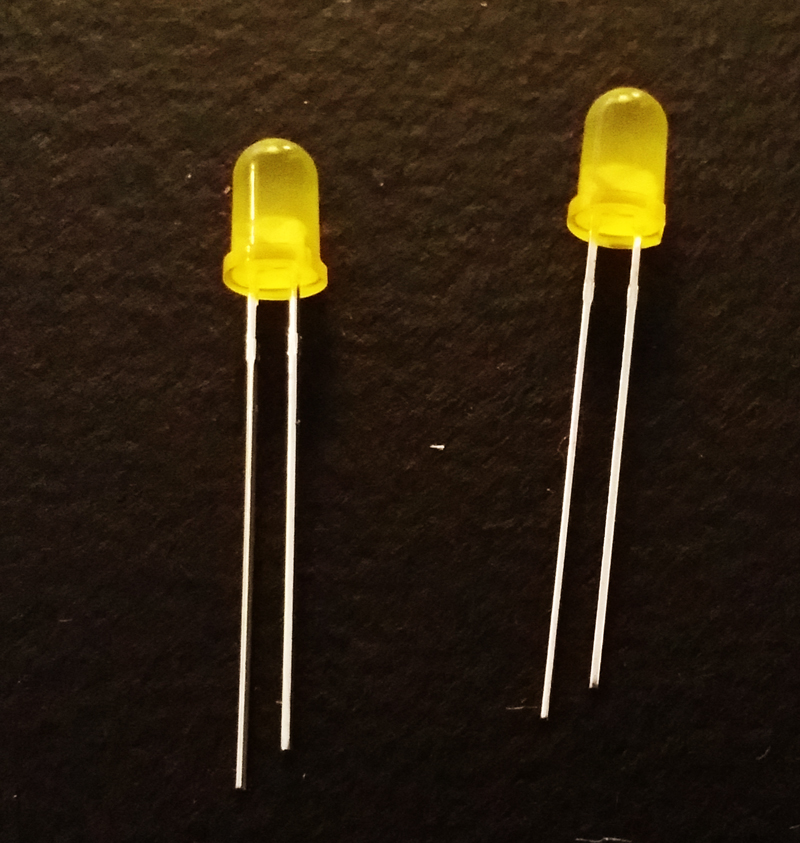
Start by setting out your LED diodes. You will notice one leg is longer than the other. The longer one is the positive pin. Before going any further test your LEDs by inserting the battery between the legs. If it doesn’t work, try turning the battery around. If it still doesn’t work try a different LED or battery. You want to make sure you have working parts right from the beginning because the chance of circuits being interrupted is quite high as you work through this project.
Cut the Wire
Cut your wire. I recommend cutting it a bit long and trimming it later to the final length. We started by measuring the length of the clothespin twice. You will need 4 lengths of wire.
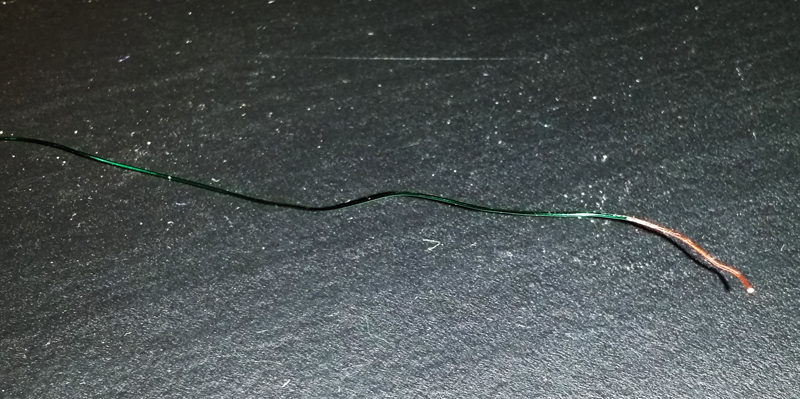
Strip both ends of your wire, about 2-3 cm in length. You want enough for a good connection but not too much that you raise your risk of circuit interruption. My wire was quite thin so I did this with a pair of scissors by scraping the wire along the scissors. If you have a thicker wire you can use wire strippers if you have them.
Attach the Wires
Now wrap the wire around the positive pin of each LED, then take the loose ends and twist them together. Repeat the process with the negative pin on both LEDs.
Secure the wires with tape by wrapping a bit of tape around the leg of the diodes, plus to secure the loose ends of the wires together. I recommend using different coloured tape for the positive vs negative sides, this will help keep things organized.
Test the Circuits
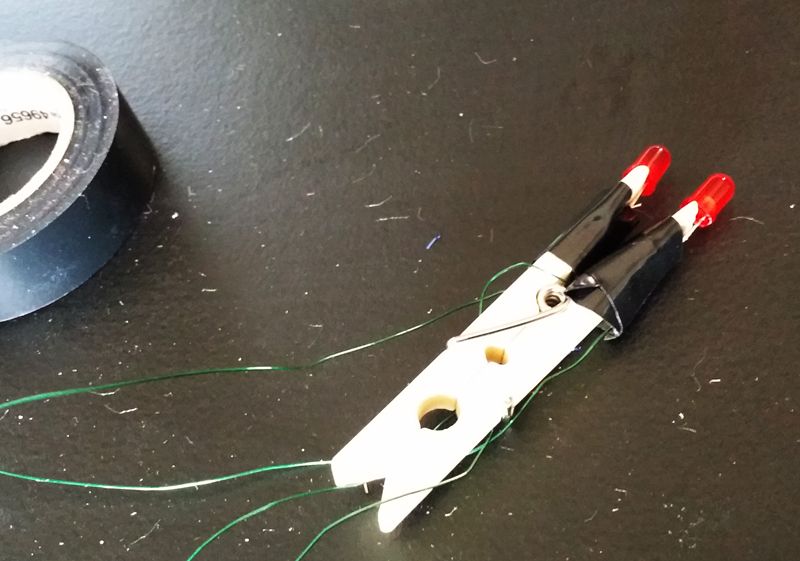
Take your two sets of twisted wires and test them on the battery. Throughout the construction I recommend you keep testing the circuits. It is very easy to interrupt the circuit. At times I even secured the wires to the battery with a clothespin so I could ensure the work I was doing wasn’t interrupting the circuit.
This project will require some patience and trial and error.
Mount the Circuit Bug Eyes
The next step is to attach the LED’s to the legs of the clothespin by having each leg on either side of the wood. This will help prevent the wires touching and causing a short. You can simply set the LED’s there and snug them on but if you want them more secure I recommend wrapping the pins onto the wood with electrical tape. If you are going to get shorts in your circuit this is where they are most likely going to happen.
You may also want to tape the wires against the body, or if you have lots of extra you can wrap it around the clothespin. Make sure to leave the extra dangling from the end so you can attach the battery.
Next, take the two positive leads and tape them together with one colour of electrical tape, then repeat with a different colour for the negative leads. This will help you keep them organized.
Design Your Circuit Bug
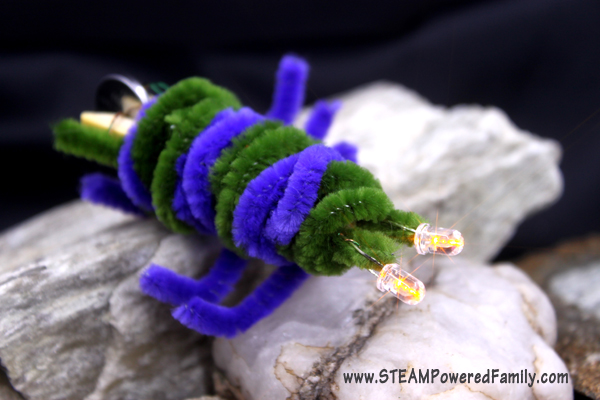
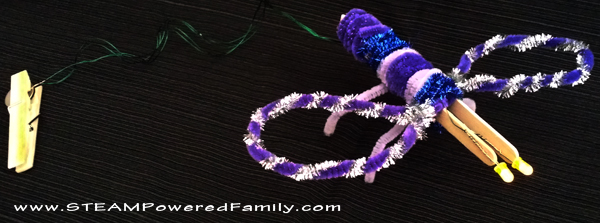
Start building your bug! You can do this however you wish. We simply wrapped the pipecleaners around the clothespin to create the look we wanted. By bending and twisting the pipecleaners we were able to secure them and make quite a stable design. We went with a Dragonfly, Beetle Bug and Bumblebee.
Troubleshooting Tips
Keep Testing
As you build keep testing that circuit! I intentionally left the leads really long on the dragonfly to show the wires, make the wiring a bit easier on that one, and it worked with the look of that bug. I can always go back and trim those up, but for the purposes of our project I wanted variety and a chance to show off the wiring to my six year old in a very obvious way. He found it much easier to insert the battery into the dragonfly design. In the beetlebug and bumblebee inserting the battery is quite snug and was hard for his little fingers to do.
Trimming the Wires
On most of the bug designs you will probably want to trim the wires to get a more compact look. Trimming also gives you a more stable connection so you can play with your creation more.
When you are completely finished building your bug it is time to trim the excess wire. I recommend you do both the negative leads first: trim then strip, then twist them back together. Then do the same on the positive leads. I didn’t do this one time and it was a pain trying to figure out which were my positives and negatives again! This is also where using different coloured tape helps.
Attaching the Battery
Wrap the negative leads around one side of the clothespin end (the tight part that clamps shut), then wrap the other side with the positive leads. Make sure the stripped portion is on the inside. Then simply insert your battery to create life in your circuit bug! You can also use some electrical tape to secure the battery.
Eyes Don’t Light Up
If the bugs eyes don’t light up, turn the battery around. If it still doesn’t work you will need to disassemble your bug to find the point where your circuit is being interrupted. Testing throughout the construction helps with troubleshooting.
Make it Simple
To simplify this project I highly recommend using prewired LED diodes. It eliminates a lot of the circuit interruption issues that come from wiring them yourself.
Turning Off Circuit Bugs
They don’t have an on/off switch, so to turn off your bug simply remove the battery.
If you have adventurous kids, challenge them to incorporate a homemade on/off switch like we did for our circuit wands.
We had so much fun with these little critters. I hope you enjoy your Circuit Bugs!
NOTE: Thank you for visiting STEAM Powered Family. We are the original creators of this Circuit Bug activity and we love that people all over the world are doing this activity with their children, however, we do ask that if you are sharing your projects or programs on the internet that you link back to this article. We also ask that you DO NOT copy this article and repost it on your site, please link to this original, copyrighted, article. Thank you for helping us as we innovate and create new projects that encourage kids to embrace STEAM.
MORE CIRCUIT PROJECTS FOR KIDS