

Sun Printing with Turmeric: A Color-Changing Chemistry Experiment
Who knew a little sunshine and a kitchen spice could create such a magical science experiment? Sun printing with turmeric blends art and chemistry in one beautiful hands-on activity that students will not stop talking about.
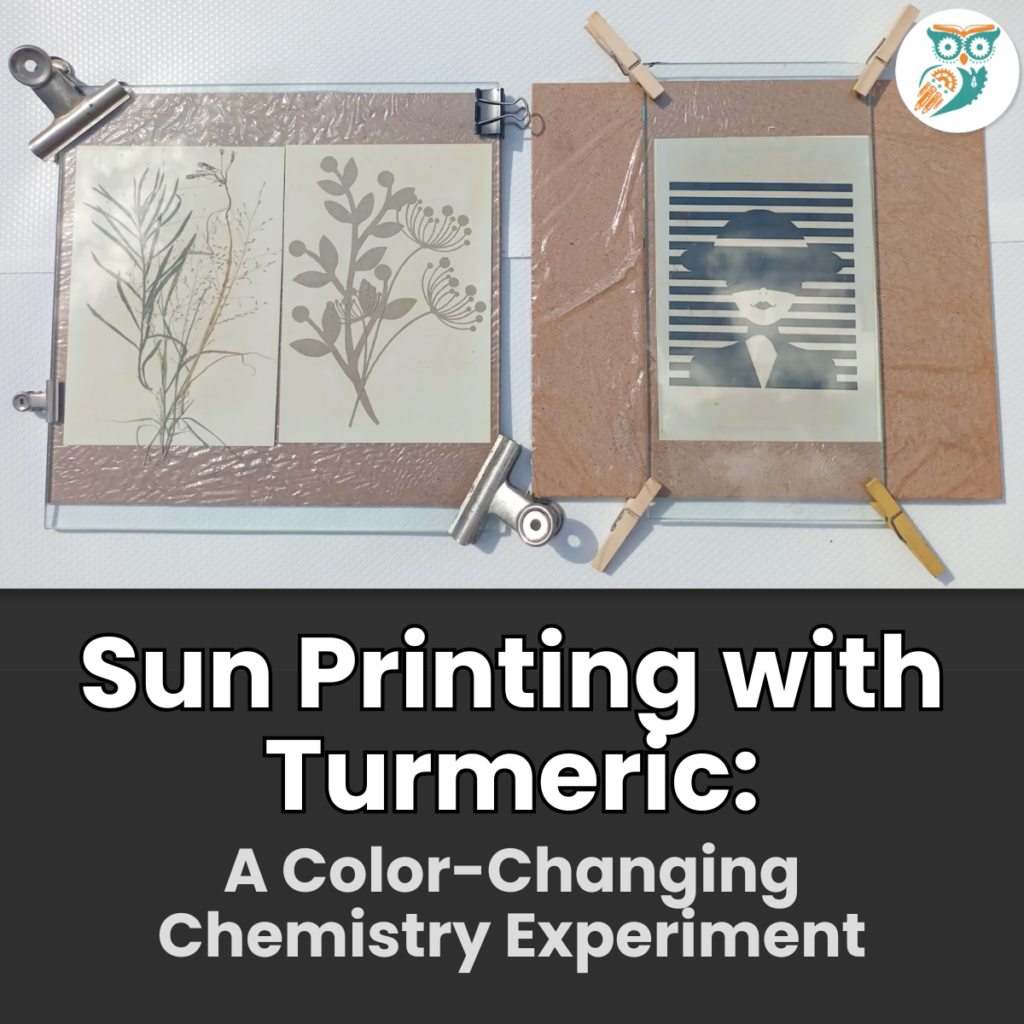
In this experiment, students coat paper with a turmeric solution, place leaves or stencils on top, and let the sun do its work. As the paper sits in the sun, the bright yellow pigment slowly fades around the objects, leaving behind a print. Then comes the real surprise. When a borax or baking soda solution is sprayed on, the print transforms into rich orange, red, and brown tones right before their eyes.
It is a lovely way to explore how light and chemical reactions can change materials, all using simple ingredients you probably already have at home or in the classroom.
What Is Sun Printing with Turmeric?
Table of Contents
Disclaimer: This article may contain commission, paid partnerships, or affiliate links. We independently review everything we recommend. When you buy through our links, we may earn a commission from qualifying purchases.
Sun printing with turmeric is a creative science activity where paper is coated with a turmeric mixture, then placed in the sunlight with leaves, stencils, or small objects on top. The sunlight affects the exposed areas of the paper, while the covered sections stay darker. When the objects are removed, you are left with a beautiful print of their shape.
This process is called the anthotype process, a method of photographic printing that uses light-sensitive plant pigments to create images. It is a perfect blend of science, art, and observation.
The Science Behind the Color Change
Turmeric contains a natural pigment called curcumin, which gives it its strong golden-yellow color. Curcumin is very sensitive to changes in its environment, especially light and pH. That sensitivity is exactly what makes this experiment work.
What Is Curcumin?
Curcumin is the natural coloring compound found in turmeric. It is what gives turmeric its bright yellow-orange appearance, and it is also what gives turmeric its reputation as a powerful natural ingredient.
More importantly for this experiment, curcumin acts as a natural pH indicator. That means it changes color when it reacts with different substances on the pH scale.
What Is pH?
pH is a measure of how acidic or basic a substance is. It is measured on a scale of 0 to 14, where 7 is neutral, meaning the substance is neither acidic nor basic. Pure water has a pH of 7. Anything below 7 is an acid (like lemon juice or vinegar), and anything above 7 is a base, also called alkaline (like baking soda or soap).
How pH Affects Color
This is where the chemistry comes in.
When turmeric stays in a neutral environment, it remains yellow. When it comes into contact with something alkaline, like borax or baking soda, the curcumin pigment reacts and changes color.
Baking soda raises the pH, causing the turmeric to turn orange-red. Borax goes one step further. It not only makes the mixture alkaline, it also reacts more strongly with the pigment itself, creating a much deeper and longer-lasting reddish-brown result.
Borax vs. Baking Soda: Which Works Better?
For this project, borax gives a much darker and more permanent finish than baking soda.
Baking soda simply changes the pH, which produces a softer orange-red color. Borax reacts more deeply with the turmeric pigment, which is why the final print appears richer and holds its color better. That makes borax the best choice for a stronger, more dramatic final reveal.
Both work beautifully, so use whatever you have on hand. If you can choose, reach for the borax.
If your students enjoy a classic baking soda reaction, this turmeric activity offers a quieter, more artistic version of the same chemistry. The result is a color change instead of a fizz, but the science is just as exciting.
Materials You Will Need
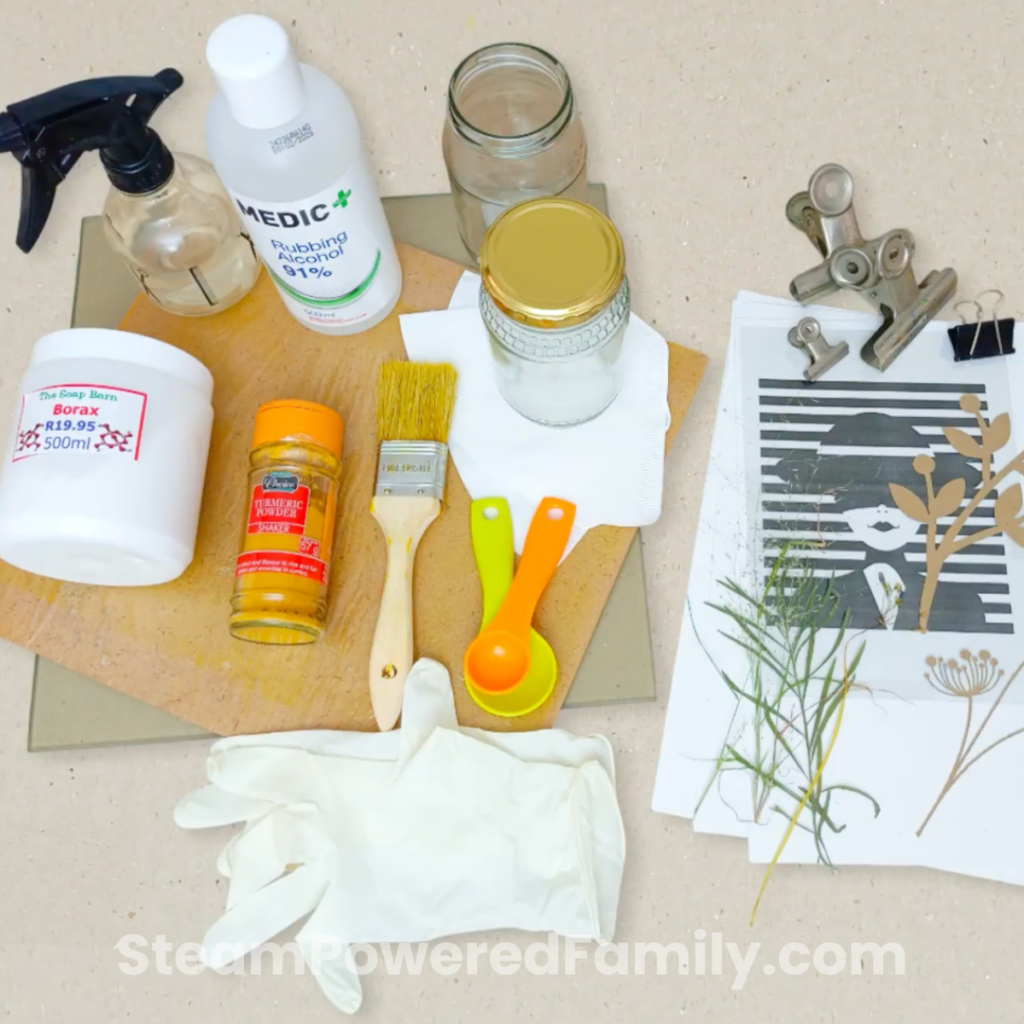
Most of these supplies can be found at home or picked up from a grocery or hardware store. The watercolor paper and acrylic sheet are the only items you may need to grab from a craft or art store.
- Turmeric powder
- 91% rubbing alcohol
- Borax or baking soda
- Two small glass jars
- Small spray bottle
- Coffee filter
- Medium paintbrush
- Teaspoon measure (5 ml)
- Tablespoon measure (15 ml)
- Pair of rubber gloves
- Thin wooden board or thick cardboard box (covered with cling wrap or plastic)
- Piece of glass or thin clear acrylic sheet
- Wooden clothes pegs or metal bulldog clips
- 4 pieces of A5 watercolor paper or thick paper that can withstand water
- Leaves, grasses, and flowers that are dry or have been pressed
- Black and white images, laser-printed onto an acetate or transparency sheet
- Stencils or paper cut-outs of leaves, grasses, and flowers (these gave the best results)
Safety First
This experiment is best for kids ages 6 to 12 with adult supervision. Take a moment to review the safety basics before you begin:
- Rubbing alcohol is flammable. Keep it away from open flames or heat sources, and work in a well-ventilated area.
- Borax should be handled with care. Wear rubber gloves and avoid contact with eyes or mouth. Adults should handle the borax measuring step.
- Turmeric stains. Wear old clothes, an apron, or a smock, and protect work surfaces with newspaper or a tablecloth.
- Adults should handle any cutting or trimming of acrylic or glass sheets.
Step-by-Step Instructions
Watch this experiment in action in the video below, if you can’t see the video due to your settings, visit our YouTube channel.
Step 1: Make the Turmeric Paint
- Place 2 teaspoons of turmeric powder into a glass jar.
- Add 4 tablespoons of rubbing alcohol to the turmeric.
- Shake well until the powder has fully dissolved.
- Place a coffee filter into the second glass jar.
- Put on rubber gloves. Turmeric stains everything, and yellow fingers are no fun.
- Pour the turmeric paint into the coffee filter and let it drip into the second jar.
- When the dripping slows, lift the filter up by the edges and gently squeeze the rest of the liquid out. Throw the filter away.
Step 2: Mix the Borax or Baking Soda Solution
- Fill a glass about one-quarter full with warm water.
- Add 4 tablespoons of borax or baking soda to the glass.
- Stir or swirl until all the powder has dissolved.
- Pour the solution into the small spray bottle.
Step 3: Prepare the Paper
Start with three or four pieces of paper. You can always do more later.
- Place a piece of paper onto the wooden board or thick cardboard.
- Use the paintbrush to coat the paper evenly with the turmeric solution. Do all the pieces.
- Let the papers dry for about 5 minutes, then coat them again.
Set the painted papers in a dark place to dry. The turmeric solution is photosensitive, which means it is sensitive to light. You do not want to accidentally expose them before you are ready to print.
Tip: Coat one piece of paper with three layers of turmeric solution instead of two. Make sure you remember which one. You will see why at the end of the experiment.
Step 4: Set Up the Prints
Turn off the lights and close any curtains that allow direct sunlight onto your work surface. Remember, the paper is photosensitive.
- Place each piece of paper onto your board.
- Carefully arrange the items you have chosen onto the paper to create your print.
- Cover the print with a piece of glass or an acrylic sheet.
- Place wooden pegs or metal bulldog clips onto each corner to hold the cover flat. If your objects lift up, light gets underneath and your print will not work.
Tip: If you are using a laser-printed acetate, place it with the printed side facing up so it touches the glass and not the turmeric paper. The laser ink can leave marks on your print.
Tip: Position your pegs or clips so they do not touch the turmeric-coated paper. They will leave a mark.
Step 5: Expose the Prints in the Sun
Now for the magic. Take your prints outside and place them in direct sun for 2 to 3 hours. This step is called exposing the print.
Keep checking on the progress of the yellow color as the sun does its work. The yellow will slowly fade in the exposed areas. You will know they are ready when the yellow background has almost disappeared and looks creamy.
If it is a cloudy day, do not worry. The print will still work because UV rays still pass through clouds. It will just take a bit longer.
When the prints look faded, bring them back inside. It is time for the big reveal.
Step 6: Reveal the Magic
Keep the prints out of direct sunlight from this point until you wash them in water.
- Fill a large glass dish with enough water to cover one print at a time.
- Remove the clips and the objects from your first print.
- Spray the print with the borax or baking soda solution and watch the color change.
- Place the print in the water. You can gently rub it with your fingers before and during the soak.
- Repeat with the rest of your prints.
- Hang the prints to dry, or lay them flat on a paper towel in a dark cupboard until completely dry.
What Is Happening Scientifically?
This activity introduces both physics and chemistry in a fun, hands-on way.
Physics: Sunlight carries energy. When the paper sits in the sun, the light energy breaks down the curcumin pigment in the exposed areas, causing them to fade.
Chemistry: When borax or baking soda is added, the alkaline solution reacts with the curcumin pigment, causing a dramatic color change. This is a chemical reaction in action.
Children get to observe how both light energy and chemical change can transform materials, two of the most important concepts in early science.
Tips for Best Results
Here are a few lessons learned from running this experiment many times.
- Make sure pressed leaves and flowers are completely dry. If they still hold moisture, the liquid can ooze out in the sun and leave circular blobs on the paper.
- If you use a laser-printed transparency, always place it printed side up so the ink does not transfer to the turmeric paper.
- More coats of turmeric mean a richer print. Try painting one piece of paper with three coats and compare it to one with only two. The difference is striking.
- Paper bag cut-outs of flowers and leaves give some of the cleanest, sharpest exposures.
- Experiment with paper from old printed books. The texture and tint can produce really lovely results.
Once you have the basics down, have fun playing with variables. Change the number of turmeric coats, the time in the sun, the objects you use, and even the type of paper. Every variation produces a slightly different result.
Other Natural Dyes to Explore
This experiment opens the door to exploring all kinds of natural pigments. Here are a few more dyes you can compare with turmeric:
Red cabbage (anthocyanins): Creates a blue-violet base that is highly light-sensitive. It also reacts to pH, turning pink with acid (like lemon juice) and green with a base (like baking soda).
Beetroot (betalains): Creates a deep magenta or red-burgundy color. It is a fugitive color, meaning it fades quickly in sunlight.
Onion skins: Create rich gold and warm orange hues.
Hibiscus tea: Creates a muted purple-grey or pinkish-red hue.
Blueberries: Create reds, purples, and even deep indigo colors.
Spinach (chlorophyll): Creates soft green hues.
Each of these natural dyes responds differently to light, acids, and bases, so it is a wonderful way to explore the variety of natural pigments around us.
Extension Ideas
Once your students fall in love with this project, keep the momentum going with more simple chemistry experiments they can try at home or in the classroom. Take this project even further with these ideas:
- Test other household substances like vinegar, soap, or lemon juice and observe how each one affects the turmeric color.
- Compare turmeric to red cabbage juice as natural pH indicators.
- Use stencils, leaves, or paper cut-outs to create patterned sunprints.
- Track the color changes over time with photos or a simple chart.
- Introduce the basic pH scale and have students test common kitchen liquids.
Final Thoughts on Sun Printing with Turmeric
Sun printing with turmeric is one of those rare activities that feels like art and science at the same time. Students get to mix solutions, predict outcomes, and watch a real chemical reaction unfold in front of them, all while creating something beautiful enough to hang on the wall.
It is the kind of hands-on experiment that sparks the question every educator loves to hear: “what else can we try?”If your kids are ready to keep exploring, dive into our full library of chemistry experiments for kids for more colorful reactions, kitchen science, and easy classroom-friendly projects.
Turmeric fades in sunlight because UV light breaks down the curcumin pigment, the natural compound that gives turmeric its bright yellow color.
Yes, turmeric is a natural pH indicator. It changes color when it comes into contact with alkaline substances like baking soda or borax.
Baking soda is alkaline, which raises the pH. The change in pH causes the curcumin in turmeric to react and shift from yellow to a deep orange-red color.
Yes! Natural pigments like turmeric, red cabbage, beetroot, and hibiscus can all be used for sun printing. Each one creates different colors and reacts differently to light and pH.
This experiment is ideal for children ages 6 to 12 with adult supervision, especially during the steps that involve rubbing alcohol and borax.
Vinegar will not produce the same dramatic reveal because it is acidic. Turmeric reacts with alkaline (basic) substances. However, you can still experiment with vinegar as part of an extension activity to see how acids affect turmeric differently.