

Plant Maze Experiment: How to Grow a Plant Through a Maze (STEM Activity)
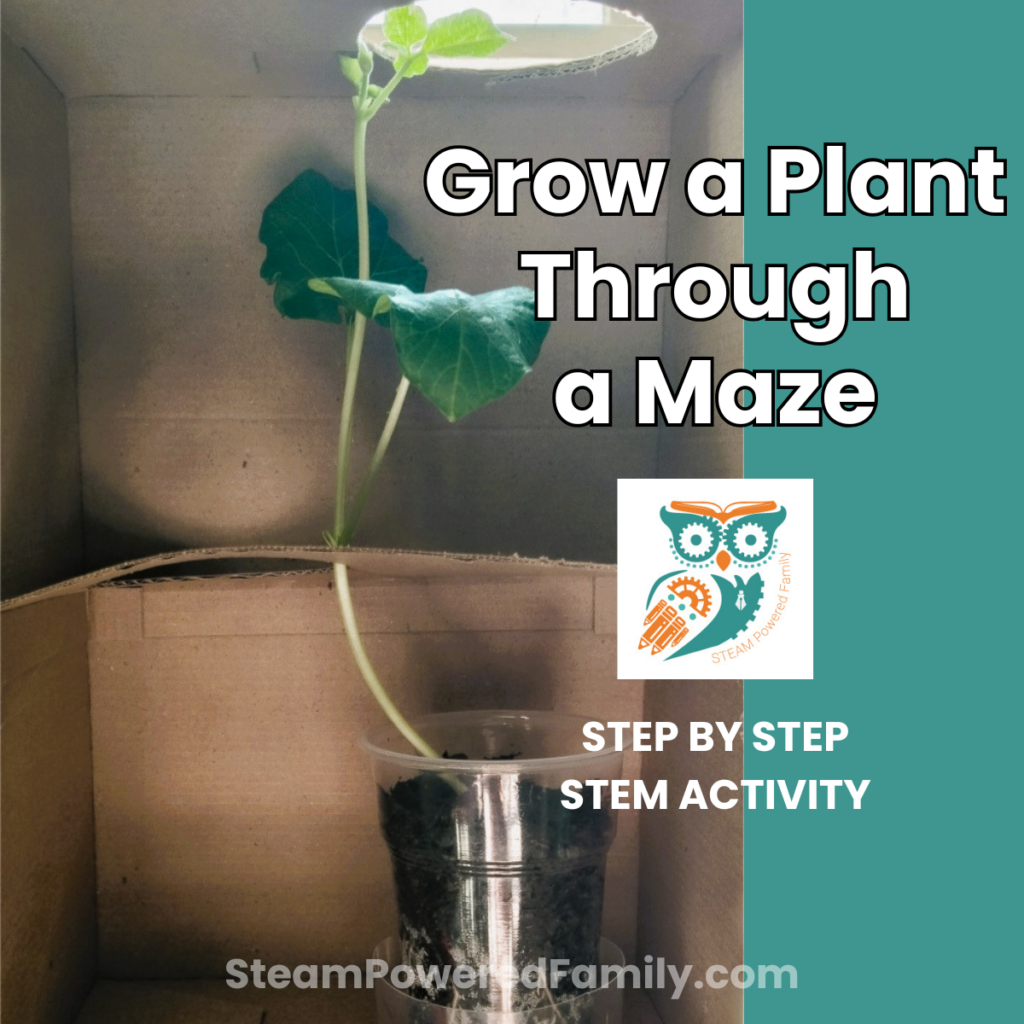
Growing a Plant in a Maze is one of those wonderfully weird science activities that feels a little bit like magic. How can a plant possibly find its way through twists and turns inside a dark shoebox? The answer lies in a fascinating plant behaviour called phototropism.
Phototropism is the way plants grow in response to light direction. Think of it as the plant version of finding the sunny spot by the window on a cold day. Same instinct, different life form.
The Science Behind the Plant Maze Experiment: Seeds, Germination, and Phototropism
Table of Contents
Disclaimer: This article may contain commission, paid partnerships, or affiliate links. We independently review everything we recommend. When you buy through our links, we may earn a commission from qualifying purchases.
First, let’s have a closer look at the seed and understand germination.
The Three Parts of a Seed
The seed has three main parts: the outer shell, which is called the seed coat, the embryo, which is a small baby plant and inside the seed is the endosperm, which is the plant food for the embryo.
The seed coat is very smart! It has special chemicals that can determine if the seed is in the right place and when the right moment arrives for the plant to start growing. The seeds are sleeping or dormant, and they can stay like this for hundreds or even thousands of years before growing. If your students want to dig deeper into what is happening inside a seed, our seed lab investigation is a wonderful companion activity.
What a Seed Needs to Germinate
The seed needs three things to grow: water, sunlight and the right temperature. If you want to explore how that water moves through the environment before it reaches the plant, pair this activity with our water cycle lesson for a natural extension.
Once the seed has all three of these things, the embryo gets the signal to start growing. This is called germination.
The seed coat allows the water to pass through into the embryo, as well as the endosperm, which provides the embryo with useful nutrition and energy.
Then the seed coat cracks open, and the roots will pop out downward, and the mind-blowing thing is that a seed can tell which way is up and down, and the roots begin to sprout downwards.
After sprouting, the stem will begin to grow upwards into the open air, where the leaves will be able to create their own food.
How Photosynthesis Works
The plant’s roots take up water and minerals from the ground, and the leaves absorb a gas called carbon dioxide from the air.
They convert these ingredients into food by using energy from the sunlight. This process is called photosynthesis, which means “making out of light”.
Why Do Plants Grow Toward Light?
Plants are constantly responding to the world around them. One of the strongest responses is to light. Why do plants grow toward light?
Plants grow toward light because they use light energy for photosynthesis and naturally respond through phototropism.
How the Plant Maze Experiment Works
In this project, you will create a maze inside a box, plant seeds at one end, and place a light source at the opposite opening.
Inside the shoebox maze, the bean plant will bend and stretch toward the small opening where light enters the box. Even though the plant cannot “see,” it can detect where the light is strongest and slowly grow in that direction. Watching this happen is a fantastic way to explore plant biology in action.
At first, it just looks like a bean growing inside a box, but very quickly, the experiment becomes much more than a simple craft project. Children begin asking questions, making predictions, observing changes, and recording what happens over time. Even the smallest daily changes become exciting to watch.
Before beginning this wonderfully weird experiment, hand out the Observation worksheet so learners can predict things like:
Will the plant reach the light? How long will it take? Will the stem grow straight or curve around corners?
Grab the free classroom-ready packet below. It includes the shelf diagram, observation sheet, 14-day growth tracker, reflection questions, and success tips. A ready-to-teach resource for any classroom.
Throughout the experiment, children are allowed to practice scientific observation by noticing small changes each day. They can record leaf size, stem direction, colour changes, and how quickly the plant moves through the maze. This helps build important scientific thinking skills while encouraging patience and curiosity.
All this info will be recorded in an observation sheet throughout the whole process.
Why We Chose Broad Beans for This Plant Maze Experiment
In this project, we are using a broad bean because it grows quickly, produces strong shoots, and makes the plant’s journey through the maze easy to observe.
So, let’s get on with physically making a DIY Plant Maze! You can watch and follow the video below or just follow the instructions below.
How to Make a Plant Maze (Step-by-Step Build Guide)
⚠️ SAFETY NOTE: CRAFT KNIFE AND GLUE GUN
This plant maze experiment uses a craft knife, an Exacto knife, and a hot glue gun. Adult supervision is required for the cutting and gluing steps, especially with younger learners. Keep fingers well away from the blade of both knives and the hot tip of the glue gun. Set up a designated cutting surface and glue gun station with clear rules before you begin.
Materials Needed for the Plant Maze Experiment
- Shoebox with a flip lid
- Handful of beans (I used white kidney beans)
- Small piece of scrap cardboard to make the “shelf” inside the box
- Soil
- Glass jar or saucer to sprout the beans
- Paper towel
- 2 sizes of clear plastic cups
- Craft knife
- Exacto knife
- Glue gun
- Scissors
- Ruler
- Pencil
- The free printable Observation worksheet
Watch the Plant Maze Experiment Build Video
This video may be used as a visual example build so that the students get the hang of how the plant maze experiment can be done, and then let them build their own, or they can watch and follow the build, allowing them to change things I have done along the way, with their own ideas and designs. If you cannot see the video, visit our YouTube Channel here.
Step 1: Prepare the Shoebox
Close the shoebox, and on the top right side of the box, trace the mouth of the cup.
Using the Exacto knife, cut the circle out. Do this in small, slow movements and remember to keep your fingers away from the knife. Ask an adult for help if you are unable to do this yourself.
Open the box and place the small clear cup into the left corner, and make a mark about 3 to 4 cm above the cup. This is where you will place the maze shelf.
Step 2: Cut the Maze Shelf
To cut the shelf correctly, see the diagram below:
- Measure the width and depth of the inside of the shoebox.
- Add 1.5 cm onto the shape on 1 long side and 2 of the short sides. (These 3 sides will fold downwards to make sticking the shelf into the box easier.)
- Use the edge of the scissors to mark folding lines (the dashed lines) and then cut on all the solid lines.
- Fold the three sides down and ensure that the shelf fits into the box and is at the correct height before applying the glue. Remember that there must be enough space for the plant to grow through the hole and up towards the light.
- Use the cup to trace the circle on the left side of the shelf.
- Cut the circle out slowly and carefully once again.
- Fold the sides of the shelf down and glue the two corners down with the glue gun.
- Now glue the shelf in place with the glue gun.
Step 3: Sprout the Beans (Germination)
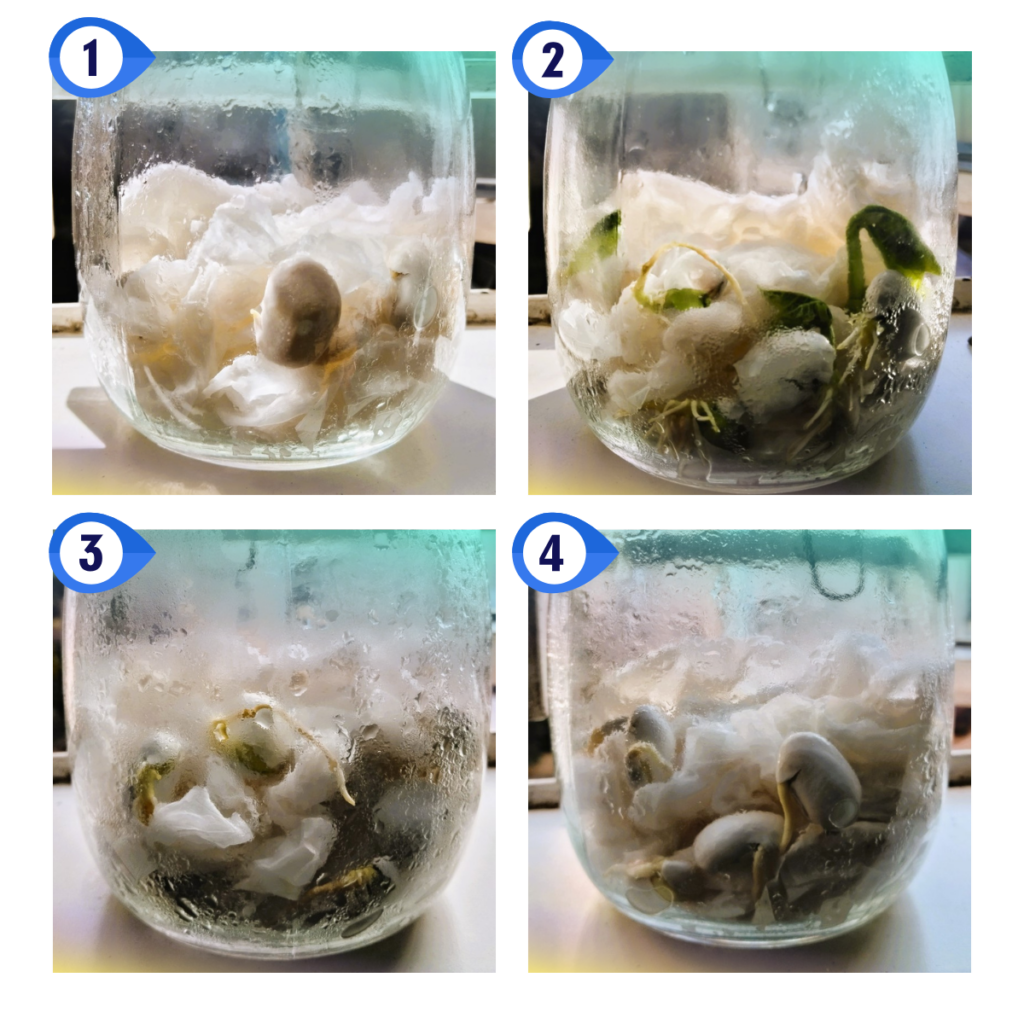
Get about 3 to 4 pieces of paper towel and the glass jar or saucer you are going to use to sprout the beans.
Wet (not soak) each piece of paper towel with water, gently open them up and place them in the glass jar.
Place the beans onto the paper towel around the edge of the glass jar, so you can see them sprouting.
Place the jar onto a sunny window sill and watch the beans sprout. Don’t forget to sprinkle a little water on the paper towel from time to time, so it remains moist.
The beans will be ready to place in the shoebox when the root measures about 7 cm in length. This is a healthy-sized root.
My beans were ready in 8 days! The reason for this is that right after germination, the plant is getting its energy from the seed. Waiting for the seedling to get a little taller gives the seedling time to establish roots and grow healthy leaves, which are needed to process sunlight and navigate the maze. Transplanting the seedling too soon is a shock to the plant. Stronger seedlings with true leaves handle the move and the darker environment of the maze much better than fragile, brand-new sprouts.
Step 4: Plant the Bean Sprouts
Choose the healthiest bean sprout (with the best leaves) to plant in the cup. (Make sure you do 2 plants in case the first one dies).
Make small holes at the bottom of the cups and stand the cups in a slightly larger container for drainage. I used the bottom of a larger plastic cup as my container.
Fill the cup you are using with 3/4 soil.
Make a hole for the bean sprout with the back of a teaspoon or your finger.
Gently place the root into the hole and cover the bean and smaller roots with soil. Do not compact the soil into the cup; it should be loose soil.
Sprinkle some water over the soil. Do not soak the soil. You will see the water drain out of the holes in the cup and land in the container you have chosen to stand the cup in. That water will feed the plant for a day or two.
Complete the drawing of your maze setup on the Observation Sheet now.
Step 5: Assemble the Maze and Start Observing
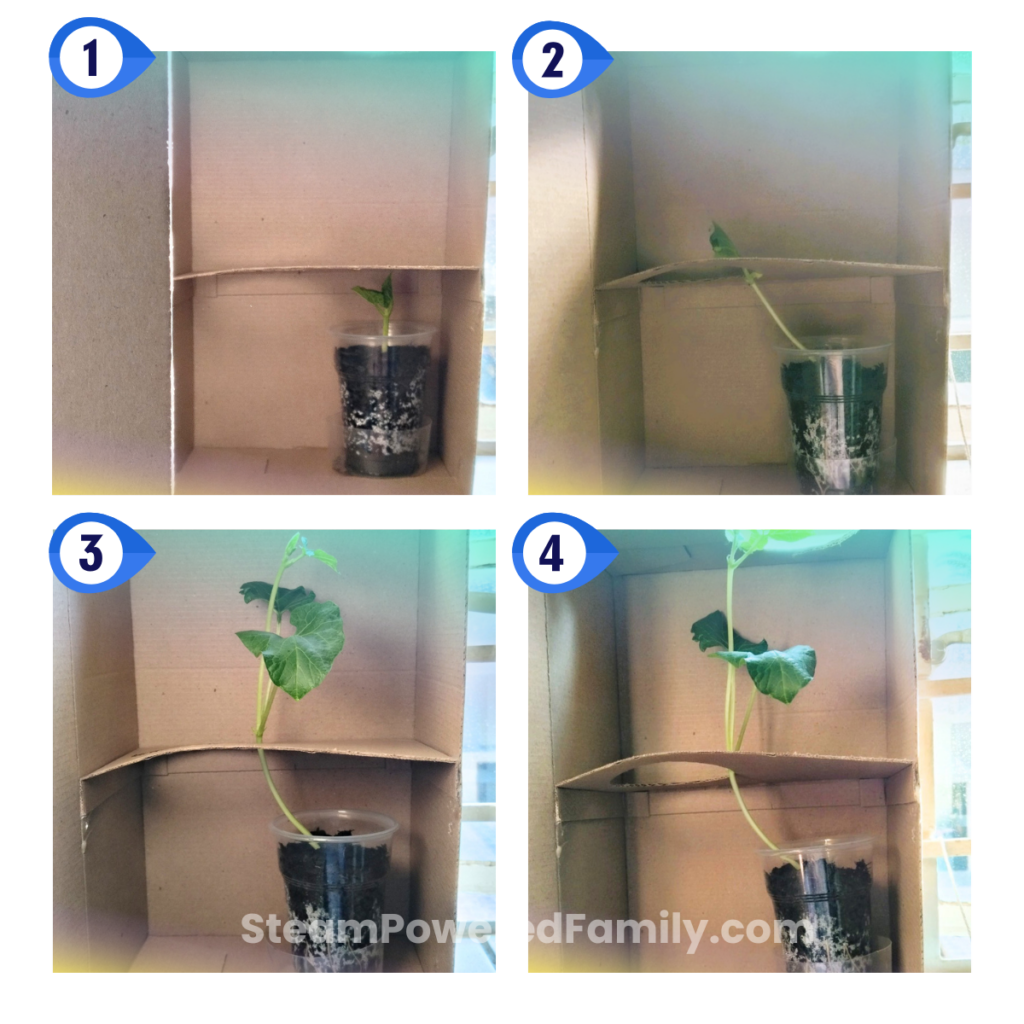
Check the plant every day, only once a day. If you keep opening the box to look at the plant, you may confuse the plant, and it may not grow through the maze.
Remember, the plant will always grow towards the light! Ensure that no light can enter the box except for the holes you made inside and on the top of the box.
It took my plant 6 days to find its way through the maze. It was magical to watch the whole process!
Don’t forget to document daily what you see when you open the shoebox on the Observation Sheet, and, of course, did you predict what was going to happen correctly?
The learners may want to take the bean plant out of the box and plant it at home to continue watching how beans grow and enjoy the fruits thereof.
What Skills Do Kids Learn From the Plant Maze Experiment?
The skills that children learn from this experiment include practice observation, critical thinking, measurement, scientific inquiry, and problem-solving skills while learning how living things respond to their environment.
Keeping records is an important part of real science, so documenting the experiment adds even more educational value. Learners can keep journals, take photographs, draw diagrams, or measure plant height every day. Recording results helps children notice patterns and compare changes over time. It also teaches organisation, data collection, and how scientists communicate discoveries.
Cross-Curricular Extensions for the Plant Maze Experiment
This plant maze integrates multiple learning and developmental areas:
Math Connections
Children can measure plant height in centimetres, calculate daily growth, compare timelines between different plants, and create graphs showing growth over several days or weeks.
Literacy Connections
Students can write observation notes, describe changes they notice, explain predictions, and write conclusions at the end of the experiment. Older learners can even create full experiment reports using scientific vocabulary.
Art Extensions
Art extensions make the project even more engaging. Children can decorate the outside of the shoebox maze, design creative plant labels, paint nature themes, or draw detailed plant growth diagrams showing roots, stems, and leaves. Some learners may even enjoy creating comic strips or illustrated journals documenting the plant’s “maze adventure.”
Environmental Science Integration
Environmental science plays an important role in this experiment, too.
Light, water, temperature, airflow, and soil quality all affect how successfully the bean plant grows. Too little water may slow growth, while too much light may cause weak, pale stems. It also helps children understand how much living things depend on the environment around them. For a closer look at what is happening inside the plant itself, pair this experiment with our plant and animal cell model project.
Social and Emotional Learning: Patience
One of the most important social and emotional skills children learn from this experiment is patience because most plant maze experiments show visible growth within one to three weeks. They begin looking forward to checking the maze each day to see what new changes have appeared overnight.
Troubleshooting Your Plant Maze Experiment
Of course, not every experiment goes perfectly the first time, and that is part of real science too. Troubleshooting encourages problem-solving and resilience. If the plant is not growing well, learners can check:
- Is the soil too dry or too wet?
- Is enough light entering the maze?
- Is the plant getting fresh air?
- Is the box becoming too hot?
- Were the seeds healthy before planting?
Sometimes the plant may grow slowly, bend unexpectedly, or even stop growing for a few days. These moments create excellent opportunities for discussion and deeper investigation.
Extension Ideas and Deeper Inquiry Questions
This project also opens the door to deeper enquiry and exciting extension activities. Children can begin asking bigger scientific questions such as:
- Would the plant grow differently under coloured light?
- Would another plant species solve the maze faster?
- What happens if the maze path is narrower?
- Does natural sunlight work better than artificial light?
These ideas can lead to even more experiments, including:
- Compare plant growth using different light sources.
- Test multiple plant species in separate mazes.
- Measure daily growth and graph results.
- Add maze obstacles with varying widths.
- Create a time-lapse recording of plant growth.
- Explore the effects of coloured light filters.
- Turn the activity into a full science fair investigation.
- Pair the experiment with lessons on photosynthesis.
For another plant-based investigation your students can run alongside this one, try our water pollution experiment that shows how contaminants affect flowers. It pairs beautifully with the maze experiment for an environmental science unit.
For all these reasons, this experiment makes an excellent science fair project with measurable observations and variables.
Final Thoughts on the Plant Maze Experiment
By the end of the project, children are often amazed that a simple bean plant could navigate a maze using nothing but light. What begins as a fun shoebox activity quickly grows into a rich STEAM investigation filled with science, creativity, problem-solving, observation, math, literacy, and artistic expression. Most importantly, it encourages curiosity, and curiosity is where all great science begins. For more classroom-ready STEM projects, check out our STEM centers for the classroom roundup for the perfect companion resource.
Frequently Asked Questions About the Plant Maze Experiment
Plants grow toward light because they use light energy for photosynthesis and naturally respond through phototropism.
Phototropism is the way plants grow in response to light direction.
Create a maze inside a box, plant seeds at one end, and place a light source at the opposite opening.
Fast-growing plants like beans, peas, or grass seeds work best for observing results quickly.
Most plant maze experiments show visible growth within one to three weeks.
Sunlight provides the energy plants need to make food through photosynthesis.
Yes, this experiment makes an excellent science fair project with measurable observations and variables.
Children practice observation, critical thinking, measurement, and scientific inquiry skills.