Simple Circuit Owl Craft
Here at STEAM Powered Family we LOVE our owls. In fact we are kind of obsessed. Another one of our loves is building simple circuits. With this project we have brought both of those loves together to create an Owl Craft out of a recycled toilet paper (TP roll), with a special simple circuit inside to makes the eyes light up.
Toilet Paper Owl Craft with a Circuit
Table of Contents

Disclaimer: This article may contain commission, paid partnerships, or affiliate links. We independently review everything we recommend. When you buy through our links, we may earn a commission from qualifying purchases.
Back when STEAM Powered Family started many years ago, one of our first projects we shared was a fun activity called Circuit Bugs. It was a really cool project that proved to be very popular, but it was definitely a more advanced circuit building project for kids due to the process which involved striping wires, ensuring clean connections, and more.
But that was many, many years ago. And now there are some new products available that make circuit building so much easier!
Sure, you can definitely do a more advanced version of these circuit activities, but if you are working in a group or have some younger kids or kids that are brand new to circuit building, having a simpler way to to build circuits is a huge blessing.
Toilet Paper Owl Circuit Craft Video Tutorial
If you can’t see the video tutorial, please turn off your adblockers as they also block our video feed. You can also find this video on the STEAM Powered Family YouTube Channel.
The Science of Electricity
The first thing we need to learn about before doing an circuit project is electricity. Thomas Edison invented the first commercially viable light bulb back in the 1800’s. Since then light bulbs have changed significantly, and more importantly have become much more efficient. We now have Light Emitting Diodes or LEDs, like we use in this STEM project. LEDs are extremely efficient compared to old style bulbs, using less energy, lasting much longer, and producing far less heat.
LEDs have two specialized semiconductors called a P-N Junction. When a large enough voltage is applied they emit light through a process called electroluminescence.
Photoluminescence vs Electroluminescence
If you have been following STEAM Powered Family for a while, you might remember learning about photoluminescence when we played with Glow in the Dark science. So what is the difference between photoluminescence and electroluminescence?
Photoluminescence is when something like glow in the dark paint is exposed to light, the molecules in the paint absorb photons in the visible region. This excites the electrons to a higher electronic excited state. When the lights are turned off it radiates a photon as the electron returns to a lower energy state. Eventually the electrons lose their energy and their glow. This is way most glow in the dark products need to charge in the light, glow for a short period after the light is turned off, then go dark and need to be recharged again.
Electroluminescence is the basis of light-emitting diodes (LEDs) in which a P-N (positive-negative) Junction diode emits light when an appropriate voltage is applied. The electrons recombine with electron holes in the LED to release energy in the form of photons.
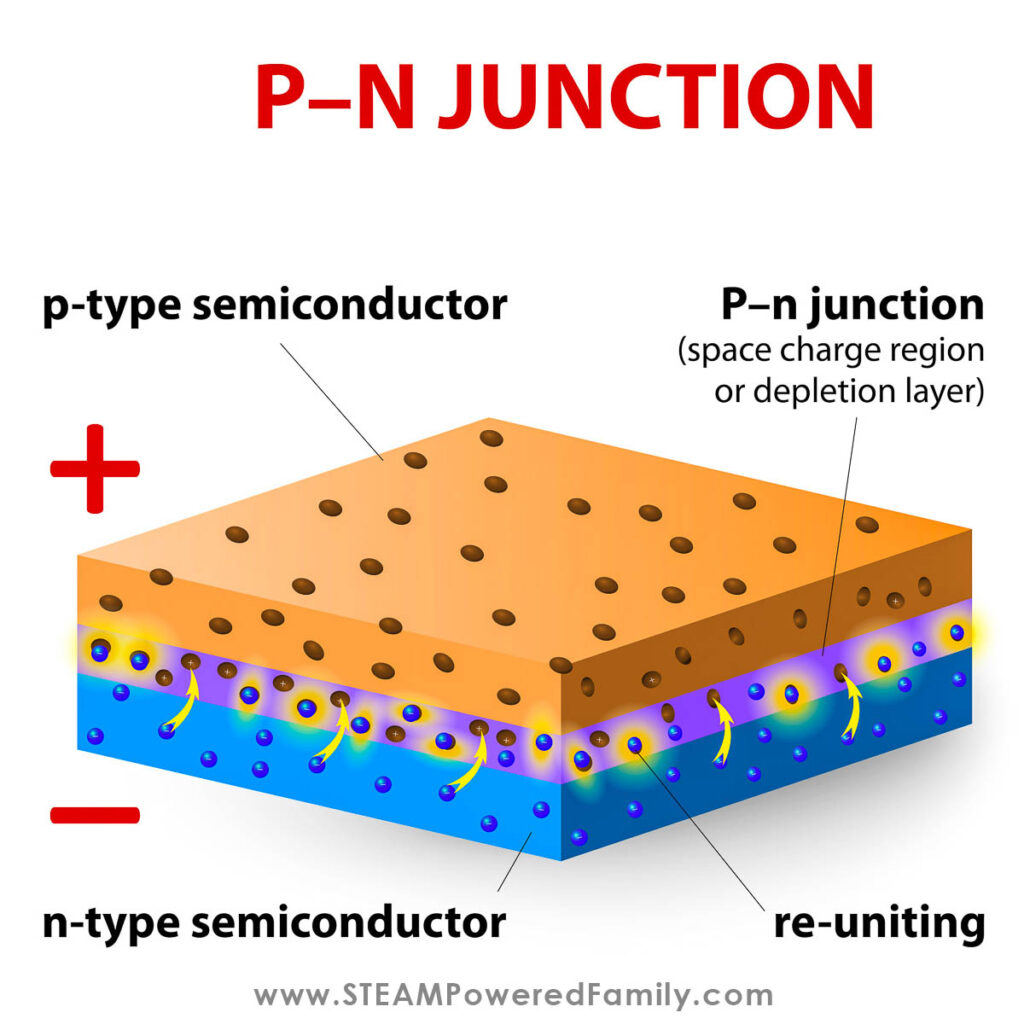
Simply put, the key difference between photoluminescence and electroluminescence is that photoluminescence occurs following the absorption of a photon as the material is exposed to light, it then releases the photon when light is removed to create a temporary glow. In contrast, electroluminescence occurs through the generation of light by applying an alternating current to a semiconductor which causes it to release photons as long as the current is present. Remove the current and the light turns off.
Circuit Owl Craft Tutorial
This is an easy circuit craft that creates the cutest little owl that your kids are going to love to build. To create this project I am providing you with a list of the supplies I used, including special pre-wired LEDs which make this circuit project such a breeze!
Materials and Supplies
Prewired 3V LED diodes (These are a game changer when it comes to circuit building with kids!)
Electrical Tape
Coin Battery – CR2032 3V
Clothespin
2″ Long Reach Hole Punch
Toilet Paper Roll
Paint and paint brush
Construction Paper
Glue
Scissors
Other decorating supplies so kids can get creative! Feathers, glitter glue, fabric, etc.
How To Make a Circuit Owl Craft with a Toilet Paper Roll
The easiest way to do this project is to think of it as two steps. We need to build the circuit, plus we need to create our owl.
Making the TP Owl
First, let’s make our owl. For this step you need the toilet paper roll, paint and brushes, long reach hole punch, construction paper, glue, scissors and decorating supplies.
Paint the toilet roll whatever base colour you prefer. I found the easiest way to do this was to put my fingers inside the roll and hold it up while painting that way. But really it doesn’t matter. Let your kids get creative!
Let the paint dry.
Now using the long reach hole punch make two eye holes about 3cm (1.25″) down. I decided to add paper hole reinforcement stickers around the eyes of my owl because I liked the look.
Watch the video if you need help with this next step. Carefully push in from the front and the back of the tube to fold them in and create the “ear” peaks.
Now it is time to decorate. I used alternating colours to create strips of scalloped paper that when layered looked like feathers. Then I added a wing on either side by simply folding a piece of paper in half and cutting out a pointed oblong shape. Finally I cut out a diamond shape, folded in in half for the beak. Then I glued everything on.
The Toilet Roll Owl Craft is complete! Now let’s bring them to life with a circuit.
Building the Circuit
To build the circuit you will need 2 prewired LEDs (one for each eye), electrical tape, coin battery, clothespin, and scissors.
Test the Circuit
Start by testing your LEDs, the last thing you want to do is go through all the trouble of building your circuit only to discover something was wrong with your LED before you even started.
With the prewired LEDs all you need to do is take the positive lead and place it on the positive side of the coin battery, and the negative lead to the negative side of the battery. The light should come on. With the prewired LEDs each lead is colour coded which makes this whole process so easy! If your light doesn’t turn on, try switching the leads in case you mixed up the positive and negative. If it still doesn’t work, try a different LED.
Set the battery aside, we won’t need it for a bit.

Wiring the Circuit
Place the clothespin so the part you squeeze together is up. This is going to be the top where the eyes will attach.
Take an LED and place it pointing off the front of the clothespin, repeat with the other LED. Make sure the positive and negative leads are on the same side to make it neater.
Now tape the LEDs into place with electrical tape.
Take the two negative leads and tape them together. Repeat with the positive leads.
Wrap the leads around the clothespin making sure to not make it too tight. You want to be able to still open and close the clothespin. Tape them into the place.
Now take the negative leads and place them on the negative side of the battery, repeat with the positive side. The lights should come on. If they don’t, make sure the wires are contacting the battery. Also make sure the protective sleeve is not cracked anywhere along your leads.
Tape the leads to the battery.
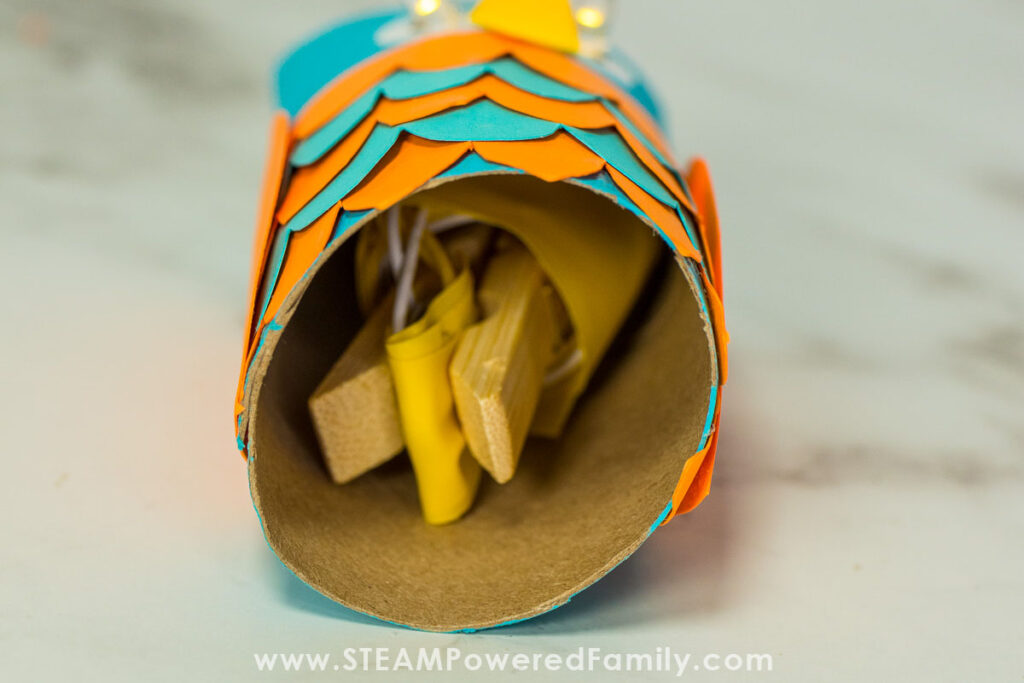
Now open the clothespin and slide the battery inside being careful not to dislodge the wires. Close the clothespin onto the battery. This will help secure the connection. You can also add a bit more tape to secure things if you wish.
Assemble the Circuit Owl
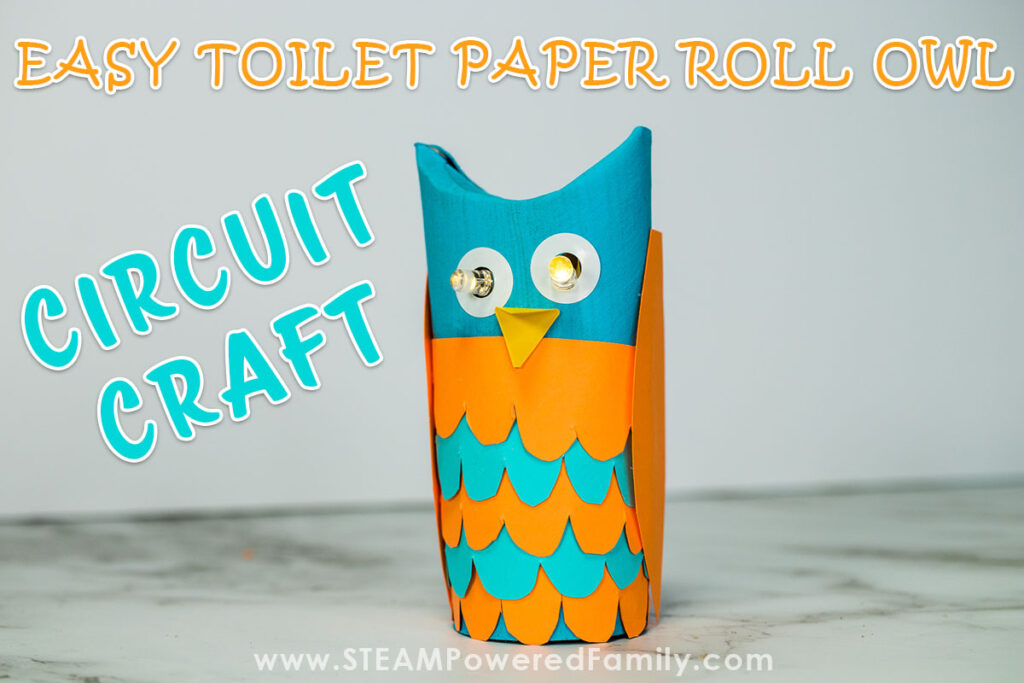
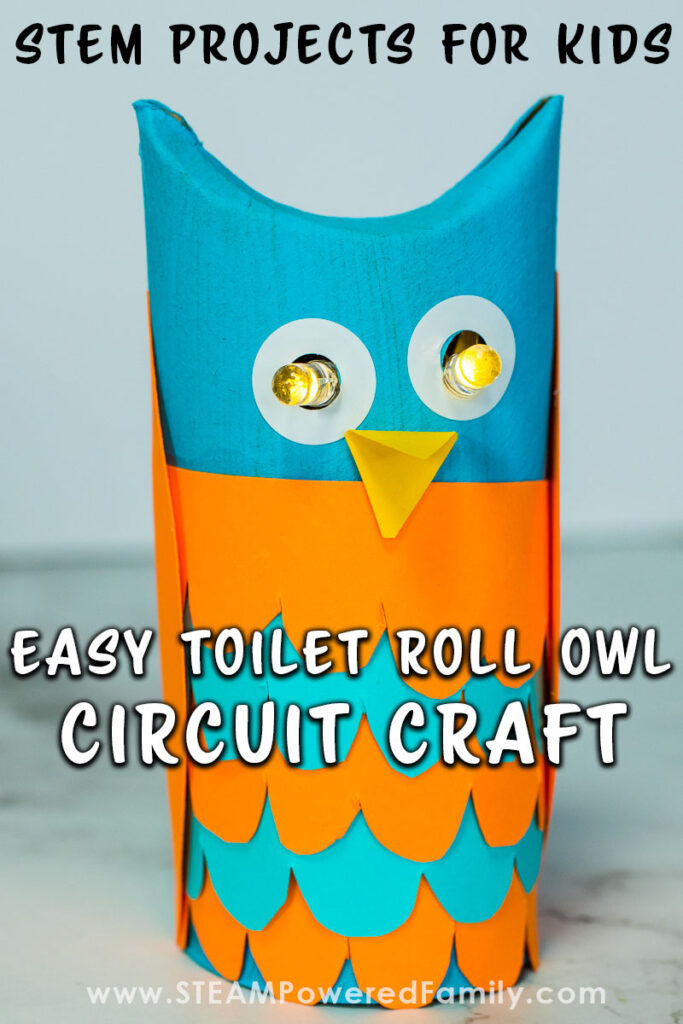
Slide the circuit inside the owl and slip the LEDs through the eye holes. Your circuit owl is now complete!
To turn it off, simply remove the battery.
Your Owl Circuit Craft is now finished!
More on the Science of LEDs
If your kids are anything like mine, they love to know all the details about how things like LED bulbs work. We found this cool tutorial you can check out.
Want more owl projects?
Do you love owls as much as we do? Check out these owl projects!