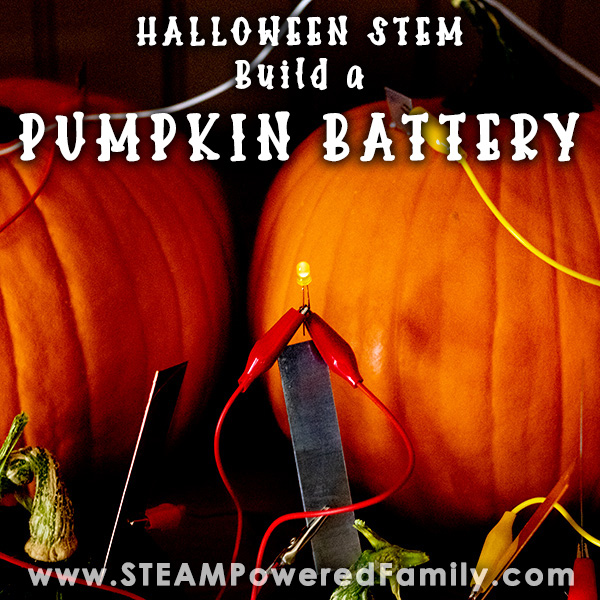
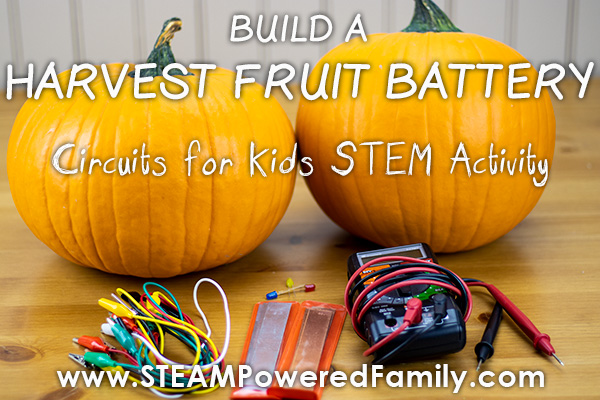
Pumpkin Battery
In the past we have explored various circuits. From our very first Circuit Bugs, to Potato Batteries and Lemon Batteries, to our recent Harry Potter wands that cast Lumos with the flick of the thumb. It is safe to say we really enjoy building circuits and batteries around here. So with fall upon us that means harvest season. So we decided to test out some pumpkins and squash from the garden and see if we could build a fruit battery. The results were surprising!
Pumpkin Battery – Halloween Electricity Experiment
Table of Contents
Disclaimer: This article may contain commission, paid partnerships, or affiliate links. We independently review everything we recommend. When you buy through our links, we may earn a commission from qualifying purchases.
Our Pumpkin Battery Hypothesis
First of all we were not 100% sure this would work.
One hypothesis we had as that pumpkins and squash would not be acidic enough to act as a battery. Our lemons worked well but they are highly acidic. For our potato battery we had to prepare the potatoes in order for them to work effectively. So really we were not sure this would go anywhere.
Our second hypothesis was that, if it did work, the larger pumpkins would produce much more energy than our tiny little squash.
Our hypothesizes were both wrong. Which was a great thing! When making a hypothesis it is not about being right, it is about making a prediction and adjusting variables to see the outcomes. That’s part of mastering the scientific method.
Looking for tips on using the Scientific Method? Check out this resource and grab a free printable.
Which by the way is totally addictive and my kids are constantly telling me they NEED to do scientific investigations, as they pull apart my kitchen pantry and cupboards. The pursuit of scientific knowledge can be messy!
Oh and yes, Pumpkins and Squash are fruit. You can read more here.
Pumpkin Battery Experiment Supplies
Since we do these kinds of experiments a lot, we had everything we needed on hand, once we gathered the fruit from the garden. The best part is once you buy these, you can do so many cool experiments! For this experiment you will need:
Multimeter
Zinc plates
Copper plates
Wires with alligator clamps
LED bulbs
Sharp knife (about the width of your plates makes things easier)
Pumpkins and/or Squash (ours was Zucchini Globe Squash)*
*We had 2 pumpkins and 3 small squash, based on our results you need at least 4 pieces to get enough energy to power an LED. If we had more pumpkins we would have used all pumpkins, but we wanted to use what we had available.
Pumpkin and Squash Battery Directions
We didn’t grab video this time, we were having too much fun exploring, but we used a similar approach and technique in our lemon battery experiment. You can watch that video here:
STEP 1 – How much energy does a pumpkin or squash produce?
I find with these experiments it is important to go step by step and really let the kids explore and see what is happening.
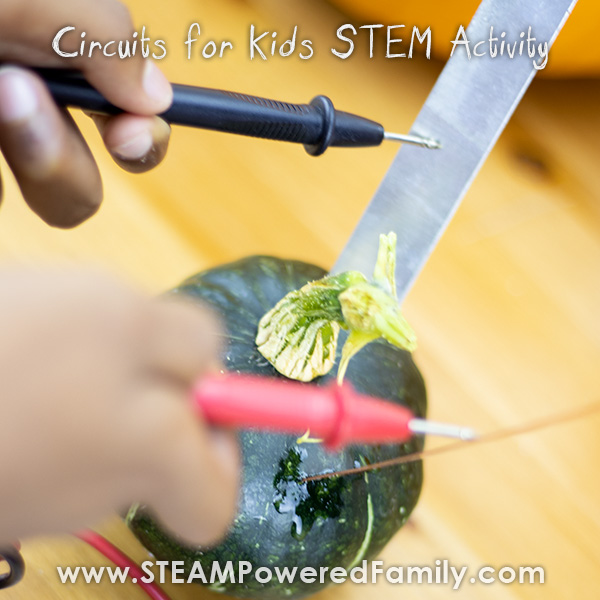
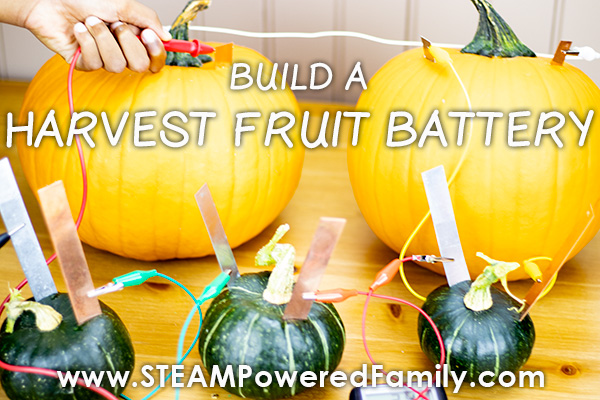
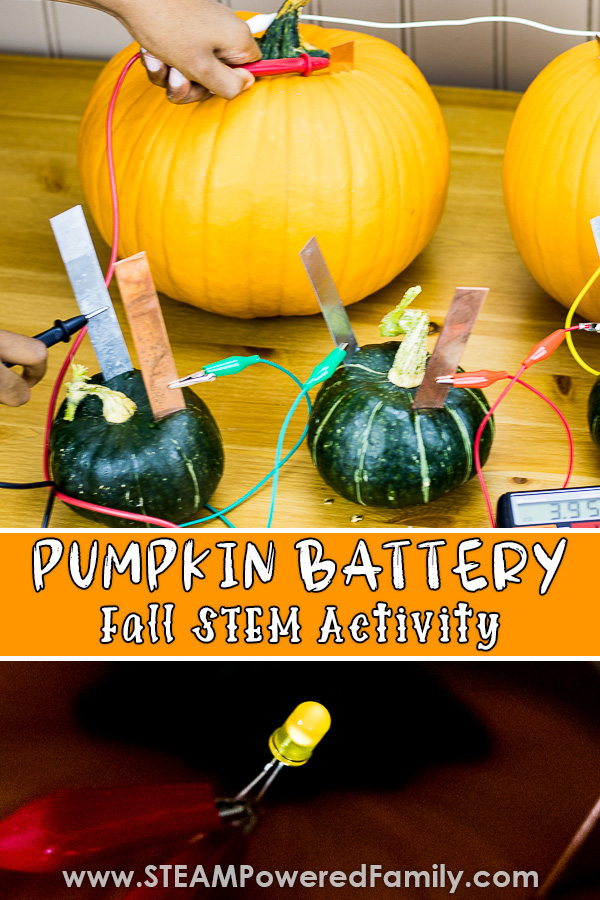
The first step was taking one of our pumpkins and cutting one slit in either side. It is important that you place these slits so the plates will not touch. I chose to position my slits where I would cut the top of the pumpkin to remove the top for carving. That way once we were done our circuits we could still carve our pumpkins! And after pumpkin carving, don’t forget to turn them into Puking Pumpkins!
Next we carefully inserted a zinc plate in one slit and a copper plate in the second slit.
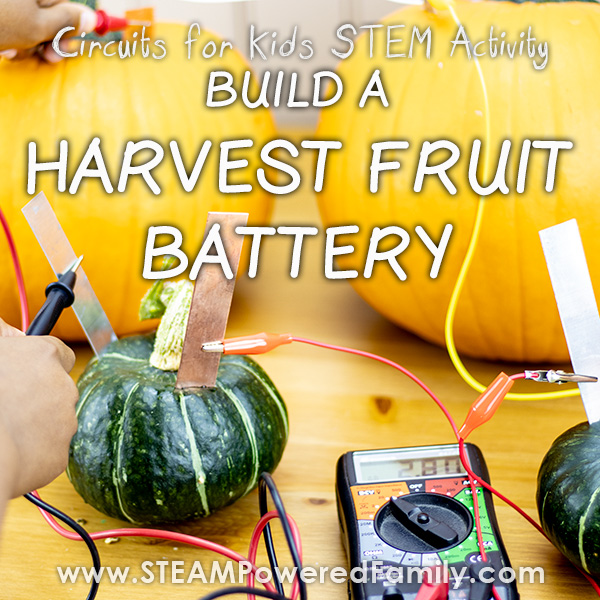
Now it was time to see how much energy our pumpkin was producing! Using the multimeter we took our first reading.
Turns out it was producing around 0.96 volts.
Interesting… that is pretty much exactly what our lemons produced when we made a lemon battery.
At this point my son’s curiosity was through the roof! He had to see what the other pumpkin and our tiny little squashes would produce. We made two slits in each piece and inserted one zinc plate and one copper plate into each.
Then he spent about 10 minutes testing and retesting each piece of fruit. Each piece produced between 0.90 and 1.00 volts. It seemed almost like the smaller the squash the more energy it produced, but I will say there was a lot of error as my son was still learning how to hold the probes steady and properly to get a proper reading. He was sure having fun though!
So both of our hypothesizes were proven wrong. Not only did it work, larger fruit did not equal more voltage.
STEP 2 – Building a Fruit Battery
Next up we started linking the pumpkins and squash. This is the connecting of the cells in our battery.
We started by linking the pumpkins to each other. To link the fruit run an alligator clip from the copper plate on the first pumpkin to the zinc plate on the second pumpkin. Then touch the multimeter to the zinc plate on the first pumpkin and copper plate on the second pumpkin to see how your voltage output has changed with two cells.
Then we added the first squash. For this we ran an alligator clip from the copper plate on the second pumpkin to the zinc plate on the squash. To test we touched the multimeter to the zinc on the first pumpkin and copper on the squash.
You always want to connect copper to zinc. Make sure you take a reading each time to see how your energy output is growing.
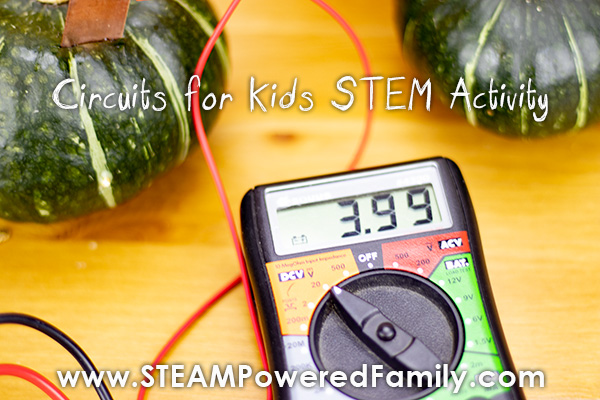
Once we had everything linked the highest we could get was 3.99 volts. We tried everything to break 4 volts, but just couldn’t get the numbers that high. It was fun trying though.
STEP 3 – Light Up An LED With Pumpkins
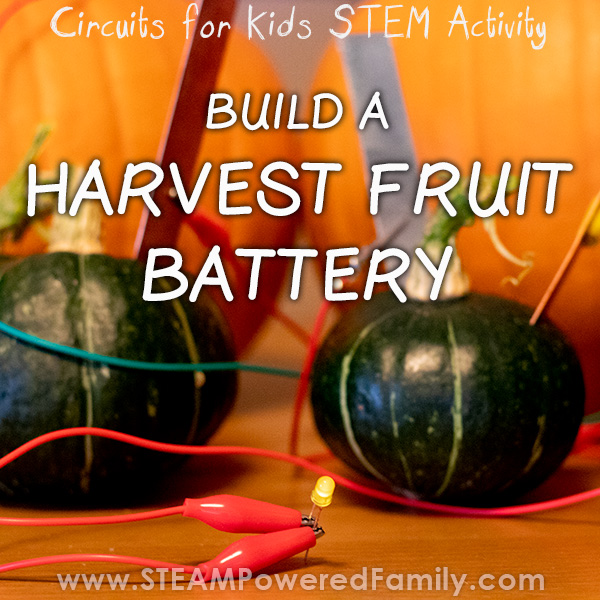
Once we had our fruit battery built, with both pumpkins and our 3 squash all nicely linked together, it was time to hook up an LED and see if it would light up.
In both our potato battery and lemon battery experiments this step worked, so we really hoped it would work this time too!
We replaced the multimeter with an alligator clip going from the zinc on the first pumpkin and an alligator clip going from the copper plate in the last squash. Then we carefully attached the alligator clips to the LED light. Nothing.
We turned the light around. Maybe we had our positive and negative legs mixed up.
Still nothing.
I grabbed a different LED from our bin. Knowing this really should be working. I carefully attached the alligator clips to each leg and… WE HAD LIGHT!
The Science Behind a Pumpkin Battery
The science behind how food can power a light bulb is really fascinating. Our zinc and copper plates are called electrodes, and the inside of our fruit, which is moist, is our electrolyte.
All batteries have a “+” (known as the cathode) and a “-” (known as the anode) terminal. In our fruit battery, the copper plate is our positive cathode and the zinc plate the negative anode.
Electric current is created by the flow of atomic particles called electrons. Conductors are materials that allow electrons (and the electrical current) to flow through them. Electrons flow from the negative to the positive terminal.
So in our experiment electrons are flowing from our zinc plate, through the fruit to the copper plate. From there it goes into our alligator clip, along the wire, into the zinc plate on the next piece of fruit, where it picks up more energy as it travels through that cell. It continues on, building energy with each additional cell we add. Until finally we have enough voltage to power a light bulb.
Volts (or voltage) is a measurement of the force moving the electrons through our fruit battery. The higher the voltage the more power the battery has, but higher voltage also means greater danger. Always remember to be careful and safe around electricity. Thankfully our food based batteries are very low voltage.
Troubleshooting Your Fruit Battery
Unlike our lemons that we rolled to make them juicy and our potatoes that we boiled to prep, we can’t really do much to prepare pumpkins and squash to make them better battery cells. That’s why it is very important to get the freshest pieces you can. Ours literally came out of the garden and were used for science within 48 hours.
If you are not getting a reading, make sure you are using your multimeter correctly. Read the instructions that came with your device to ensure proper usage.
Also, always remember to connect zinc to copper. My son did try copper to copper and zinc to zinc. He had to see what would happen. Which is fine. But for your battery to work, it needs to be linked correctly.
Have fun exploring pumpkin batteries!
MORE ELECTRICITY SCIENCE EXPERIMENTS FOR KIDS