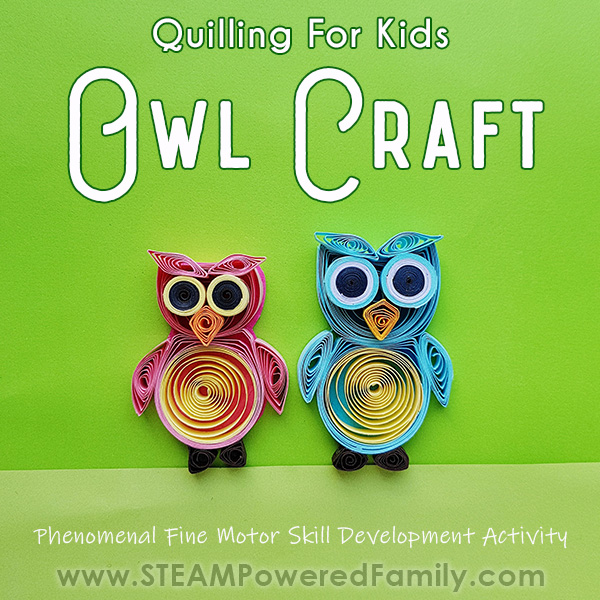
Easy Paper Quilling Owl Craft
We love our owls around here at STEAM Powered Family! This Quilling Owl Craft is so cute and a fantastic creative outlet along with building fine motor skills. Kids will love making their very own quilled owl.
OWL PAPER CRAFT
Disclaimer: This article may contain commission or affiliate links. As an Amazon Influencer I earn from qualifying purchases.
Not seeing our videos? Turn off any adblockers to ensure our video feed can be seen. Or visit our YouTube channel to see if the video has been uploaded there. We are slowly uploading our archives. Thanks!
Owls are one of our favourite animals. The prominence in our beloved Harry Potter books, the symbolism of wisdom and growth, plus the Great Horned Owl that lives in the woods behind our house, keep owls always on my minds!
Oh and don’t forget our special STEAM Powered Family Owl.
Yup, we really love owls around here.
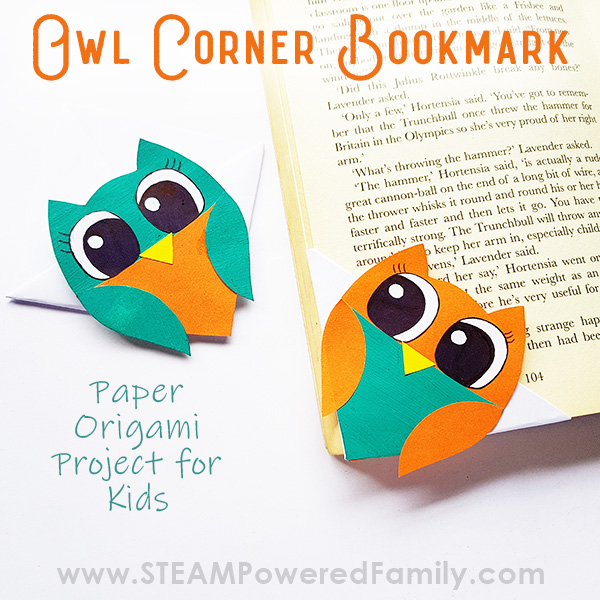
Just recently we have made an Owl Corner Bookmark, plus an Owl Squishy to help relieve stress. These are great projects for your tweens to tackle.
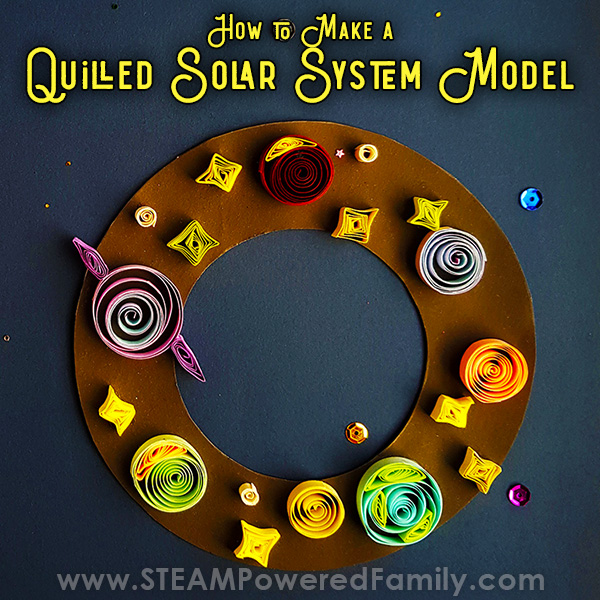
Today we are super excited to add another owl craft, with these amazing Quilling Owls. Recently we did an entire Solar System Model with quilling. These owls are a less scientific, much cuter quilling adventure!
Why Do Quilling?
Quilling is an easy, fun and highly calming crafting activity. It helps build fine motor skills including strength and coordination. The process of quilling is also known for being very relaxing, especially for those that struggle with anxiety. It is a great way to practice mindfulness.
Quilling is also extremely budget friendly, making it a great option for those with a strict crafting budget.
What Can A Quilled Owl Craft Be Used For?
These quilled owls can be used as decorative pieces on greeting cards or notebooks, on the cover of homemade books, to decorate a bulletin board, and so much more! Use your imagination!
I think these little owls would be amazing on a homemade end of year thank you card for teachers!
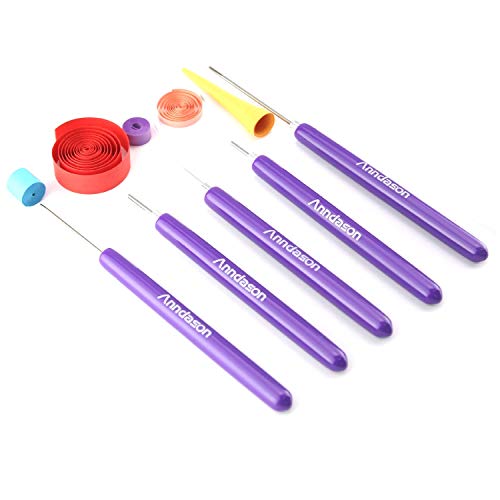
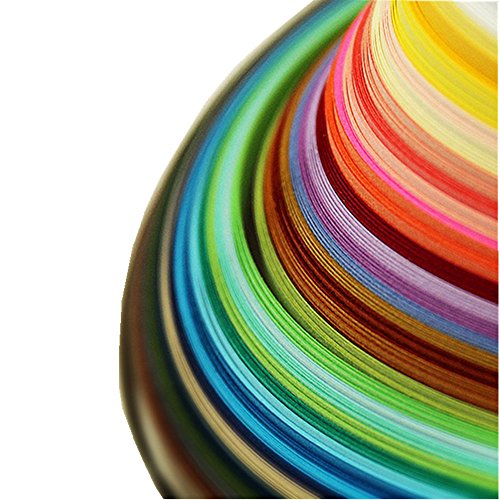
Quilled Owl Craft Supplies
Paper quilling strips
Slotted quilling tool
Scissors
Craft glue
Colored craft paper


STEP-BY-STEP DIRECTIONS FOR QUILLING AN OWL
First, you can make your owl in whatever colours you choose! Encourage kids to get creative and make their owl special and unique to them.
makE the body first
Start by selecting your first colour which will be a highlight colour for your owl. Take a 12 inch long quilling strip and coil it with the slotted quilling tool. Hold the quilled strip tightly inside the tool.
Now choose a different colored quilling strip. This one will be the main color of the owl. This strip should also be 12 inches long. Stick its open end with the outer end of the previous coil. Coil the strip around the previous coil. Hold the joint coils firmly. Apply glue at the open end to secure the coil.
Carefully take the coils out of the tool and allow them to loosen up a bit.
Press any one side of the loose coil to create a teardrop shape. Keeping about a 2 cm gap with the first pressed point, press the teardrop shape again to form a bunny ear or shield shape. This is the body of the owl.
Next make the owl head
Use a single, 20 inch long, quilling strip to create another shield or bunny ear shape, just like we did for the body. This one should be slightly smaller than the first one. It will be the head of the owl.
NOw make the wings
Use two 8 inch long strips to create 2 quilled marquise shapes. These will form the wings.
Finally create the Owl features
Using another two 8 inch long strips, create 2 curved marquise shapes to form the eyebrows.
Then use two 6 inches strips to create 2 triangles for the legs.
One 6 inch strip to create a square which will become the beak. You can stretch the square slightly to make it more beak shaped like we did. You could also create a triangle if your little quilling master is feeling confident.
For the eyes, use a 12 inch long black strip to create a tight coil and then tightly coil a 10 inch long different colored strip around it. Repeat to make the second eye.
assemble your Quilled owl craft
Take a sheet of colored craft paper that is complementary to your owl colours as you will see a bit of this colour through your coils. Apply glue on it by tracing the shape of the owl’s body and head. Place the quilled body and quilled head on the glued craft paper.
Stick the quilled eyes and quilled beak on the head, using a dab of glue, to create your adorable owl face.
Stick the quilled curved marquise shapes above the eyes. Allow the glue to dry for a while.
Use scissors to trim the craft paper tight to the edges of your owl. This step is only necessary if you don’t want to see the craft paper you have mounted your owl onto.
Attach the quilled legs and the quilled wings to complete the quilled owl. Let the glue dry.
Video of Quilling An Owl Craft
I put together a quick video showing the steps of quilling an owl.
Looking for some video tutorials to help you get started quilling? I found this video to be quite helpful.

MORE CRAFTS AND ACTIVITIES