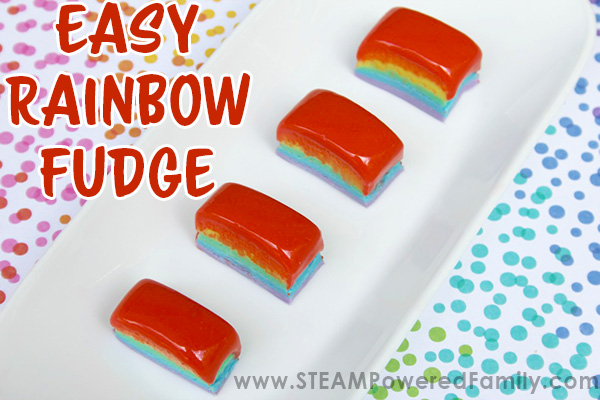
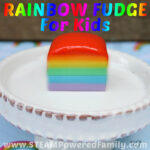
Easy Layered Rainbow Fudge Recipe For Kids
Need the perfect, easy to make treat that will WOW the kids? Try this simple, layered Rainbow Fudge recipe. Kids love it and it looks amazing. Perfect for end of school year, parties, potlucks or just because you need a few more beautiful rainbows in your life! Best of all, it’s so simple and so easy to make, it is a great recipe for kids to do themselves.
RAINBOW FUDGE RECIPE FOR KIDS

Disclaimer: This post contains affiliate links
Rainbows. There is something just so special about them. They are a sign of hope. Sunshine after the rain. They are beautiful, yet untouchable. So bringing a few extra rainbows into our days is always a good thing! Especially when they are delicious too.
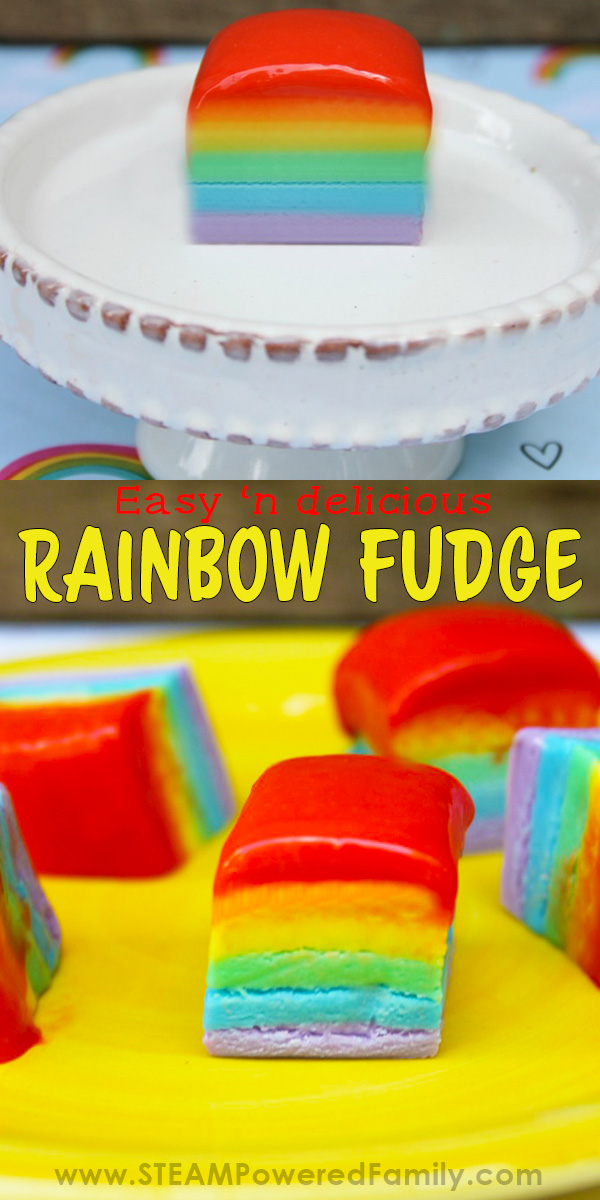
Sometimes the most beautiful and gorgeous food is actually incredibly easy to make. I’ve discovered that with this Rainbow Fudge recipe. It looks gorgeous and will have everyone asking for the recipe, but it is so simple, kids can make it.
If you have been following us at STEAM Powered Family you know we love diving into the science behind Candy. In fact, we have made fudge the traditional way in the past as we explored the role of crystallization in candy making. This recipe is a much more simplified version, which makes it great for kids that want to tackle fudge making by themselves.
Project idea! Why not make fudge using this recipe and our original fudge recipe and compare the results? See how the different processes and ingredients create similar but different treats.
Check out our video for pictures of each step
I have to say this recipe is gorgeous, even the in process photos as the fudge is being created are just gorgeous!
Rainbow Fudge Ingredients
3 cups sweetened condensed milk
6 cups white chocolate chips
1 1/2 teaspoons clear vanilla extract
3 teaspoons butter
Salt
Purple, blue, green, yellow, orange and red gel food coloring
8×8 baking dish
Aluminum foil
Freezer
Microwave
Spoons
Spatula
Microwave safe bowls (6 is best, but if you wash quickly, you can reuse)
A note about food coloring – You can use liquid food coloring, but the gel version offers a richer color and less liquid. Less liquid gives you a much better consistency in your fudge. So in a pinch you can use liquid colors, but it is best to grab some gel food coloring for this recipe.
Easy Layered Rainbow Fudge Recipe Directions
Step 1 – Line baking dish with aluminum foil. Ensure it is as smooth as possible to create a smooth edge on your fudge.
Step 2 – In 6 microwave safe bowls, add 1 cup of white chocolate chips each.
Step 3 – Add 1/2 cup sweetened condensed milk to each bowl. Ensure your bowls will not overfill. You need room to stir.
Step 4 – Add 1/4 teaspoon vanilla to each bowl.
Step 5 – Add 1/2 teaspoon of butter to each bowl. Softened but not melted.
Step 6 – Add a pinch of salt to each bowl. Set all the bowls except one to the side.
Step 7 – Heat one bowl in microwave for 30 seconds at 50% power (or the chocolate will burn.) Stir. Melt an additional 15-20 seconds and stir. Continue this until smooth. Do not over do it! As you stir it will melt a bit more. Only go until it is just smooth.
Step 8 – For bottom layer (first), add 3-4 drops of purple food coloring (or mix red and blue food coloring to create your purple and do some color theory review!). Stir until well mixed. If the color is not quite to your liking, you can add another drop of food coloring and mix it in.
Step 9 – Pour into pan and tap the sides of the pan a few times to get rid of any bubbles.
Step 10 – Spread the top evenly until nice and smooth with spatula. Place pan in the freezer and let it freeze for 15 minutes.
Step 11 – While the first layer is freezing begin preparing the next layer – blue.
Steps 12 – When first layer is nice and firm remove from freezer, continue freezing until it is firm.
Step 13 – Add the blue layer, smooth the top and freeze. Repeat for green, yellow, orange and red layers. Ensure each layer is firm before adding the next layer.
Step 14 – Once you have added the final red layer place the pan in the freezer and let it set up overnight.
Cut it into squares and enjoy a little rainbow in your day!
Storing Rainbow Fudge
If you have any fudge left over or need to store and transport your fudge, place it in an airtight container. I also recommend placing it in the fridge if you are keeping it for a few days.
MORE PROJECTS FROM STEAM POWERED FAMILY
-
Explore the science behind Candy Making
-
Make Lava Toffee and create eruptions in the kitchen
-
Learn more about polymers as you create yummy gummies
-
Super Simple Pressed Sugar Candies
Easy Rainbow Fudge
Easy rainbow fudge recipe that looks amazing, tastes delicious, and is so simple kids can make it themselves! Always a hit at parties, potlucks, end of year celebrations or just because you need a little extra rainbow sweetness in your life. This recipe is the perfect solution!
Supplies
- 3 cups sweetened condensed milk
- 6 cups white chocolate chips
- 1 1/2 teaspoons clear vanilla extract
- 3 teaspoons butter
- salt
- Purple, blue, green, yellow, orange and red gel food coloring
Instructions
-
Line baking dish with aluminum foil. Ensure it is as smooth as possible to create a smooth edge on your fudge.
-
In 6 microwave safe bowls, add 1 cup of white chocolate chips each.
-
Add 1/2 cup sweetened condensed milk to each bowl. Ensure your bowls will not overfill. You need room to stir.
-
Add 1/4 teaspoon vanilla to each bowl.
-
Add 1/2 teaspoon of butter to each bowl. Softened but not melted.
-
Add a pinch of salt to each bowl. Set all the bowls except one to the side.
-
Heat one bowl in microwave for 30 seconds at 50% power (or the chocolate will burn.) Stir. Melt an additional 15-20 seconds and stir. Continue this until smooth. Do not over do it! As you stir it will melt a bit more. Only go until it is just smooth.
-
For bottom layer (first), add 3-4 drops of purple food coloring (or mix red and blue food coloring to create your purple and do some color theory review!). Stir until well mixed. If the color is not quite to your liking, you can add another drop of food coloring and mix it in.
-
Pour into pan and tap the sides of the pan a few times to get rid of any bubbles.
-
Spread the top evenly until nice and smooth with spatula. Place pan in the freezer and let it freeze for 15 minutes.
-
While the first layer is freezing begin preparing the next layer - blue.
-
When first layer is nice and firm remove from freezer, continue freezing until it is firm.
-
Add the blue layer, smooth the top and freeze. Repeat for green, yellow, orange and red layers. Ensure each layer is firm before adding the next layer.
-
Once you have added the final red layer place the pan in the freezer and let it set up overnight.
-
Cut it into squares and enjoy a little rainbow in your day!