Rainbow Hot Chocolate Bombs
Are your kids obsessed with hot chocolate bombs? Did you know they are actually quite easy to make and your kids can even make their own? Making Hot Chocolate Bombs is a fantastic activity for kids to get into the kitchen, learn a little candy science and make delicious treats!
Rainbow Sprinkle Hot Chocolate Bombs for Kids
Disclaimer: This article may contain commission or affiliate links. As an Amazon Influencer I earn from qualifying purchases.
Not seeing our videos? Turn off any adblockers to ensure our video feed can be seen. Or visit our YouTube channel to see if the video has been uploaded there. We are slowly uploading our archives. Thanks!
It started with bath bombs. My kids were obsessed but my pocketbook did not approve of the daily use of bath bombs, so we started making our own! It lead us into some incredible learning opportunities. It also fostered incredible creativity in my kids.
So it’s no surprise that when the latest craze took hold, we wanted to immediately start making our own. This time it is the delicious treat, Hot Chocolate Bombs!
Making them is actually not that difficult. Your upper elementary and older kids can easily make these. As long as they are old enough to safely use a microwave, they can make hot chocolate bombs!
We have been making these for a few months now, so we have tried lots of different techniques. At the end of the day it is all about learning how to temper the chocolate properly and mastering the techniques.
However, we made this even easier, by removing the worry about tempering by using candy melts. This allows you to easily use the microwave, which is easier for kids. The flavour is slightly different from real chocolate, but it makes it so much easier for the kids to make. Plus you can get lots of different colours!
But the best part? Even if it doesn’t work out perfectly, it will still taste AMAZING. So either way it’s a win!
Ready to make a tasty treat? Here is everything you need to know!
Here is a quick video showing each of the steps! If you can’t see the video, please turn off your adblockers.
Rainbow Sprinkle Hot Chocolate Bomb Recipe
Ingredients
1 ⅓ cups white candy melts
¼ cup yellow candy melts
5 tbsp rainbow sprinkles
¼ cup mini marshmallows
3 heaping tbsp hot chocolate mix
Tools
1 medium sized glass bowl
1 small sized glass bowl
Silicone spatula
Small spoon
Silicone half sphere mold
Kitchen shears
Sandwich size food storage bag
1 small heat safe plate
Microwave
Food safe gloves (optional)
Directions
Melting Candy Melts
First we need to melt the white candy melts.
Heat the white candy melts in a medium glass bowl (I have also used a silicone bowl successfully) in the microwave for 1 minute at 50% power. Stir well. If needed, heat in 30 second intervals until the wafers are fully melted and smooth/creamy. Don’t over cook them. As you stir, they will continue to melt. Better to stir for a couple of minutes, then overcook your candy melts.
Filling the Molds
Place the silicone sphere mold on a flat serving tray or baking sheet, and spoon approximately a little less than a tbsp of the melted candy wafers into the molds. Adjust the amount of candy melts you add to suit the size of your molds. Thoroughly coat the inside of the mold with a small silicone spatula, or the back of a small spoon. Make sure to work the candy melts right up to the edges and make them a little thicker. This is important for when you attach the spheres together. If the candy is pooled at the bottom, spread again to evenly coat all sides, or your sphere will be less circular, and more flat on the bottoms from the pooled candy.
Setting Up
Place the silicone mold in the refrigerator for 5 – 10 minutes to set. I often leave them in there longer. Just to be sure everything is set up completely.
Remove from Molds
Once set, remove from the refrigerator, and begin slowly pulling the mold away from the spheres on the sides first, and then lightly push from the bottom to remove them. You can either place them on the serving tray/cookie sheet, or I placed them on a piece of parchment paper for the next steps. Try to handle them as little as possible to avoid fingerprints, or melting. (To reduce fingerprint smudges, wear food safe gloves)
Filling and Forming
Place a small plate in the microwave and heat it for approximately 20 seconds until it is just warm. For this next step we need to melt the edges of the spheres so they can adhere to each other.
Place one of the sphere halves open side down onto the plate. Twist it a little to get the edges slightly melted, and then immediately flip back over and fill with a heaping tbsp of hot chocolate mix, some mini marshmallows, and approximately a tsp of rainbow sprinkles. Place another sphere on the plate and twist, and once the edges are slightly melted, place it on top of the filled sphere. You can twist them slightly to help meld them together. If you have any cracks that didn’t seal, heat a spoon in hot water, dry thoroughly, and use it to smooth around the seam.
Tip! It is very important that you don’t expose your candy melts (or chocolate if you use real chocolate) to any water. It will cause it to seize.
Repeat to make the remaining hot chocolate bombs. Once finished place in the fridge to set up for another 5 minutes.
Decorating
Now it’s time to make your hot chocolate bombs extra special! Kids love to decorate theirs to make them unique.
I find it easiest if I flip over the silicone mold and use the bottom to hold the hot chocolate bombs while decorating them with the kids. Otherwise they can roll around a bit too much.
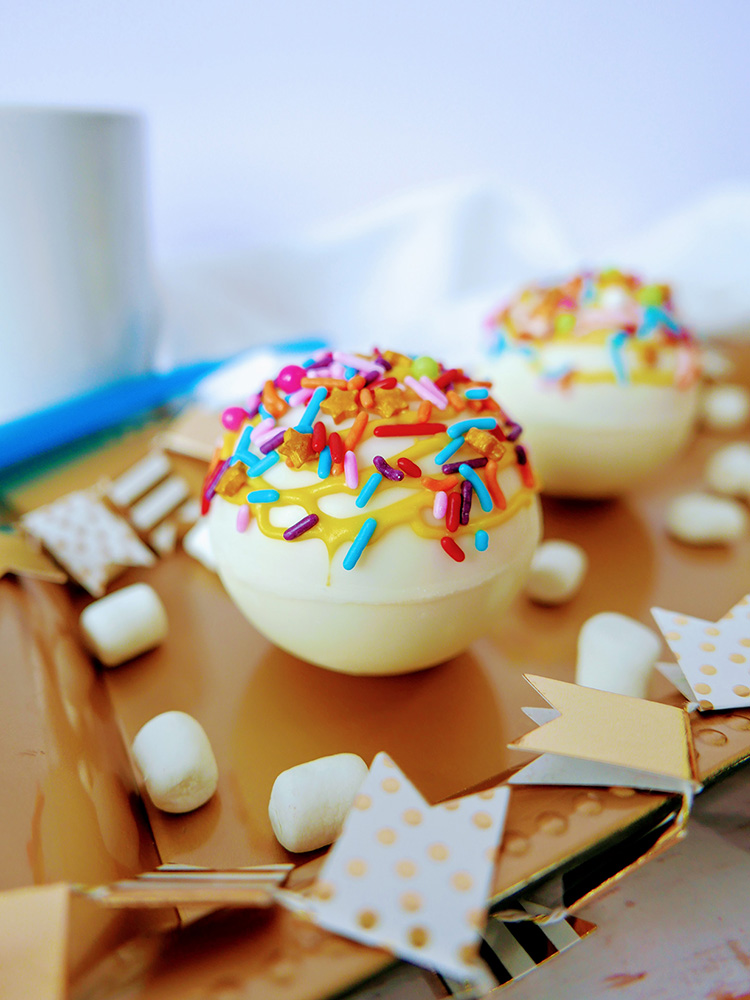
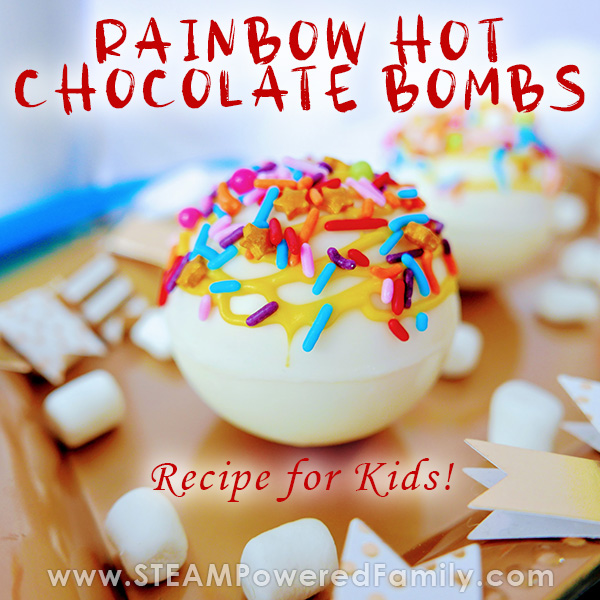
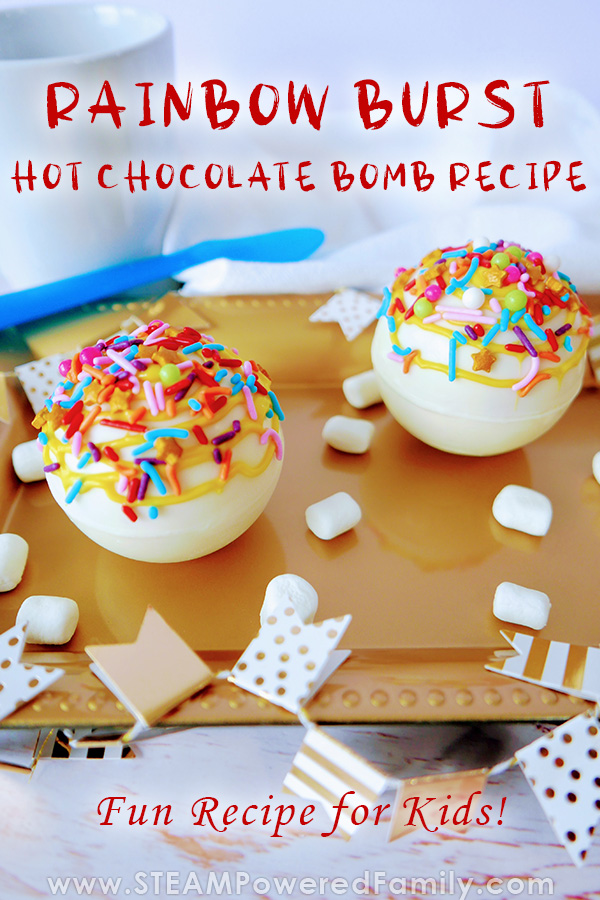
Place the yellow candy melts in the microwave, and heat in 30 second bursts, stirring in between, until melted. Once smooth/creamy, drape the sandwich bag over your hand, and fill with the melted wafers. Cut a very small tip of the bag with kitchen shears, and pipe a spiraling circle on the top of the cocoa bombs. Immediately add sprinkles. Let set for 2-3 minutes.
Enjoying Rainbow Hot Chocolate Bombs!
When you’re ready to enjoy your hot chocolate bomb, heat approximately 8oz of milk in the microwave, or on the stovetop. Place your hot chocolate bomb in a mug, and slowly pour the milk over it. Stir lightly to open the bomb and see the hot chocolate explode and rainbow sprinkles burst from inside! Continue stirring until the candy melts and hot chocolate mix is blended, and enjoy!
Need extra marshmallow goodness? Why not consider making your own marshmallows to go with your hot chocolate bombs? The science behind making marshmallows is fascinating!
Hot Chocolate Bomb Making Tips
While handling the spheres, wearing food safe gloves will help keep them from melting, and also minimize your fingerprints on them.
If you are having a hard time getting the two spheres to connect to each other, you could pipe some extra melted candy wafers along the seam and dip in sprinkles. Simply make the seam part of your decoration.
To melt the sphere edges, you can either use a heated plate, or a lightly heated frying pan. I have used both, and both are equally effective. You can also pipe a small line of melts along the edge if your children prefer that approach.
These will keep for up to 2 weeks if kept in an airtight container in a cool dry place, or up to a month in the refrigerator, but the coloring may change slightly in the candy melts from being refrigerated. Ours never last more than a few days!
Happy Hot Chocolate Bomb Making!
Did you love this? Try our Harry Potter Inspired Hot Chocolate Bomb!
More Learning in the Kitchen
Rainbow Burst Hot Chocolate Bombs
Easy rainbow hot chocolate bomb recipe. Making hot chocolate bombs is a wonderful way to get the kids in the kitchen doing hands on learning!
Supplies
- 1 1/3 cups White Candy Melts
- 1/4 cup Yellow Candy Melts substitute with colour of your choice!
- 5 tbsp Rainbow Sprinkles
- 1/4 cup Mini Marshmallows
- 3 tbsp Hot Chocolate Powder
Instructions
-
Heat the white candy melts in a medium glass bowl in the microwave for 1 minute at 50% power. Stir well. If needed, heat in 30 second intervals until the wafers are fully melted and smooth/creamy.
-
Place the silicone sphere mold on a flat serving tray or baking sheet, and spoon approximately a little less than a tbsp of the melted candy wafers into the molds. Adjust the amount of candy melts you add to suit the size of your molds. Thoroughly coat the inside of the mold with a small silicone spatula, or the back of a small spoon. Make sure to work the candy melts right up to the edges and make them a little thicker.
-
Place the silicone mold in the refrigerator for 5 – 10 minutes to set.
-
Once set, remove from the refrigerator, and begin slowly pulling the mold away from the spheres on the sides first, and then lightly push from the bottom to remove them. You can either place them on the serving tray/cookie sheet, or I placed them on a piece of parchment paper for the next steps.
-
Place a small plate in the microwave and heat it for approximately 20 seconds until it is just warm.
-
Place one of the sphere halves open side down onto the plate. Twist it a little to get the edges slightly melted, and then immediately flip back over and fill with a heaping tablespoon of hot chocolate mix, some mini marshmallows, and approximately a tsp of rainbow sprinkles. Place another sphere on the plate and twist, and once the edges are slightly melted, place it on top of the filled sphere. You can twist them slightly to help meld them together. Let set for a couple of minutes.
-
Place the yellow candy melts in the microwave, and heat in 30 second bursts, stirring in between, until melted.
-
Once smooth/creamy, drape the sandwich bag over your hand, and fill with the melted wafers. Cut a very small tip of the bag with kitchen shears, and pipe a spiraling circle on the top of the cocoa bombs. Immediately add sprinkles. Let set for 2-3 minutes. Enjoy!


