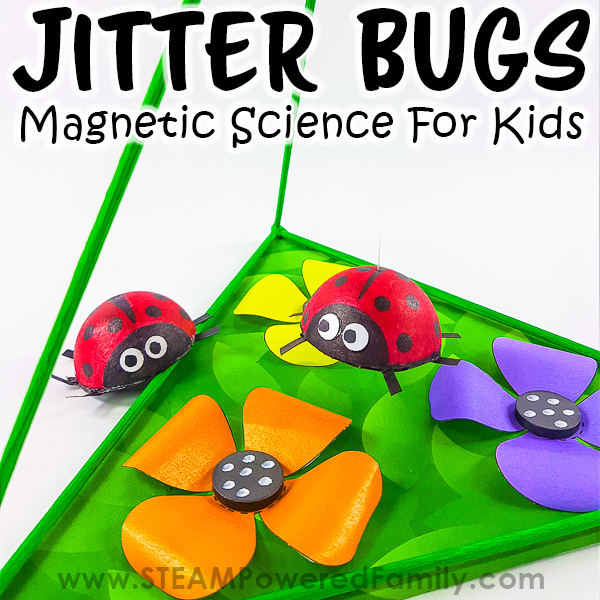
Jitter Bugs – Science with Magnets
Have you ever wondered why the letters you stuck on the refrigerator don’t fall on the floor or what you can use to pick up all your mom’s sewing pins you accidentally knocked off the table? Magnets are what keep the letters on the refrigerator and are the best thing to use to pick up all those pins in one go! In this eye-opening project, you will see the magic of Magnetism in action. Magnets that repel or push each other away will cause a ladybug to fly and spin on its own as you build your very own magnetic toys. This is a fantastic STEM project for Elementary and Middle School. Jitter Bugs – Magnetic Science for Kids.
BUILDING A MAGNETIC JITTER BUG
Disclaimer: This article may contain commission or affiliate links. As an Amazon Influencer I earn from qualifying purchases.
Not seeing our videos? Turn off any adblockers to ensure our video feed can be seen. Or visit our YouTube channel to see if the video has been uploaded there. We are slowly uploading our archives. Thanks!
What is Magnetism, and How Does it Work?
Let’s look at what a magnet is. A magnet is an object made of metal or rock that can exert a special force on other metal objects. This force can be a push or a pull and is called Magnetism. Electricity and Gravity are also forces of nature.
Every minute of the day, Magnetism is at work all around us. Almost everything that uses electricity or runs with a motor has magnets. The magnetic force helps your car run, your microwave cook, powers compasses, and makes your computer work. Even the Earth we live on is a giant magnet!
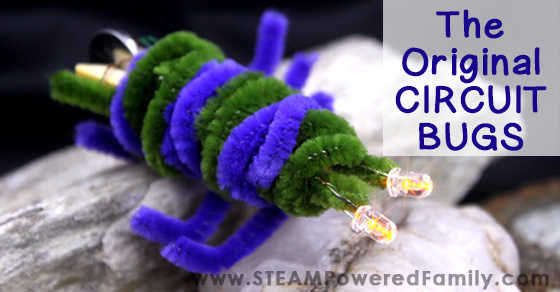
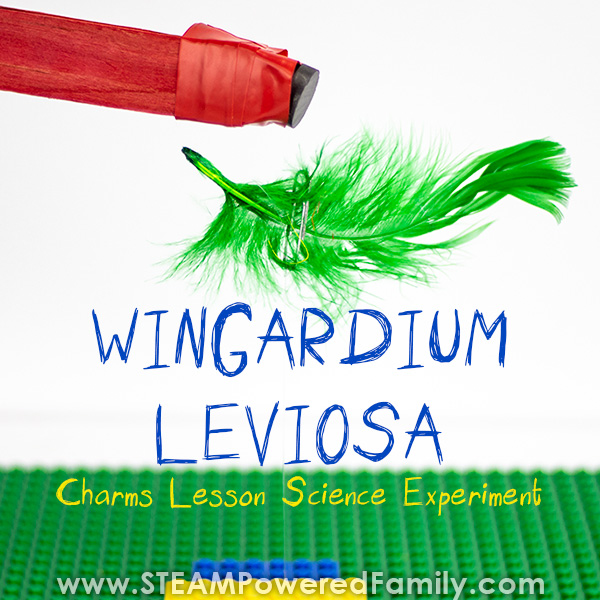
If a magnetic object like a paper clip enters a magnetic field, it is pulled toward the magnet. We explored this in our Wingardium Leviosa Experiment. Magnetic fields even work underwater or in slime, making magnetic slime. A strong magnet can even attract a magnetic object through a table which we discovered in the Make it Move Challenge.
Not all objects are attracted to magnets. Plastic, rubber, water, and glass are not attracted to magnets and are non-magnetic materials.
Some animals, such as pigeons, bees, and salmon, can detect the Earth’s magnetic field and use it to navigate. These creatures seem to have magnetic material that acts as a compass in their bodies.
Magnets are fascinating for students to study at any grade. Check out even more Magnet Experiments for Kids.
Magnetic Jitter Bug STEM Activity Video
Check out our video demonstrating how to make Magnetic Jitter Bugs. It really helps to see all the steps of bringing this amazing project to life! It starts with a demonstration of the incredible, long lived jittering of our jitter bug!
If you can’t see this video, please turn off your adblockers as they also block our video feed. You can also find this video on the STEAM Powered Family YouTube Channel.
How to Make a Magnetic Jitter Bugs
Materials & Tools
Thin, sturdy cardboard – cereal box or small postage box
Black cardstock or thin cardboard (you can also paint or colour it make black)
Glue gun
Glue stick
Scotch tape
Ruler
Pencil
Hobby knife
Scissors
Ping pong ball or the same size polystyrene ball
4 Magnets-18mm/0.709 inches
Fishing line – 250mm/10 inches
Long sewing needle
6 Wooden skewers
Side-cutters or cutting pliers
Markers or paint
Blu-Tack (Reusable Adhesive)
The Magnetic Jitter Bug templates (see the form below to access them)
Jitter Bug Templates
The templates for the Jitter Bug activity are available to all STEAM Powered Family mailing list members. Enter your email into the form to unlock the printable templates.
Magnetic Jitter Bug DIY Directions
Make the Pyramid
Print out all the template pieces, or you can draw your pictures on white printer paper.
Get your 6 wooden skewers, a pencil, a ruler, and, if you have, a small side-cutters.
Make a mark at 220mm/81/2 inches on 3 wooden skewers and cut them to that length.
Make a mark at 240mm/9,5 inches on the other 3 wooden skewers and cut them to that length.
Cutting the ends of the skewers at an angle for the Pyramid for easy joining is best demonstrated in this image.
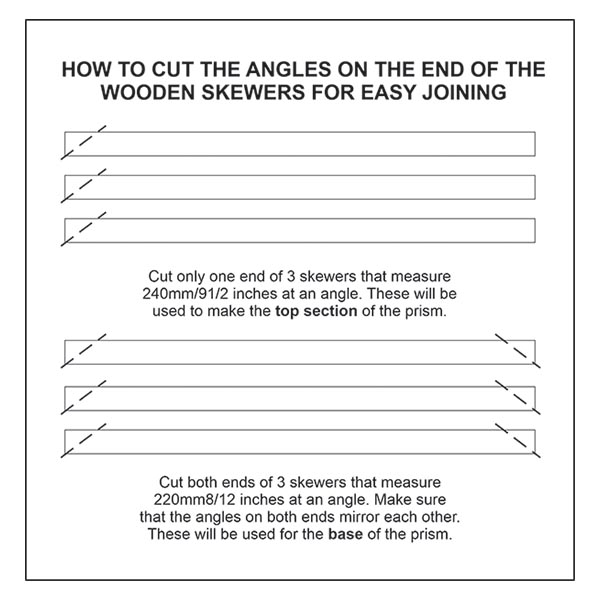
PRO TIPS!
- Check that the angles on the shorter wooden skewers mirror each other.
- Use the side-cutters to cut the angles. It is so much easier than using a pair of scissors
or a hobby knife
Making the base of the Pyramid:
Using the glue gun, put a small blob of hot glue on the end of one skewer and join it to another skewer.
Then glue the third skewer to the ends of the first two skewers. You should now have a triangle.
Making the top section of the prism:
Take two of the last 3 skewers and glue them together with a small blob of hot glue.
Glue the last skewer onto the two you have previously joined. You should now have the top section of the pyramid ready to glue onto each base corner.
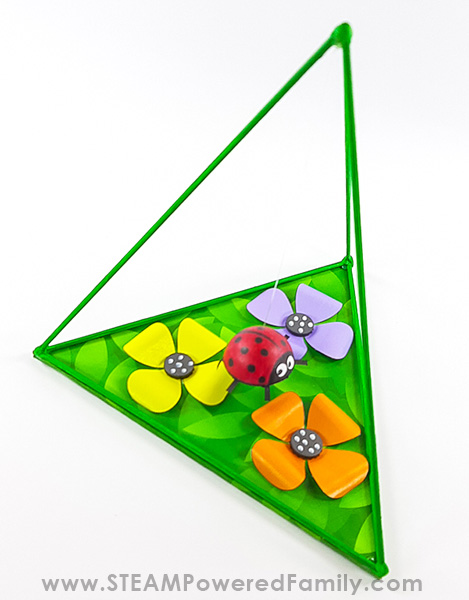
YOUR PYRAMID IS READY! (Read more about what a Pyramid is below)
Finishing the prism:
Place the base of the Pyramid onto a piece of sturdy cardboard from an old postage box
and trace its shape with a pencil.
Cut out the triangle. This will be the base of the whole project.
PRO TIP! This would be a good time to paint the wooden skewer prism.
Covering the base with the green leaves template:
Take the green leaves template you printed out.
Turn it upside down, place the cardboard base on top of it, and trace the shape
onto the template.
Make sure you leave an equal space of 10mm/3/4 inch around the whole base. You will need this to fold back and cover the sides of the cardboard base.
Now cut out the shape.
Leave it upside down and glue the cardboard onto the back of the green leaves.
Using the glue gun, put hot glue down one of the sides of the cardboard.
Quickly, put that edge down onto the surface you are working on while folding back the edge.
Do the same on the other two sides and cut off the excess paper on each corner.
Glue the edges onto the underside of the base with a glue stick or scotch tape.
Getting the Jitter Bug ready:
Mark the centreline of the ping pong ball with a pencil.
Carefully cut the ping pong ball in half, keeping your fingers away from the blade.
PRO TIP! Ask an adult to help you here, as it is challenging to do this.
You may need to sand the edges of the ping pong ball to get it to sit flat.
Get the piece of black cardstock and trace the ping pong ball shape onto it.
Hand-draw a larger circle approximately 10mm/3/4 inch away from the traced circle.
Mark out 3 legs on either side of the circle.
Cut out all the legs.
Using the glue gun, stick the ping pong ball onto the black cardboard.
Cut off any excess black cardboard from the edge.
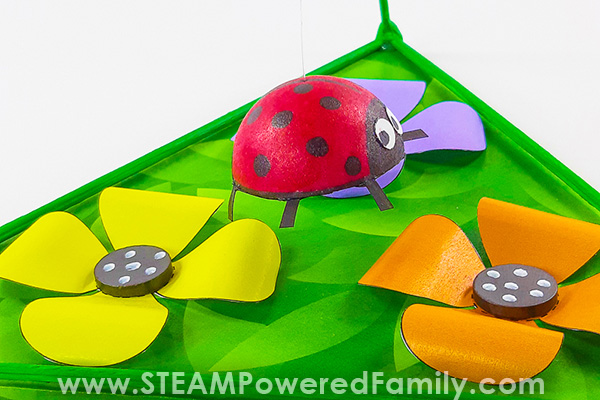
Colour the Jitter Bug with permanent markers or paint and use small paper circles for the eyes. This is your chance to give your ladybug character!
PRO TIP! Make the small circles for the eyes with a paper punch.
Thread the fishing line through the eye of the sewing needle.
Gently push it through the top of the Jitter Bug and the black cardboard on
the underside.
Using the glue gun, stick the end of the fishing line down onto the black cardboard.
Completing the Jitter Bug:
The magnet under the Jitter Bug must repel the three magnets on the Pyramid’s base.
Take 2 magnets and find out which way they need to be to repel each other.
Using the glue gun, stick the magnet onto the black cardboard under the Jitter Bug.
Sticking the prism to the base:
Place the Pyramid on top of the green leaves base and check which way it fits the base best, by
turning it around on the base.
Put a blob of hot glue onto each of the three corners of the base.
Place the prism onto the base.
Cutting and placing the flowers onto the base:
Get the template of the flowers you printed out.
Cut all the pieces out.
Place them in a triangle shape onto the base.
Glue them onto the base with a glue stick, only in the middle of the flower.
There are more petals to add to each flower if you want to add more. I only used the flower with the four petals.
Sticking the magnets to the flowers:
Take the remaining magnets one at a time and put them against the magnet under the Jitter Bug to see which side repels the magnet. This is REALLY important!

Stick the magnet, with the repelling side facing up, to the centre of the flower. You can do this permanently with hot glue gun or you can use a reusuable adhesive, Blu-Tack, to hold them in place. Blu-Tack will allow you to remove the magnets if you want to reuse them in other projects down the road.
Do the same with the other two remaining magnets.
Take a chopstick or something thin and gently roll the ends of the petals onto it to give them a curl.
Make a few dots on each magnet using a white felt tip pen, white acrylic paint, or a correction pen.
PRO TIP! The magnets must always repel each other.
The base is now ready!
Sticking the fishing line and Jitter Bug to the prism:
Get the Jitter Bug with the fishing line and hold it under the middle of the prism.
Push the Jitter Bug and see if the magnets make it jump and spin around all the flowers. You may need to adjust the height up and down until you find the perfect length.
When you are happy with the length of the fishing line, cut it and put a blob of hot glue
onto the end, turn the prism upside down and hold the fishing gut as straight as you can in the
middle of the three skewers that come together. Wait for it to dry.
PRO TIP! Getting the magnets stuck down correctly is the most important thing, as once they are stuck down, getting them off will tear the flower, so remember, the secret to doing this correctly the first time is: TEST! TEST! TEST!
Your Magnetic Jitter Bugs are now ready!
Push it around and watch the magic of Magnetism in Action! How long do your Jitter Bugs jitter around? They love to jitter and dance!
What is a Pyramid?
A pyramid is a three-dimensional (3D) shape. It has a polygon base and flat (triangular) sides that join at a common point (called the apex).
The base can be any shape or size but is generally an equilateral triangle, where all the sides are the same. If you rotate the Pyramid, all the sides look the same. This 3D shape is also called a tetrahedron. In this activity, you made a Triangular Pyramid.
Math challenge! Can you work out the area of your Triangular Pyramid?
If the base is square, it resembles the pyramids in Egypt. There are many types of Pyramids:
Square, triangular, pentagonal, and oblique, to name a few. How do you think changing the shape of the pyramid might affect this experiment?
The Science of Magnetism
Magnets are pieces of metal or rock with an invisible power to attract particular kinds of metal. This power is known as a force.
A magnetic field is an area around a magnet with a magnetic force. All magnets have a magnetic field, no matter their size of them. Things that are attracted to magnets are called
Magnetic Objects. All magnetic objects are made of metal, but not all metals are magnetic. The primary metals attracted by magnets are iron, cobalt, and nickel. You can turn one of these
metals into a magnet by rubbing it with a magnet!
The middle of our planet comprises two metals called iron and nickel. Both metals are attracted
to magnets. These special metals can also become magnets. Our world is always turning around
in space, and the Earth’s metal core is turning, too. These movements make a Magnetic Force
that surrounds the Earth called a Magnetic Field.
Every magnet has both a North and a South Pole. The Magnetic Force in a magnet flow
from the North Pole to the South Pole, and it creates a Magnetic Field around a magnet. If you try to push the south poles together, they repel each other. The same works for the north poles.
That means that poles that are the same repel each other. If you turn one magnet around and the North and the South Poles face each other, they are automatically attracted to each other.
The History of Magnetism
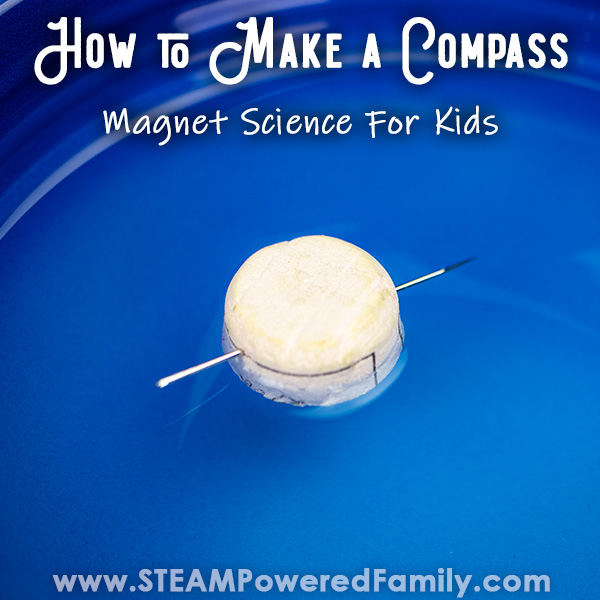
The ancient Greeks and Chinese knew about naturally magnetic stones called “lodestones.” These chunks of iron-rich minerals may have been magnetized by lightning. The Chinese discovered that they could make a needle magnetic by stroking it against a lodestone and that the needle would always point to the North after doing so. Learn how to make a compass with this knowledge here.
Troubleshooting
If the Jitter Bug is not flying or spinning around, it is possibly too far away from the magnets in the flowers. Raise it by the fishing gut with one hand, give the Jitter Bug a push, or see if lowering it will make a difference.
Your magnets may be stuck down in the wrong orientation, which causes the magnets to attract and not repel.
More Lady Bugs
If you enjoyed making Lady Bugs in this project, explore the Lady Bug Life Cycle with some hands on learning.